To record the computer activities, I have tried a lot of different screen recorders. To be honest, a robust video recorder app enables me to finish the recording more efficiently, which helps save more time for my later video editing.
How do you pick the best screen recorder? Take these factors into consideration, such as an intuitive user interface, a watermark-free nature, unlimited recording duration, and more. To help you make a faster decision, I have listed 10 powerful Windows screen recorders. Read the content below to find out!
Windows Built-in Screen Recorder
Does Windows have a screen recorder? The answer is yes. This section is for those who don’t want to download any screen recording software. There are 4 great built-in screen recorders, including Xbox Game Bar, Snipping Tool, Clipchamp Screen Recorder, and PowerPoint.
Xbox Game Bar
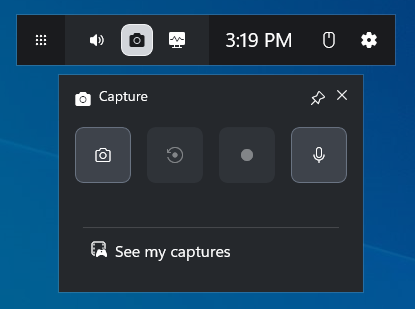
Xbox Game Bar, also known as Xbox Screen Recorder, is a built-in gaming overlay available on Windows 10/11. This Windows screen recorder for PC enables capturing the screen, taking screenshots, and chatting with others during a game. With Xbox Game Bar, there is no need to download extra software for game recording. Just press the Windows + G keys to activate it.
Key Features of Xbox Game Bar
- Capture gameplay clips instantly with the microphone and system sounds.
- Take screenshots during the game process.
- Adjust the volume levels for the voice chat, game, or background application.
- Manage the tasks that consume high resources.
- Monitor the PC performance through the FPS (frames per second) and the usage percentages for RAM, CPU, and GPU.
Why Recommend the Xbox Game Bar
Compared with downloading a third-party screen recorder, using Xbox Game Bar offers a more efficient recording method. Don’t need to wait for the download anymore. Just press the Windows + G keys to start the recording in seconds. After the recording, the Xbox Game Bar allows for direct viewing of the output video, instead of switching to the output folder.
Pros and Cons
| Pros: | Cons: |
| 1. No additional payment or installation. 2. Lower resource consumption than traditional recorders. 3. Quick adjustment of various audio sources. | 1. No customizable options for choosing the recording area. 2. Unavailable recording for Windows desktop, or File Explorer. 3. No support for webcam recording.No editing features for the recorded video. 4. A recording duration of up to 4 hours. |
My Own Experience with Xbox Game Bar
I really like using Xbox Game Bar to record my game highlights. It is very easy to use. I can just accomplish the whole recording process with several shortcuts. Since there is a 4-hour recording duration limit, I can’t use Xbox Game Bar to record a gameplay video that lasts longer than 240 minutes. To finish a long-time recording, I have to record the gameplay one by one, which is inconvenient.
Until now, I have used Xbox Game Bar to record 100+ videos. All these recordings never cost me a dime. However, it is difficult to edit the recording within the Xbox Screen Recorder. To make the recording look more professional, I need to download an extra video editor. Here, I highly recommend MiniTool MovieMaker.
By the way, when I want to capture the interface of File Explorer and the Windows desktop, I have to use another screen recorder. That’s vexing.
Snipping Tool
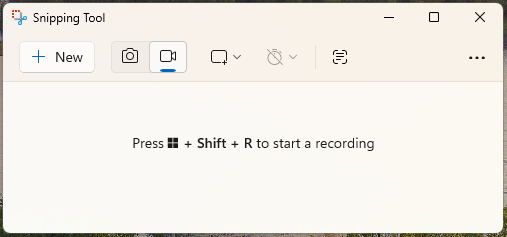
The Snipping Tool is a built-in tool available on Windows. With this screen recorder Windows, it is a piece of cake to take screenshots, annotate the images, and capture the screen. To activate this screen recorder, just press the Windows + Shift + S keys.
Why Recommend the Snipping Tool
Unlike some complicated screen recording tools, the Snipping tool never requires any manual configuration for the recording settings. Just press the corresponding hotkeys to start the recording.
Meanwhile, the Snipping Tool gives great freedom to customize the recording area. More importantly, this tool is watermark-free, and there is no upgrade payment for any advanced functions.
Key Features of Snipping Tool
- Capture the whole screen or a customized recording region.
- Record the microphone and system sounds simultaneously.
- Take screenshots with different modes.
- Create an animated GIF with a screen recording.
Pros and Cons
| Pros: | Cons: |
| 1. No additional installation or cost.A clean and simple interface. 2. Low system resource consumption. 3. GIF export support. | 1. No recording support for Windows 10 or older versions. 2. Limited editing features. 3. No real-time screen annotation. |
My Own Experience with Snipping Tool
When I need to customize the recording area, I prefer the Snipping Tool instead of Xbox Game Bar. I have used it so many times for capturing the File Explorer, the Start menu, and the Windows desktop areas.
However, the Snipping Tool doesn’t allow me to record the webcam. In addition, I found that there are some problems, like crashes or being out of sync during a long recording. Finally, when I run the Snipping Tool on Windows 10, the screen recording function is unavailable.
Clipchamp Screen Recorder
Clipchamp Screen Recorder, also known as Microsoft Clipchamp, is not only a screen recorder but also a video editor available on Windows 10/11 and macOS. More advanced than the Snipping Tool, this Windows screen recorder offers more editing functions that empower a user to create various videos, including demos, tutorials, and more.
Why Recommend Clipchamp Screen Recorder
More than an easy-to-use screen recorder, Clipchamp Screen Recorder is suitable for those who want an all-in-one solution for screen recording and video editing. It supports instant video editing on the timeline once the recording process completes. In addition, the advanced functions like AI-generated captions will make the video creation easier.
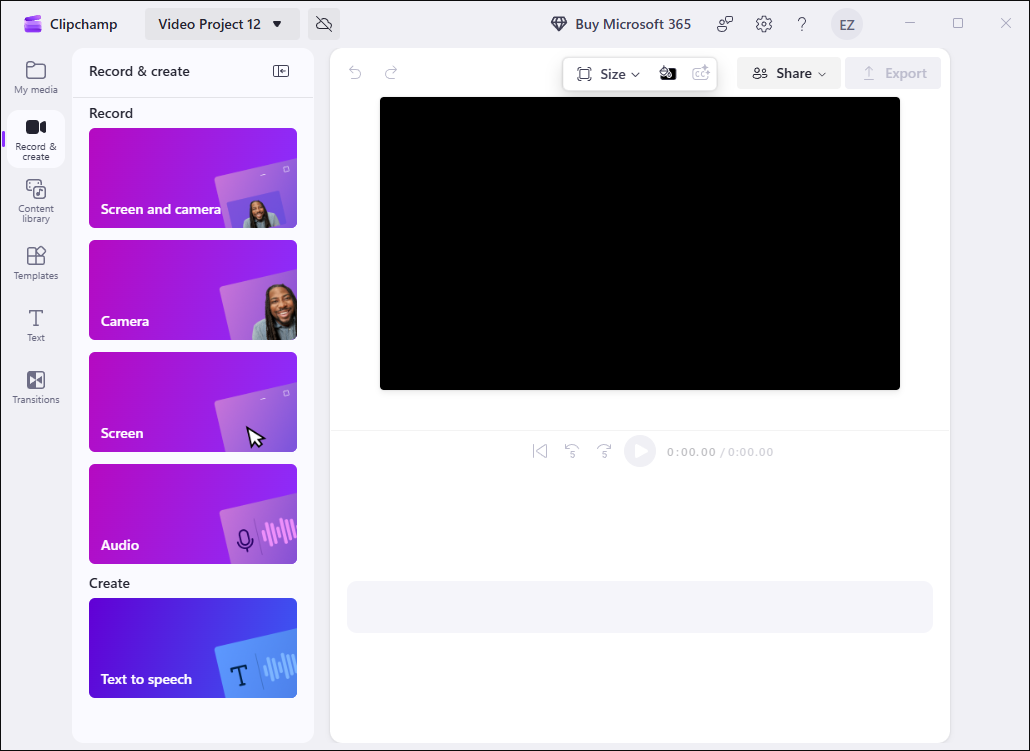
Key Features of Clipchamp Screen Recorder
- Record the screen and webcam at the same time.
- Capture a selected browser tab, app window, or the whole screen.
- Record the system and microphone audio at the same time.
- Directly export and upload the videos to platforms like YouTube, TikTok, or OneDrive.
Pros and Cons
| Pros: | Cons: |
| 1. Webcam recording support. 2. Strong AI support for auto-captions and silence removal. 3. Rich editing functions. 4. Direct social sharing. | 1. High system resource consumption. 2. 30 minutes limit for the recording duration. 3. Required payment for 4K recording export. 4. Lack of hotkeys to begin/end the screen recording. |
My Own Experience with Clipchamp Screen Recorder
I have used Microsoft Clipchamp to edit a lot of recorded videos. It enables me to trim, merge, reverse, and speed up/slow down my recordings effortlessly. In addition, Clipchamp Screen Recorder features an intuitive interface. Although I knew little about screen recording, I could access this tool without hassle.
Meanwhile, Clipchamp allows me to directly share my videos on YouTube and TikTok. That’s great for me. However, the operation of this screen recorder requires sufficient system resources. Sometimes, it takes me a lot of time to wait for Clipchamp to load. On condition that there is an emphasis on video editing after recording the screen, never miss this application.
PowerPoint
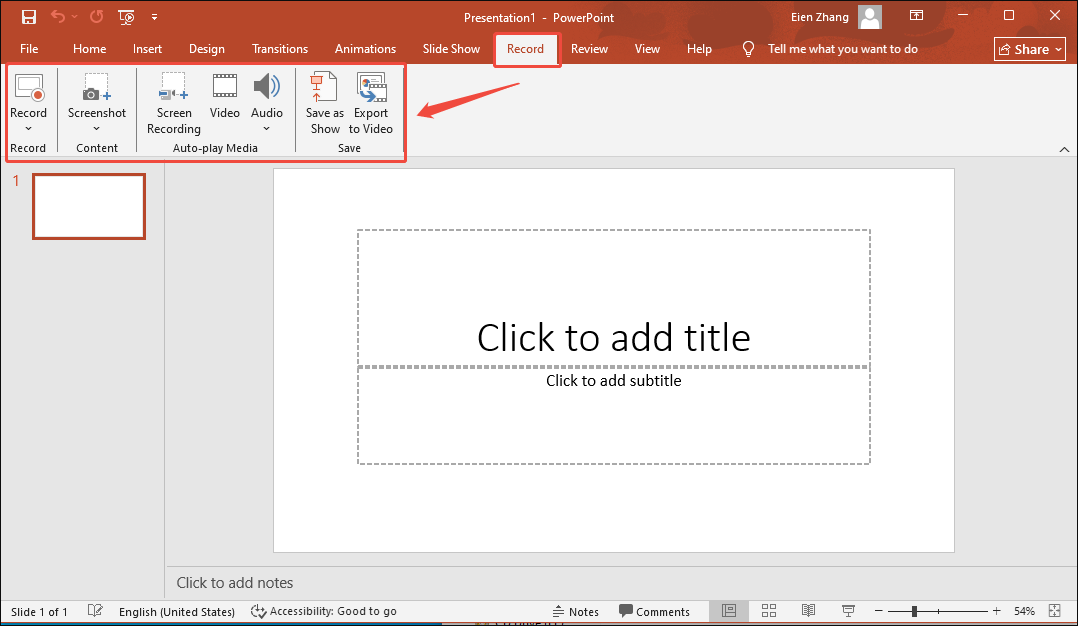
Developed by Microsoft, PowerPoint is a popular pre-installed presentation software. I have used it to create a lot of slideshows with images, text, animations, and multimedia. In addition, PowerPoint offers built-in recording functions.
Why Recommend PowerPoint
In addition to recording the screen with system and microphone sounds, PowerPoint also supports slide-by-slide recording. In this situation, any stumbling on a sentence won’t break the whole recording process. I only need to re-record a specific slide instead of repeating the whole recording process.
How Does PowerPoint Recording Work
Firstly, PowerPoint enables people to capture the microphone audio and insert the recording into the presentation directly. Meanwhile, it empowers users to capture the slideshow one by one and save the presentation recording in the MP4 or WMV format. The output resolutions include 480p, 720p, 1080p, and 4K. The key features of PowerPoint recording are listed below.
- Record the presentations with the system and the microphone sounds.
- Capture the screen with a webcam and directly insert the recordings into the presentation.
- Record the whole screen or a selected regional area.
- Screenshot the specific window for slideshow creation.
Pros and Cons
| Pros: | Cons: |
| 1. No need for installing third-party screen recorders. 2. Slide-by-slide recording support. 3. Rich built-in annotation tools. 4. Easy recording exporting for sharing or editing. | 1. Limited editing features. 2. Difficult switching to other programs during the recording. 3. High resource usage. |
My Own Experience with PowerPoint
I have used PowerPoint to record my screen so many times. Such a recording allows for the direct video insertion into my presentation, which makes my slideshows more understandable and interesting for the audience.
In addition, all the videos exported from PowerPoint can be saved in the MP4 format and with a high resolution up to 4K. However, it really gives me a headache when I am using PowerPoint to edit the recordings. To make the recordings look more professional, I need more editing functions like complex video effects.

Offline Windows Screen Recorder
Here, I will recommend 3 remarkable offline video recorder apps, including MiniTool Screen Recorder, OBS Screen Recorder, and Bandicam Screen Recorder.
MiniTool Screen Recorder
MiniTool Screen Recorder is a one-stop solution for screen recording, webcam capturing, and screen annotation. In essence, it is an MP4 recorder with an intuitive interface. More importantly, all the recordings by MiniTool Screen Recorder don’t contain any watermarks.
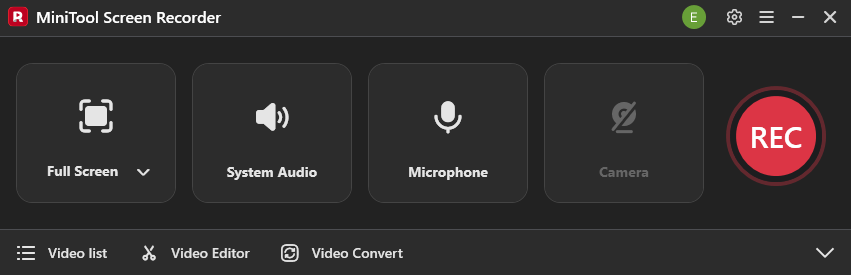
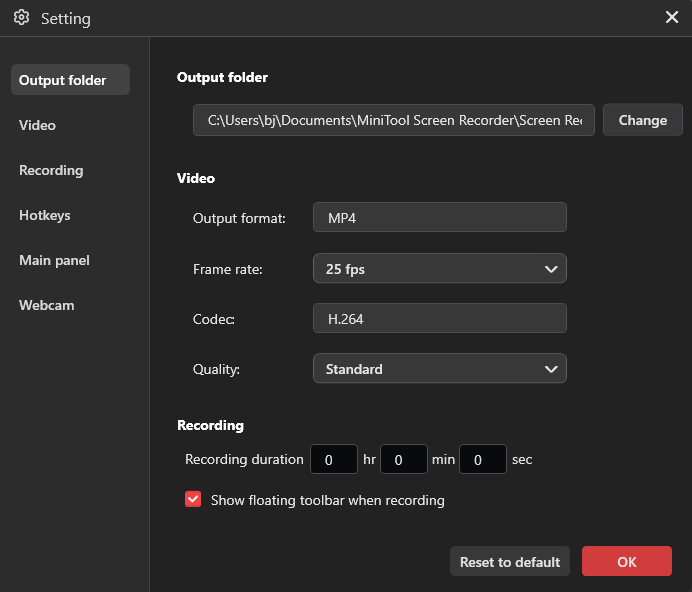
Plus, MiniTool Screen Recorder provides multiple advanced options to customize the recording quality (High, Standard, and Original), frame rate (15fps, 20fps, 25fps, 30fps, and 50fps), and recording duration (no limit).
Why Recommend MiniTool Screen Recorder
MiniTool Screen Recorder is suitable for those who want to record the screen and webcam while annotating the screen. Meanwhile, it allows for changing the shape and position of the webcam with simple clicks.
MiniTool Screen Recorder offers simple hotkeys that enable every beginner to accomplish the recording tasks quickly. No matter whether a user wants to record the entire screen or capture a selected area/app window, this free screen recorder can always meet their needs.
Since MiniTool Screen Recorder allows presetting the recording duration, it brings great convenience to those who want to auto-stop the recording. Besides, this software has a low requirement for CPU usage (often less than 10%), which helps avoid PC lagging in the recording process.
MiniTool Screen RecorderClick to Download100%Clean & Safe
Key Features of MiniTool Screen Recorder
- Capture the whole screen or record a selected region/software window.
- Record the computer screen without any time limits and in a high resolution, like 4K.
- Capture the microphone and system sounds simultaneously or separately.
- Annotate the screen with different elements like lines, shapes, and more in real-time.
- Record the webcam with simple clicks.
Requirements for Computer Configuration
MiniTool Screen Recorder sets a requirement for a PC. Specifically, it is available on Windows 10 (64-bit) and Windows 11 (64-bit). Simultaneously, the CPU of the PC must be Intel Core i5 or better, 2GHz+. To run MiniTool Screen Recorder smoothly, at least 4GB of RAM is necessary.
Before downloading and installing MiniTool Screen Recorder, ensure that the PC has at least 1GB of free space. Apart from that, the GPU of the PC must meet the requirements. According to the official website of MiniTool Screen Recorder, the workable GPUs include Intel HD Graphics 5000 or later, NVIDIA GeForce GTX700 or later, and AMD Radeon R5 or later.
Pros and Cons
| Pros: | Cons: |
| 1. No watermarks and ads. 2. Easy-to-use for novices. 3. No limit for the recording duration. 4. Capture the screen in high resolution. 5. Webcam recording support. 6. Screen annotation support. | 1. Need to sign up for webcam recording and screen annotation. 2. Only available on Windows. 3. Need to download another software to edit the recording. |
My Own Experience with MiniTool Screen Recorder
I have used MiniTool Screen Recorder to capture various computer activities like games, online meetings, video calls, and more. I love its well-organized interface. Even if I am a beginner in screen recording, I am able to use it easily.
Meanwhile, MiniTool Screen Recorder allows me to preset the recording duration. I don’t need to wait for it to end the recording manually anymore. That’s cool! Furthermore, I like the screen annotation function of MiniTool Screen Recorder. It enables me to highlight the key points of screen recordings.
With this program, I can capture any selected software window as I want. Until now, I have used MiniTool Screen Recorder to capture many online tutorials, which has earned me a lot of subscribers on YouTube, Facebook, and other platforms.
OBS Screen Recorder
OBS Screen Recorder, which is also known as OBS Studio, is a free program with an open-source nature. This Windows 10 screen recorder aims to help people capture a high-quality video and conduct a livestream. Since OBS Screen Recorder doesn’t require any payment and never sets a limit for the recording duration, it has become one of the most popular tools among educators, gamers, and content creators.
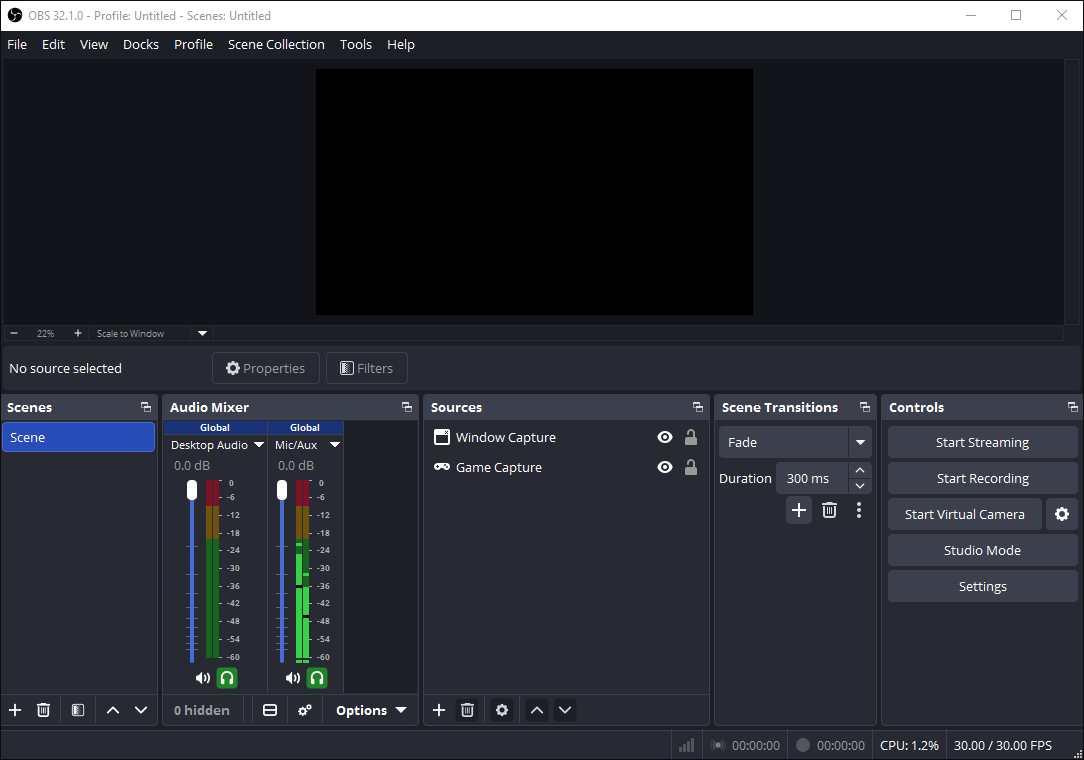
OBS Studio also enables capturing the whole screen or customizing the recording area. Meanwhile, it empowers people to adjust the frame rate. More importantly, OBS Screen Recorder allows for combining different input sources, including browsers, webcam, videos, images, and text, into the screen recording.
On the other hand, OBS Studio is equipped with an audio mixer that helps control the audio sources effectively. This mixer brings multiple benefits, including noise suppression and sound quality enhancement by applying compressors and equalizers.
Why Recommend OBS Screen Recorder
OBS Screen Recorder provides a crash-proof. When capturing the screen with the Clipchamp Screen Recorder or the Snipping Tool, the power going out or the computer freezing will lead to losing the entire recorded video.
In contrast, OBS Screen Recorder automatically saves the recording files in the MKV format. This format supports recording the screen second by second. As such, during the OBS recording, if the PC crashes, the recorded video will last until the beginning of the crash.
Meanwhile, OBS Screen Recorder enables people to capture microphone and system audio on separate tracks, which helps adjust the corresponding volume level more easily. Moreover, if one wants to add a logo to the screen or hide sensitive windows during the recording, OBS provides ultimate scene customization!
Key Features of OBS Screen Recorder
- Support high frame-rate & high-resolution (up to 4K) recording.
- Capture a full screen, a selected area, or a specific window.
- Improve the audio quality with a robust audio mixer.
- Record different sources, including the screen and webcam, at the same time.
- Monitor and adjust recordings in real time with a live preview.
Requirements for Computer Configuration
If people want to run OBS Screen Recorder on Windows, ensure that the operating system is Windows 10/11. As for the CPU, Intel i5 2500K, Ryzen 1300X, or more advanced ones can be OK. Meanwhile, at least 4GB of RAM is necessary for normal operation. In terms of the GPU, DirectX 11 compatible or later can work.
Pros and Cons
| Pros: | Cons: |
| 1. No cost, watermarks, or time limits. 2. Professional scene layouts. 3. High recording performance. 4. Advanced control over different audio sources. | 1. Great difficulty of use for novices. 2. Lack of video editing functions. 3. High requirements for the PC system. |
My Own Experience with BOS Screen Recorder
I have used OBS Screen Recorder to capture various gameplay videos. Undoubtedly, its capability of controlling the audio sources, live streaming, and screen recording is really amazing. OBS Studio is a great boon to gamers.
However, when I first used this tool, I was really confused by the complicated interface of OBS Studio. It takes me some time to learn how to use this application, which makes my screen recording less efficient.
In addition, to get the best recording quality on my PC, I have to manually configure the settings such as the encoder, bitrate, and resolution. In other words, I need to make so many preparations before recording the screen.
Bandicam Screen Recorder
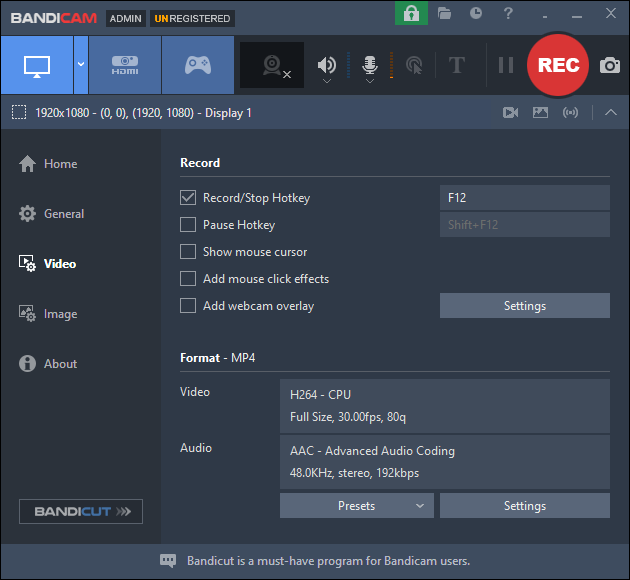
Developed by Bandicam Company, Bandicam Screen Recorder is a robust and lightweight screen recording tool. With it, people can record a high-quality video (up to 4K UHD and 480fps). Additionally, it is a more reliable option for long-term recording. Hence, if a user wants to capture high-quality gameplay videos or online meetings, never miss Bandicam Screen Recorder.
Compared with many other screen recorders, Bandicam uses fewer GPU, CPU, and RAM resources. Hence, it is less likely to encounter frame dropping or lagging when using Bandicam to record a computer activity. In other words, if the PCs are low-end but one wants to capture a high-demand game, Bandicam Screen Recorder can be an ideal choice.
Why Recommend Bandicam Screen Recorder
Better than some built-in screen recorders, such as Xbox Game Bar, Bandicam Screen Recorder is not just limited to 1080p at 60fps. Specifically, it supports recording a video in 4K Ultra HD. Meanwhile, the recording frame rate can be set to up to 480fps.
Bandicam Screen Recorder also offers many advanced recording options that built-in recorders don’t have. For example, it supports background recording, allowing for recording a selected app window in the background while handling other affairs.
More importantly, Bandicam empowers a user to record from external devices, including webcams, consoles, and phones. It also features real-time drawing tools and gives the mouse effects, which help the audience to grasp the key points of the recording. Bandicam Screen Recorder also strikes a good balance between video compression and recording quality, offering a high-quality recorded video with a small file size.
Key Features of Bandicam Screen Recorder
- Record the entire screen or a selected area on the PC in 4K Ultra.
- Support high-quality game capture using OpenGL, DirectX, or Vulkan technologies.
- Record various external video devices such as webcams, IPTV, gaming consoles, and more.
- Capture system and microphone audio without recording audio for over 24 hours.

Requirements for Computer Configuration
Bandicam Screen Recorder is available on Windows 7/8/10/11 (64-bit). The minimum requirements for CPU are AMD Athlon XP or Intel Pentium 4. If people want a better performance of Bandicam, a dual-core (Intel Pentium D / AMD Athlon 64 X2) is recommended. Meanwhile, it is suggested that there is more than 1GB of RAM.
Plus, more than 1GB of HDD (Hard Disk Drive) space is necessary. As for the graphics, the minimum requirement is 800x600 resolution (16-bit color). The recommended graphics is 1240x768 resolution (16-bit color).
Pros and Cons
| Pros: | Cons: |
| 1. Good performance on low-end PCs. 2. High recording quality. 3. Feature-rich recording modes. 4. Real-time drawing tools. 5. Smaller file size of recorded videos. | 1. 10-minute recording limit for free users. 2. Watermarks in the recordings of a free version. 3. Limited features for video editing. |
My Own Experience with Bandicam Screen Recorder
Bandicam Screen Recorder has brought me a lot of surprises. What leaves a deep impression on me is its outstanding recording quality. Meanwhile, compared with OBS Studio, it is easier for me to understand the interface of Bandicam Screen Recorder.
I really like the online drawing tools of Bandicam Screen Recorder. With them, I can make my recordings more understandable for the viewers. Plus, this Windows 11 screen recorder offers a lot of customization options for output settings. I can customize the codecs, bitrate, audio channel, and other parameters based on my needs.
However, when I was a free user of Bandicam, there was a 10-minute limit for the recording duration. In addition, I also need to spend time cropping the recorded video to remove the watermark. That really bothers me.

Online Screen Recorder Windows
In the following paragraphs, 2 outstanding online screen recorders, such as Loom Screen Recorder and Google Screen Recorder, will be recommended.
Loom Screen Recorder
Loom Screen Recorder is an easy-to-use online recorder for capturing the screen and webcam. Plus, this Windows screen recorder also offers a Chrome extension and desktop app. With a very intuitive interface, Loom Screen Recorder not only provides beginners with a smooth recording experience but also offers experienced users many robust advanced functions.
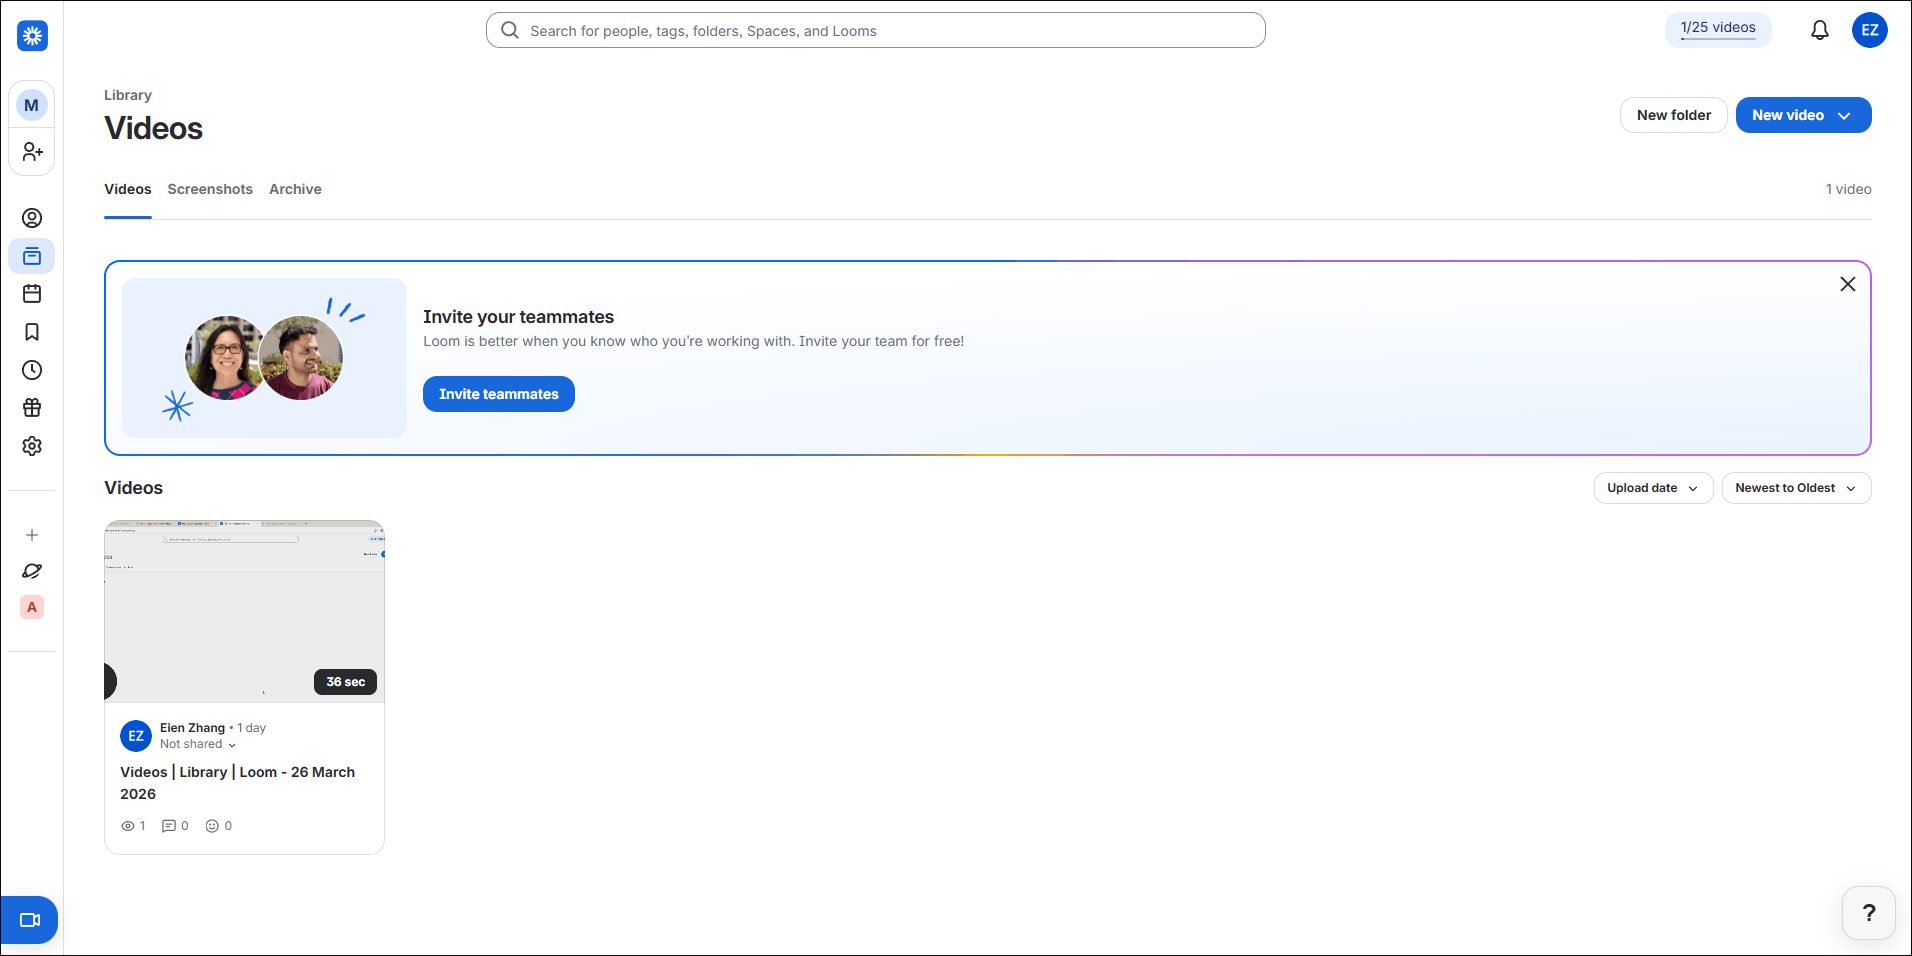
Why Recommend Loom Screen Recorder
Loom Screen Recorder supports recording the screen and webcam at the same time or separately. In the process of recording the facecam, it allows for the background replacement with a selected template or image.
Meanwhile, all the recordings by Loom Screen Recorder will be stored on Loom’s cloud storage. There is an automatically generated shareable link for the recording, which saves time for uploading the recorded video to other platforms. Moreover, Loom Screen Recorder also supports video editing, which ensures that every user can edit the recorded videos without downloading an additional video editor.
Key Features of Loom Screen Recorder
- Capture the screen and webcam both or separately.
- Record the entire screen, a selected region, or a browser tab.
- Annotate the screen in real-time.
- Edit the recorded videos easily within the Loom website.
- Share the recordings quickly via a link.
Where Is Loom Screen Recorder Available
More than an online screen recorder that works well on browsers such as Chrome and Edge, Loom Screen Recorder also offers a desktop application available on Windows, macOS, Android, and iOS.
Before using Loom Screen Recorder on the web browser, ensure that there is at least 4GB of RAM. In addition, to avoid the compatibility issue, it is suggested to use Google Chrome and update it to the latest version.
The desktop Loom Screen Recorder is highly compatible with Windows 10 (64-bit) and Windows 11. As for the CPU, an Intel 6th Gen (Skylake) or a comparable AMD CPU is necessary. In terms of the RAM, at least 8GB is required for the desktop version. To attain optimal performance, 16GB of RAM is recommended. To prevent the recording failure, at least 10% of free hard drive space is needed.
Pros and Cons
| Pros: | Cons: (for a free version) |
| 1. No additional installation. 2. Ease of use for novices. 3. Instant sharing of the recorded videos. | 1. 5-minute limit for recording duration. 2. Only 720p support. 3. No editing features. 4. Recording download unavailable. |
My Own Experience with Loom Screen Recorder
I have used Loom Screen Recorder on Google Chrome so many times. Undoubtedly, its intuitive interface is understandable to me, and I don’t need to wait for the software download. Meanwhile, Loom Screen Recorder empowers me to share the recorded video more easily.
However, without an upgrade payment, Loom Screen Recorder only allows me to record a video that lasts up to 5 minutes. Meanwhile, as a free user, I can’t use its editing features or download the recorded file. In addition, only 720p export resolution is available for me. To bypass those limitations, I have to subscribe to a business plan.
MiniTool Video ConverterClick to Download100%Clean & Safe
Google Screen Recorder
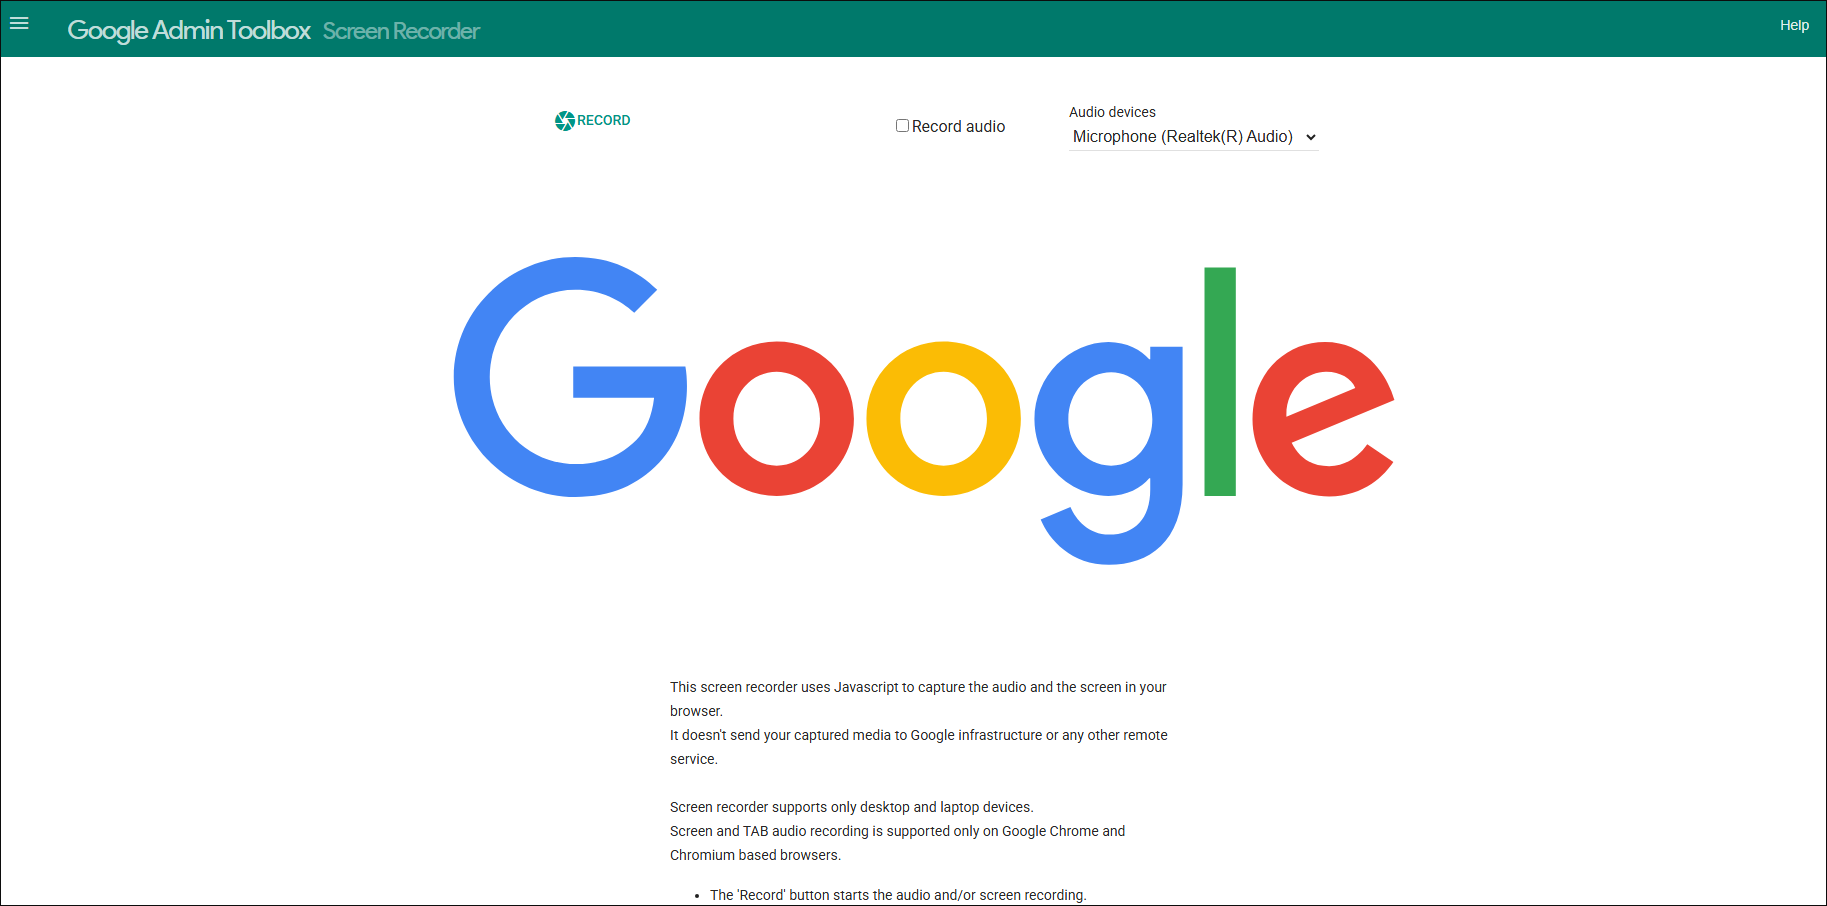
Google Screen Recorder is an amazing web-based video recorder. It supports recording the entire screen, a Chrome tab, or a selected app window with the audio from the system and different microphone sources. After the recording, Google Screen Recorder offers an instant preview.
Why Recommend Google Screen Recorder
Google Screen Recorder is accessible to any Windows user who has installed Google Chrome on the PC. It features a well-organized interface and enables beginners to accomplish screen recording with simple clicks. Simultaneously, there are multiple options for customizing the recording region.
Google Screen Recorder also helps manage the audio recording effortlessly. In addition, it is a lightweight tool that puts a low requirement on the system resources, which makes Google Screen Recorder an ideal choice for low-end PCs. By the way, there is no limit for the recording duration.
Key Features of Google Screen Recorder
- Record the whole screen, a selected app window, or a Chrome tab.
- Capture the system and microphone sounds simultaneously or separately.
- Customize the audio sources of different microphones.
- Automatically save the recording in the WEBM format.
Where Is Google Screen Recorder Available
Google Screen Recorder is only supported by laptops and desktop devices. Meanwhile, there is only support for Google Chrome and Chromium-based browsers. As such, for those who want an online screen recorder available on mobile devices, Google Screen Recorder is not a choice.
Note: Despite the support of Chromium-based browsers, it is suggested to directly run Google Screen Recorder on Chrome to avoid accidental unknown errors.
Pros and Cons
| Pros: | Cons: |
| 1. No payment and watermarks for the recording. 2. No limit for the recording duration. 3. No additional installation or advertisements. 4. Low requirement on PC system resources. | 1. Limited device and browser support. 2. No functions for webcam recording, screen annotation, or video editing. 3. Only one output format (WEBM). 4. Limited options for output resolution. |
My Own Experience with Google Screen Recorder
I have used Google Screen Recorder to capture the entire screen, a specific game app window, and a Chrome tab. Undoubtedly, its recording modes enable me to choose the recording area more quickly and accurately, instead of customizing the recording region by drawing a box.
Google Screen Recorder also allows me to determine the audio recording easily. There are various options for configuring the microphone sources. Meanwhile, since it doesn’t require an installation, I can use Google Screen Recorder to finish the recording more quickly than downloading a third-party screen recorder.
However, Google Screen Recorder lacks advanced functions. For example, during the recording, I can’t use a drawing tool to engage the audience. In addition, I can’t use this tool on different browsers or a mobile device. Sometimes, I want to save the recording in the MP4 format. However, Google Screen Recorder only supports one output format: WEBM. Meanwhile, I am unable to set a resolution for the recording.

Screen Recorder Chrome Extension
Want a screen recorder Chrome extension? If yes, never miss Awesome Screen Recorder & Screenshot.
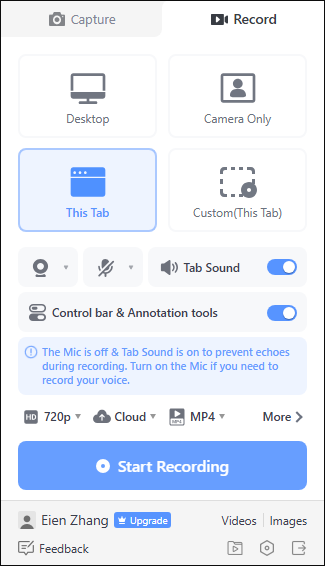
Awesome Screen Recorder & Screenshot
Developed by Diigo Inc, Awesome Screen Recorder & Screenshot is a powerful tool that aims to record and annotate the screen. With a history of over 13 years, it has millions of users worldwide.
Why Recommend Awesome Screen Recorder & Screenshot
The file size of the Awesome Screen Recorder & Screenshot extension is small. Compared with downloading a traditional screen recorder, like OBS Studio, it takes people less time to add this extension to the browser. Meanwhile, Awesome Screen Recorder & Screenshot offers an understandable UI, which enables beginners to access this screen recorder effortlessly.
Once the recording ends, Awesome Screen Recorder & Screenshot allows users to directly edit the recorded video within the website. For example, it is effortless to trim the output video. Simultaneously, this screen recorder offers editing functions to add text, links, shapes, blurs, or images to the recording.
On the other hand, Awesome Screen Recorder & Screenshot makes it easier to manage the PC storage space. For example, it empowers a user to save the recordings in the cloud or on the PC. If there is limited space on the PC, it is unnecessary to delete some files to free up the storage space. Just save the recording in the cloud.
Key Features of Awesome Screen Recorder & Screenshot
- Record the whole screen, a selected app window, or a browser tab.
- Capture the screen with/without the system audio.
- Share the recorded video via a link.
- Edit the recorded video on the timeline.
- Capture and annotate the image.
- Save the output video in the WEBM or MP4 format.

Where Is Awesome Screen Recorder & Screenshot Available
As a top-grade browser extension, Awesome Screen Recorder & Screenshot is available on a wide range of browsers, including Google Chrome, Edge, and Firefox. When using it on a browser, ensure that there is a minimum of 2GB of RAM.
Meanwhile, Awesome Screen Recorder & Screenshot also provides a desktop version, which is available on Windows. Specifically, it supports Windows 10 (64-bit) and more advanced operating systems.
Pros and Cons
| Pros: | Cons: |
| 1. Ease of recording, editing, and sharing a video. 2. Webcam recording support. 3. Cloud storage support. | 1. Only 720p support without upgrade. 2. No options for customizing the recording tab. |
My Own Experience with Awesome Screen Recorder & Screenshot
One time, my OBS Studio was not working due to an unknown error. To finish my recording in time, I went to the Chrome Web Store and found Awesome Screen Recorder & Screenshot as an alternative. It only took me about 10 seconds to add the extension to Chrome. After entering the interface, since all the buttons are located in an organized way, I learned how to use this tool without effort.
Undoubtedly, Awesome Screen Recorder & Screenshot is a lightweight and easy-to-use screen recorder for Windows. It also empowers me to directly share the recordings on other platforms via a link. However, as a free user, I can only export the recorded video in 720p.
Although Awesome Screen Recorder & Screenshot offers editing functions, it is a little limited for me. I can’t crop, rotate, flip, reverse, or speed up the screen recordings within the website. To accomplish the video editing, I have to download and install an extra video editing software: MiniTool MovieMaker.
To Wrap Things Up
This article has summarized 10 remarkable Windows screen recorders. If you want a built-in tool, choose among Xbox Game Bar, Snipping Tool, Clipchamp Screen Recorder, and PowerPoint.
On condition that you prefer an offline screen recorder, MiniTool Screen Recorder, OBS Screen Recorder, and Bandicam Screen Recorder can all help. If you further want a watermark-free and easy-to-use screen recorder without any time limits. The MiniTool product can be a better choice.
Provided that you need an online screen recorder, there are 3 amazing options, including Loom Screen Recorder, Google Screen Recorder, and Awesome Screen Recorder & Screenshot. Just select one based on your preference. If you have encountered any problems when using MiniTool Screen Recorder, just send the problem description to support@minitool.com to ask for help.