Nowadays, people often need to record audio from computers. For example, capture sound from webinars, meetings, or online lectures to take notes, or record online music for offline listening. Therefore, this post offers two reliable methods to get high-quality audio recordings on Windows.
How to Record Audio from Computer
This section explains how to use Windows 11’s built-in Sound Recorder or MiniTool Screen Recorder to capture computer audio with ease.
Method 1: Use Windows 11 Sound Recorder
Windows is dedicated to delivering a range of tools to help users complete common tasks. When it comes to audio or voice recording, it also offers a simple, built-in tool: Sound Recorder on Windows 11 and Voice Recorder on Windows 10.
With this application, you can easily record audio from computer or a microphone. However, it cannot record system audio and the microphone simultaneously.
Here’s how to record audio on computers using the Windows built-in tool.
Step 1: Open Windows Sound/Voice Recorder
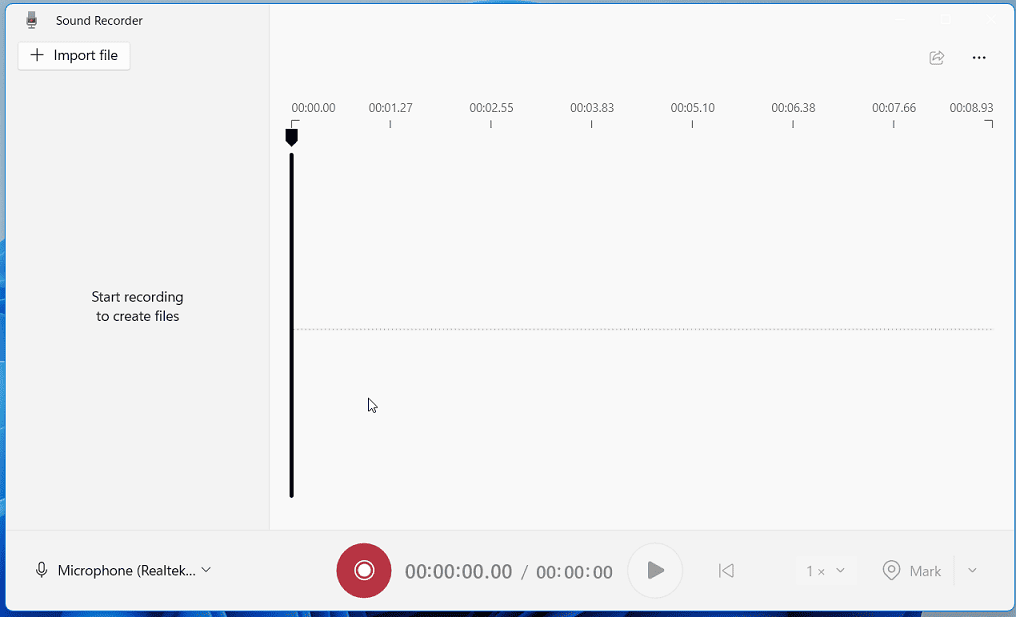
Click the Search box, type “sound recorder” or “voice recorder”, and open the app.
Step 2: Record Your Voice
Windows Sound/Voice Recorder is designed for simple voice recording. To record the microphone input, please make sure your microphone is plugged in. By default, the volume is set to 100%.
To start recording, click the Record icon on the main interface, and start speaking. To stop it, click the Stop recording icon.
Step 3: Record System Audio
To capture internal audio from your computer, first, you need to enable Stereo Mix.
1. Open Sound settings
On Windows 11:
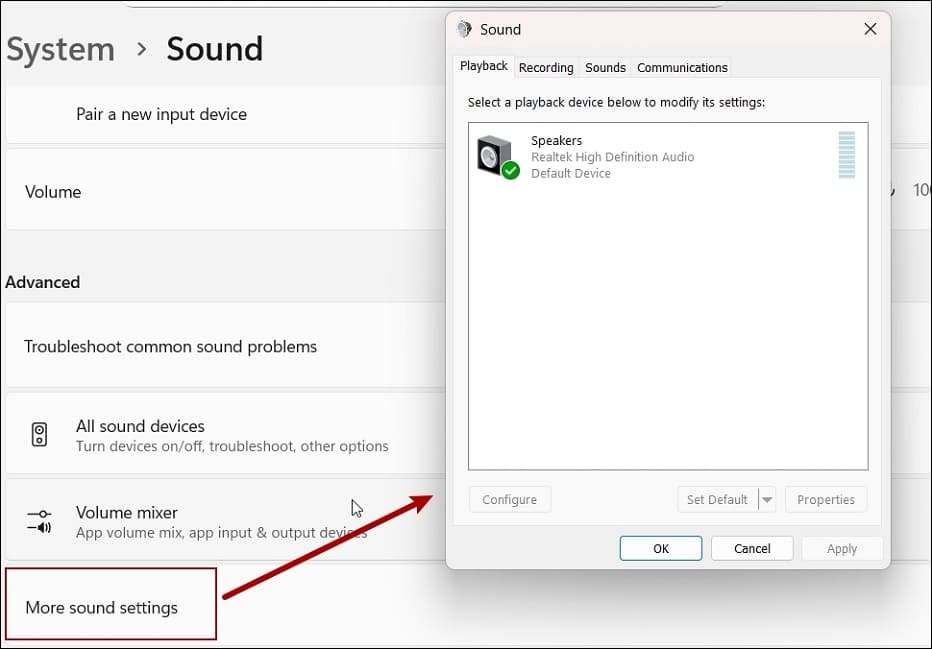
- Right-click the Speaker icon at the bottom of your screen and select Sound Settings.
- Scroll down to the Advanced section and select More sound settings.
On Windows 10:
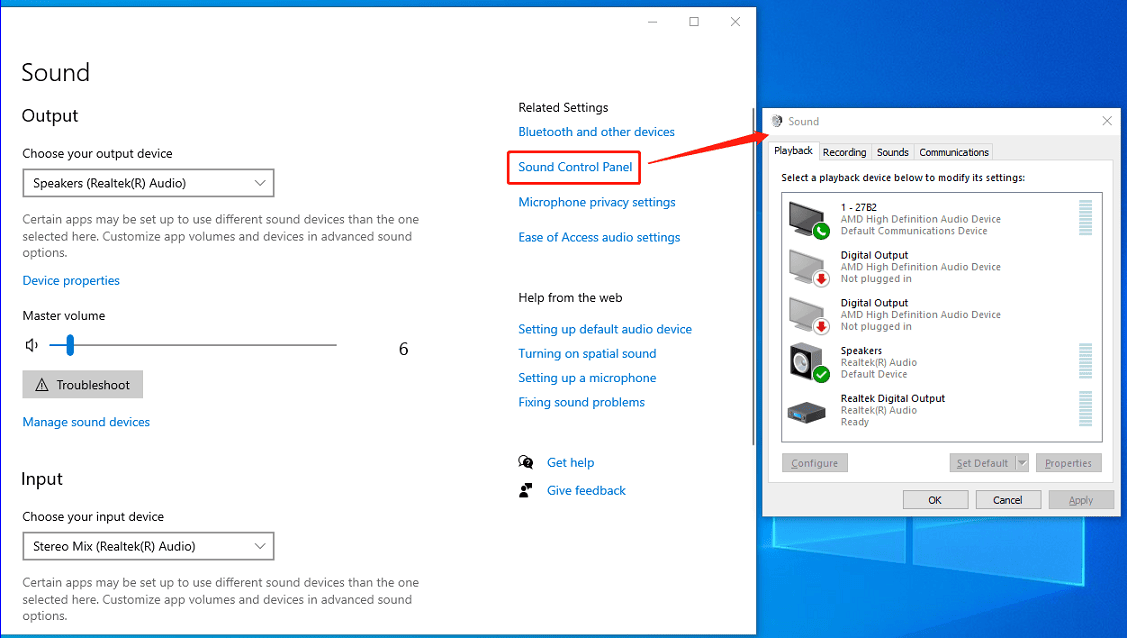
- Right-click the Speaker icon and select Open Sound settings.
- Select Sound Control Panel on the right side.
2. Enable Stereo Mix
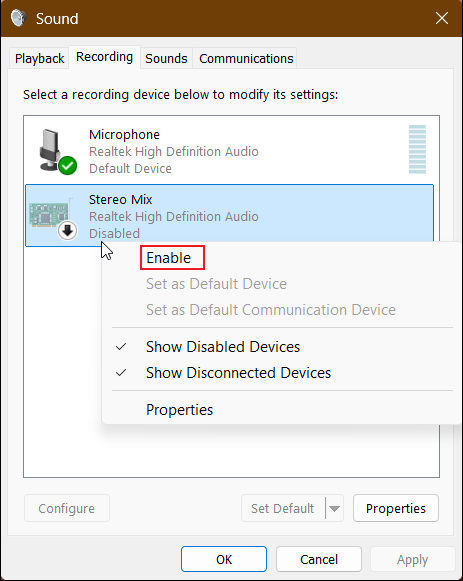
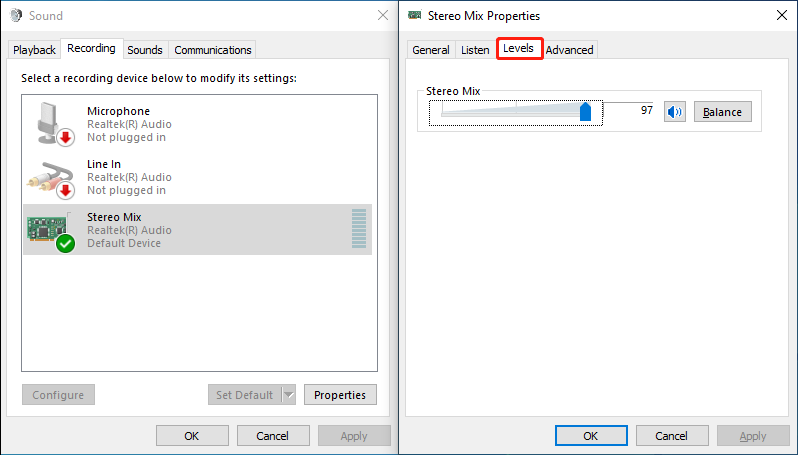
- In the Sound window, switch to the Recording tab.
- Right-click the blank area and choose Show Disabled Devices.
- Right-click Stereo Mix, select Enable, and click OK
To change the volume, double-click Stereo Mix, go to Levels, and drag the slider to the right or left.
3. Start audio recording
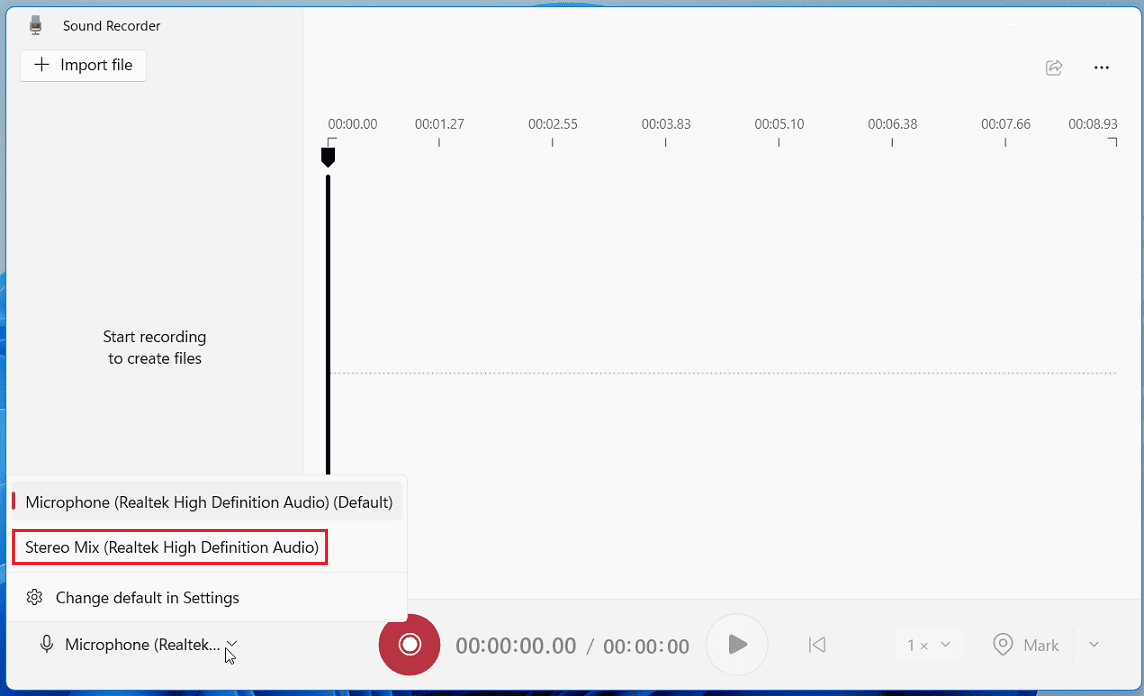
Windows 11: Open Sound Recorder, click the arrow next to the Microphone option at the bottom, and click Stereo Mix (Realtek High Definition Audio) to set it as the recording device.
If you’re running Windows 10, just skip the step above. Next, turn up the speaker volume and play the audio you want to record. Then, start recording by clicking the Record button.
Finally, you’ll get an M4A file. You can directly play the recording in the application. To locate the file, right-click it and select Show in folder or Open file location.

Method 2: Use MiniTool Screen Recorder
As mentioned above, Windows Voice/Sound Recorder only supports single‑source recordings. If you want to record your computer audio and microphone input at the same time, a third-party recording program is necessary. MiniTool Screen Recorder is recommended here for the following benefits:
- Record system audio and microphone sound separately or simultaneously.
- Free to use and no recording time limit.
- An intuitive interface makes it easy to use, even for beginners.
- Record with a preset duration for automatic stop when time is up.
- Ensure clear and high-quality audio recordings.
What’s more, MiniTool MovieMaker can record your screen with a webcam or capture a webcam only. With extensive screen annotation tools, you can easily create engaging tutorials, software demonstrations, and presentations.
How to record computer audio using MiniTool Screen Recorder? Here’s the guide.
Step 1: Download and Install
Click the button below to download the excellent recording software to your computer.
MiniTool Screen RecorderClick to Download100%Clean & Safe
Step 2: Choose the Audio Source
After installation, open the application, and you’ll immediately enter the main interface of MiniTool Screen Recorder. By default, system audio and the microphone are recorded simultaneously.
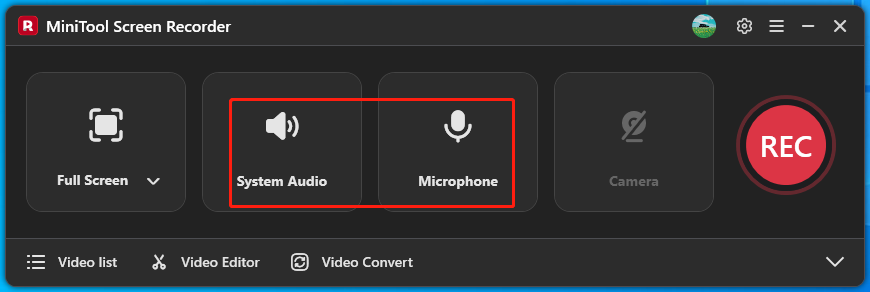
- To record system audio only, click Microphone to disable it.
- To capture your voiceover only, click System Audio to mute it and plug in your microphone.
- To record both, do not change any settings.
Don’t forget to adjust the volume levels. Open Volume Mixer to independently control sound levels of browsers, media players, speakers, and system audio.
Step 3: Set a Recording Duration
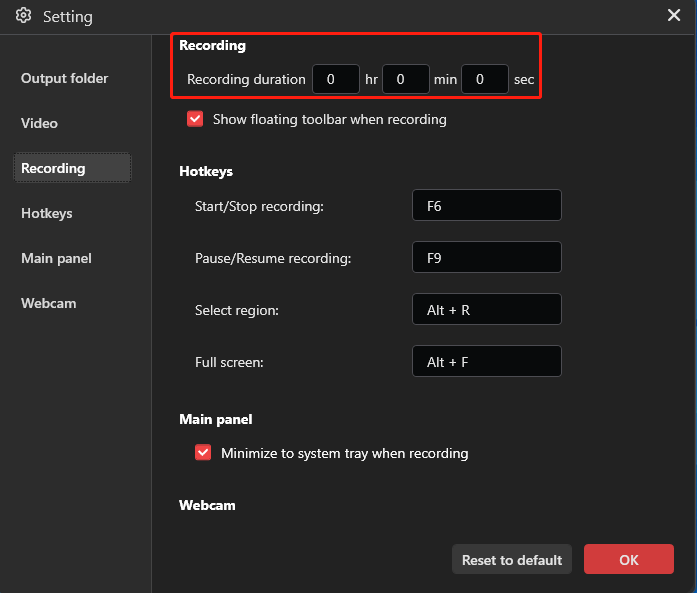
If you need to record a long online lecture or other events with a fixed duration, you can set a recording length accordingly. Then the recording stops automatically once the period is reached.
To do this, click the Settings icon in the upper-right corner, go to Recording in the Settings window, set your recording duration, and click OK to save the change.
Step 4: Start and Stop Audio Recording
To record music or other online audio resources, locate the target page, and mute other tabs you don’t need to record.
Click the red REC button on the right of the main interface, and the recording starts after a 3-second countdown. Then play the audio or start talking.
If you set a recording length, the recording will end when the time is up. You can also press F6 to stop the process at any time.
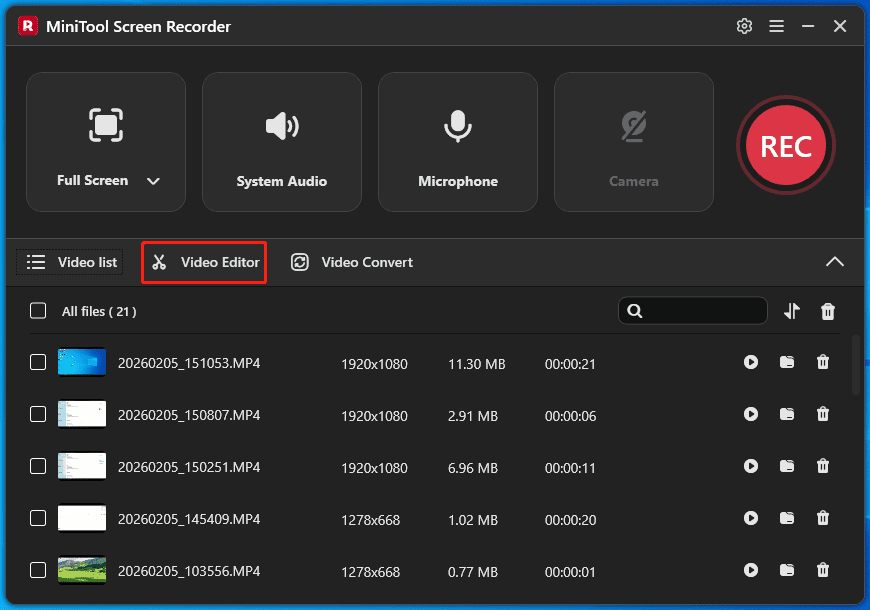
Step 5: Extract Audio from the Recording
Finally, you’ll get an MP4 file. To extract audio from the recording, click the Video Editor option to open or download MiniTool MovieMaker. It’s primarily designed as a free video and GIF editor, and it also serves as a simple audio editor and extractor.
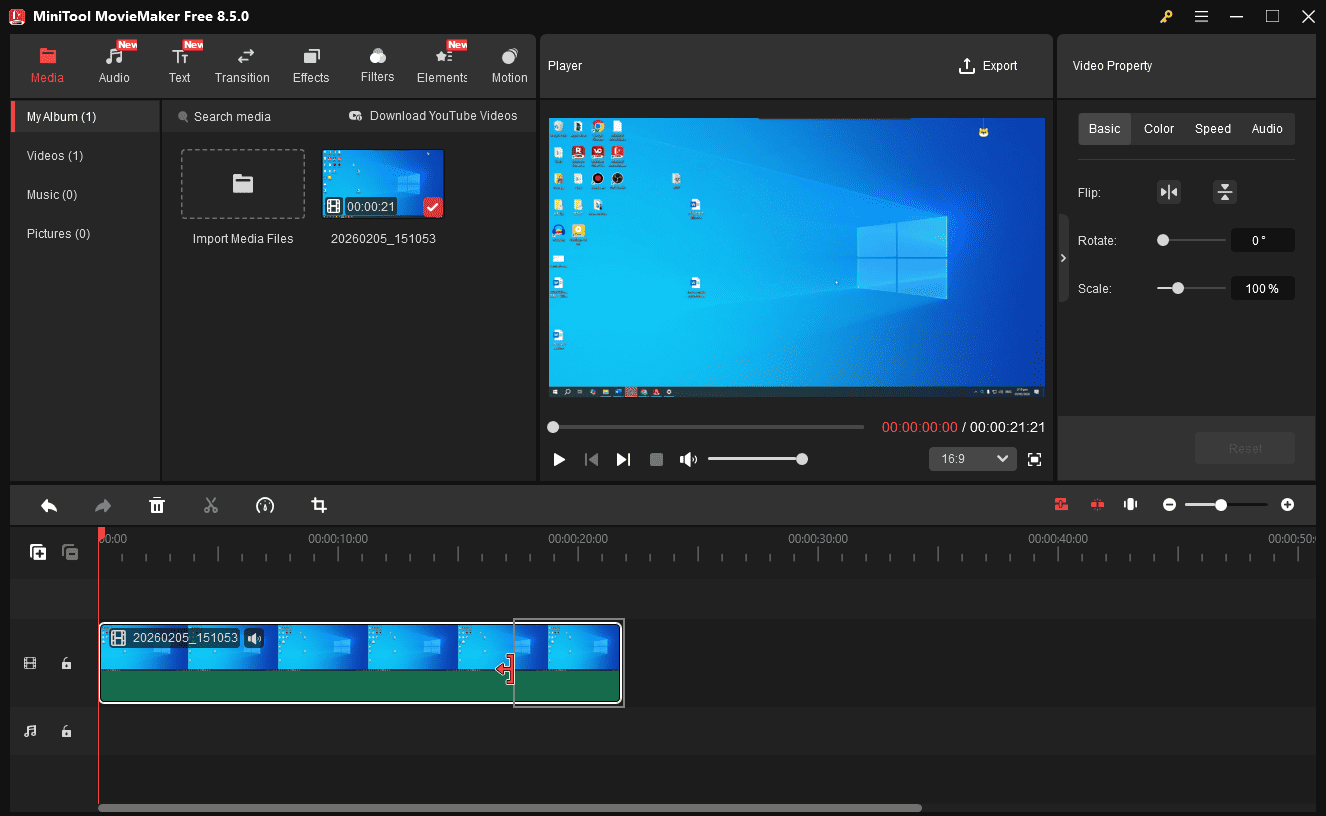
1. Import the MP4 file
Launch MiniTool MovieMaker and click Import Media Files to add the MP4 file you just recorded. Drag and drop it to the timeline.
2. Trim the recording
To remove unwanted parts at the beginning or end of the clip, hover your mouse over the start or end of the clip until the Trim icon appears, and drag the icon inward.
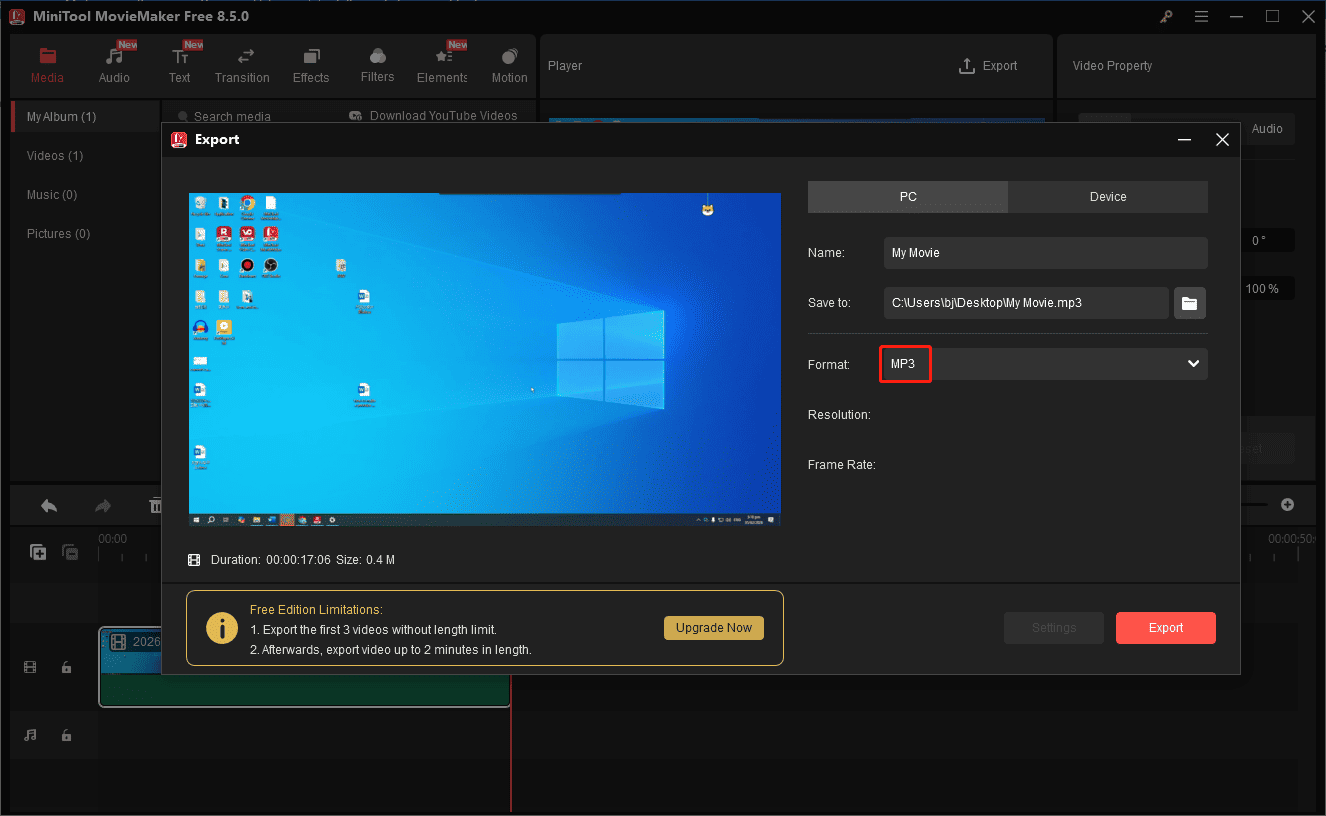
3. Save the recording as an MP3 file
Click Export in the upper-right corner, set Format to MP3, and click Export.
Understanding the Main Types of Computer Audio Recording
What does the system audio and microphone sound include when screen recording? Let's take a look at the basics.
System Audio (Internal)
System audio refers to the internal sound output of your computer. Simply put, it’s a digital audio stream from applications running on your computer, such as music or other audio playing in web browsers.
Microphone Input (External)
The microphone sound includes all the audio from the external, physical world, such as your voice. It can be recorded by connecting a microphone to your computer.
DAW Recording (for Music Production)
System audio and microphone voice are existing sounds that you can hear and record. What if you want to create music by recording? That’s a DAW (Digital Audio Workstation) recording. You can use a DAW application to record vocals and live instruments, or use MIDI (Musical Instrument Digital Interface) to play any virtual instrument on your computer.
DAW software is essential to produce music by recording on your computer. Here are some of the best choices.
- Ableton Live
- FL Studio
- Avid Pro Tools
- PreSonus Studio One
- Steinberg Cubase
- Cockos Reaper 6
- Cakewalk by BandLab
- Bitwig Studio
- Acoustica Mixcraft
Conclusion
This post mainly explains two reliable methods to record audio from computer – both internal and external sounds. It’s your turn now! Follow the steps above to capture your computer audio effortlessly.
Finally, if you have problems when using MiniTool Screen Recorder and MovieMaker, please email us at support@minitool.com for help.