This article introduces the various aspects of Windows Voice Recorder and shows you how to use this tool to capture audio. Meanwhile, it recommends a top-grade alternative to Windows Voice Recorder: MiniTool Screen Recorder. Besides, this post provides you with an application called MiniTool MovieMaker to edit your recorded audio.
A recording app is indispensable for capturing audio. It is workable for you to download and install a third-party app. If you want to record the audio without downloading extra software, the Windows Voice Recorder app, which is pre-installed on your PC, can help.
What is Windows Sound Recorder? How to record audio with this voice recorder for Windows? Read the following content to find out.
What Is Windows Voice Recorder
Windows Voice Recorder, also known as Windows Sound Recorder, refers to a built-in audio recorder available on Windows 10/11, HoloLens, and Surface Hub. With it, you can capture a wide range of audio content, such as voice memos. More importantly, Windows Sound Recorder can save the recorded audio in multiple formats, such as M4A and MP3.
If you are a Windows 10 user, the recording app is called Voice Recorder. Provided that you are a Windows 11 user, the name of the audio recorder is Sound Recorder. More than an audio recorder, Windows Sound Recorder also allows you to trim or share the recordings with the microphone of your PC. How to record audio with it? The following content can help.
How to Record Audio with Windows Voice Recorder
Below are the detailed instructions on how to capture audio using Windows Voice Recorder.
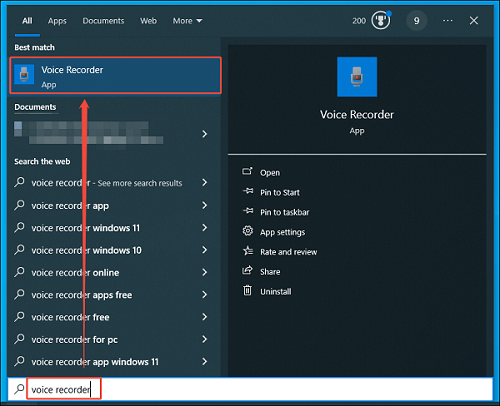
Step 1. Open the Voice Recorder app.
Activate the Search box on the taskbar. Then, enter voice recorder into the search box and click on the pop-up Voice Recorder app.
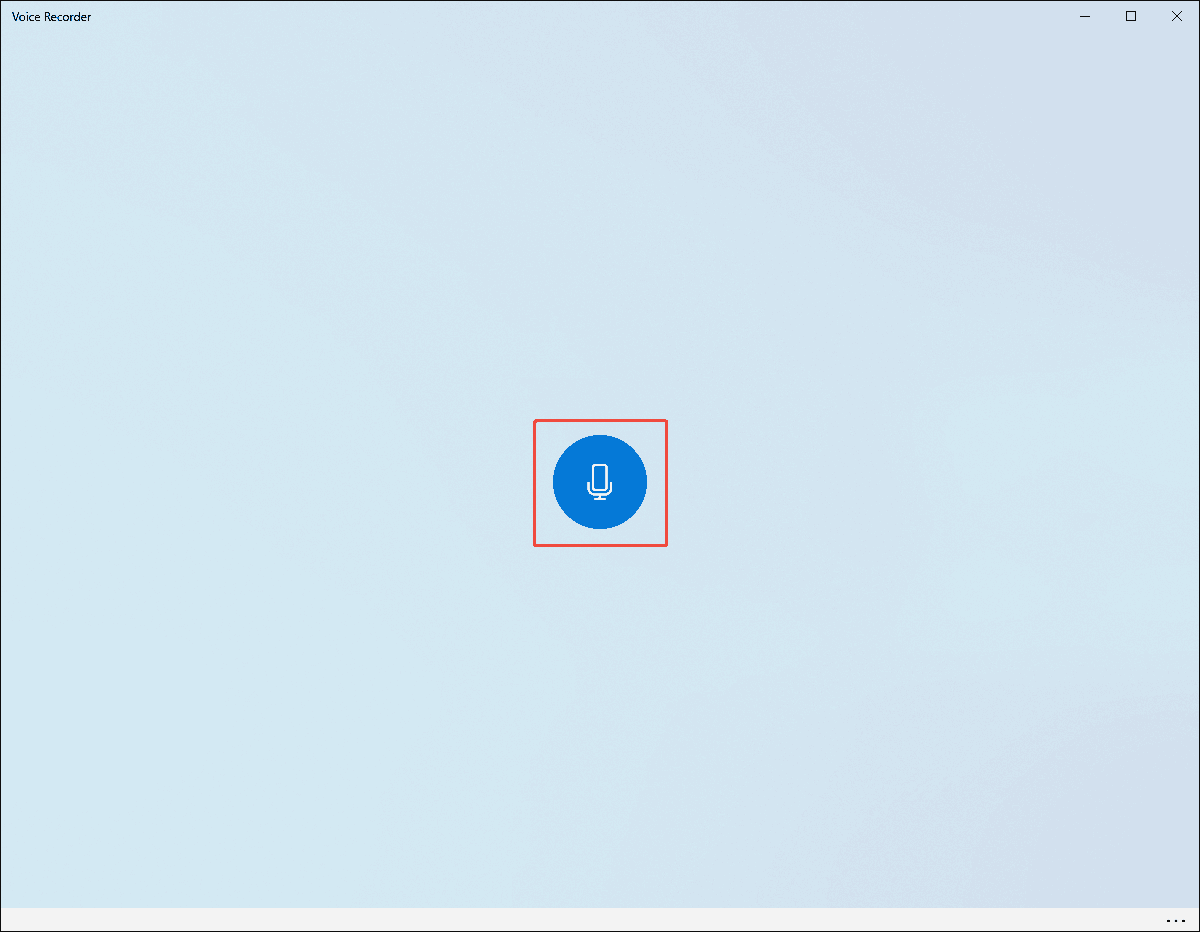
Step 2. Begin the recording process.
Click on the Microphone icon in the central part to start the recording process.
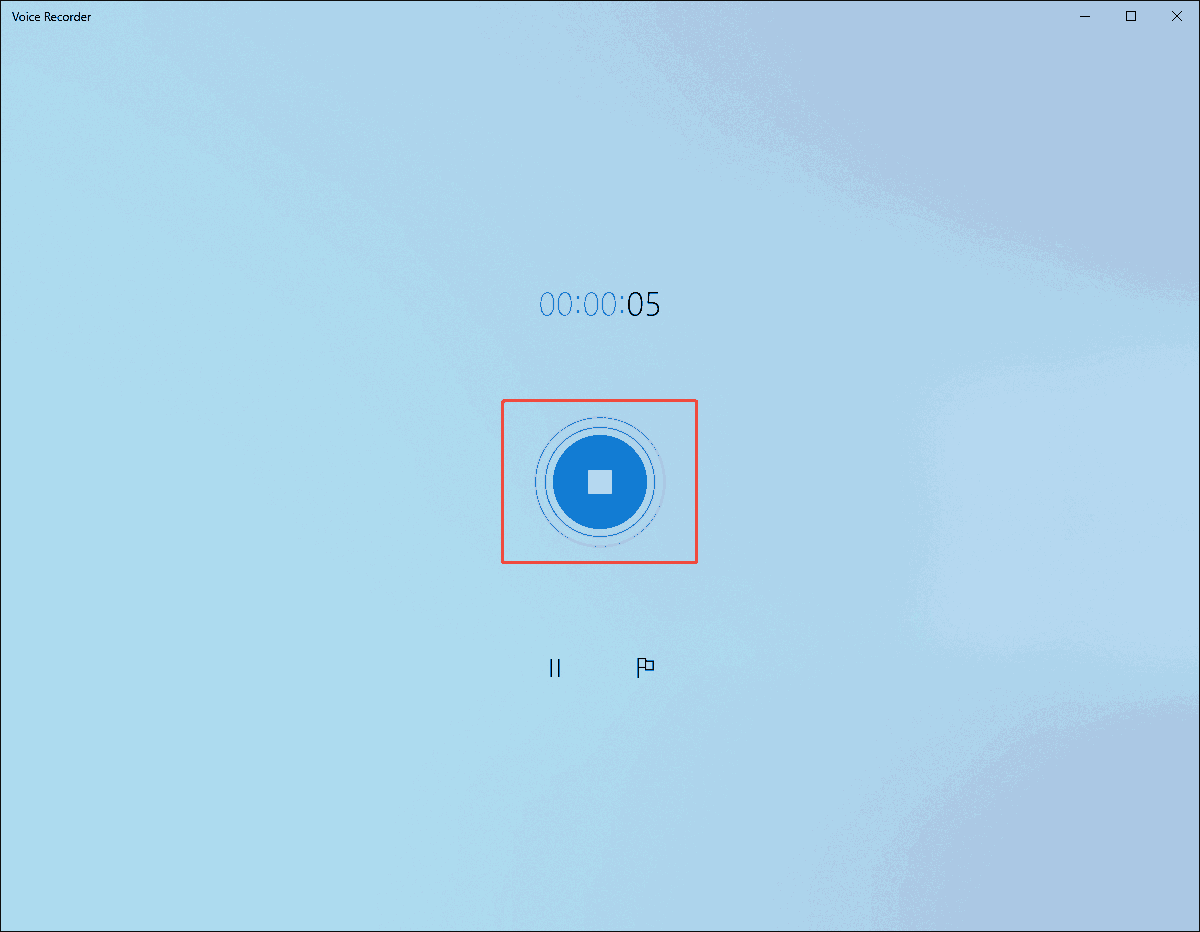
Step 3. End the recording.
When the recording process finishes, click on the Stop button to end the recording process.
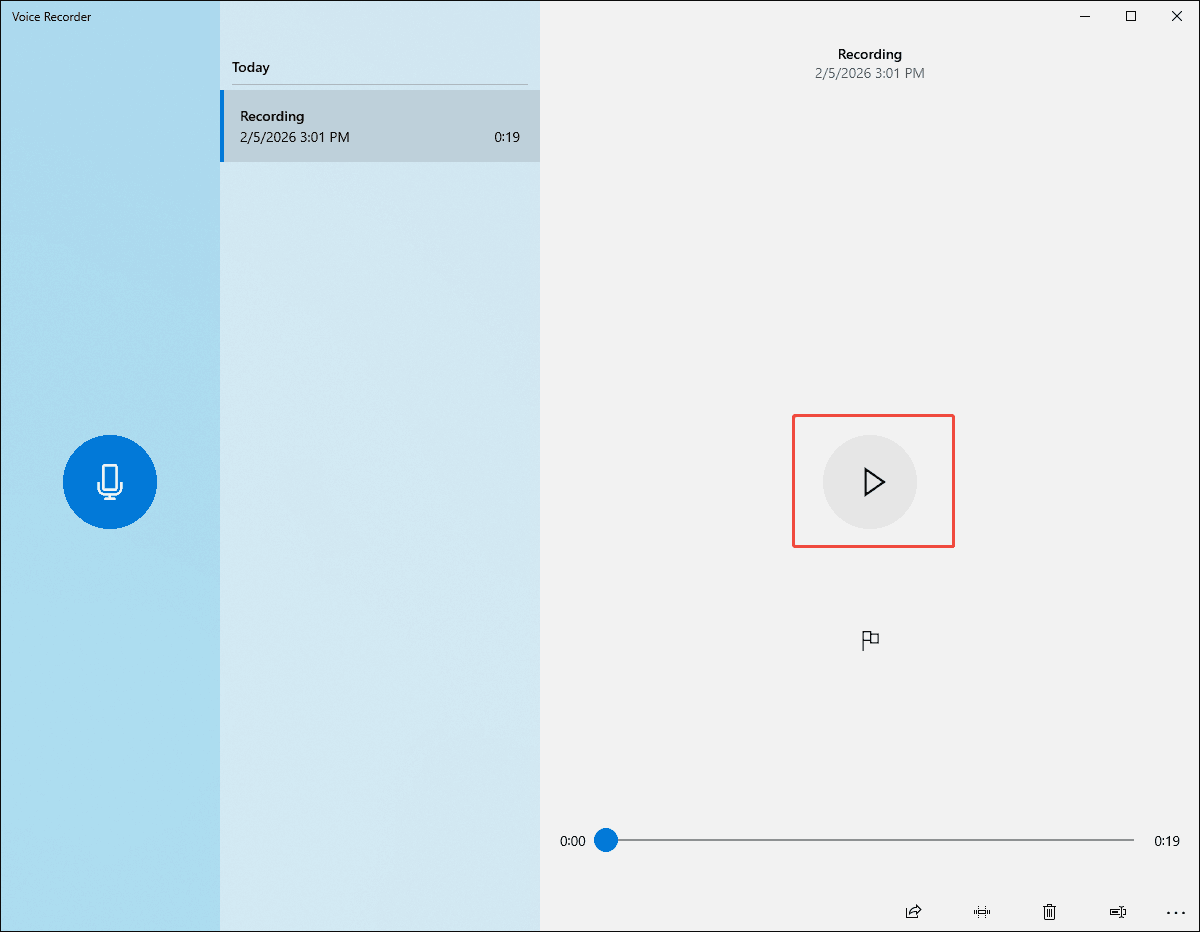
Step 4. Check the recorded file.
If you want to view the recorded audio, click on the Play icon.
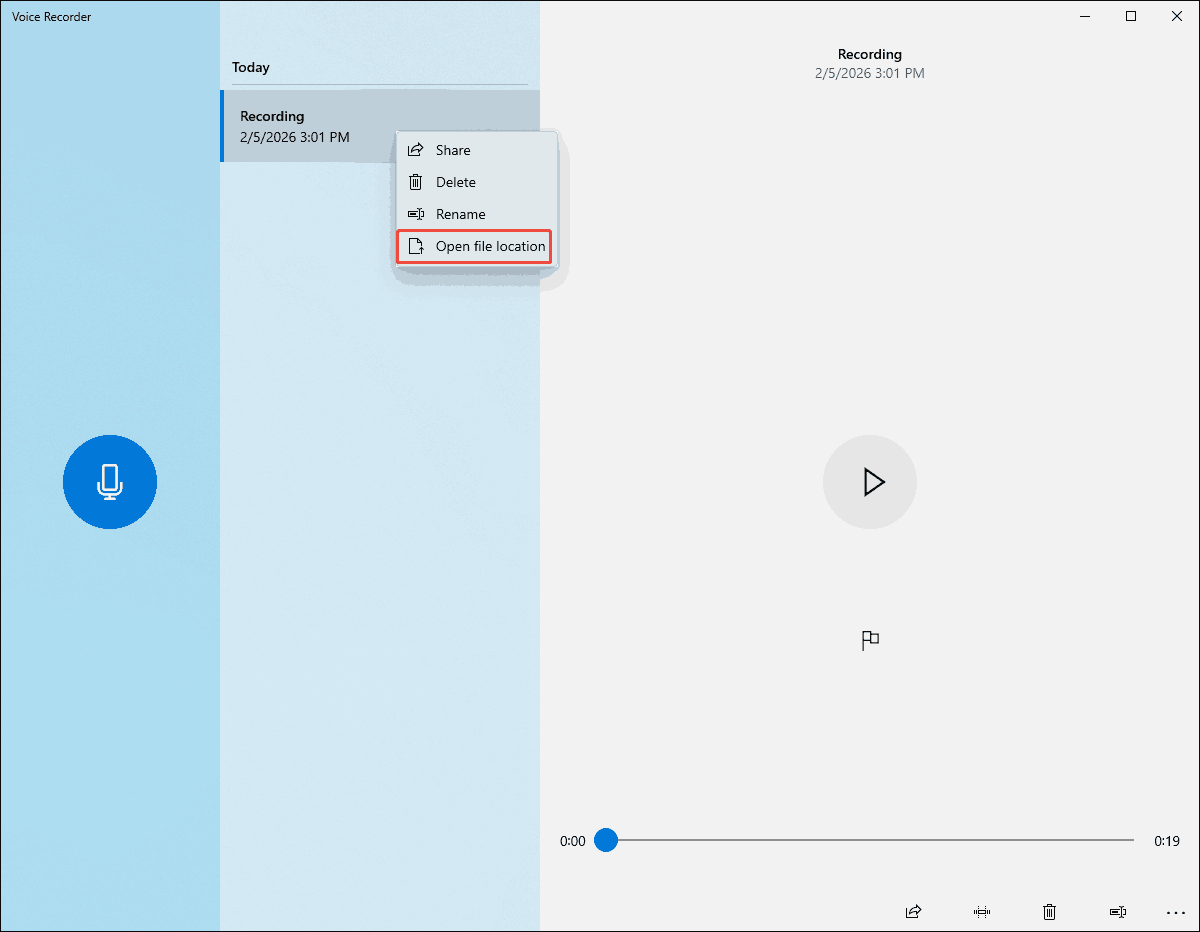
On condition that you want to locate the output file, right-click on the recorded file and choose the Open file location option.
With the detailed guidance above, it will never be difficult for you to capture the audio using voice recorder Windows.
What to Do If Windows Sound Recorder Is Not Working
If voice recorder Windows 11 is not working, you can try MiniTool Screen Recorder to record the audio.
What Is MiniTool Screen Recorder
MiniTool Screen Recorder is a free video recording program that enables you to capture PC audio easily and quickly. There aren’t any time constraints during the recording.
MiniTool Screen Recorder is an MP4 recorder, which allows you to share or edit your recordings without any compatibility issues. In addition, this program enables you to enjoy a watermark-free recording experience.
Beyond an audio recorder, MiniTool Screen Recorder also empowers you to record the webcam or annotate your screen. Meanwhile, it features a well-organized interface, ensuring every entry-level user can use MiniTool Screen Recorder to finish the recording tasks.
How to Record Audio with MiniTool Screen Recorder
Below is a step-by-step tutorial on how to record the audio using MiniTool Screen Recorder.
Step 1. Download and install MiniTool Screen Recorder.
MiniTool Screen RecorderClick to Download100%Clean & Safe
Click on the download button above to download and install MiniTool Screen Recorder on your PC. Then, launch this application.
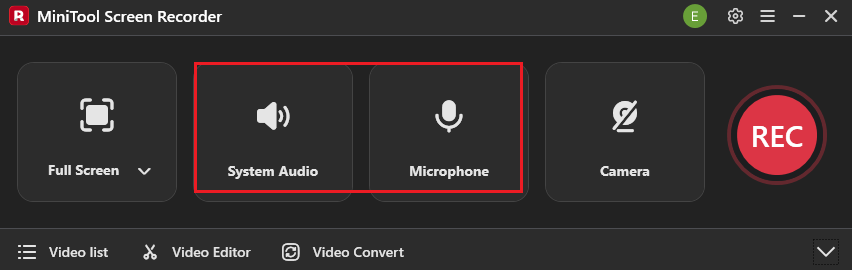
Step 2. Choose the recording area and manage the audio recording.
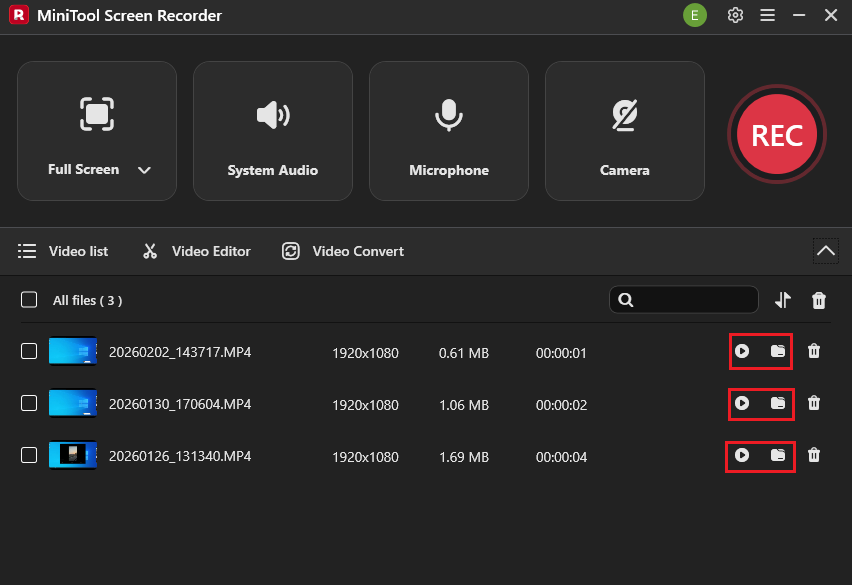
By default, MiniTool Screen Recorder will capture the whole screen. To customize the recording region, press the Alt + R keys and make a choice. Then, click on the System Audio icon and the Microphone icon to turn on/off the system and microphone sounds.
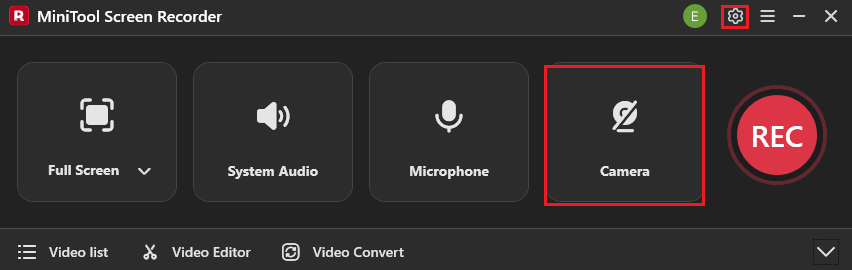
Step 3. Activate the webcam recorder and configure other settings.
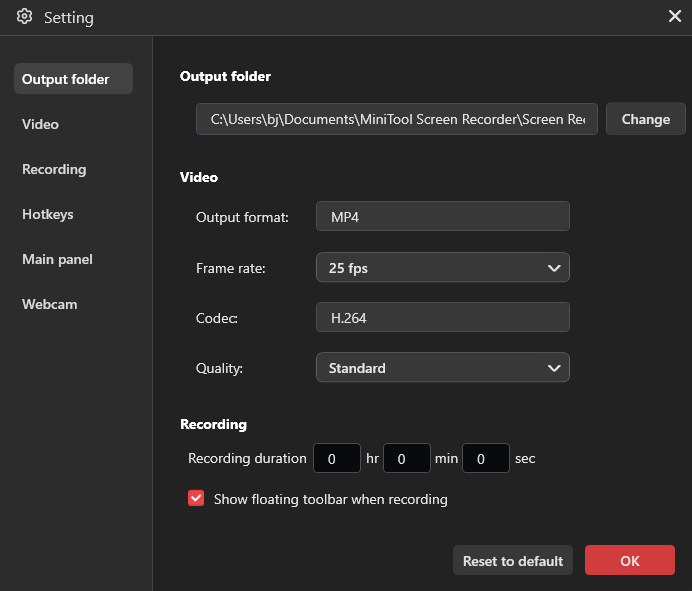
If you want to enable the webcam recorder, click on the Camera icon. Next, click on the upper-right Settings icon to enter the Settings window.
There, select a destination folder for the recorded file. Then, configure the frame rate as 15fps, 20fps, 25fps, 30fps, or 50fps. Also, you can specify the recording quality as High, Standard, or Original. Finally, click on the OK button to save the changes.
Step 4. Start/end recording and check the output files.
Begin the recording process by pressing the F6 key. After a 3-second countdown, play the computer activity that you want to record. When the recording process ends, stop it by pressing the F6 key again. In the expanded file list, click on the Play icon to view the recorded files. If you want to locate them, click on the Folder icon.
MiniTool Screen Recorder is a can’t-miss alternative to Windows Voice Recorder.Click to Tweet
With MiniTool Screen Recorder, you can capture audio easily and quickly. By the way, It is also a remarkable TikTok recorder and Facebook recorder.
MiniTool Video ConverterClick to Download100%Clean & Safe
Bonus: How to Edit the Captured Audio
If you want to edit the recorded audio with more editing functions, never miss MiniTool MovieMaker. It is not only a video editor but also an audio editor. With MiniTool MovieMaker, you are free to trim, reverse, merge, or speed up your audio. It also enables you to change the audio volume. Moreover, this application enables you to save your audio in multiple formats, such as MP4, MOV, MKV, WMV, and so on.
MiniTool MovieMakerClick to Download100%Clean & Safe

Final Words
Windows Voice Recorder is an easy-to-use application that allows you to record audio. If the Voice Recorder app is not working but you want to capture the audio on your PC, MiniTool Screen Recorder can help.
If you are bothered by any problems when using MiniTool Screen Recorder or MiniTool MovieMaker, please ask for help by sending an email to support@minitool.com. Also, you can directly share your problems with me on X. I will help you solve them as quickly as possible.