This article walks through Zoom and introduces 2 powerful free Zoom meeting recorders to you, including the Zoom built-in recorder and MiniTool Screen Recorder. Plus, it recommends an amazing video editor, MiniTool MovieMaker, to help you edit the Zoom meeting recordings.
Zoom enables you to communicate with others without the restriction of geographical limitations, greatly improving the working efficiency of an organization. To review the key points of the meeting, it is suggested that you capture the Zoom meeting. To facilitate your recording, the following content offers you 2 remarkable, free Zoom meeting recorders.
What Is Zoom
With a cloud-based nature, Zoom is a popular platform that focuses on video conferencing. Specifically, it supports virtual video calls, screen sharing, audio conferencing, and so on. More and more people use it for different purposes, such as social interactions, business, education, and more.
![How to Record Google Meet Sessions on Windows [2 Methods]](https://images.minitool.com/recorder.minitool.com/images/uploads/2026/01/how-to-record-google-meet-thumbnail.jpg)
Free Zoom Meeting Recorder 1. Zoom Built-in Recorders
Zoom features a built-in screen recording function. This recording function has a host-controlled nature. Where do Zoom meeting recordings go? All users can save the recordings locally. If you want to directly save the recording to your cloud storage, you need to pay for the upgrade. In addition, if you are a participant in a meeting and want to capture the meeting, you need to grant the host’s permission.
Below is a step-by-step tutorial on how to record Zoom meetings with the built-in screen recorder.
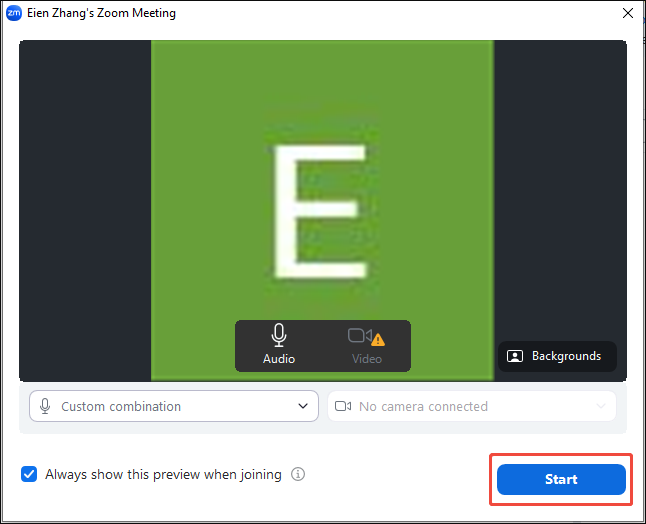
Step 1. Begin your meeting.
Download and install the Zoom app on your PC. Then, launch this application to enter the main interface. There, choose the New Meeting option under the Home section to activate the Zoom Meeting window.
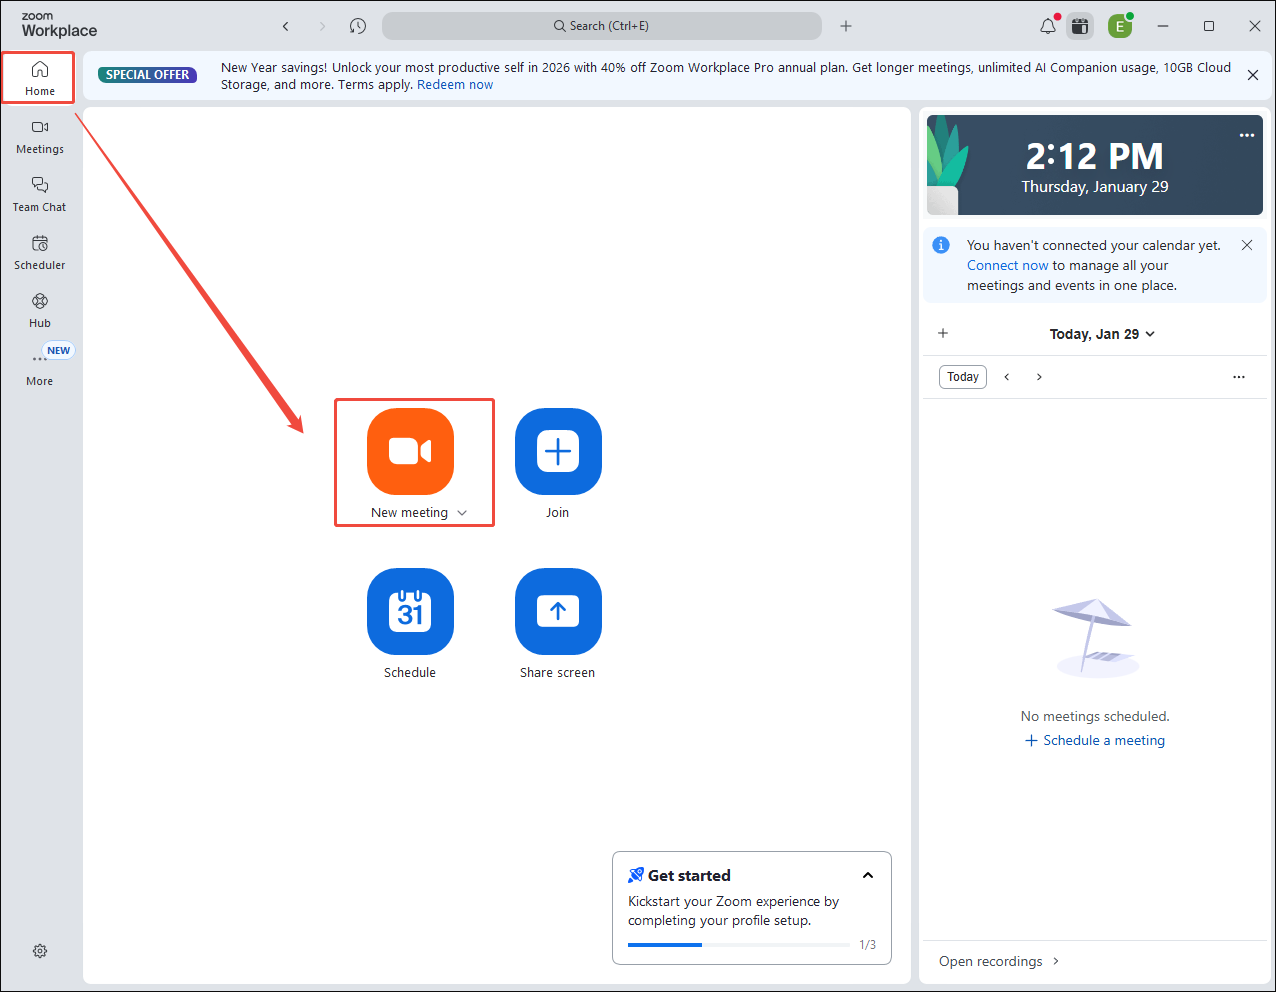
Click on the bottom-right Start button to begin the meeting.
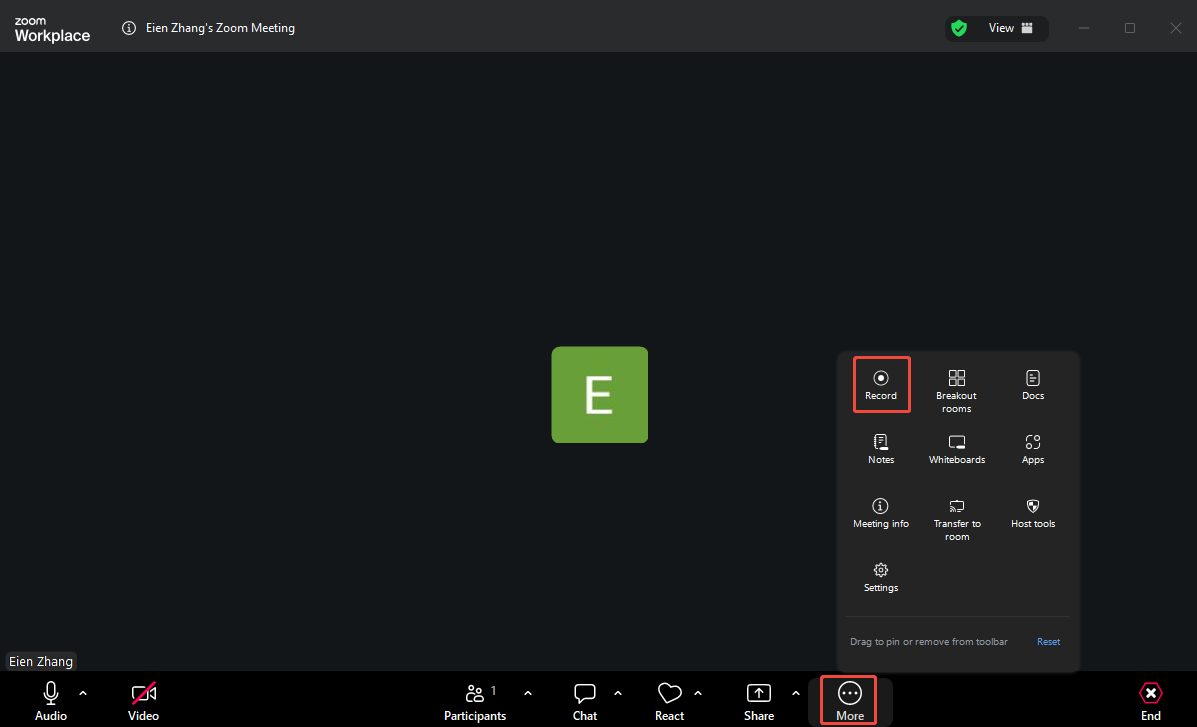
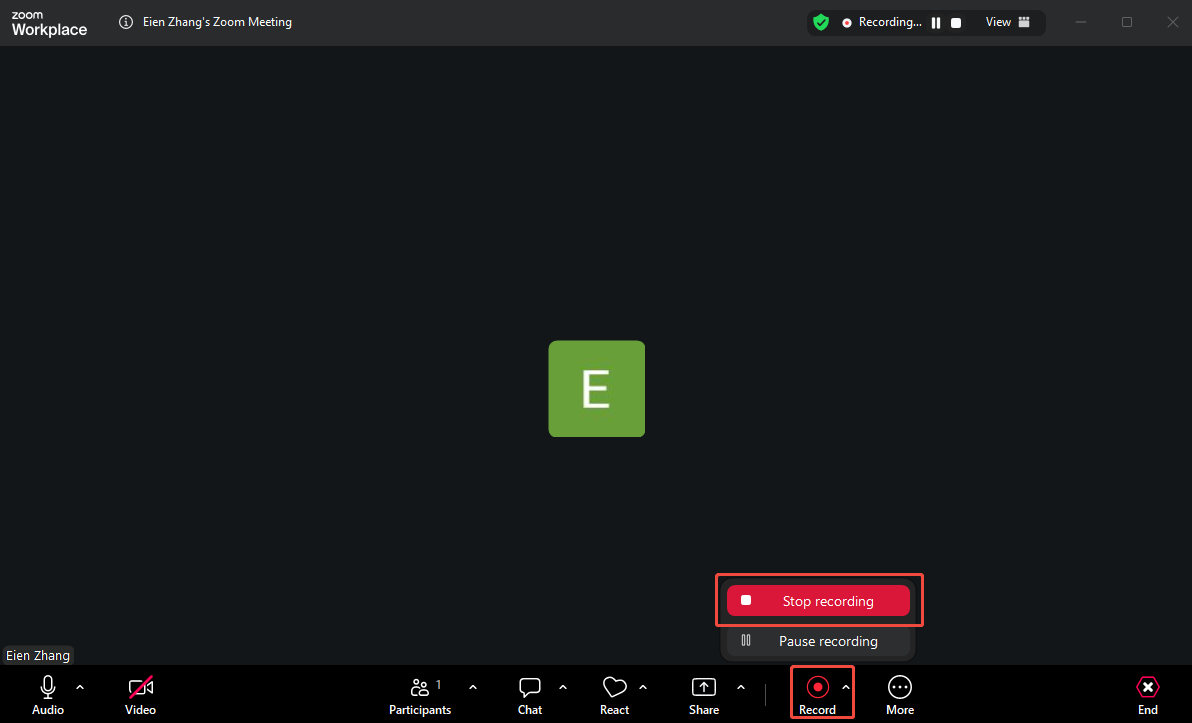
Step 2. Start and end the recording.
Mouse over the meeting interface and click on the More option at the bottom to expand the option menu. There, select the Record option to begin the recording process.
When you have recorded what you want, click on the Record option again and choose Stop recording to end the recording.
Step 3. Check the recording file.
If you want to finish the recording, click on the bottom-right End option and choose End meeting for all.
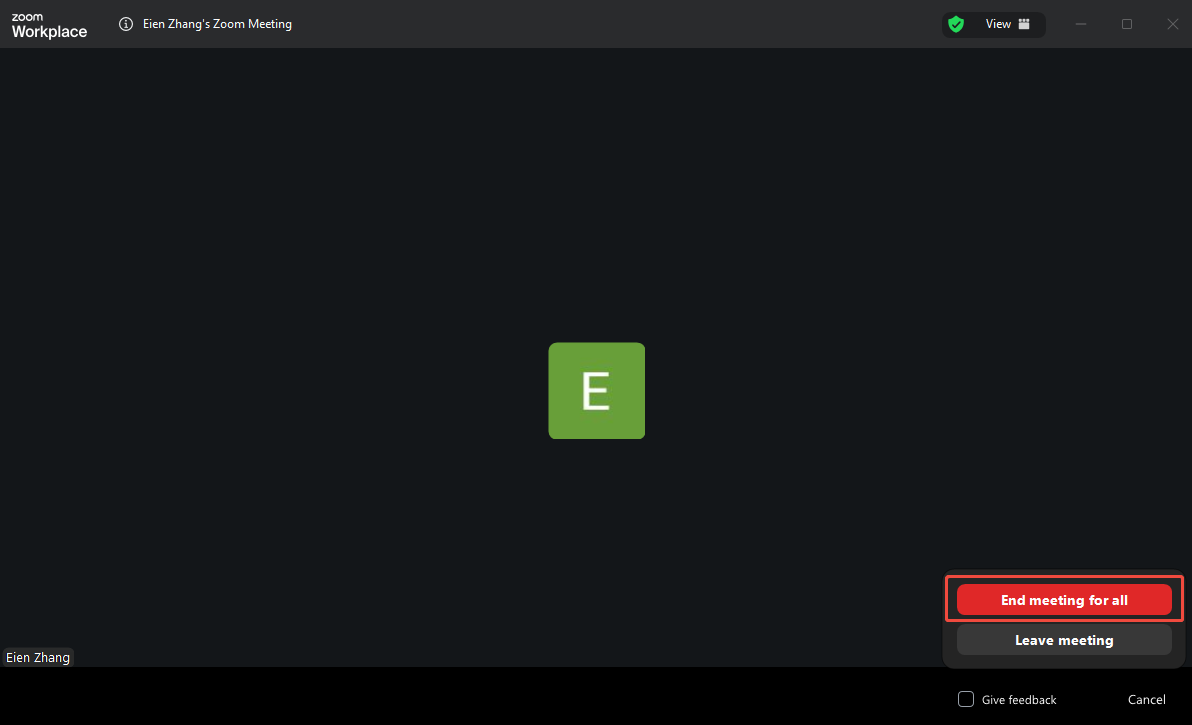
After ending the meeting, the recordings will be converted to MP4 automatically. Once the conversion is done, the output folder will pop up automatically. Then, you can view and check the recorded file.
All the recordings made by the built-in screen recorder will be saved in the MP4 format. Undoubtedly, the function is very easy to use. Do you want to use another free Zoom meeting recorder with audio that allows you to capture the screen without others knowing? If yes, the following content can help.

Free Zoom Meeting Recorder 2. MiniTool Screen Recorder
MiniTool Screen Recorder is a great Zoom meeting recorder free.
What Is MiniTool Screen Recorder
MiniTool Screen Recorder is a video recorder app free that allows you to capture the screen, record the webcam, and annotate your screen with simple clicks. More importantly, this recording application provides you with a watermark-free experience without any time limits or payment.
Moreover, MiniTool Screen Recorder will automatically save the recording in the MP4 format, which empowers you to share, play, or edit your recording files on a wide range of platforms. In addition, it features an intuitive interface, which makes MiniTool Screen Recorder easily accessible to every entry-level user.
How to Record Zoom Meetings with MiniTool Screen Recorder
Below are the detailed steps to capture Zoom meetings using MiniTool Screen Recorder.
Step 1. Download and install MiniTool Screen Recorder.
MiniTool Screen RecorderClick to Download100%Clean & Safe
Download MiniTool Screen Recorder by clicking on the download button above. Then, follow the on-screen prompts to install this free Zoom meeting recorder on your PC.
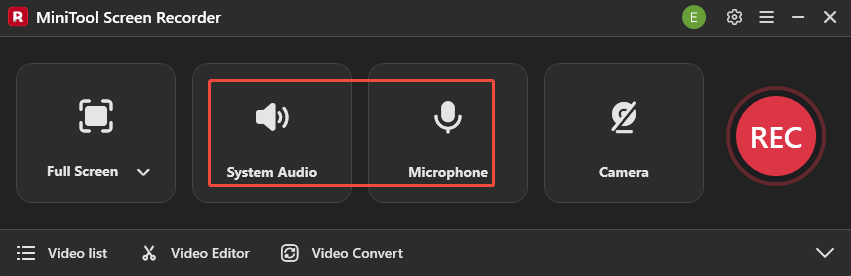
Step 2. Select the recording area and control the audio recording.
By default, MiniTool Screen Recorder will adopt a full-screen recording mode. If you want to customize the recording area, press the Alt + R keys. Then, click on the System Audio icon and the Microphone icon to turn on/off the recording of system and microphone sounds.
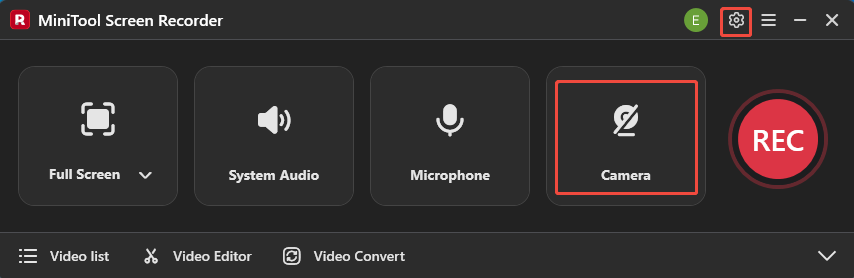
Step 3. Enable webcam recorder and configure recording settings.
Click on the Camera icon to enable the webcam recording function. Then, click on the upper-right Settings icon to enter the Settings interface.
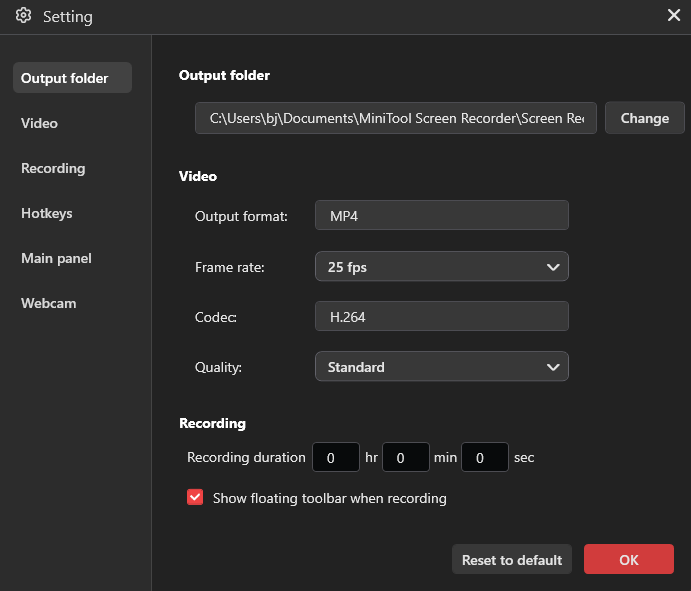
There, you can select an output folder for the recording files. Meanwhile, you can set an output folder for the recorded video. In addition, you are free to set the frame rate as 15fps, 20fps, 25fps, 30fps, or 50fps. Plus, you can specify the recording quality as High, Standard, or Original. Finally, click on OK to save the changes.
Step 4. Start and end the recording.
Begin the recording process by pressing the F6 key. After a 3-second countdown, begin the meetings that you want to record. When the recording process ends, stop it by pressing the F6 key again.
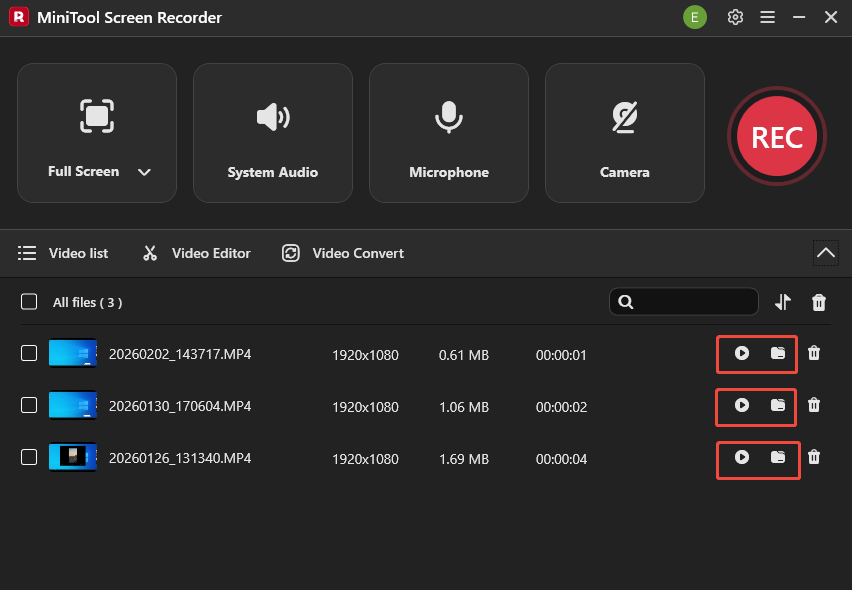
Step 5. Locate the recorded file.
In the expanded file list, click on the Play icon to view the recording file directly. If you want to locate the recorded video, click on the Folder icon.
Undoubtedly, MiniTool Screen Recorder is an easy-to-use screen recorder that enables you to capture a wide range of computer activities effortlessly. For example, it allows you to screen record on Telegram or capture Facebook videos effortlessly.
![How to Convert Webex Old Recordings to MP4 Easily [5 Steps]](https://images.minitool.com/recorder.minitool.com/images/uploads/2026/01/convert-webex-recording-to-mp4-thumbnail.jpg)
Bonus: How to Edit Your Zoom Recordings
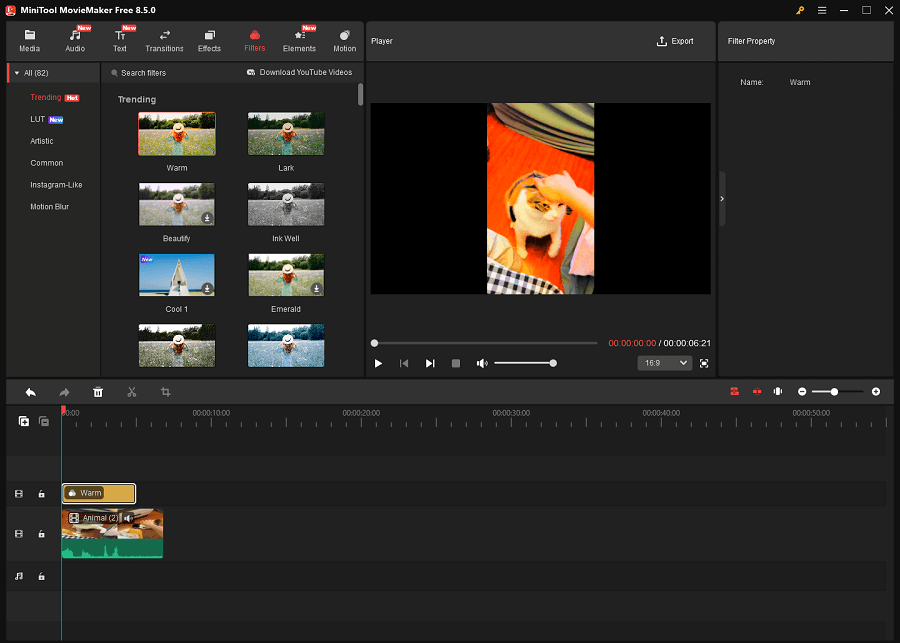
Do you want to edit your Zoom meeting recordings? If yes, MiniTool MovieMaker can help. It is a professional video editor that lets you edit your video frame by frame. There is a variety of editing functions that you can try, such as reversing, trimming, cropping, flipping, and rotating.
What’s more, MiniTool MovieMaker enables you to change the volume, speed, or aspect ratio of the recording effortlessly. Meanwhile, it can save your recording files in multiple formats, including MP4, MKV, MOV, WMV, MP3, GIF, and more.
MiniTool MovieMakerClick to Download100%Clean & Safe
To Wrap Things Up
Both Zoom’s built-in recording function and MiniTool Screen Recorder allow you to record Zoom meetings for free. If you don’t want to download extra software, choose the built-in recorder of Zoom. On condition that you want to capture the meeting without others knowing, try MiniTool Screen Recorder.
If you have encountered any problems when using MiniTool Screen Recorder or MiniTool MovieMaker, you can ask for help by sending an email to support@minitool.com. Also, you can directly send me a message on X. I will help you as quickly as possible.