This post explains how to record Google Meet using its built-in tool and an excellent third-party screen recorder – MiniTool Screen Recorder. It also walks you through the prerequisites for using Google Meet’s built-in recording tool. Follow this guide to capture meetings and discussions for later viewing.
Google Meet is a video-conferencing service that allows people to stay connected and collaborate with friends, family, and colleagues via meetings and calls. Knowing how to record Google Meet is essential when you want to review the meeting later or share it with people who couldn’t attend.
This post covers both the service’s native recording tool and powerful third-party applications to capture what’s happening on Google Meet.
Can You Record a Google Meet
Can you record a Google Meet? The answer is definitely Yes! This platform offers a native tool for recording meetings. However, this feature is not accessible to everyone.
Requirements to Use the Recording Tool in Google Meet
You can use Google Meet’s built-in recording feature to capture video meetings using one of the following Google Workspace editions:
- Business Standard
- Essentials
- Business Plus
- Education Plus. Users with a Staff or Student license.
- Enterprise Essentials
- Enterprise Standard
- Enterprise Starter
- Enterprise Plus
- Workspace Individual Subscriber
- Google One subscribers with 2 TB or more storage space
- Teaching and Learning Upgrade
While Google Meet is a free conferencing platform, its native recording tool is not a free feature. With the above Google Workspace editions, you can access the meeting recording tool and sessions longer than 60 minutes, and other features.
Who Can Use Google Meet’s Recording Tool
Can anyone with an eligible account use the built-in tool to record Google Meet meetings? No, users with an eligible account can capture a conference if they meet the following conditions at the same time:
- The Google Workspace administrator has enabled meeting recording for their account.
- They are the meeting host, co-host, a participant from the host's organization and Host Management is turned off, or a teacher/co-teacher for meetings created through Google Classroom.
Furthermore, the native Google Meet recording tool is only available on computers. If you want to record Google Meet on your phone or tablet, use the device’s built-in screen recording tool. Please remember not to abuse or maliciously edit recorded meetings.
How to Record Google Meet with the Native Feature
After learning all the requirements, let’s see how to record on Google Meet with its built-in tool. You must obtain the consent of all participants before recording this meeting.
Step-by-Step Guide to Google Meet Recording
Step 1: Start or join a meeting
On your computer, go to the Google Meet website, click New meeting to start an instant meeting, create one for later, or schedule in Google Calendar. Enter a code or nickname to join a meeting.
Step 2: Record the meeting
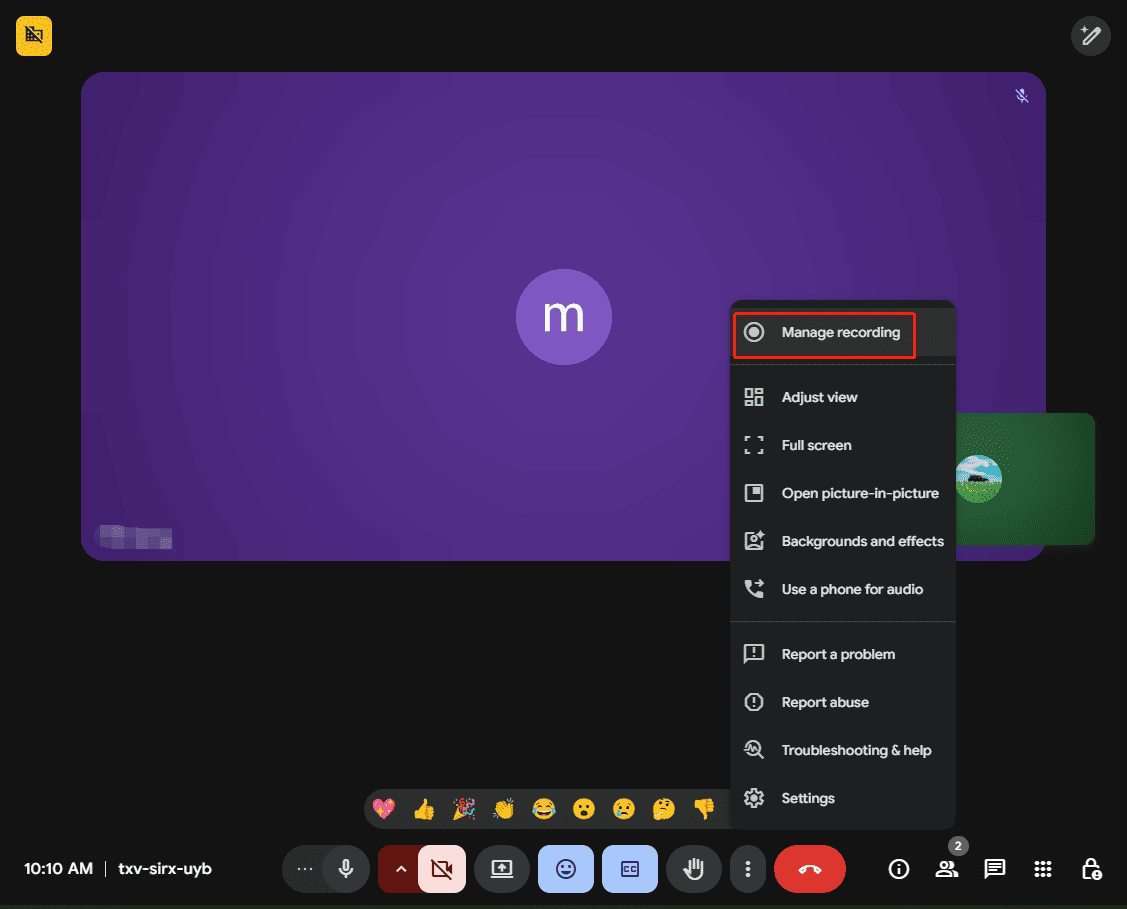
While you’re in the meeting, click the More options icon at the bottom right and select Manage recording.
If you want to record captions during the meeting, turn on captions in advance.
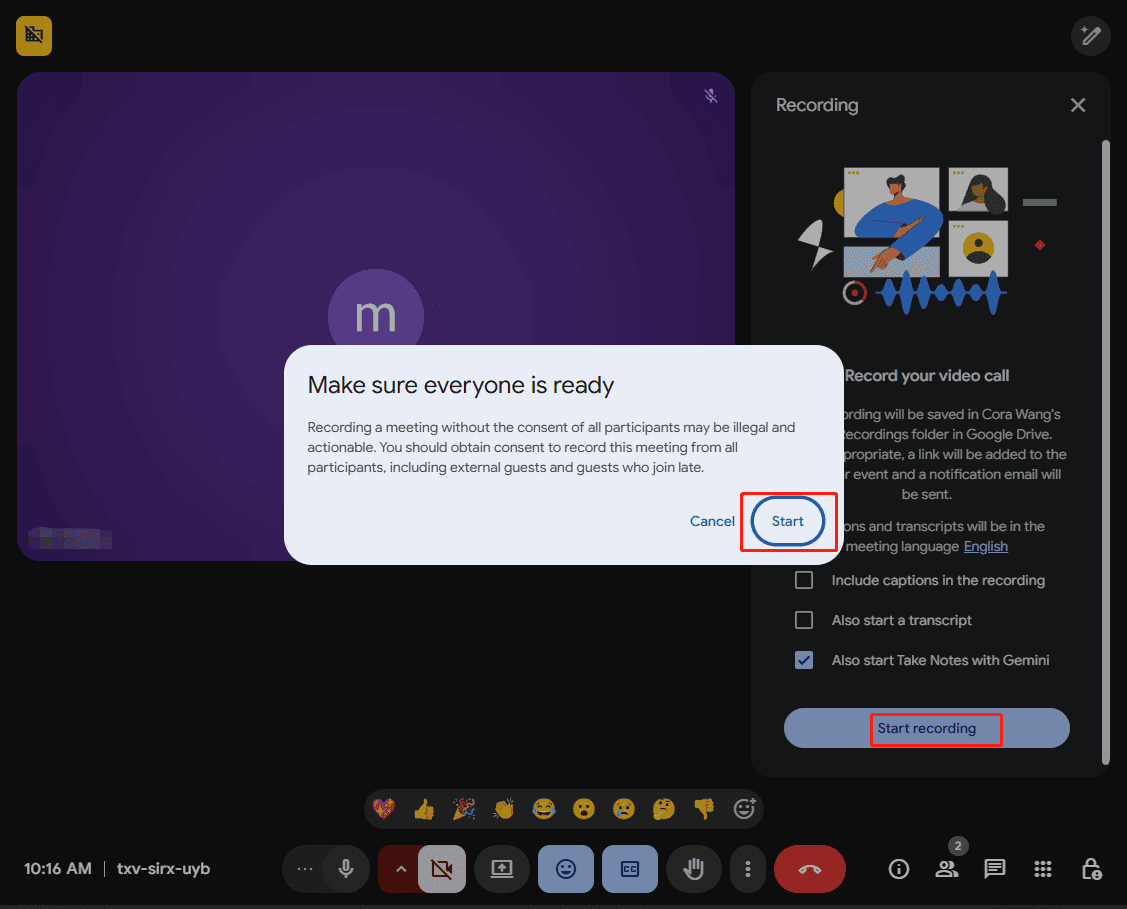
Then, a Recording window pops up on the right side of the screen. Click the Start recording option at the bottom and click Start in the pop-up screen to start recording the meeting. Participants will then be notified when the recording begins and stops.
Step 3: Stop recording
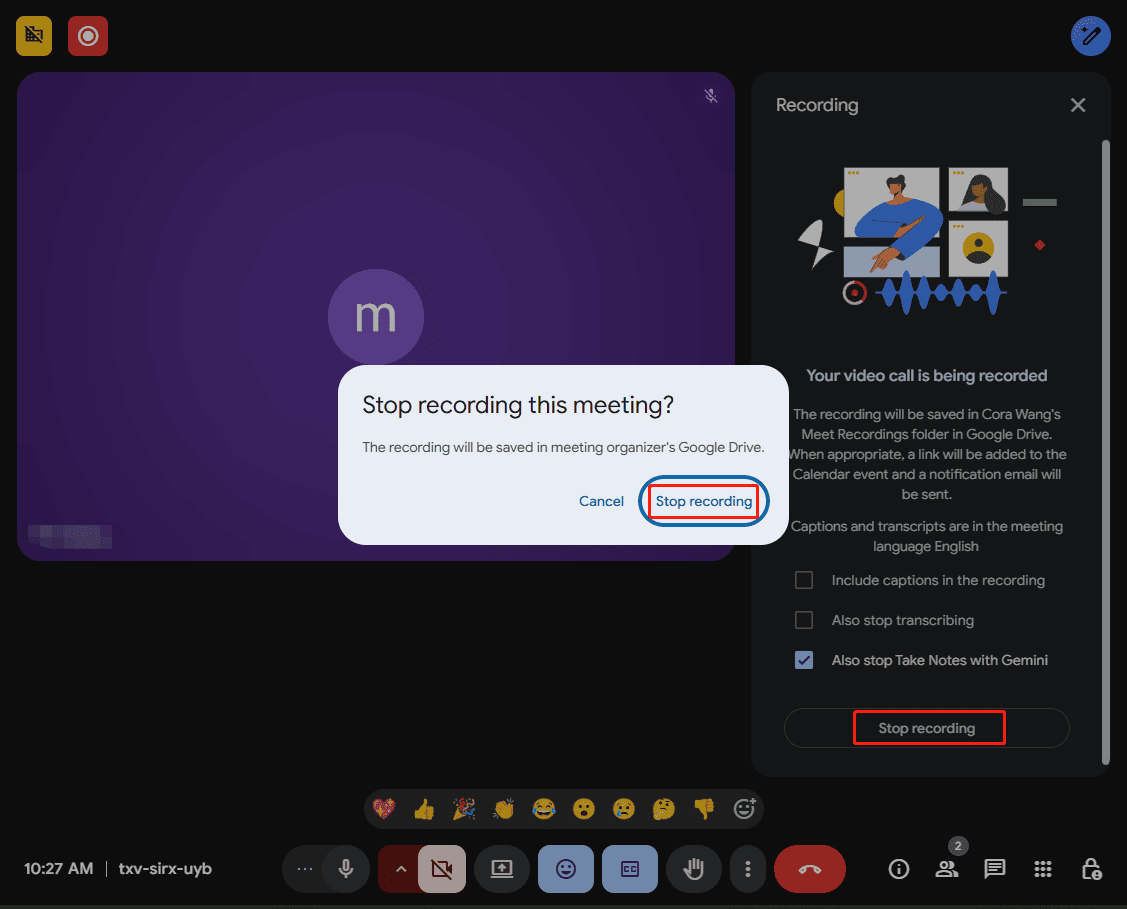
To stop the meeting recording, click Stop recording on the right side and select Stop recording in the pop-up screen to confirm.
Where to Find Google Meet Recordings
Once the recording stops, where is the video saved? To find the recording:
- Navigate to Google Drive.
- Select My Drive on the left side.
- Click the Meet Recordings folder to find your recording.
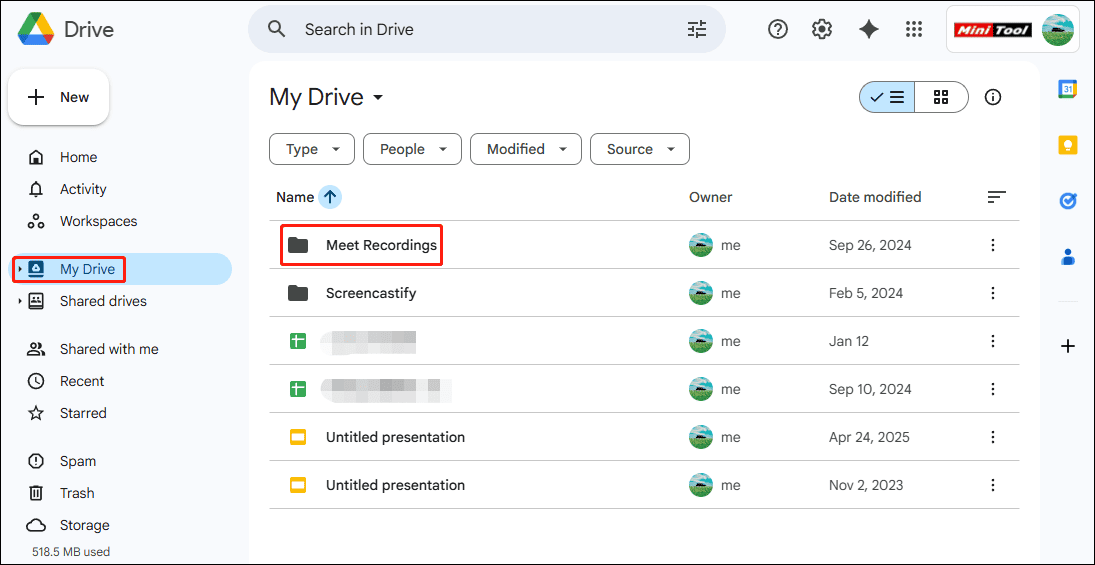
After locating the specific recording, you can instantly preview the video, download it to your computer, share it with others via email, or get a shareable link. If the recording says “Still processing” in Drive, you can download it to your PC for instant playback.
Furthermore, you can open the video with Preview in Google Drive, then edit it in Google Vids, an online timeline-based video editor designed to help users make informational videos for work. However, some features can’t be applied to videos longer than 30 minutes.
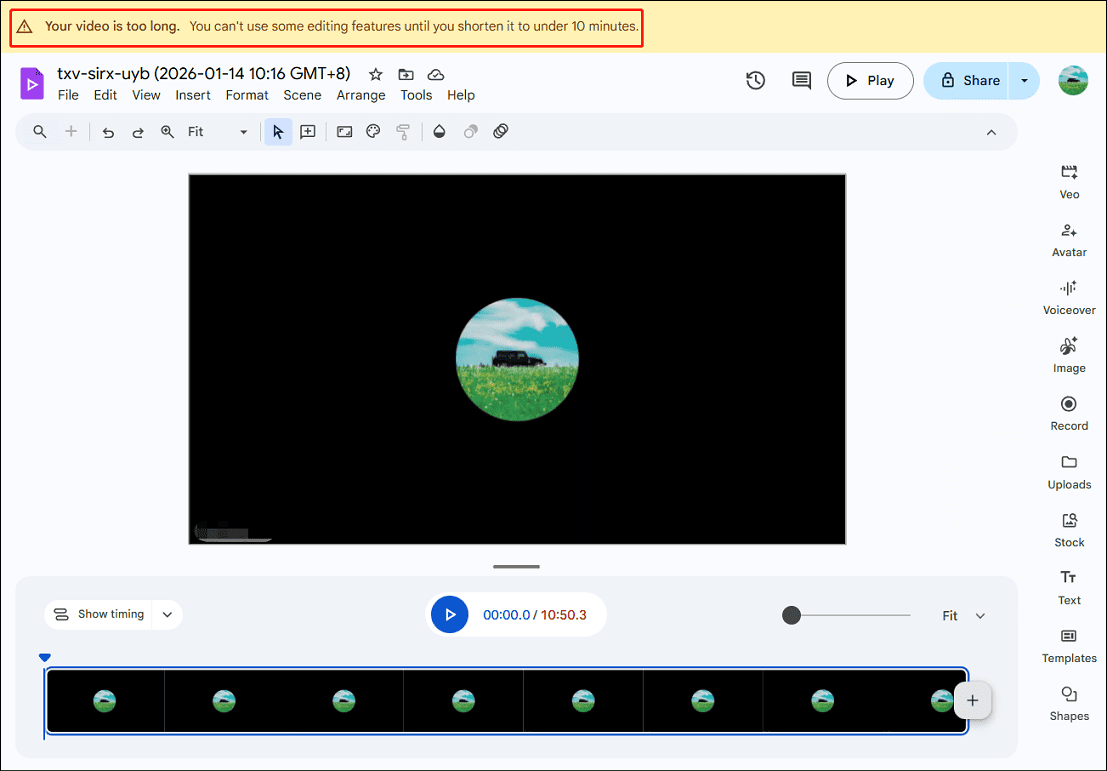
To edit your Google Meet recordings without a length limit and access additional editing tools, consider using other video editors, such as MiniTool MovieMaker, to enhance your content.
MiniTool MovieMakerClick to Download100%Clean & Safe
Pros and Cons of Google Meet’s Built-in Recording Tool
Advantages:
- Built into Google Meet and one-click recording without additional settings.
- Automatic cloud save – Recordings are saved in the organizer’s Google Drive.
- Automatically generate transcripts of spoken words, chat messages, and notes during the meeting.
- The organizer can control who can access the recording in Drive to ensure security.
Disadvantages:
- Not available to users with a personal Google account.
- Only the meeting organizer or a specific eligible user from the same organization can record meetings.
- Lack of basic recording settings, such as the inability to choose the recording area.
Nevertheless, the recording feature in Google Meet is still perfect for archiving internal company meetings, capturing team presentations for new employees, or recording online training courses for customers to replay at any time.
How to Record Google Meet Using Third-Party Software
There are always times when you need an alternative to Google Meet’s recording tool to capture video calls, if:
- You use a free Google account or Google Workplace Starter edition.
- You want to add annotations while recording or have more controls over recording.
- You’re just an attendee.
- Your Google Drive doesn’t have enough storage space.
Use MiniTool Screen Recorder to Capture Google Meet
If you’re seeking a third-party tool for recording Google Meet on Windows, don’t miss MiniTool Screen Recorder, a professional screen and webcam recording application designed for Windows users of varying levels to capture what’s on the screen in high quality.
Why Use MiniTool Screen Recorder
Why is this application a reliable solution for recording Google Meet meetings? Here are the main strengths.
#1 Simple & user-friendly interface: It’s very easy to set up and start recording immediately in just a few clicks.
#2 Flexible recording area: It allows you to record the entire screen, a specific window (like the Google Meet window), or part of the screen (you can also choose to capture parts of a Google Meet session).
#3 Extensive annotation & drawing tools: This Google Meet recording application offers a variety of tools for screen annotation, such as arrows, step numbers, rectangles, ellipses, and text. This can be very useful when you need to emphasize a key point during the meeting recording.
#4 System audio and microphone recording: It can record both audio from the meeting, such as speeches from attendees and sounds from shared presentations, and your microphone audio.
#5 High-quality output: It can record the screen at up to 4K resolution and lets you select the recording frame rate and quality, ensuring clear Google Meet recordings while controlling file size.
#6 Scheduled screen capturing: The software allows you to set a duration for automatic stop at the end. You can use this feature to record a fixed-length event on Google Meet, like virtual training sessions.
#7 No watermark: MiniTool Screen Recorder doesn’t leave a watermark on the recorded videos, ensuring clean and high-quality outputs. It also has no recording time limit.
Guide to Recording Google Meet with MiniTool Screen Recorder
Here’s how to record a Google Meet using the excellent screen recording software.
Step 1: Install the software
Click the button below to download the free screen recorder. Then, install it on your computer.
MiniTool Screen RecorderClick to Download100%Clean & Safe
Step 2: Adjust recording settings
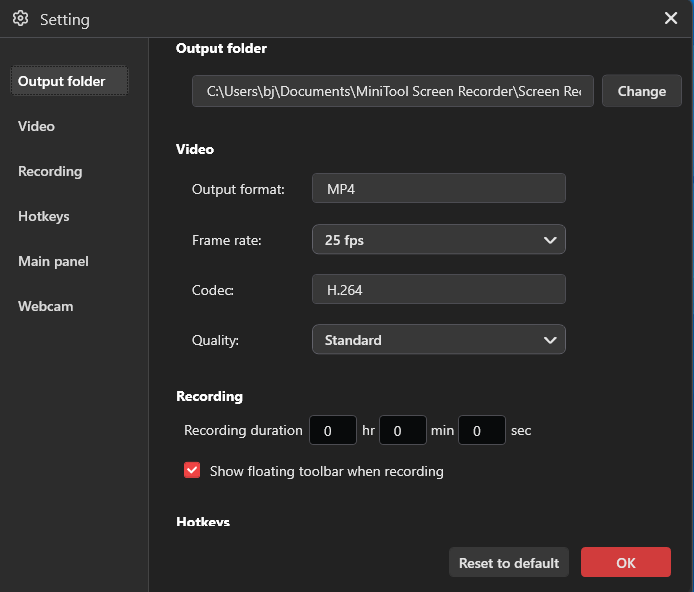
Click the Settings icon in the upper-right corner to open Settings.
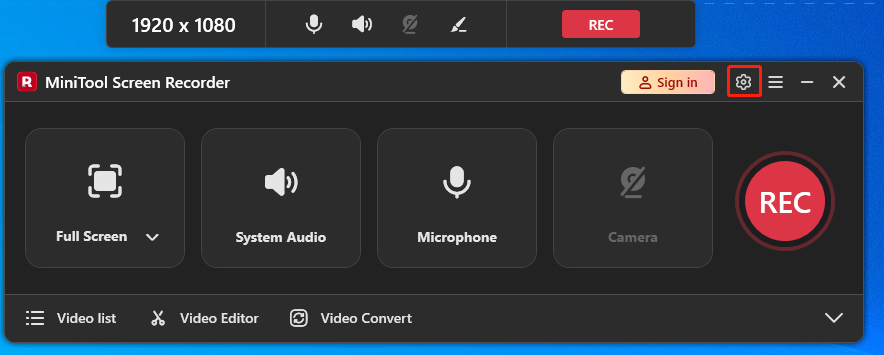
You can then change the folder to save recordings, frame rate (15, 20, 25, 30, or 50FPS), and quality (standard, original, or high), set a recording duration, and change hotkeys. Finally, click OK to save changes.
Step 3: Specify Recording Area
Launch the application, and a ribbon will appear at the top of your screen. By default, MiniTool Screen Recorder automatically selects your entire desktop to record.
To record a meeting in Google Meet, click Full Screen, click Select Region from the dropdown, go to Google Meet, drag the red handles and move the rectangle to choose the area you want to capture.
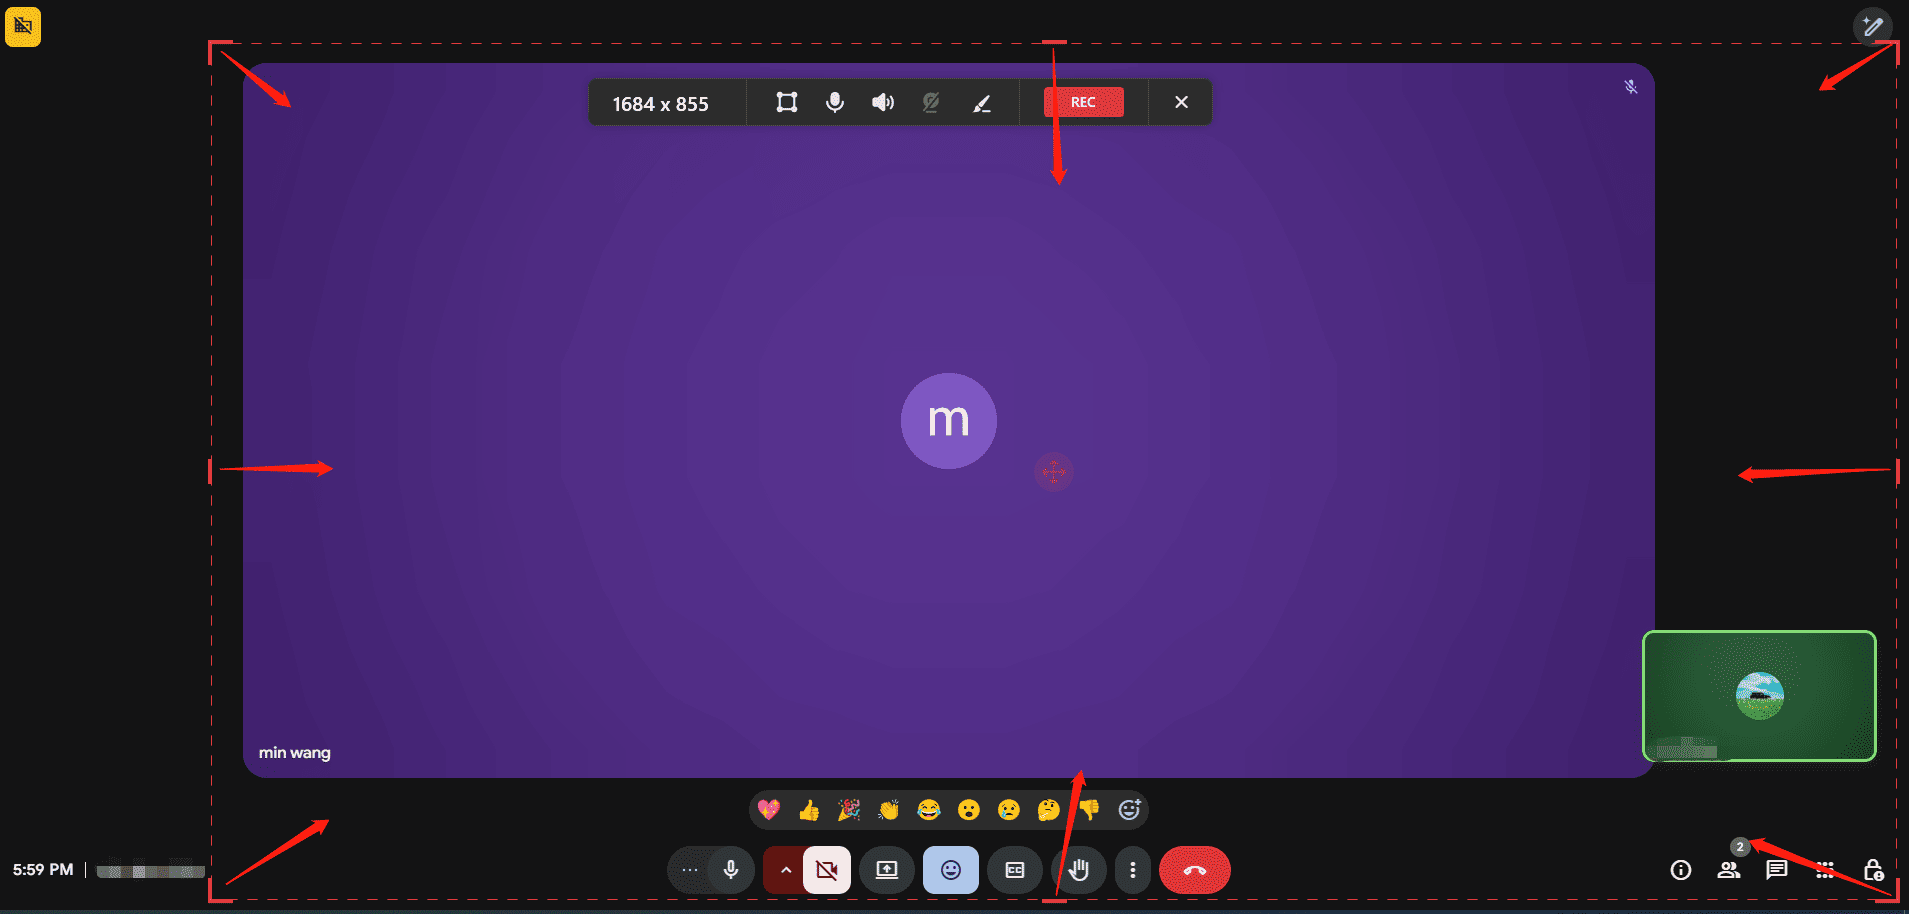
The system audio and microphone recording are turned on by default, so you don’t need to make any other changes to record audio in the meeting.
Step 4: Sign in with your account
To use annotation tools during recording, click Sign in at the top and enter your email and password.
Step 5: Record the meeting
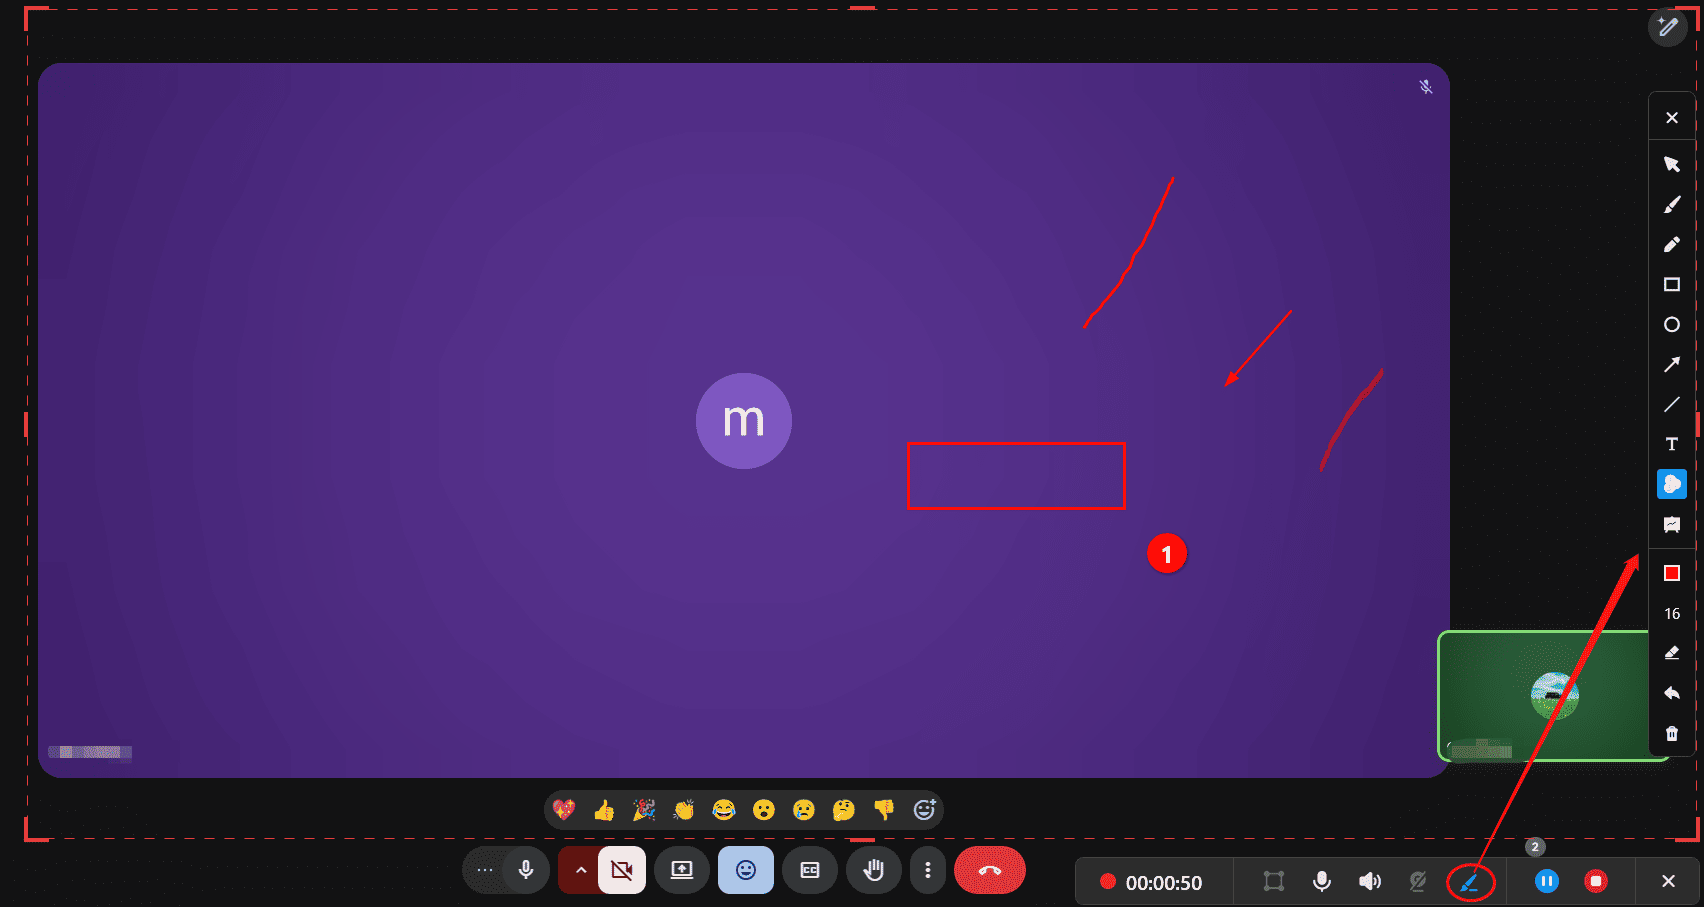
Click the red REC button, and the recording will start after a 3-second countdown. To add annotations, click the Pen icon on the floating toolbar below the recording area to activate the annotation toolbar.
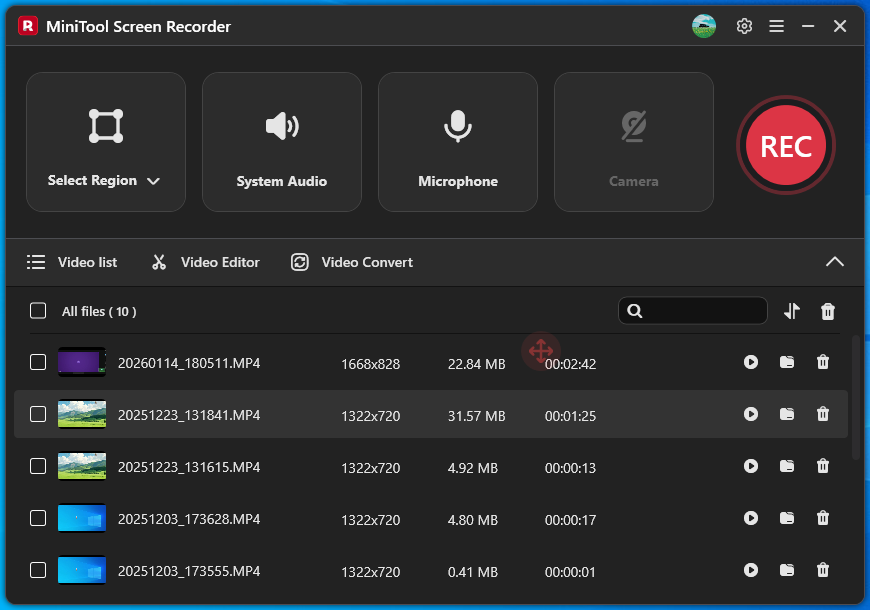
Step 5: Stop and find the recording
To stop recording on Google Meet, click the red Stop option on the ribbon or press F6 (or your hotkey). The video will appear at the top of the Video list tab. From there, you can play, delete, or find the video file.
Learn More About MiniTool Screen Recorder
As a universal screen recording application, MiniTool Screen Recorder can record online meetings (Google Meet, Zoom, Teams, Webex, etc.), online lectures, gameplay, video calls, and other activities on the screen.
MiniTool Screen Recorder saves recordings as MP4 files and currently does not generate separate transcripts or audio files. If you need a transcript of a meeting recording to take minutes, use MiniTool Video Converter to transcribe the videos to text or extract audio from videos.
MiniTool Video ConverterClick to Download100%Clean & Safe
What’s more, MiniTool Screen Recorder allows you to record webcam only on the desktop or with the screen. With multiple custom settings, you can easily create reaction videos, engaging tutorials, and presentations.
![How to Convert Webex Old Recordings to MP4 Easily [5 Steps]](https://images.minitool.com/recorder.minitool.com/images/uploads/2026/01/convert-webex-recording-to-mp4-thumbnail.jpg)
Explore More Google Meet Recording Applications
1. Snipping Tool
If you’re running Windows 11, you can use Snipping Tool to record a Google Meet video call quickly. You can access this tool from the Start menu and start a recording in a few clicks.
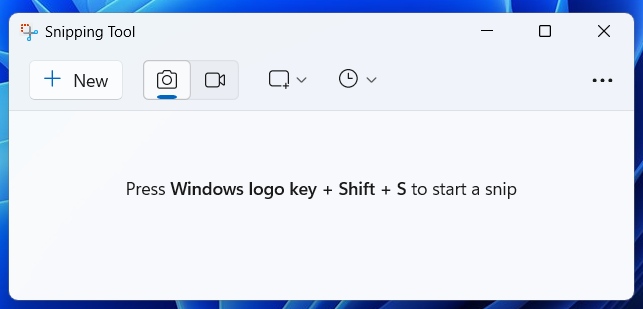
After recording, you can use the built-in trim tool to remove unwanted parts from the video. It also lets you save the recording in GIF format. The Snipping Tool is ideal for quick recordings without requiring basic settings.
2. OBS Studio
OBS Studio is a free, open-source, cross-platform, and powerful application for screen recording and live streaming. It’s almost capable of capturing everything on the PC screen, such as specific windows, the desktop, gameplay, webcams, capture cards, live web content, and more.
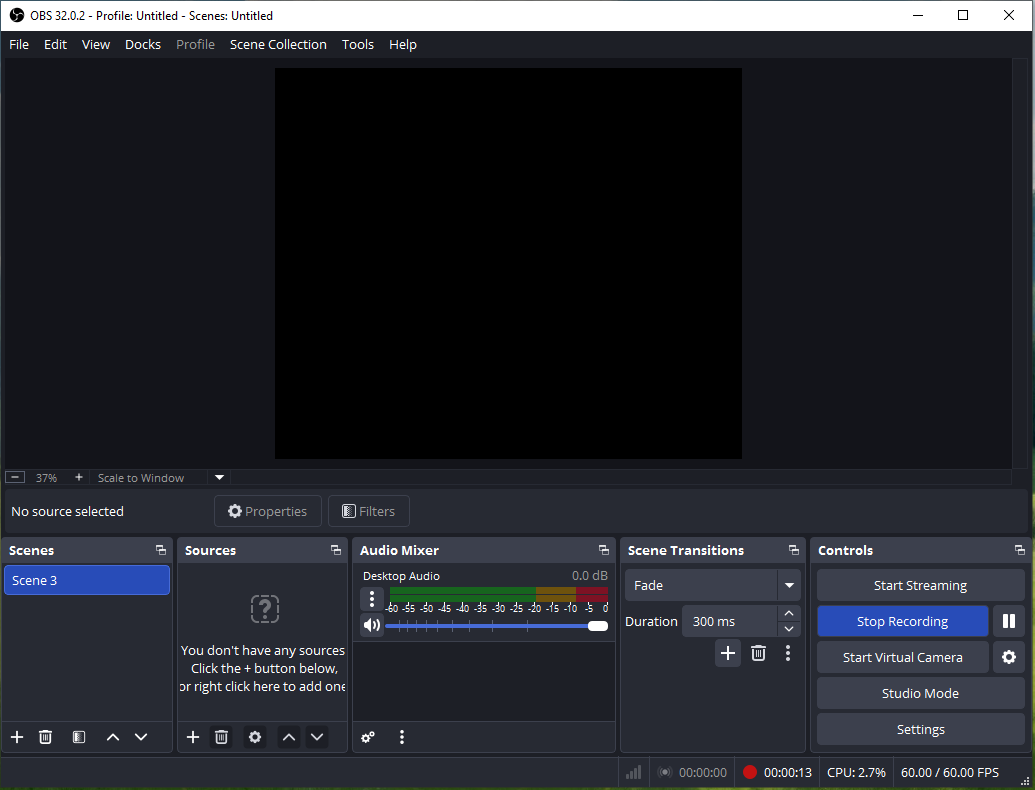
Undoubtedly, you can use OBS Studio to record Google Meet sessions without other participants knowing.
Best of all, OBS Studio provides advanced audio control (like noise suppression), offers various settings (such as resolution, formats, frame rate, encoders, and audio sample rate) to control the final quality and file size.
3. Loom
Loom is also one of the most convenient tools for recording your screen and camera. It offers a Chrome extension, desktop applications, and mobile apps. Similarly, it’s a great solution for recording Google Meet.
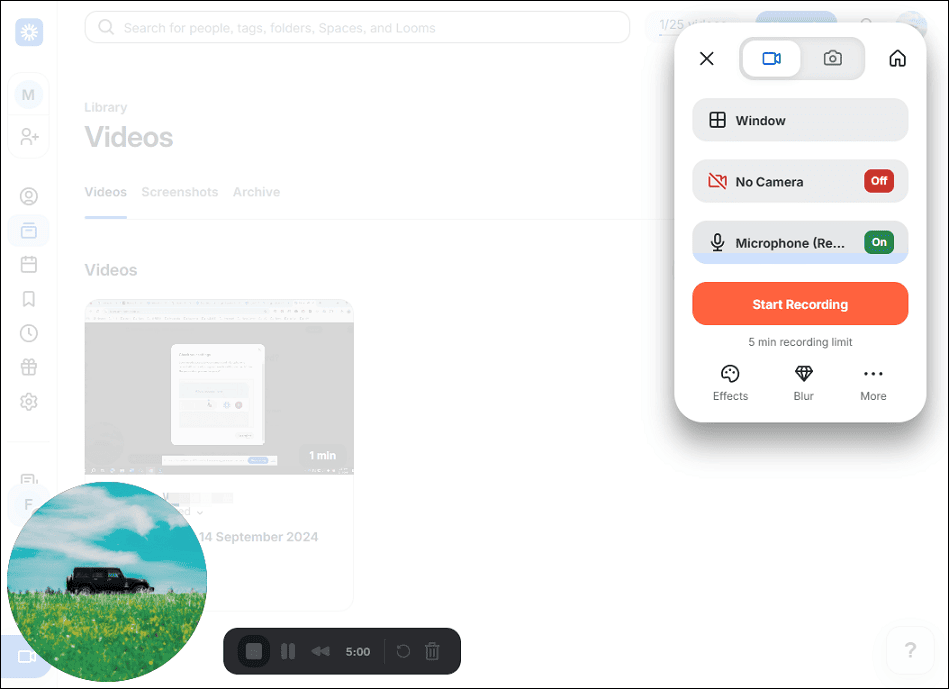
Additionally, Loom provides a simple editor to trim, merge clips, add backgrounds, and more to enhance recordings. Also, it can convert video to text in diverse languages.
The free Starter plan of Loom supports up to 25 videos in total and has a 5-minute recording length limit per video.
Conclusion
This post shows you how to record Google Meet using its native feature and the excellent MiniTool Screen Recorder. It also introduces another three dedicated programs for you to choose from.
Regardless of which method you choose to record a meeting, use the recording for later review and other legitimate purposes.
Finally, if you have any questions while using MiniTool products, please email us at support@minitool.com for help.