Running into OBS stuttering when recording? Learn how to resolve the issue by adjusting your video configuration, managing process priority, and following a few extra steps to enjoy seamless and high-quality recordings. Alternatively, you can use MiniTool Screen Recorder to capture your desktop activity.
OBS is a free and powerful screen recording and live streaming application often used by creators, streamers, and professionals. Sometimes, the software may stutter or lag. Just imagine how frustrating it would be: when recording an important activity, only to find that OBS stutters.
This post covers common causes for OBS stuttering when recording and step-by-step solutions to achieve smooth recording experiences.
Why Is My OBS Recording Stuttering
OBS lag when recording means your computer can’t meet the demands of real-time video capture and encoding, resulting in dropped frames, choppy playback, or frozen footage in your recording.
Reasons for this issue can be various. The common causes include:
- Encoding Lag: There’s not enough time for OBS to encode frames before the next one arrives due to incorrect settings, such as high resolutions. Essentially, the lag is caused by encoding overload in OBS.
- High GPU/CPU Usage: The PC is struggling to process the game, OBS, and other applications simultaneously. So, OBS can’t be allocated enough resources to render frames.
- Incorrect OBS Settings: Fail to select the right video encoder, bitrate, frame rate, and other settings in OBS for your hardware.
- Driver/Software Issues: Your graphics driver or the OBS recorder is out of date.
How to Fix OBS Stuttering When Recording
While many factors cause OBS stuttering when recording, it’s not hard to fix the issue for a smooth recording.
Quick Fixes for OBS Recording Stuttering
Let’s first look at the basic solutions for OBS stuttering.
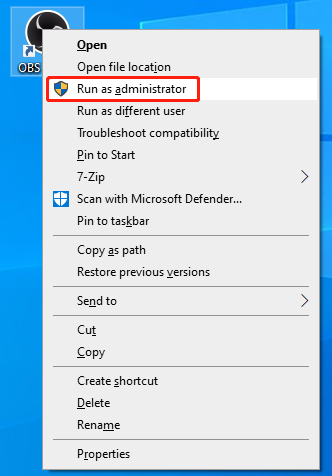
1. Run OBS as Administrator
Launching apps with administrator privileges on Windows can ensure proper GPU resource access. If OBS is lagging, run it as an administrator to see if that resolves the issue.
- First, exit your OBS completely.
- Search OBS from the Start menu or right-click on the shortcut.
- Select Run as administrator and click Yes to confirm.
2. Update OBS Studio
Running the latest version ensures performance improvements. To update OBS to fix recording lag:
On the main interface, select Help at the top menu bar and click Check For Updates from the dropdown.
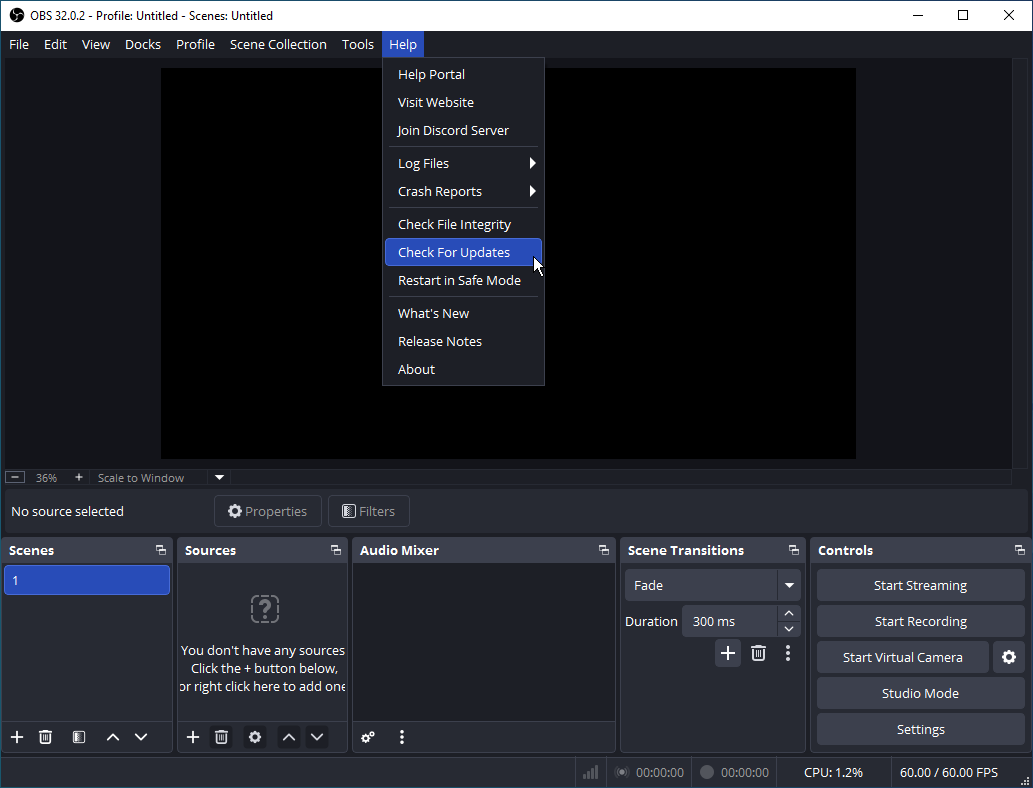
Then, the application automatically scans for new versions. If a new update is available, click Update Now, and follow prompts to install it.
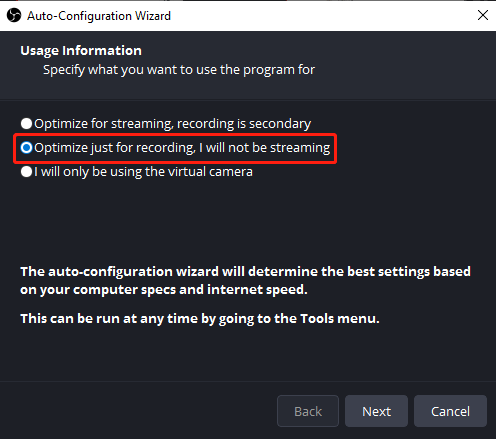
3. Use the Auto-Config Wizard
When you first open OBS, the Auto-Configuration Wizard window appears and lets you specify your goal using the program. Then, the wizard will automatically optimize settings for recording or streaming.
Ensure OBS is optimized for recording to stop the software from lagging. Go to Tools, select Auto-Config Wizard, and check the Optimize just for recording, I will not be streaming option. Then, follow the prompts to apply the settings.
4. Update Windows & GPU Drivers
Additionally, ensure that you’re running the latest Windows update and that the GPU driver is also up to date. This is crucial for optimal performance, stability, and improved compatibility with applications like OBS.
5. Close Background Applications
Running too many programs in the background consumes a lot of system resources. Close unnecessary apps to free up resources for OBS to operate smoothly.
Advanced Solutions for OBS Stuttering
This section offers essential app settings and other troubleshooting tips to optimize OBS for smooth recording.
1. Adjust Video Settings
OBS provides various configuration settings for recording. It’s important to configure appropriate video settings to avoid OBS stuttering when recording.
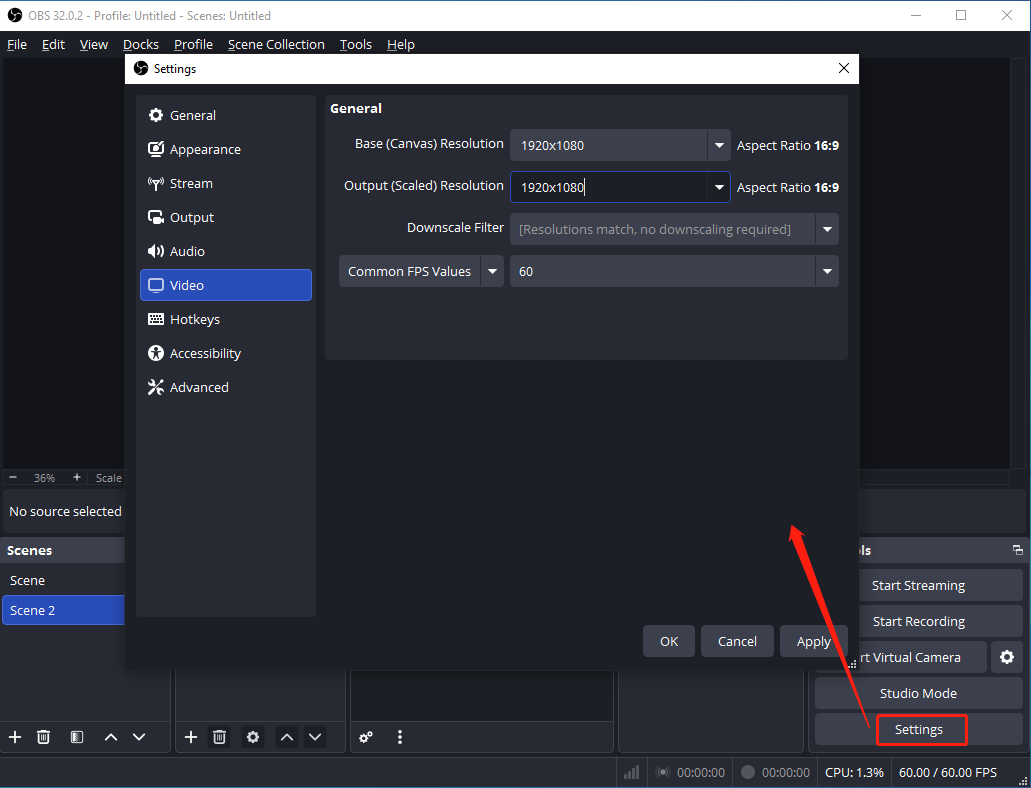
Click Settings in the lower right corner to open the Settings window and select Video in the left sidebar in the pop-up.
Then, you can adjust:
- Base (Canvas) Resolution is the native size of your monitor or recording source.
- Output (Scaled) Resolution is the final size of your recording or stream. Generally speaking, they should be set to the same resolution for the optimal result. To fix OBS lag when recording, you can lower the output resolution from 1920 x 1080 to 1280 x 720.
- FPS (frame rate) values: The frame rate is set to 60FPS by default. This is optimized for gameplay recording. When you record other activities on the desktop, reducing it to a lower rate, such as 30PFS, may solve the lagging problem.
2. Optimize Output Settings
Go to the Output option to access more recording settings.
In the Simple output mode, go to the Recording section, open the Video Encoder menu to change the setting.
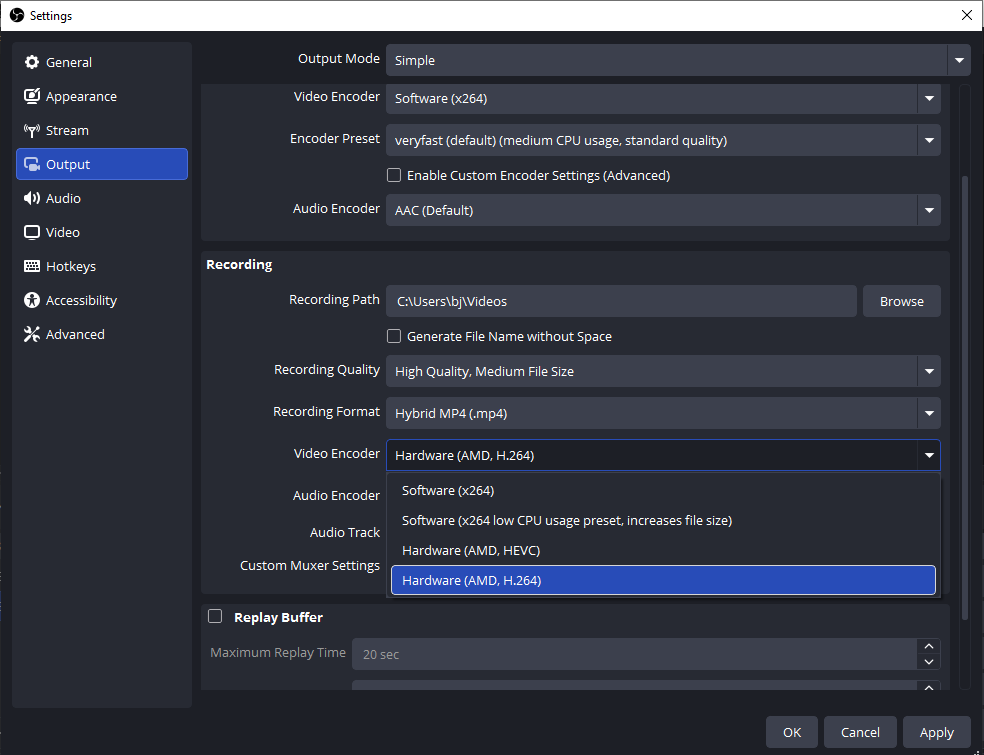
For low-end PCs, x264 is recommended. You can choose the corresponding encoder depending on the dedicated GPU.
- NVIDIA GPU: Use NVENC (New)
- AMD GPU: Use AMD H.264
- Intel CPU: Use QuickSync
Go to the OBS Knowledge Base to learn more information about each encoder. For optimal recording quality, use the best-quality hardware encoder available (AV1 > HEVC > H.264) with high-bitrate AAC or lossless audio formats.
From here, you can also modify the recording format (MKV or MP4 is recommended; go to the OBS website for more about its supported video/audio formats) and the quality of your recording. Finally, click Apply and OK to save the changes.
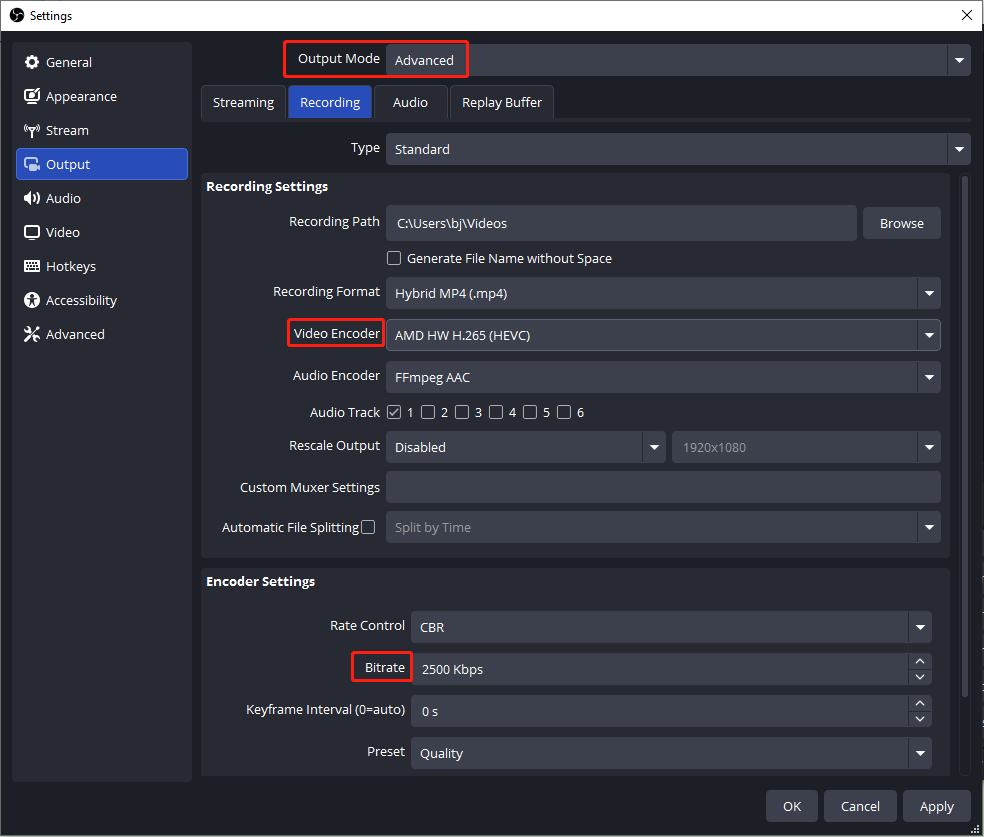
Furthermore, you can switch from Simple to Advanced output mode and go to Recording to access more options to fix OBS lagging while recording. Select the best video encoder in Recording Settings and go to Encoder Settings to change the bitrate.
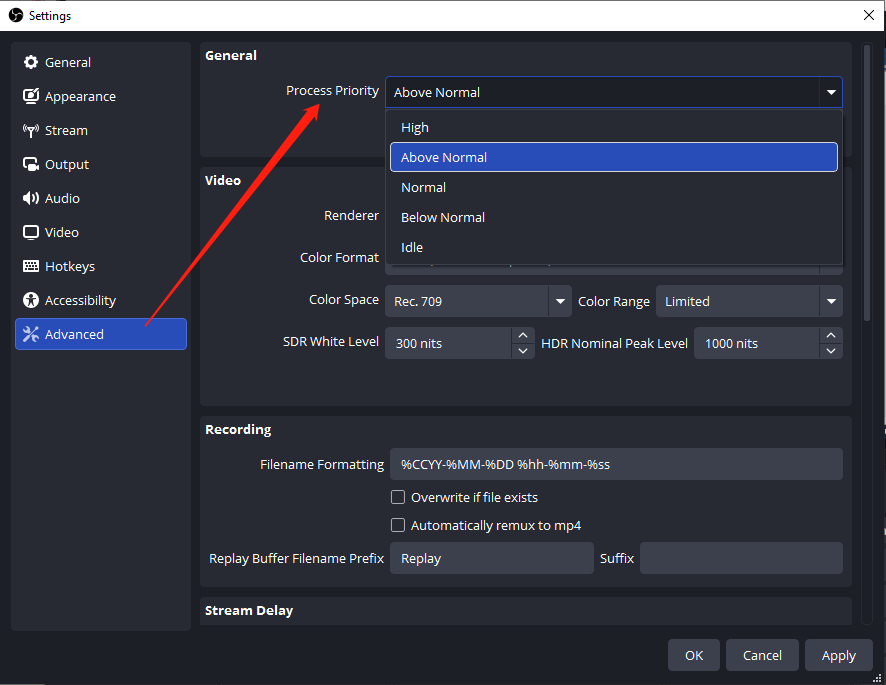
3. Manage Process Priority
Here’s how to fix OBS stuttering by adjusting the process priority.
In the Settings window, click Advanced on the left side, expand the Process Priority menu, select Above Normal to reduce lag and dropped frames while keeping a good balance with other apps, or choose High for maximum resources to OBS (This can impact other apps.). Click Apply and OK to save settings.
Additional Troubleshooting Tips
Alternatively, you can try the following tips to stop or fix OBS lag when recording.
1. Change graphics preference: Right-click anywhere on your desktop, select Display settings, select Graphics, click OBS Studio, and set GPU preference to High Performance.
2. Use Game Capture instead of Display Capture when recording games with OBS.
3. Reduce the game’s frame rate: Limit the game's frame rate to 60 FPS or to your monitor’s refresh rate. Press Win + I to open Settings, select System, Display, Advanced display, and change the refresh rate.

Use an OBS Alternative for Screen Recording
You can use OBS alternatives when it stutters while recording. Among various applications, MiniTool Screen Recorder can be the best free OBS alternative for screen recording. It captures anything on your screen, such as the entire desktop, a custom region, or specific application windows.
As a webcam capturing application, MiniTool Screen Recorder records webcam, screen, or both simultaneously. It also lets you resize and change the shape and position of your camera overlay.
Furthermore, MiniTool Screen Recorder provides various screen annotation tools (arrows, rectangles, shapes, whiteboard, and more) to create engaging videos. It also has no watermarks or recording time limits.
Here’s how to record your screen using MiniTool Screen Recorder.
Step 1: Launch the Application
Click the button below to download and install the screen recorder. After that, open the software.
MiniTool Screen RecorderClick to Download100%Clean & Safe
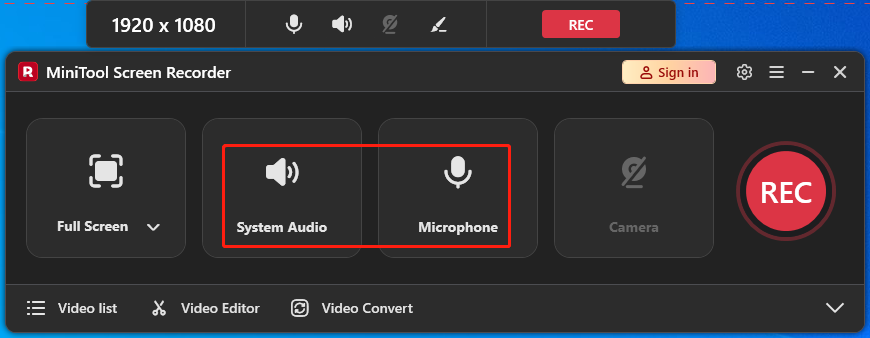
Step 2: Check Audio Settings
By default, MiniTool Screen Recorder captures both audio from your computer and microphone. If you don’t record the audio, click System Audio or Microphone to disable the setting.
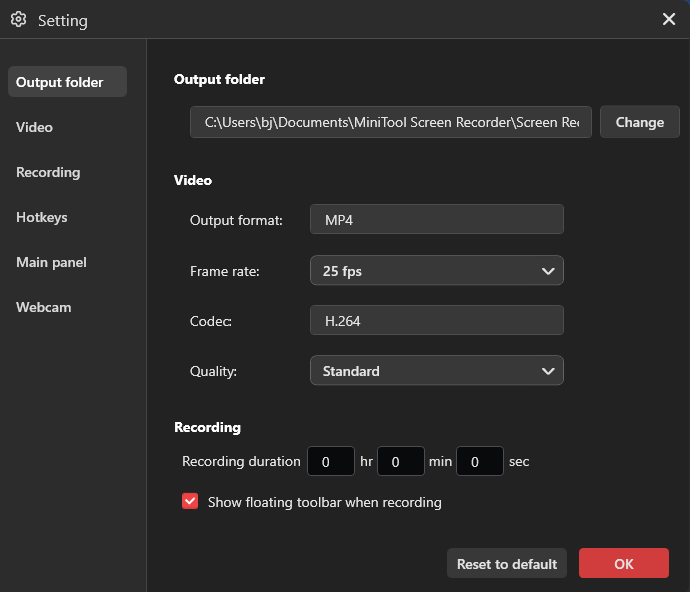
Step 3: Adjust Recording Settings
Click the Settings icon in the upper-right corner of the interface. On the Settings window, you can change the output folder, frame rate, quality, hotkeys, or set a recording duration. Click OK to apply changes.
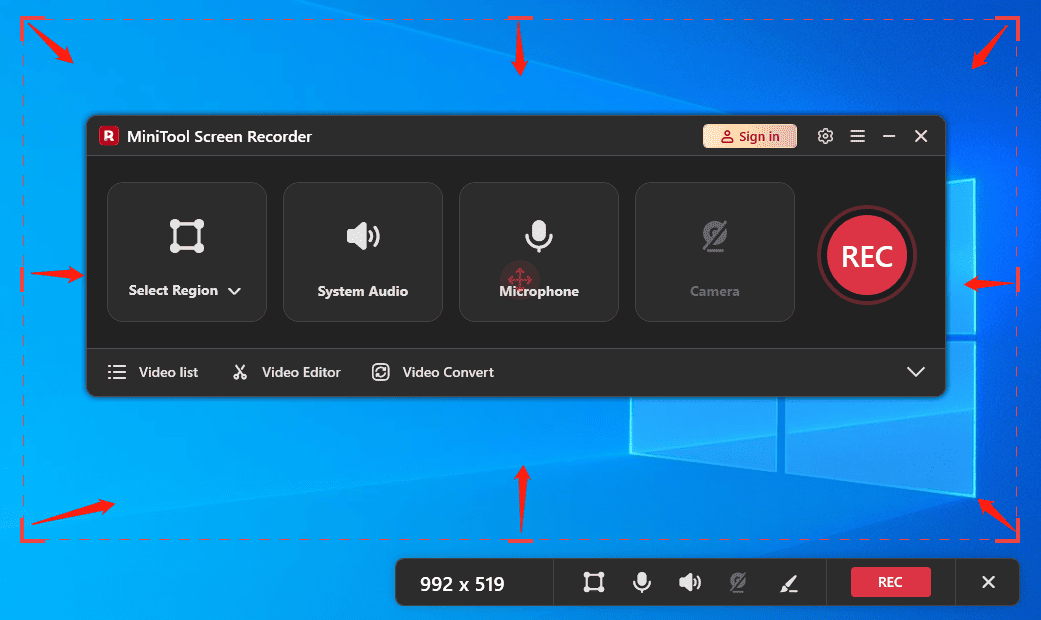
Step 4: Select Recording Area
The application selects the whole screen to record by default. To capture part of the screen, click the arrow next to the Full Screen option, click Select Region, and drag to select your desired recording region.
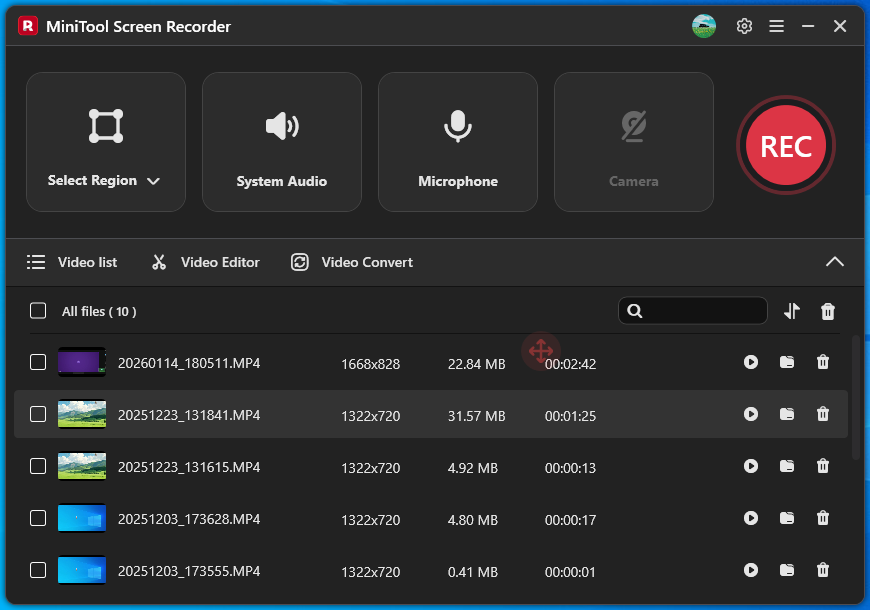
Step 4: Start and Stop Recording
Click the red REC button, and the recording will start after a 3-second countdown. To end your recording, press F6 or your custom hotkey. Then the video appears at the top of the Video list.
MiniTool MovieMakerClick to Download100%Clean & Safe
Conclusion
OBS stuttering when recording is an annoying problem, but it can be easily fixed. This post explains 11 methods to solve the issue and ensure smooth recordings in the application.
When OBS is not working properly, you can also try an alternative like MiniTool Screen Recorder for high-quality screen recording.
Finally, if you have any questions while using MiniTool Screen Recorder, please email us at support@minitool.com for help.