OBS “An Unspecified Error Occurred While Recording”
Although OBS is widely considered the most powerful free screen recording software, it can occasionally encounter issues, such as the software lagging while recording and “An unspecified error occurred while recording”.
Have you ever received the error message when starting a screen recording with OBS? If this happens, you cannot capture any screen activity with the software.
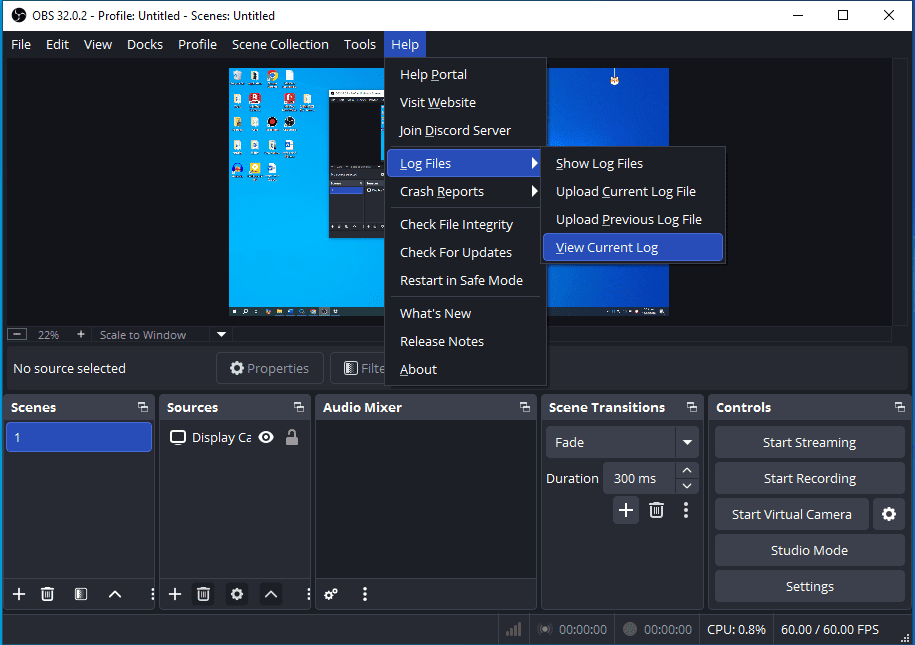
An "unspecified error occurred while recording" in OBS is typically caused by incorrect encoder or other recording settings, an invalid output path, or software issues. Once the error occurs, you can check the log file to see exactly what’s wrong. In OBS, go to Help > Log Files > View Current Log.
How to fix the OBS unspecified error? See below 7 effective methods.
How to Fix OBS Unspecified Error Occurred While Recording
This section covers 7 methods, from basic to advanced, to help fix the OBS unspecified error while recording.
Method 1: Restart OBS & Your Computer
If the OBS unspecified error hinders your recording, first, exit the software. After a few seconds, re-open the application and try recording again. You can also restart your computer to fix temporary glitches that may cause OBS to malfunction.
Method 2: Run OBS as an Administrator
Running an app as an administrator to grant proper permissions and elevate its privileges. You can launch OBS with administrator privileges to fix the unspecified error that occurred while recording.
Step 1: Open Task Manager, right-click on OBS Studio, and choose End Task to exit the application completely.

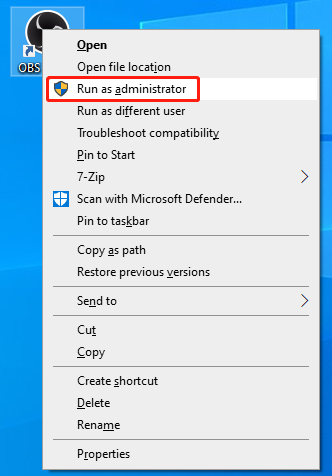
Step 2: Right-click on the OBS shortcut or search for it in the Start menu.
Step 3: Click Run as administrator and select Yes to confirm.
Method 3: Change Recording Encoder
To resolve the OBS unspecified error while recording, you can also try adjusting the recording encoder and format.
On OBS’s main interface, click Settings in the lower right corner, and go to the Output tab on the left sidebar of the Settings window. You can then change the recording format and video encoder in the Recording section.

If you’re using a hardware encoder like Hardware (AMD, H.264), you can change it to Software (x264). Likewise, if the current video encoder is set to Software (x264), alter it to your hardware encoder. Then, click Apply and OK to save the change.
Method 4: Adjust Recording Type
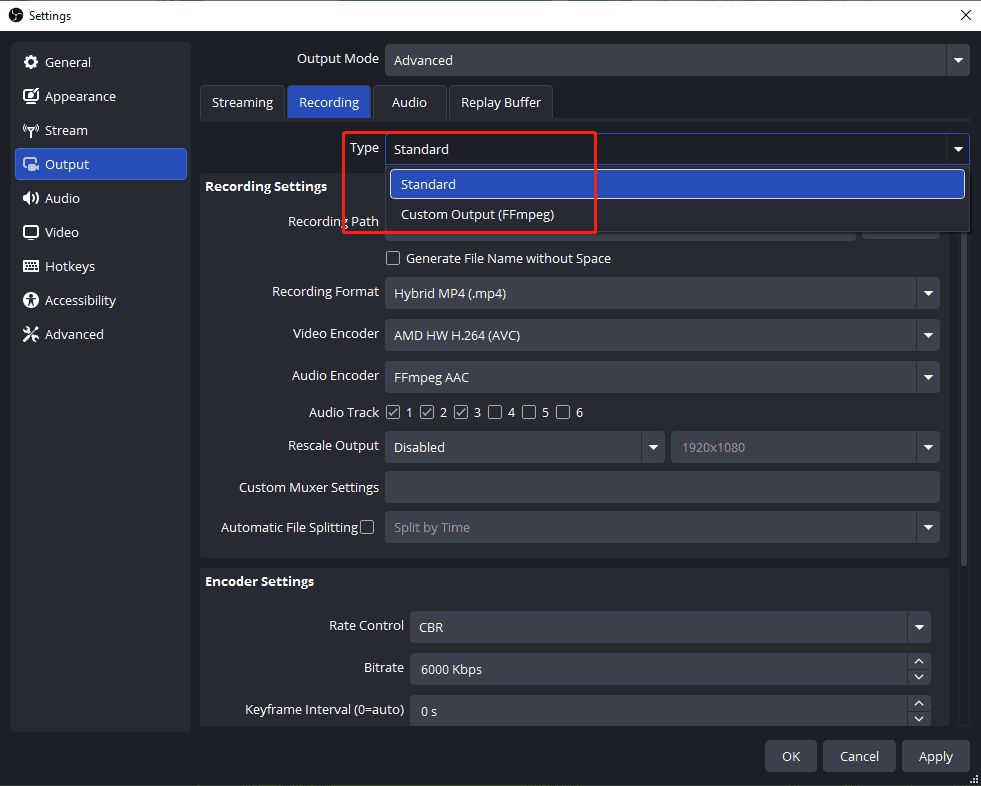
If you’re using the Advanced output mode in OBS, then you have two recording types to choose from: Standard or Custom Output (FFmpeg).
To change the recording type, go to Output > Recording in Settings, expand the Type dropdown, and choose Standard or Custom Output (FFmpeg). The Standard type is recommended for most users. After saving the adjustment, restart OBS and see if it records correctly.
What’s more, you can switch from the Advanced output mode to Simple in the output settings to fix OBS “an unspecified error occurred while recording”.
Method 5: Check Your Recording Path
In OBS output settings, check your recording path. Ensure the selected folder exists and is valid. Don’t use system folders. You can click Browse at the end of the Recording Path bar to choose another folder to save your OBS recordings.

Furthermore, ensure your drive for storing recordings has sufficient free space.
Method 6: Disable and Enable the Graphics Driver
Additionally, you can temporarily disable the graphics driver to fix an unspecified error that occurred while recording with OBS.
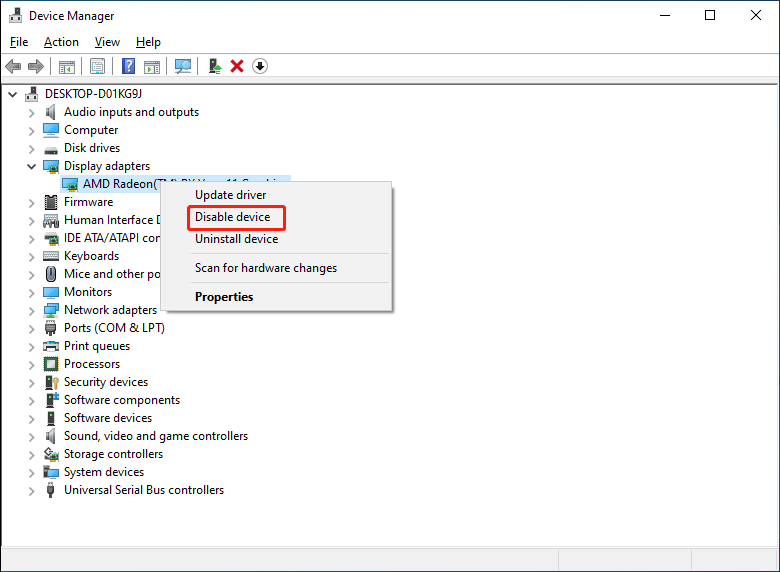
Open Device Manager, double-click the Display adapters node to expand it, right-click the dedicated graphics driver, select Disable device, and click Yes to confirm.
Next, open OBS and enable your graphics driver by repeating the above steps.
Method 7: Allow OBS Through Windows Defender Firewall
If the Windows firewall blocks OBS, the application might fail to record, showing the “an unspecified error occurred while recording” message. Therefore, you can allow OBS through Windows Defender Firewall to fix the issue. Here are the steps:
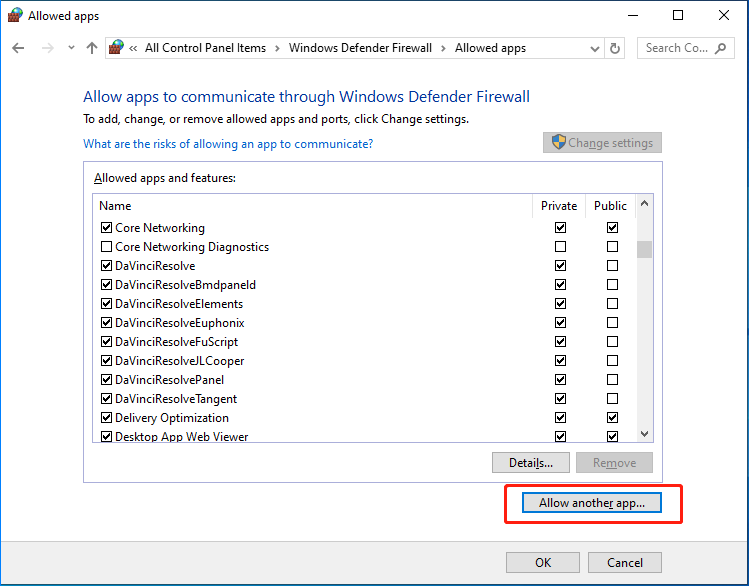
Open Windows Defender Firewall, select Allow an app or feature through Windows Defender Firewall on the left, click Change settings and Allow another app.
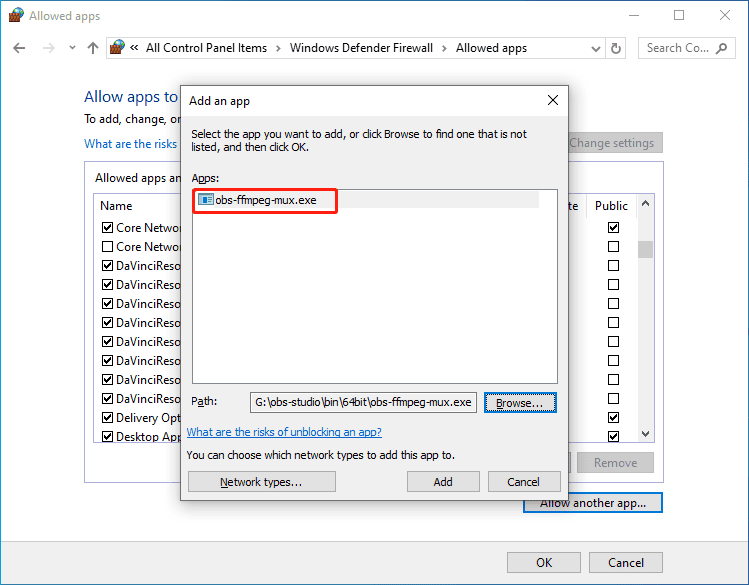
Next, choose Browse from the Add an app prompt to navigate to the OBS file location, click obs-studio > bin > 64bit > obs-ffmpeg-mux, and select Open and Add.
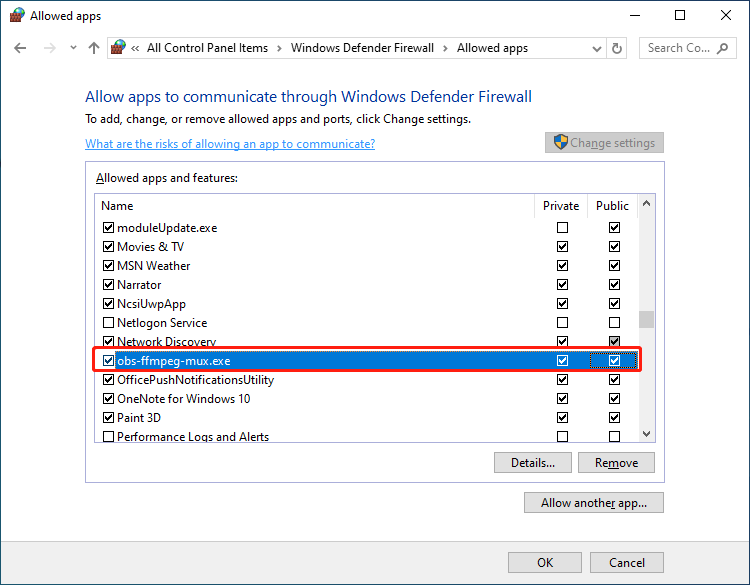
Finally, check both the Private and Public boxes for obs-ffmpeg-mux, and click OK to save changes. Restart your computer and open OBS to start recording again.
Use an OBS Alternative for Screen Recording – MiniTool Screen Recorder
When your OBS recording is blocked by an unspecified error, you can also try MiniTool Screen Recorder to record your screen. It’s a user-friendly application for recording your webcam and the desktop without time limits and watermarks.
MiniTool Screen Recorder features extensive annotation tools that allow you to draw and add arrows, rectangles, ellipses, text, and numbers while recording. Therefore, you can easily create engaging videos.
Here’s how to capture your screen activity with MiniTool Screen Recorder.
Step 1: Download and Install
Click the button below to download the excellent screen recorder. Run the software after the installation.
MiniTool Screen RecorderClick to Download100%Clean & Safe
Step 2: Adjust Recording Settings
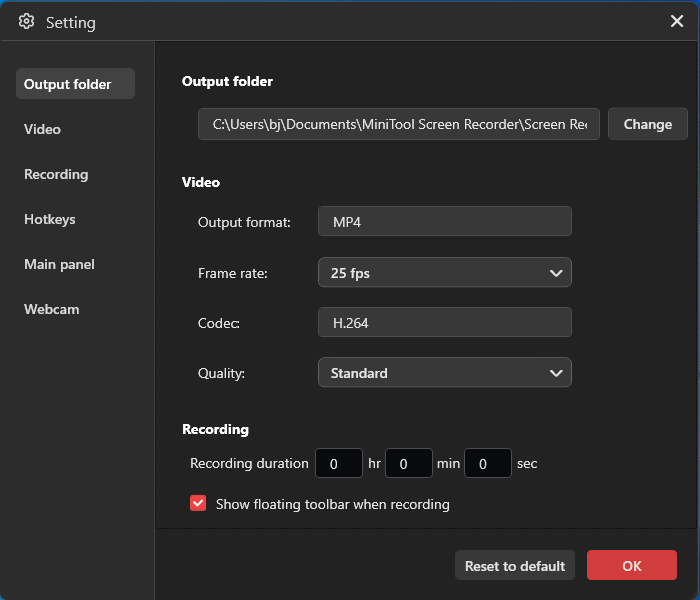
Click the Gear icon in the upper-right corner of the main interface to open the Settings window.
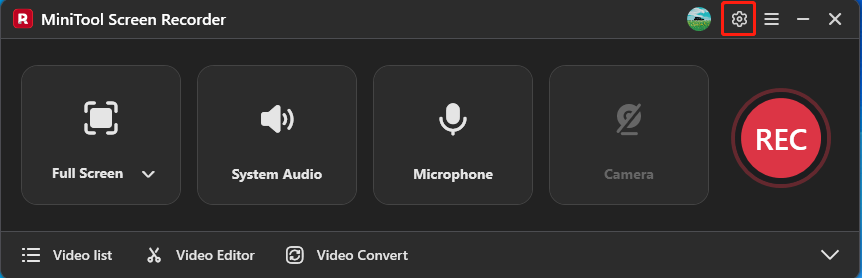
You can then change the output folder, frame rate, video quality, and hotkeys, or set a recording duration. Click OK to save changes.
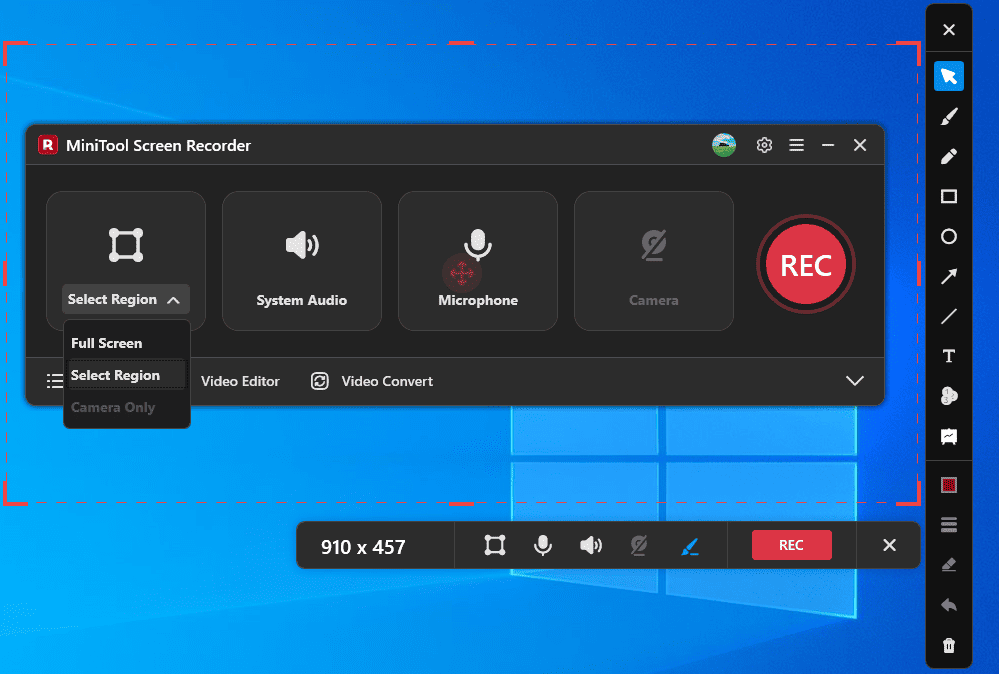
Step 3: Select the Recording Region
Your entire desktop will be recorded by default. To capture part of the screen, click Full Screen, click Select Region from the dropdown, drag and move the rectangle to choose the recording area.
Step 4: Decide Whether to Record Audio
By default, both system and microphone audio (if plugged in) are recorded along with the screen. If you don’t need audio, click System Audio and Microphone to turn them off.
Step 5: Start and Stop the Recording
Click the REC button or press F6 (or your preferred hotkey), and after a 3-second countdown, the recording starts. To stop the recording, press F6 again. If you set a recording duration, the process will automatically end once the period is reached.
Step 6: Find and Edit the Recording
After you end a recording, the Video list expands immediately, with the video you just recorded at the top of the list. You can then click the Play icon to watch the video and click the Folder icon to open the file location.

To polish your recording, such as trimming unwanted parts at both ends, or adding background music, click the Video Editor option at the bottom of the interface to open or download MiniTool MovieMaker. It’s a free video and GIF editor without watermarks.
Conclusion
Don’t be afraid when OBS shows “An unspecified error occurred while recording.” You can try the above tips to fix the issue. If none work for you, reinstall the software, or use MiniTool Screen Recorder for a quick screen recording.
Finally, if you have problems while using MiniTool products, email us at support@minitool.com for help.