This article shows 4 recording types and explains why record full screen. Additionally, it also tells the full recording methods with 3 excellent screen recorders, including MiniTool Screen Recorder.
Types of Screen Recording
Before choosing a full screen recorder, let’s learn the 4 types of screen recording that are used frequently.
1. Full Screen Recording
Full screen recording captures everything displayed on your computer screen. This recording method is ideal for educational presentations, demonstrations of documents, and gameplay demonstrations across various fields. These scenarios typically require presenting the audience with a clear, uninterrupted view of the entire computer screen.
2. Selected Screen Recording
Selected screen recording allows you to choose a specific area of your computer screen to record instead of recording the entire screen. This feature is useful when you want to focus on an important part of the screen, such as the interface of an application or a section of a browser.
3. Windows-specific Recording
Specifying a particular window to record ensures accurate capture of the target contents. It also prevents interference from desktop notifications. Furthermore, switching to another window or program during recording won’t affect the content being recorded.
4. Webcam Recording
A webcam recording is mainly used to record real-time updates displayed through a webcam. It is often used with screen recording to enrich the recorded content. Webcam recording is a popular feature among users of online teaching.
Why Record Full Screen
Full screen recording is the best choice in many situations. It ensures that all important content is captured completely. When sharing tutorials or presentations, viewers can clearly see every step on the screen, making it easier for them to understand the content.
Furthermore, it's suitable for presentations and online courses. Recording in full screen allows viewers to follow the slides, cursor movement, and explanation from an overall perspective, immersing them in the lesson.
Moreover, full screen recording is widely used in gaming recording. It records the whole screen of the gameplay, helping gamers experience realistic game environments.
Advantages and Disadvantages of Full Screen Recording
How about the merits and shortcomings of recording full screen? Read this section below to find out.
Advantages
Full screen recording can cover all content on the screen, allowing viewers to have a clear and comprehensive understanding of what's being recorded. The wealth of information helps inspire viewers to explore further.
Disadvantages
When the messy information is full of the screen, full screen recording may distract the audience’s attention. Moreover, recording entire screen contains more details and information. It takes up more storage space.
How to Record Full Screen
Need a full screen recorder? I would like to recommend 3 enhanced recorders to you, including offline and online ones.
Record Full Screen with Xbox Game Bar
Xbox Game Bar is a customizable game interface built into the Windows system that allows users to customize instant access to multiple sharing widgets, screenshots, and other game plugins. It is mainly used for Windows 10 and Windows 11. Xbox Game Bar allows you to complete full screen recording for games, browsers, or applications.
Xbox Game Bar is primarily preferred by gamers. When gamers want to record gameplay in full screen. They don’t have to close the game or switch to other software. Gamers can simply use keyboard shortcuts to record, which won't affect their gaming experience.
Key features:
- Capture and Share Screen: Allows recording videos and taking screenshots. It also allows you to share instantly.
- Monitor PC Performance: Helps monitor the PC’s CPU, GPU, RAM, and FPS in real time.
- Audio Management: Manages the audio input and output devices of the Windows system. It can also manage the volume of different applications in games.
Below is a guide on how to quickly record full screen with Xbox Game Bar.
Step 1. Make Sure the Xbox Game Bar is Working
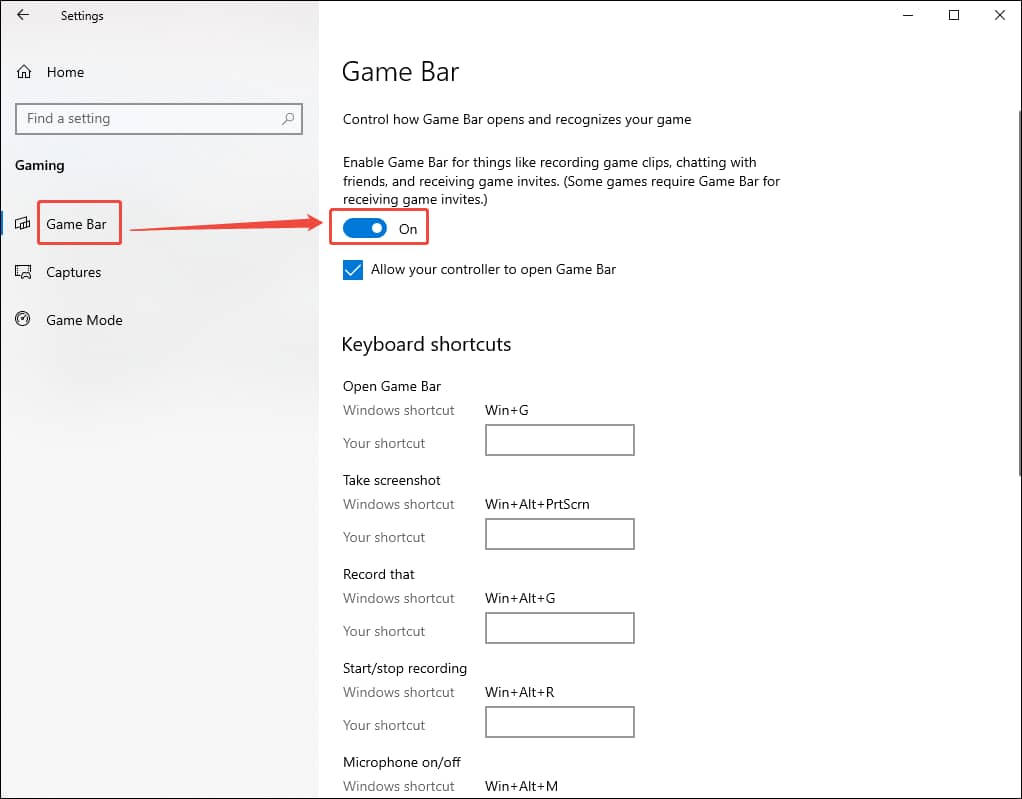
Go to Windows Settings > Gaming > Game Bar. Make sure the Game Bar enable button is enabled.
Step 2. Start the Full Recording
Open the browser or application content you want to record on your computer. Then, press Windows + Alt + R to start recording.
Step 3. Stop the Recording
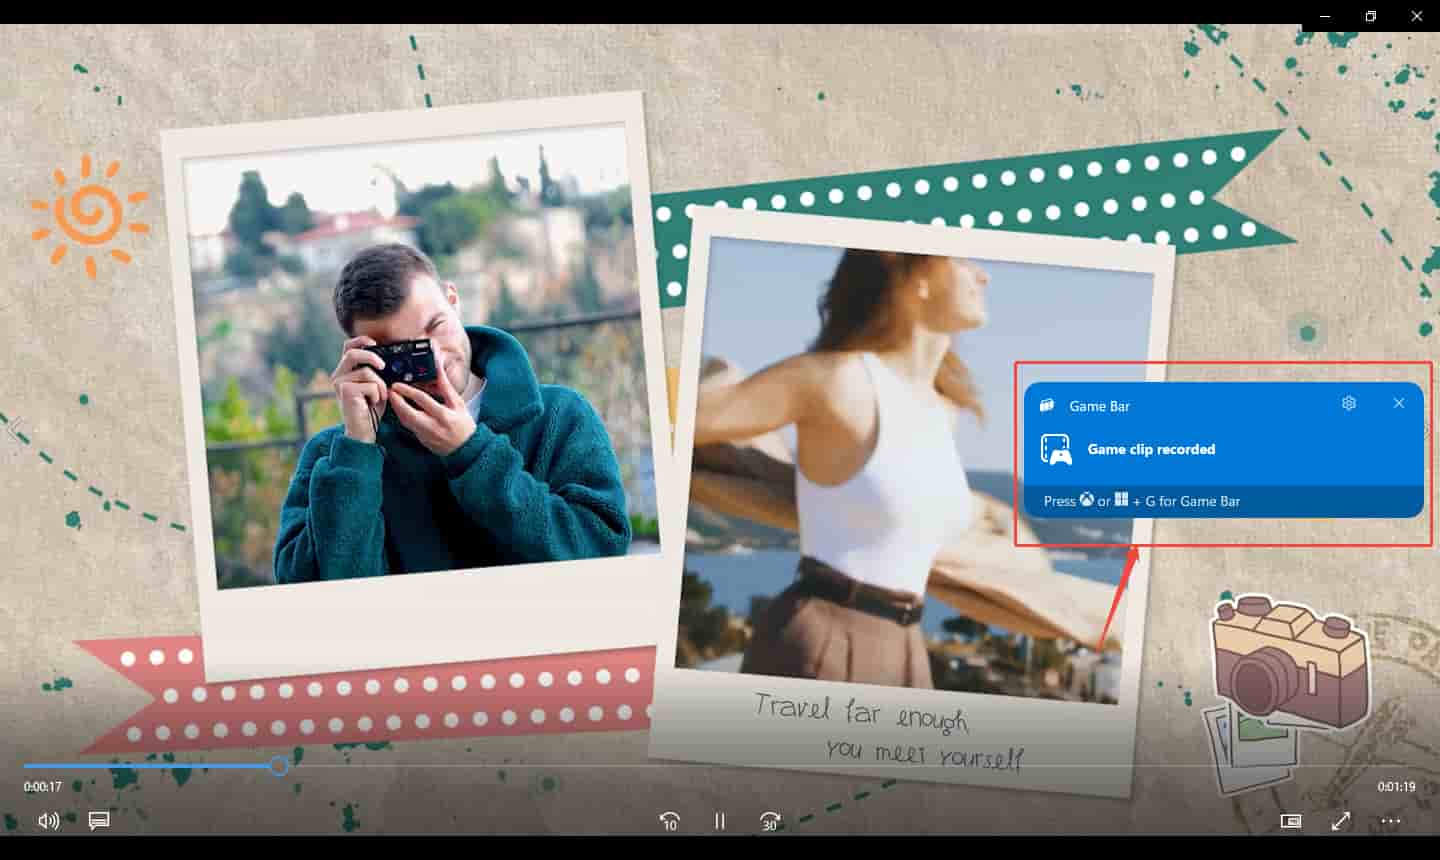
When the recording is finished, press Windows + Alt + R again to stop recording. There, a Game clip recorded shear board will automatically appear. Then, click on this shear board to go to the Gallery window.
Step 4. Check and Store the Recorded Video
In the Gallery window, click on the Play icon to check your recorded video. Then, click on the Open file location option to locate the recorded video.

Xbox Game Bar is a great recorder that Windows offers. You can record the full screen contents on your computer.
Pros:
- Supports the Windows system exclusively.
- Allowing customizing recording shortcuts.
- Supports recording audio and video simultaneously.
- No downloading and installation.
Cons:
- Only 30 fps and 60 fps frame rates are available.
- Recording time can’t exceed 4 hours.
Record Full Screen with MiniTool Screen Recorder
MiniTool Screen Recorder is a desktop tool designed for screen recording. Its simple interface is suitable for even beginners. What’s more, MiniTool Screen Recorder empowers you to record videos as long as you want. It also allows you to preset the recording duration, avoiding staying in front of the screen all the time.
MiniTool Screen Recorder also supports webcam recording. You can adjust the frame rate, position, shape, and size of the webcam overlays. Moreover, it allows you to use drawing features to highlight important information. Adding colored arrows, lines, shapes, and text to your screen recordings makes them richer and more appealing.
Additionally, MiniTool Screen Recorder provides a whiteboard for supplementing and demonstrating complex content. It also features customizable hotkeys, which you can set according to your preferences.
Key Features:
- Flexible Recording Area: Supports full-screen and custom areas to meet different recording needs.
- Multiple Recording Quality: Provides standard quality, high quality, and original quality.
- Audio Recording: Allows recording system sounds, microphone sounds, or both simultaneously.
- Webcam Recording: Enables capturing the computer screen/webcam or recording both of them for a PiP (Picture in Picture) layout.
- Clean Interface: offers a clear interface without ads, watermarks, or bundles.
Now, let’s try to use MiniTool Screen Recorder to record the full screen through a few simple steps.
Step 1. Get MiniTool Screen Recorder
Download MiniTool Screen Recorder by clicking the download button below. Then, follow the setup prompts to complete the installation.
MiniTool Screen RecorderClick to Download100%Clean & Safe
Step 2. Choose the Full Screen Model
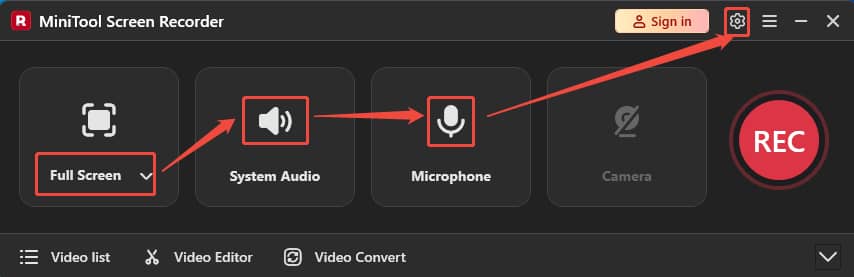
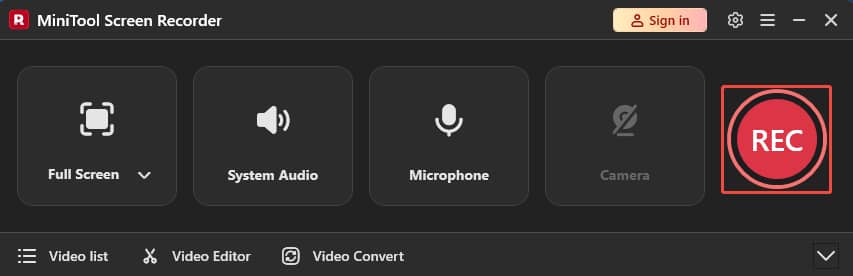
Launch MiniTool Screen Recorder. Leave the default Full Screen option selected. Next, click on the System Audio icon and the Microphone Audio icon to decide whether to enable them. Then, click on the Gear icon on the upper-right to trigger the Settings window.
Step 3. Choose a Storage Location
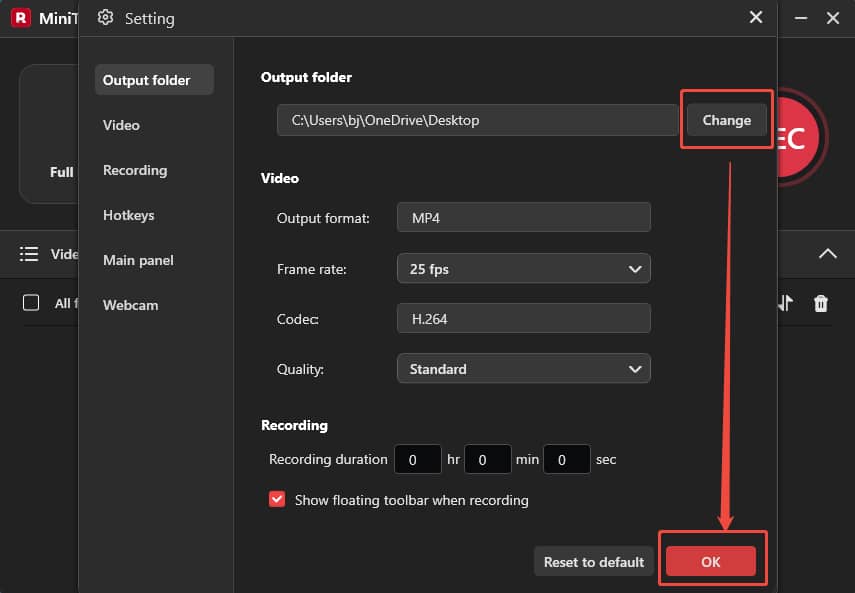
In the Settings window, click on the Change option to select a proper storage location. Then, click on the OK button to save this change.
Step 4. Start Recording
Once a series of settings is done, open the content you want to record in full screen. Next, click on the REC button and close the sign-in window. After a 3-second countdown, the recording begins. You can press the F9 key to pause/resume the recording or press the F6 key to end it.
Step 5. Check and Locate the Recording
When the recording finishes, the recorded video will appear in the Video list dropdown menu. Then, click on the Play icon or the Folder icon to view or locate this recording.

MiniTool Screen Recorder makes it easier to record full screen. It also allows you to change the frame rate, including 15 fps, 20 fps, 25 fps, 30 fps, and 50 fps.
Pros:
- Support capturing webcam, audio, and video at the same time.
- Enables recording mouse movements.
- No watermarks or ads.
Cons:
- Only supports Windows.
Record Full Screen with Free Online Screen Recorder
If you don't want to install software, an online screen recording tool is a good option. I would like to recommend Free Online Screen Recorder to you. This online recorder allows you to record both computer audio and voice. Plus, Free Online Screen Recorder also enables you to annotate using highlights during recording.
Key Features:
- Easily Accessible by a Browser: Supports quick and easy online recording within the browser.
- Recorded Video Editing: Supports cropping, trimming, splitting, and merging the recordings.
- Flexible Recording Area: Empowers capturing any region on screen.
The following is a tutorial on how to complete a full screen recording with Free Online Screen Recorder.
Step 1. Navigate to Free Online Screen Recorder’s Webpage
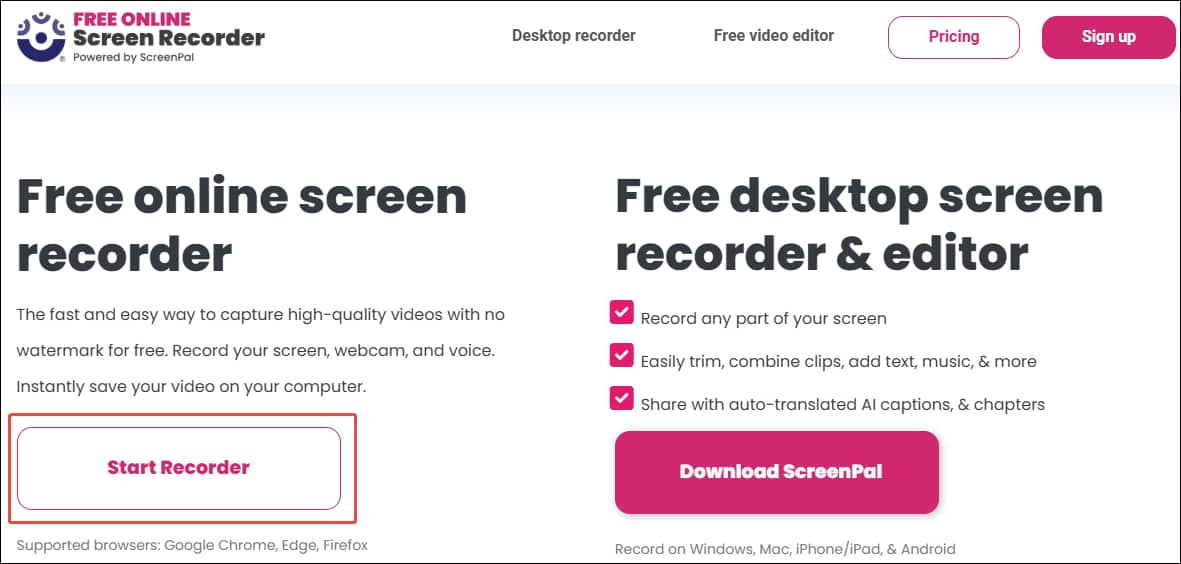
Go to https://screen-recorder.com/ to enter the Free Online Screen Recorder’s webpage.
Step 2. Choose Full Screen Recording Model
Click on the Start Recorder option to open a window for selecting the recording area.
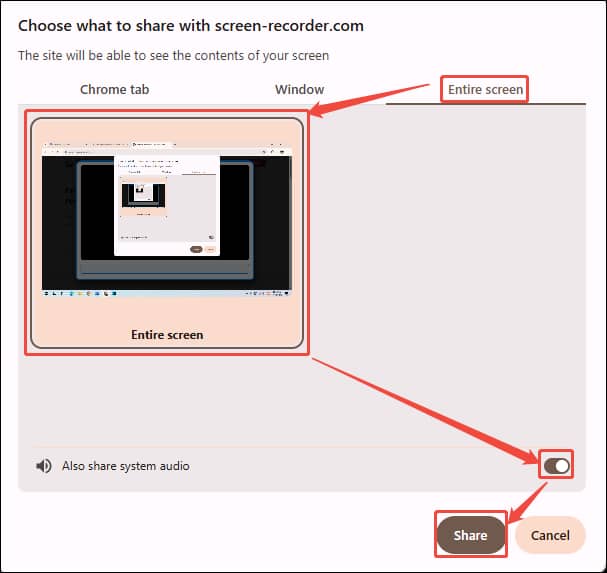
In this window, switch to the Entire screen tab. There, click on the Entire screen option, enable the Also share system audio button, and click on the Share button to enter the recording interface.
Step 3. Begin the Recording Process
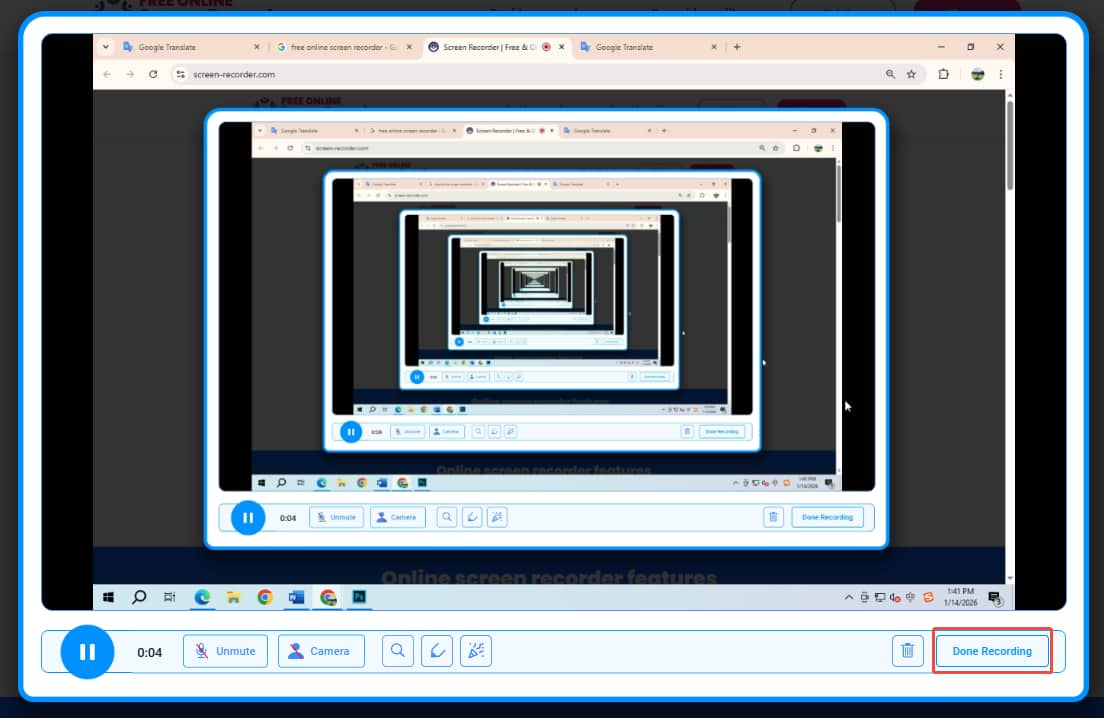
On the recording interface, click on the Microphone option and the Camera option to decide whether to record audio and camera footage. Then, click on the red Record button to start the recording process. Then, place the content you want to record on the screen.
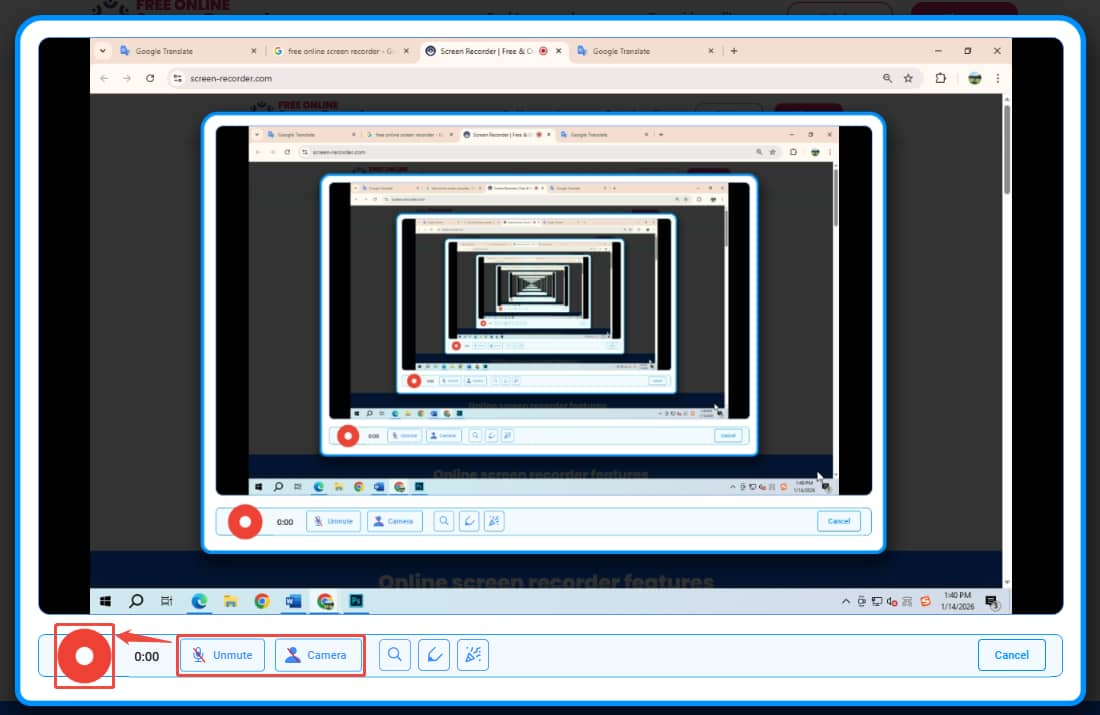
When you want to end this recording, click on the Done Recording option to complete it.
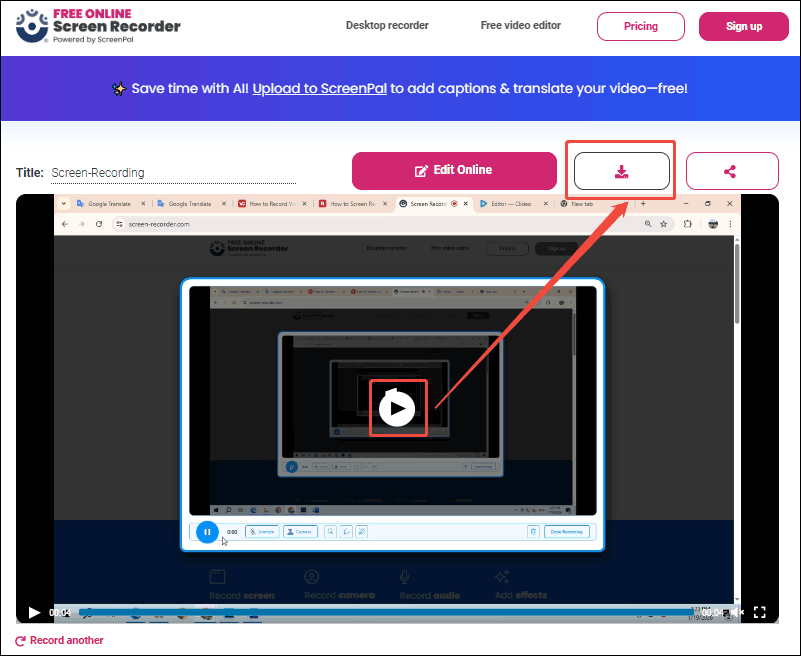
Step 4. Check and Download the Recorded Video
When this full recording ends, this online recorder will redirect you to the download page. Here, click on the Play button to view the recorded video. Once you’ve confirmed that there are no problems, click on the Download button to save this recorded video.
Using the Free Online Screen Recorder can help you quickly record full screen content without downloading and installing any application.
Pros:
- Supports high-quality recordings.
- Compatible with Google Chrome, Firefox, and Edge.
Cons:
- The annotation feature is too simple.
- Requires a smooth network connection.
Bonus: How to Compress Your Full Screen Recordings
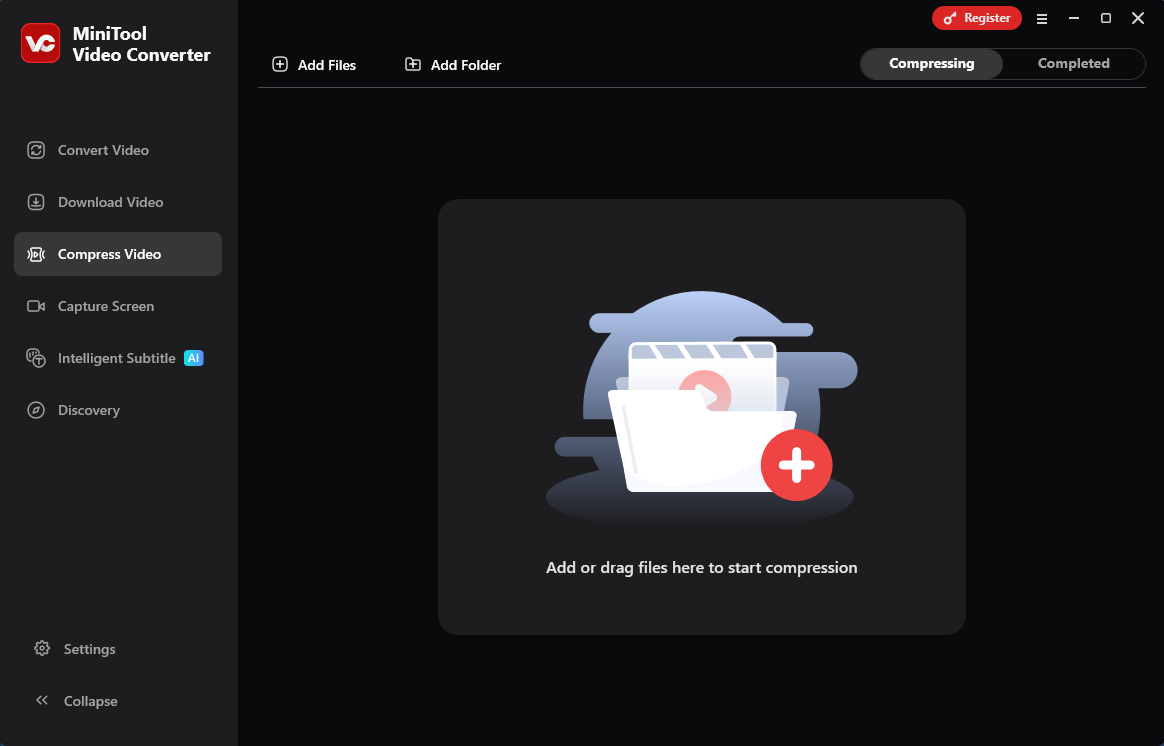
The full screen recorders above support recording high-quality video, which means the recorded video size may be large, taking up a large amount of computer storage space. Therefore, I would like to share with you a practical video compressor to shrink the recorded video size, which is MiniTool Video Converter.
MiniTool Video Converter allows you to compress video to 100%-10% of the original video without quality loss. It also supports batch compression of up to 5 tasks. In addition, MiniTool Video Converter enables you to fine-tune advanced parameters, such as resolution, frame rate, bitrate, and more.
MiniTool Video ConverterClick to Download100%Clean & Safe
Bottom Line
This article shares 3 recorders to record full screen. The native Xbox Game Bar on Windows is the easiest to use, requiring no software downloads or browser access. MiniTool Screen Recorder is a comprehensive recorder that offers various customizable options. Free Online Screen Recorder is an ideal online recording choice.
If you have any questions about MiniTool Screen Recorder or MiniTool Video Converter, feel free to contact us via email at support@minitool.com for help. You can also message me directly at X at any time. I will reply as soon as possible.