This article introduces the 6 best Microsoft screen recorders for beginners and professionals, including MiniTool Screen Recorder, Xbox Game Bar, Snipping Tool, etc. Additionally, you'll learn how to effortlessly capture the screen with these recorders and optimize your recorded content.
In today's digital age, screen recording has become an indispensable everyday skill. Whether you're an instructor needing to capture classroom content or a gamer eager to share thrilling moments, a reliable screen recorder is essential. This article provides Windows users with selection criteria for Microsoft screen recorders, a list of recommended tools, and a detailed guide to screen recording.
What Makes a Good Microsoft Screen Recorder
For Windows users, finding a screen recording tool that meets their needs within the vast Microsoft ecosystem can be quite challenging. Therefore, this chapter specifically outlines the core features that a high-quality Microsoft screen recorder tool should possess for your reference, helping you easily and quickly find the tool that best suits your needs.
#1 Ease of Use
The excellent recorder’s interface should feature a clean and intuitive layout design, allowing you to quickly start screen recording without spending time learning the features. This not only saves time but also boosts productivity.
#2 Recording Flexibility
The best Microsoft screen recorder should also meet your diverse needs. For instance, it should support full-screen recording, custom region recording, or webcam capture. Additionally, recording microphone audio and system audio are essential features. These capabilities enable you to create personalized videos tailored to your specific requirements.
#3 Modifiable Recording Configurations
A premium Microsoft screen recording tool supports customizable recording settings. You can assign frequently used keyboard shortcuts as recording hotkeys or customize the file storage path for your recordings. Furthermore, some exceptional recording tools even allow you to adjust the video frame rate, ensuring smooth playback while controlling file size.
#4 Outstanding Operational Performance
Lightweight screen recording software ensures your computer's performance remains unaffected during extended video captures. This not only enables lag-free recording but also delivers a smooth recording experience.
#5 Additional Features
An excellent Microsoft recording tool should also feature convenient auxiliary functions to enhance your recording experience. For instance, the scheduled recording feature frees your hands, eliminating the need to constantly stare at your computer screen.
The screen annotation tool allows you to effortlessly highlight important content when recording instructional processes, explaining key information, or conducting meetings.
6 Best Microsoft Screen Recorders
Below are six top-rated Microsoft screen recording tools for Windows users, ranging from built-in system software to feature-rich applications, including:
- Xbox Game Bar
- Snipping
- MiniTool Screen Recorder
- Clipchamp
- PowerPoint
- Free Screen Recorder
The following is a detailed explanation of each tool.
#1 Xbox Game Bar
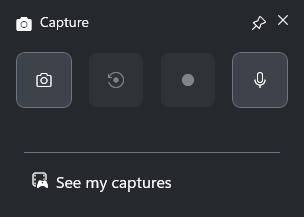
The Xbox Game Bar is a free, built-in overlay tool for Windows 10 and 11 systems, compatible with most PC games. Designed primarily for gamers, it supports features like game recording, screenshots, and chatting with friends. Beyond game recording, the Xbox Game Bar also enables recording of applications and specific windows.
Users can easily initiate recording without leaving their current window by pressing the Windows + G key combination. Additionally, Xbox Game Bar captures both system audio and microphone audio, but users must first enable recording functionality in settings to capture audio from games and other applications.
Pros:
- No software download required.
- Easy to use.
Cons:
- Does not support desktop recording.
- Recording time is limited.
#2 Snipping Tool
Snipping Tool is another built-in application in the Microsoft system that captures screenshots and records screen activity. While primarily known for its screenshot capabilities, it also offers basic recording functionality. Users can choose to record a specific window, the entire screen, a custom area, or a rectangular region.
Additionally, the Snipping Tool features built-in video editing capabilities, allowing users to trim recordings immediately after capture to the desired length. Recorded videos can also be converted directly to GIF format. Its integrated sharing function enables users to send recorded videos to colleagues or friends via email with a single click, thereby boosting work efficiency.
Pros:
- No software download required.
- Supports flexible selection of recording areas.
Cons:
- The recording feature is available only to Windows 11 users.
- Lack of advanced recording features.
#3 MiniTool Screen Recorder
MiniTool Screen Recorder is a free Microsoft screen recorder for Windows, offering professional and advanced recording capabilities. It helps users capture any activity on the screen, such as game footage, live streams, video calls, and online meetings. Users can choose to record the entire screen or a specific area.
It also allows users to record system audio and microphone audio separately or simultaneously. Additionally, MiniTool Screen Recorder supports webcam recording, enabling users to create more engaging video content featuring their faces. Its built-in annotation tools prove particularly useful during screen recording, helping users produce clearer tutorial guides or instructional videos.
What’s more, MiniTool Screen Recorder accommodates personalized needs by allowing users to customize recording parameters, including file storage paths, video quality, frame rate, webcam shape, size, and position settings.
Pros:
- Easy to use.
- No recording time limits.
- No watermark.
- No ads.
- Support recording the screen with a webcam.
- Support annotating the screen while recording.
- Support desktop recording.
- Support 4K HD recording.
- Provide multiple recording frame rates.
Cons:
- Software download required.
#4 Clipchamp
Clipchamp is also the best Microsoft screen recorder. Users can capture their screen via a web browser or the desktop application. It supports recording individual application windows, the entire screen, and camera footage. Clipchamp also allows users to record system audio and microphone audio simultaneously or separately.
Additionally, Clipchamp integrates convenient video editing features, allowing users to trim footage, apply filters, add annotations, or utilize AI-powered automatic video captioning immediately after recording. What’s more, users can also save recorded videos directly to the cloud or local hard drives as needed, with no watermarks added to any recorded content.
Pros:
- No watermark.
- Offers multiple recording area options.
- Provide a built-in video editing tool.
Cons:
- Each screen recording session is limited to thirty minutes.
- Unable to export 4K HD videos for free.
#5 PowerPoint
Although PowerPoint is a presentation application developed by Microsoft, it features powerful built-in screen recording capabilities. Users can easily initiate screen recording without leaving the application. This feature supports free selection of recording areas and is compatible with audio recording.
Additionally, during recording, users can utilize its basic drawing tools to annotate the screen. After recording, videos can be directly embedded into the slides, helping users create more polished presentations. Therefore, for those who frequently use PowerPoint for teaching or presentations, its built-in recording feature has become an indispensable tool.
Pros:
- No watermark.
- Support annotating the screen while recording.
- Support a built-in video editing tool.
Cons:
- Lack of advanced annotation tools.
#6 Free Screen Recorder
Free Screen Recorder is a completely free Microsoft screen recording tool. It supports capturing various screen activities in full-screen or specific region recording modes, while also supporting microphone and system audio recording.
To prevent audio loss, the system will automatically save audio files to the user's specified computer folder at set intervals during recording. Additionally, Free Screen Recorder offers webcam recording functionality, enabling users to capture polished videos featuring their own faces. All recorded content remains completely watermark-free.
Pros:
- No watermark.
- No recording time limits.
- Support recording the screen with a webcam.
Cons:
- Does not offer video quality output options.
- The user interface is complex.
- Lack of annotation functionality.
- Software download required.
All in all, each of the six Microsoft screen recording tools mentioned above has its own distinct advantages. Whether you're a beginner or a professional, you can select the most suitable solution based on your specific needs and skill level to accomplish your screen recording tasks.

How to Record Screen with a Microsoft Screen Recorder
After reviewing the features of each Microsoft screen recording tool, this section will guide you through how to use Microsoft screen recorders to achieve zero-delay recording on Windows. While each tool offers unique capabilities, their operational workflows generally follow a similar pattern. Therefore, we will demonstrate the process using the well-balanced MiniTool Screen Recorder as our example.
Here is a step-by-step screen recording guide for your reference.
Step 1: Download and Install MiniTool Screen Recorder
MiniTool Screen RecorderClick to Download100%Clean & Safe
Click on the button above to download MiniTool Screen Recorder. Then follow the prompts to install it on your computer.
Step 2: Customize the Recording Configuration
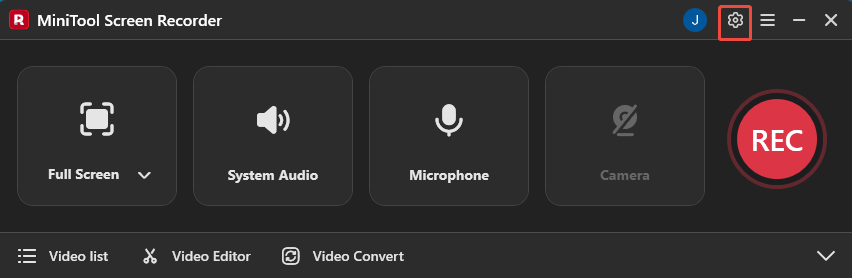
1. Launch MiniTool Screen Recorder after you install it on your computer.
2. Click on the Settings icon in the upper-right corner of the main interface to enter the Settings interface.
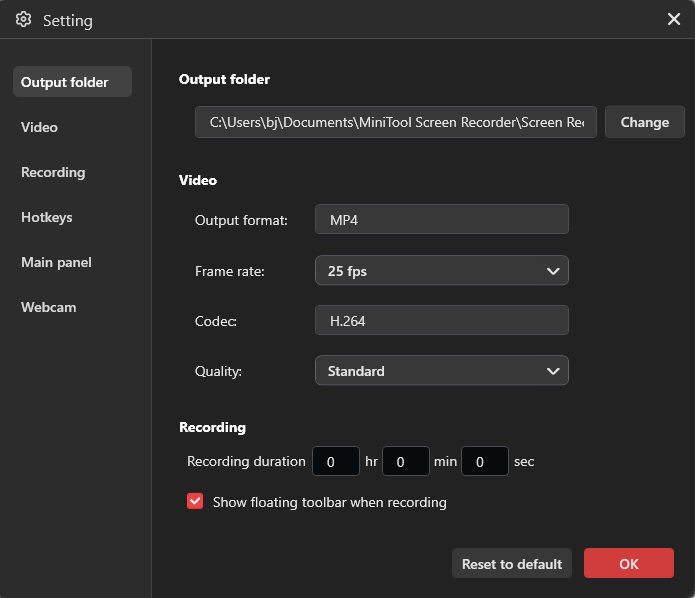
3. In the Settings interface, you can modify the output path for recorded files, customize recording hotkeys, and select parameters such as video frame rate, quality, webcam size, position, and shape.
4. Finally, when you've finished configuring the parameters, don't forget to click the OK button in the lower-right corner to save your changes.
Step 3: Select the Recording Area
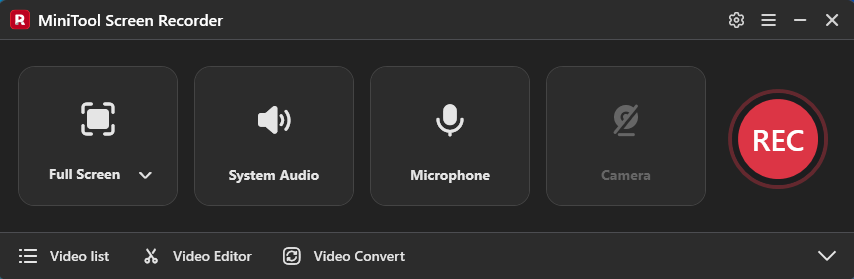
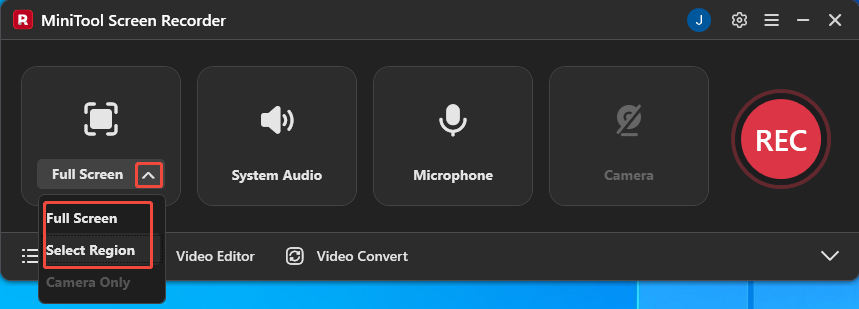
1. In the main interface, expand the drop-down menu of the Full Screen option.
2. Then, click on the Full Screen option to record the entire screen. Or, click on the Select Region option to record the specific area.
Step 4: Control the Audio Recording
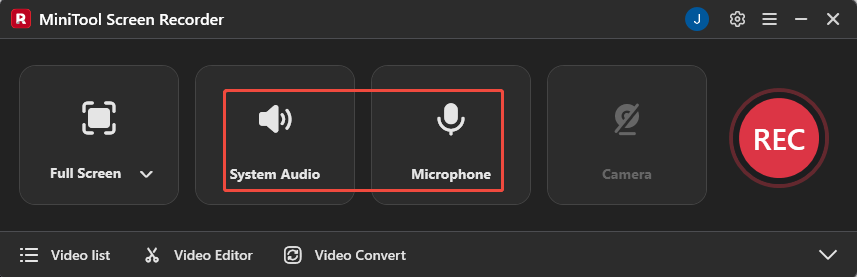
You can click on the System Audio option or the Microphone option to determine whether to record the audio from the system or the microphone.
Step 5: Control the Camera Recording
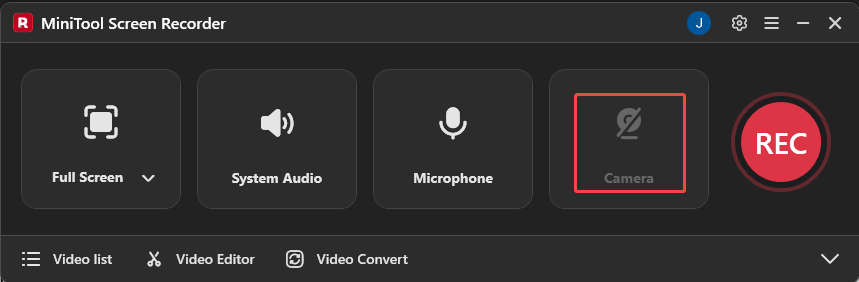
If you want to record the screen with yourself, simply click on the Camera icon on the right.
Step 6: Start and End Recording
1. Prepare the content you want to record.
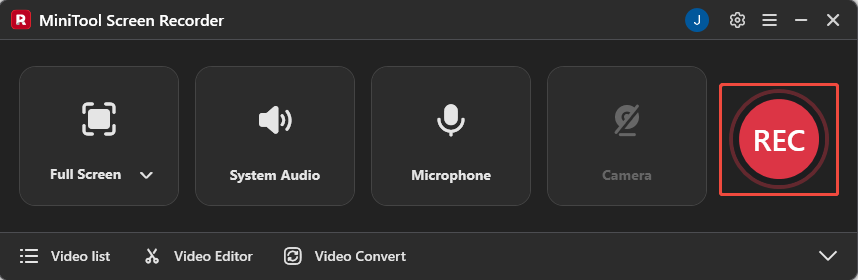
2. When you want to start the recording process, click on the REC button on the right side of the main interface or press the F6 key. After a 3-second countdown, it will automatically start.
3. During the recording process, you can press the F9 key to pause or resume the recording process.
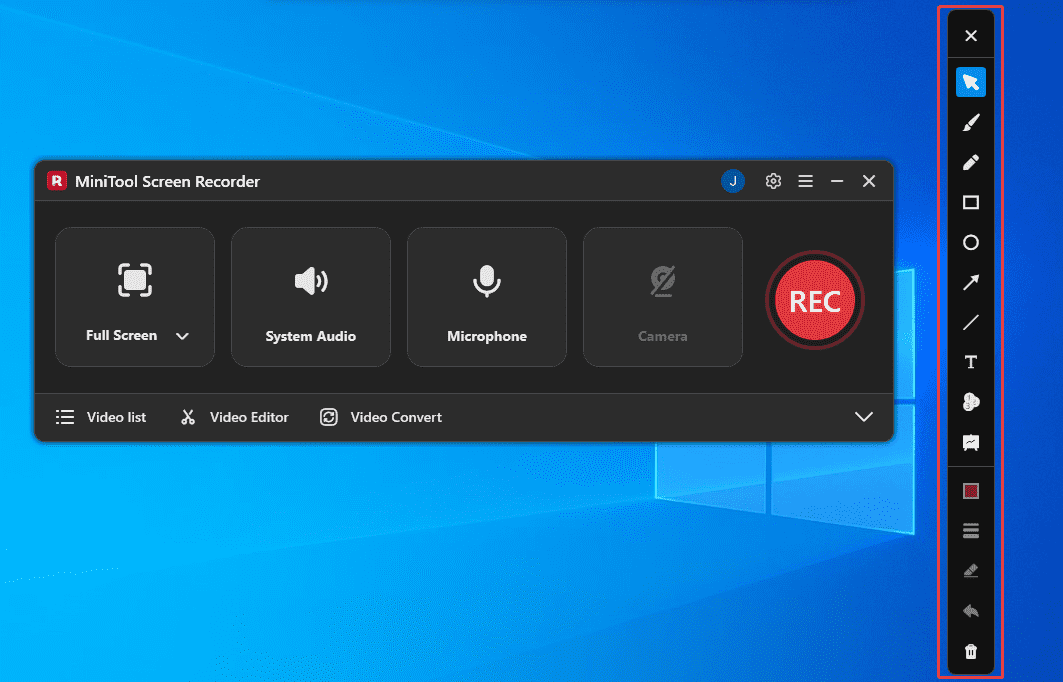
4. If you wish to annotate key information during screen recording, you can select the appropriate annotation shapes from the drawing tool panel on the right side of the screen.
5. To end the recording process, press the F6 key again.
Step 7: Check the Recorded Video
1. Once the recording is complete, you will be automatically redirected to the Video list section.
2. Then you can click on the folder icon to locate the recorded video.

Bonus: Edit Your Recordings
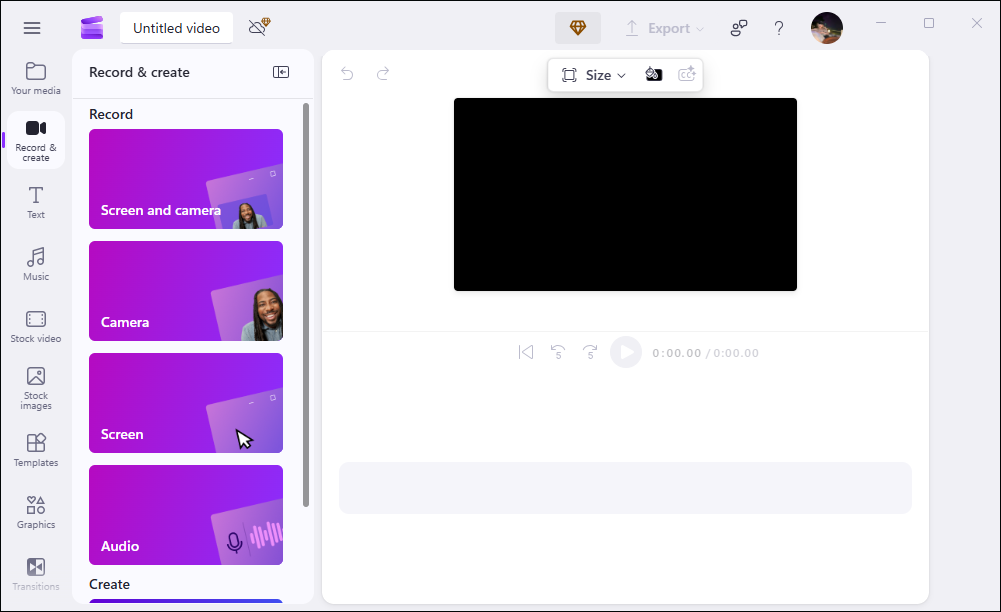
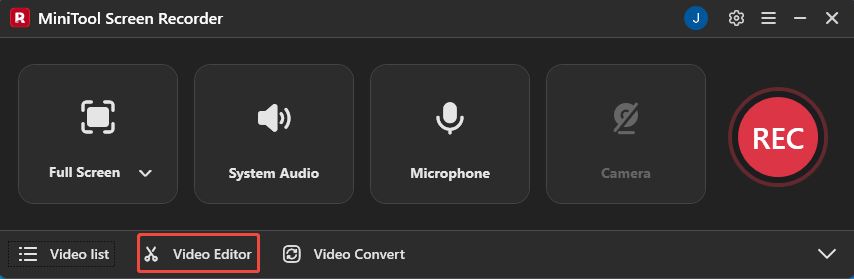
Whether you're a short-video creator sharing content on social media platforms or simply recording tutorials or demo videos, further optimizing your recordings can make your work look more professional. Now, click the Video Editor option at the bottom of the MiniTool Screen Recorder main interface to get the professional video editing tool.
Alternatively, you can directly click the button below to get this video editing tool.
MiniTool MovieMakerClick to Download100%Clean & Safe
This video editing tool offers trimming and cutting functions to help you effortlessly remove lengthy segments from recorded videos. It also features a rich built-in media library containing transitions, effects, filters, text, and more. You can add titles, subtitles, or seamless transitions to create smooth video connections.
Additionally, if your screen recording tool lacks annotation features, use this editor's arrows, lines, circles, and other elements to guide viewers' attention. What’s more, it also offers multiple output formats for you to select from, including MP4, AVI, MKV, MOV, MP3, and more.
Final Words
This article provides 6 reliable Microsoft screen recorders. You can choose the most suitable solution based on your needs and skill level. For basic recording needs, we recommend using the Xbox Game Bar, Snipping Tool, or PowerPoint. If you require professional-grade recording features and a smoother recording experience, try MiniTool Screen Recorder, Clipchamp, or Free Screen Recorder.
If you encounter any issues while using MiniTool Screen Recorder or MiniTool MovieMaker, you can reach out for assistance by emailing us via support@minitool.com or sending a message on X.