How to record a Webex meeting? As a host, you can use Webex's built-in recording feature. As a participant without recording permissions, you'll need to use a third-party screen recorder or a Windows built-in recorder, MiniTool Screen Recorder and Xbox Game Bar. This article will detail both recording methods, along with optimization strategies for the recordings.
What Is Webex
Webex is a versatile cloud-based collaboration suite compatible with Windows, iOS, and Android. It integrates multiple features such as calling and online meetings, enabling users to engage in real-time chats and conferences as long as their devices are connected to the internet.
Additionally, Webex incorporates screen recording functionality within its meeting features, allowing users to capture meeting content for later review.
Why Record a Webex Meeting
Recording Webex meetings not only serves as an archival function but also delivers multiple benefits:
#1 Save Time
Compared to manually taking notes during meetings, recording sessions saves time and boosts productivity. You no longer need to rely on short-term memory for handwritten notes. After recording, replay the audio to review key elements and highlights of the meeting quickly.
#2 Clarify Responsibility Assignment
When meetings involve critical legal regulations or contractual terms and carry risks of conflicting interests, meeting recordings can clearly document proceedings and establish accountability. This practice significantly reduces misunderstandings and disputes among participants.
#3 Expand Content Library
Recorded Webex meeting videos can be converted into multiple formats for reuse. For example, transcribing meeting content into text can be used to write articles or press releases; converting it into audio enables the creation of podcast episodes.
#4 Enhance Team Collaboration Efficiency
When employees with conflicting schedules cannot attend meetings, they can review meeting progress and access specific details anytime through meeting recordings. This approach effectively boosts overall team collaboration efficiency.
#5 Convert into Learning Resources
Archive and categorize recorded Webex meetings to build a searchable knowledge base. When team members encounter similar issues in future projects, they can quickly reference past solutions. Additionally, recorded meetings can also serve as training materials for new members, helping them rapidly acquire business knowledge and work skills.
Webex Recording Permission Requirements
Before attempting to record a Webex meeting, it is essential to understand its recording rules. Webex recording rules primarily involve two factors: account type and participants.
- Account Type: While Webex offers recording functionality for all account types, free users can only record on their computer and save files to their computer's local disk. Users who upgrade to the paid version can record both locally on their computer and in the cloud, with the option to save recordings to their local disk or cloud storage.
- Participants: Webex assigns recording permissions based on participant roles. Meeting hosts have full control over meeting functions. By default, participants cannot use Webex's built-in recording feature.
How to Record a Webex Meeting
As described in the recording permissions section above, your role in the meeting directly determines who controls recording permissions. Therefore, this chapter will explain how to record a meeting in Webex separately for hosts and participants.
Record a Webex Meeting as a Host
As the meeting host, you can directly use Webex's built-in recording feature. Below are instructions for paid users to record meetings in the cloud and locally as a host.
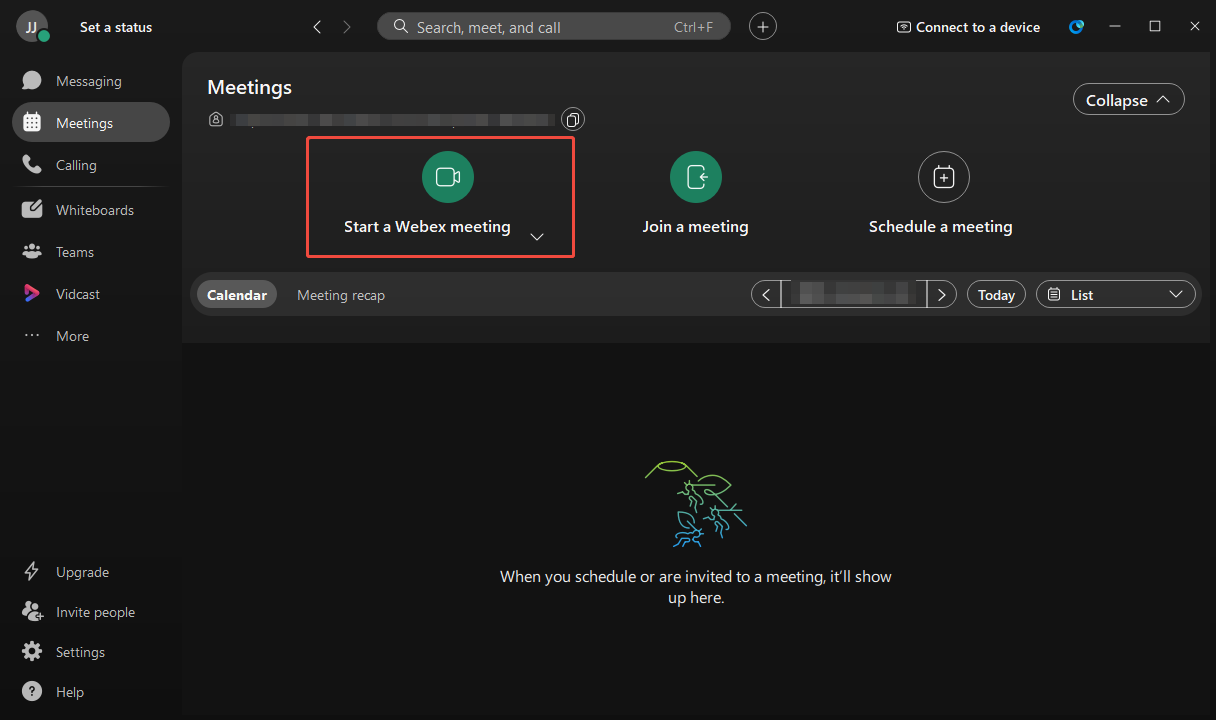
Step 1: Start a Webex Meeting
Launch Webex and click on the Start a Webex meeting option in the main interface.
Step 2: Select the Recording Mode
1. Click on the Record button in the bottom menu bar.
2. Expand the drop-down menu of Recording options at the bottom of the new pop-up window.
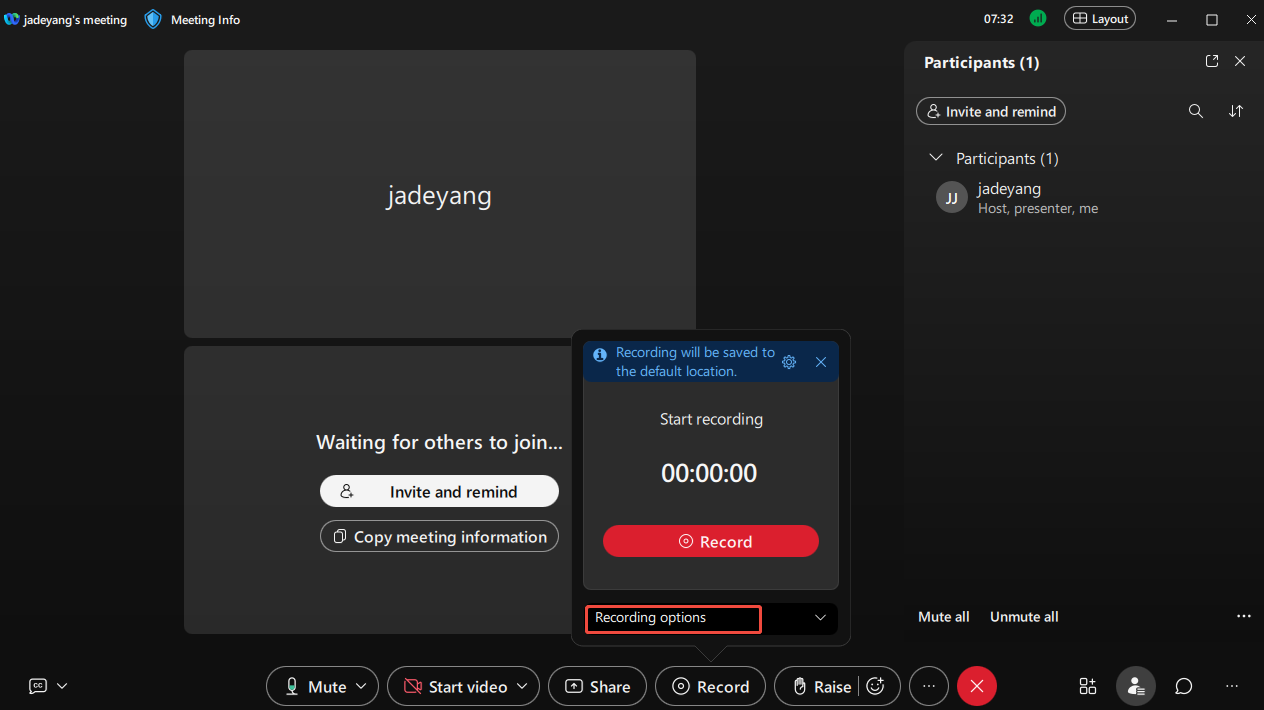
3. Then you can select the Record in the cloud option to enable the cloud recording mode. Alternatively, if you wish to record locally, select the Save to my computer option.
Step 3: Start and End Recording
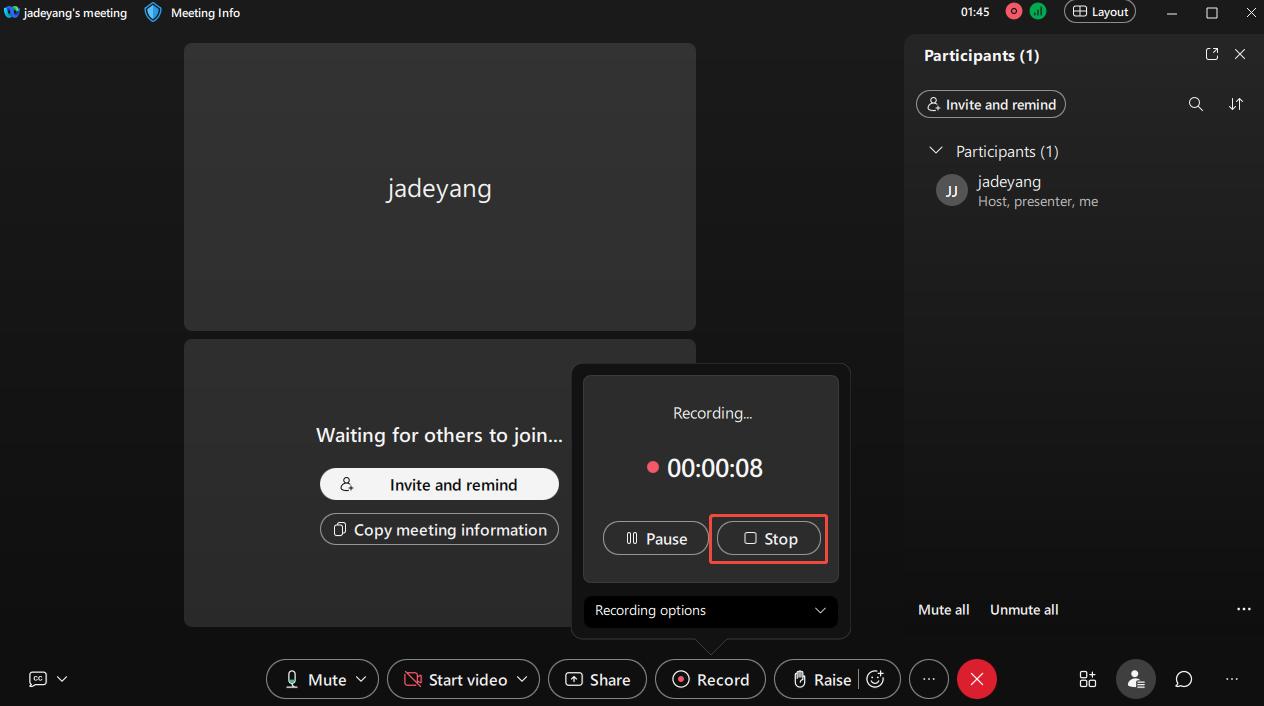
1. When you want to start recording the Webex meeting, click on the red Record button in the pop-up window.
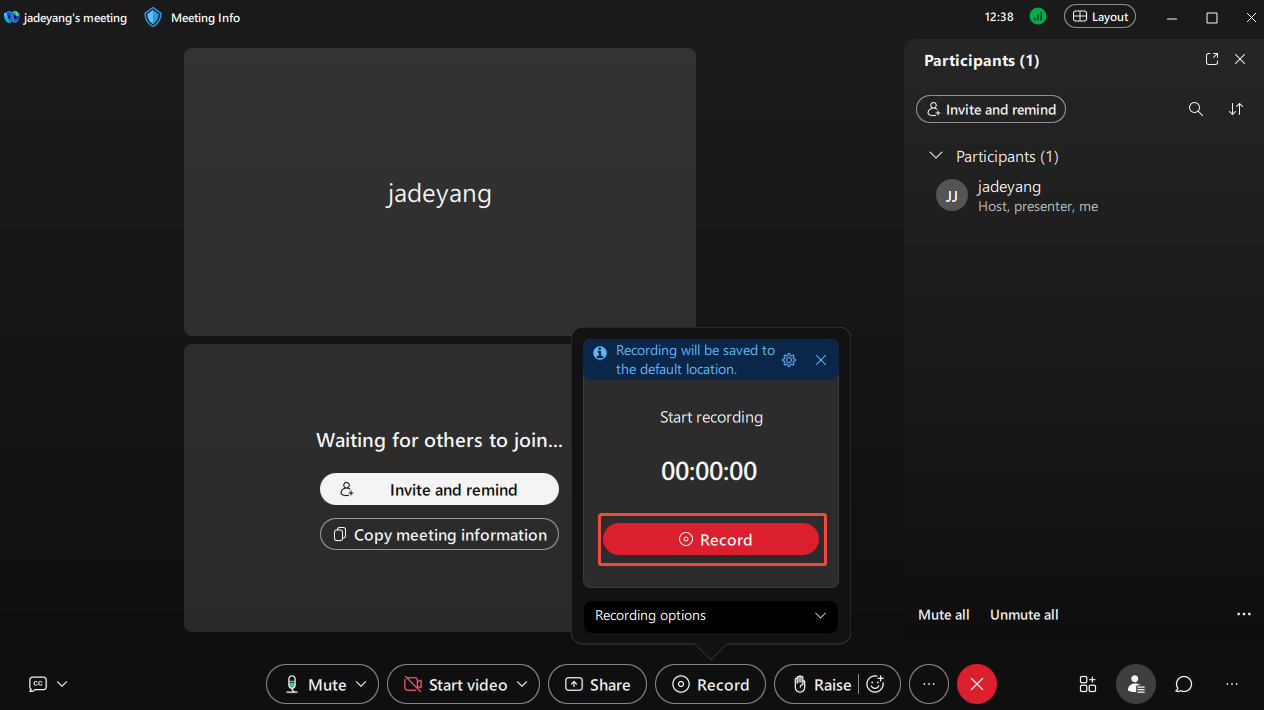
2. To end the recording process, click on the Stop button in the small window. After you end the meeting, the recording file will be automatically saved to the cloud or your local computer disk.
Step 4: Check the Recorded Webex Meeting
1. If you recorded your session in the cloud, you can log in to the Webex site and view the recorded video under the Recordings option in the left-hand menu bar.
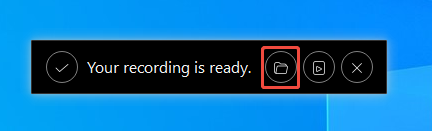
2. If you choose to record locally, a small banner will automatically appear after the meeting ends, and then you can click the folder icon to view the recorded Webex meeting video.
Record a Webex Meeting as a Participant
If you are joining the meeting as a participant, the record button will not appear. However, you can still capture meeting content using a reliable third-party screen recording tool or a Windows built-in recorder. Below is a detailed guide on how to record a Webex meeting as a participant:
#1 Use Xbox Game Bar
A built-in overlay feature in Windows, the Xbox Game Bar, makes you easily record on Webex. Although originally designed for gamers, it also supports capturing other software or windows. Now you can try recording a Webex meeting by following these steps:
Step 1: Start a Webex Meeting
Step 2: Open the Xbox Game Bar
Press the Windows + G key to launch the Xbox Game Bar.
Step 3: Enable Audio Recording Permission
1. By default, the Xbox Game Bar only enables game audio recording permissions. Therefore, you also need to enable recording permissions for other programs.
2. Click the Settings button on the upper-right side of the main panel, then select the More settings option.
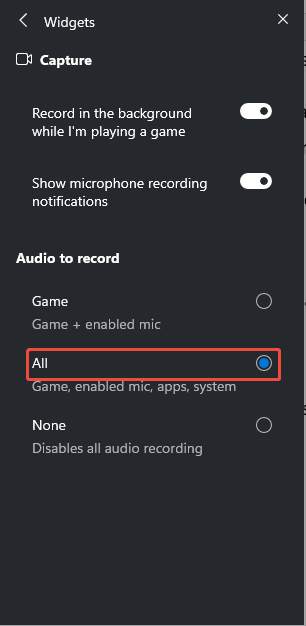
3. Navigate to the Widgets module, then check All options under Audio to record section to enable audio recording from other applications.
Step 4: Enable the Recording Mode
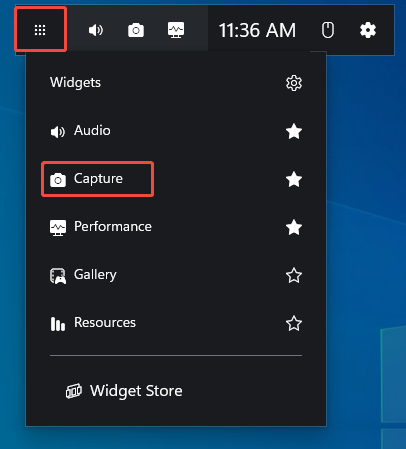
Click on the Widget Menu icon in the main panel and select the Capture option to enter the Capture panel.
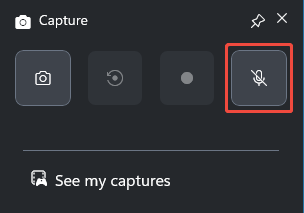
Step 5: Control the Audio Recording
In the Capture panel, click on the Microphone icon to enable the audio recording feature. Or, you can press Windows + Alt + M key on your keyboard to record the audio during the meeting process.
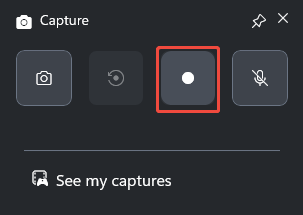
Step 6: Start and End Recording
1. To start recording the Webex meeting, click on the Start recording icon or press the Windows + Alt + R key on your keyboard.
2. To end the recording process, press Windows + Alt + R again.
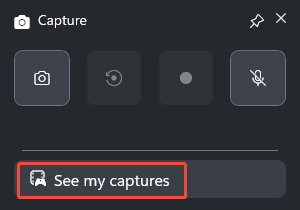
Step 7: Check the Recorded Webex Meeting
Finally, you can click on the See my captures option to check the recorded Webex meeting.
Overall, the Xbox Game Bar can handle basic recording needs. However, if users require advanced features during Webex recordings, such as screen annotation or unlimited recording duration, they will need to utilize more professional third-party screen recording tools.
#2 Use MiniTool Screen Recorder
For users seeking more advanced recording features, MiniTool Screen Recorder is the ideal choice. This free professional screen recording tool, designed specifically for Windows users, lets you record either the entire screen or a specific area, depending on your needs. It also allows users to record system audio and microphone audio separately or simultaneously.
Additionally, MiniTool Screen Recorder supports webcam recording, allowing users to create more engaging video content by incorporating their facial expressions. Its built-in annotation tools are particularly suited for tutorial creators, allowing them to highlight key information with graphical elements during recording.
It's worth noting that users can also preset recording duration, change recording shortcut keys, and adjust camera configuration parameters. All recorded content is watermark-free and unrestricted by duration. Now, you can check the comprehensive recording guide below to learn how to record a Webex meeting using MiniTool Screen Reorder.
Step 1: Download and Install MiniTool Screen Recorder
Click on the button below to download MiniTool Screen Recorder on your computer. Then follow the prompts to install it.
MiniTool Screen RecorderClick to Download100%Clean & Safe
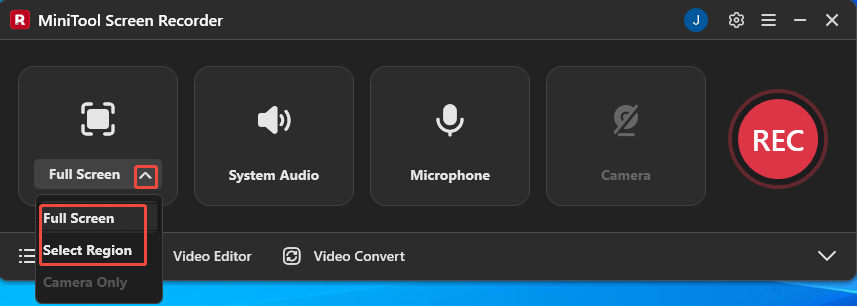
Step 2: Select the Recording Area
1. Launch MiniTool Screen Recorder after you install it on your PC.
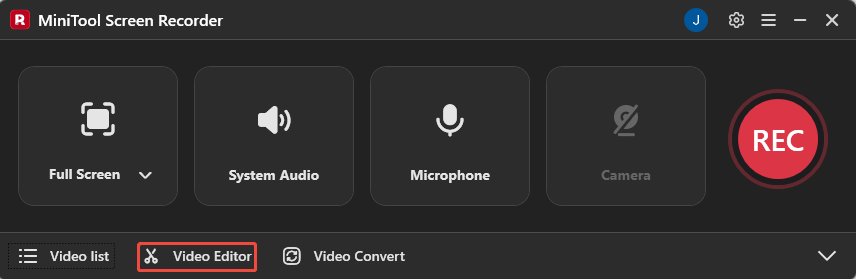
2. Expand the drop-down menu of the Full Screen option.
3. Then, choose whether to record the entire screen or the specific region based on your needs.
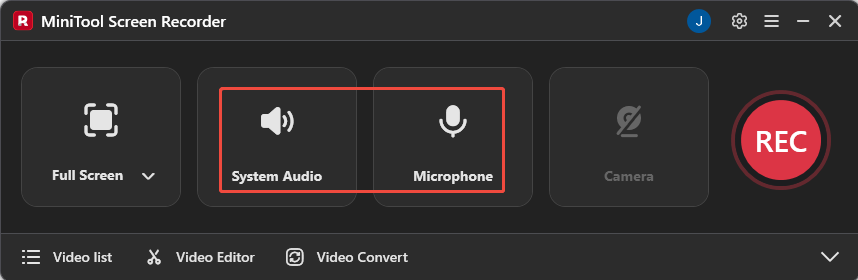
Step 3: Set the Audio Recording
Click on the System Audio icon or the Microphone icon to determine whether to turn on or off the audio recording feature.
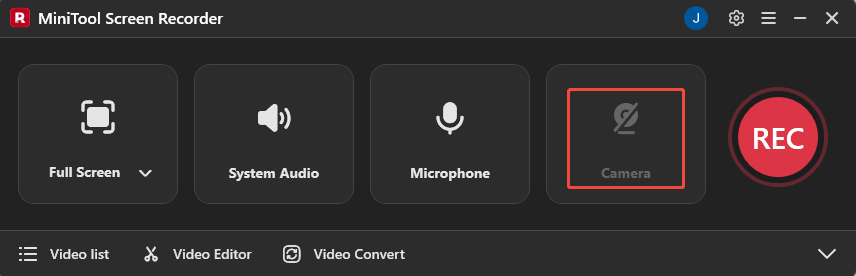
Step 4: Control the Camera Recording
Click on the Camera icon on the right to decide whether to enable the webcam recording functionality.
Step 5: Start a Webex Meeting
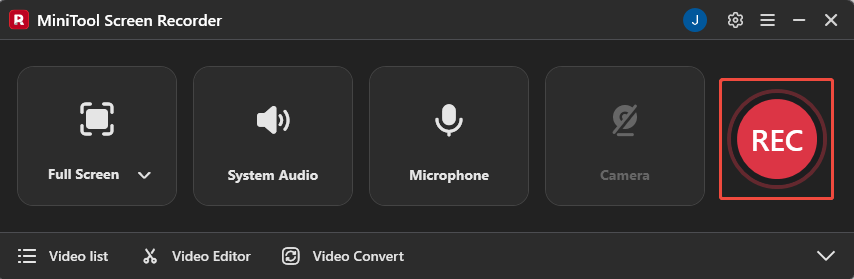
Step 6: Start and End Recording
1. When you want to start recording the Webex meeting, click on the REC button on the right side of the main interface or press the F6 key. After a 3-second countdown, it will start recording.
2. During the recording process, you can click on the F9 key to pause or resume the recording.
3. To end the recording process, press the F6 key again.
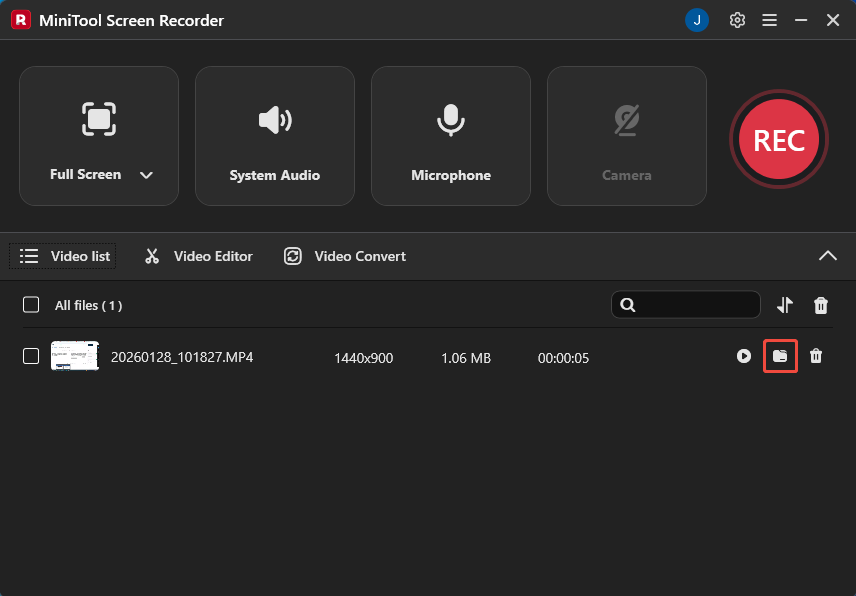
Step 7: Check the Recorded Webex Meeting
After the recording is complete, the system will automatically redirect you to the Video list section. On this page, you can click the folder icon on the right side of the recorded Webex meeting video to view its storage location.
Now that you're familiar with the two methods for recording Webex meetings as a participant, if you need to utilize more advanced features during the recording process, MiniTool Screen Recorder offers an exceptional professional-grade solution.
How to Edit Your Webex Meeting Recordings
Recorded meeting content often includes awkward silences or sensitive information, which can be transformed into more valuable material through editing. Now, click the Video Editor option at the bottom of the MiniTool Screen Recorder main interface to get the professional video editing tool.
Or, you can directly click the button below to get this video editor.
MiniTool MovieMakerClick to Download100%Clean & Safe
This video editor features trimming and cutting functions, allowing you to remove pauses or irrelevant segments from recorded Webex meetings as needed. You can also split lengthy segments into separate chapters.
Additionally, it's built-in media library offers a wide range of elements, including text, filters, transitions, and effects, allowing you to add subtitles or titles to enhance the professional look of various video themes. What’s more, it supports exporting videos in multiple formats such as MP4, MOV, MKV, WEBM, and GIF.
Conclusion
How to record a Webex meeting? The preceding section provides a detailed explanation and guidance on this issue: Meeting hosts can directly utilize the built-in screen recording feature, while participants without recording permissions can employ the third-party recorder and Windows built-in recorder recommended in this article, Xbox Game Bar and MiniTool Screen Recorder.
Additionally, this article offers video optimization strategies to help you efficiently reuse meeting content. If you encounter any issues or have suggestions while using MiniTool Screen Recorder or MiniTool MovieMaker, you can reach out for assistance by emailing us via support@minitool.com or sending a message on X.