This article explains how to download Webex recordings on Windows for hosts and participants and how to record a Webex meeting as a participant using a third-party screen recorder, MiniTool Screen Recorder.
Webex, developed by Cisco, is a comprehensive collaboration platform that helps teams connect and collaborate through video meetings, messaging, and file sharing. Once you’ve recorded a meeting, you may wonder how to download the recording to your computer for later review or sharing.
This article provides step-by-step instructions to help you download Webex recordings and record Webex meetings using MiniTool Screen Recorder.
How to Download Webex Recording
Can you download Webex recordings on your computer? Yes, you can. However, the exact steps vary depending on whether you are the meeting host or a participant. The following sections explain each scenario in detail.
Method 1: Download Webex Recordings on Windows as a Host
For Webex free plan users, meeting recordings are automatically downloaded to your local computer after the meeting ends, with no cloud storage available.
During the meeting, click the Record icon to start recording.
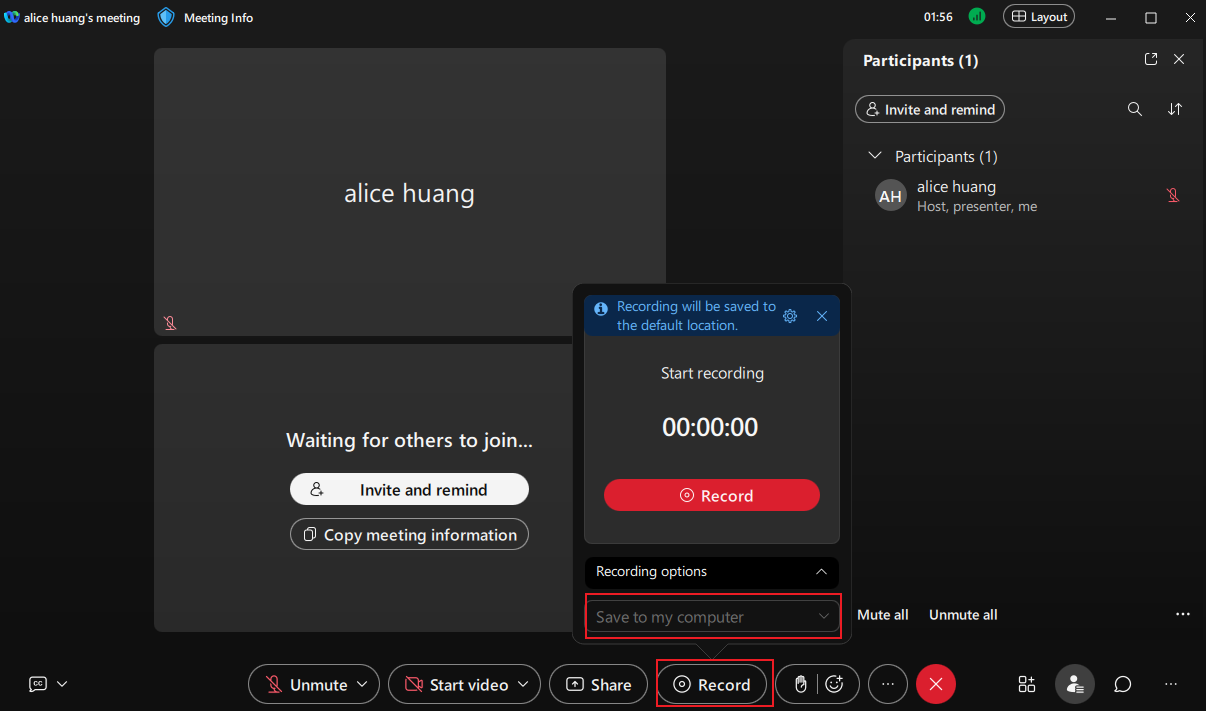
Once the meeting ends, a download notification appears in the lower-right corner of the screen. You can click the Play icon to preview the recording or click the Folder icon to find its saved location.

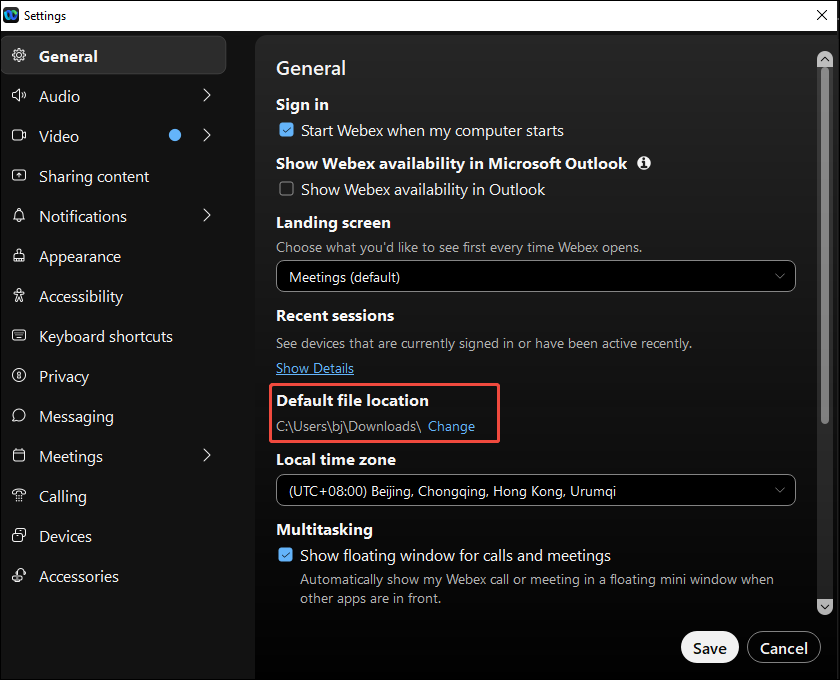
All the recordings are saved in MP4 format in the default folder (C:\Users\Username\Downloads). To change the default save location, click Settings in the left menu of the Webex interface. Under the General section, find Default file location and click Change to adjust the folder.
If you have a paid Webex account, you can choose to save meeting recordings either to the cloud or to your local computer when hosting a meeting from the desktop app. However, if you start a meeting by phone, you can’t record it to the cloud.
For paid users who save recordings to the computer, the video is downloaded after the meeting ends, similar to the free plan. If you choose to save the meeting recording to the cloud, go to the User Hub after the meeting ends and select Recordings from the navigation panel. Click the Download icon next to the recording you want to download. If a disclaimer appears, click Accept to continue.
Method 2: Download Webex Recordings on Windows as a Participant
If you are an invitee or attendee, you can only download Webex recordings using the link shared by the host.
You can select the link in the email sent to you by the host. If you receive a web link to the recording, paste the link into your browser and select Play when the player appears. Select Download to save the recording to your computer. Depending on your organization’s settings, Webex may display a disclaimer each time you download or play a recording. Select Accept to accept the terms and continue.
How to Record a Webex Meeting as a Participant
Participants do not have the right to record a meeting directly in Webex. However, they can use third-party screen recorders to capture the meeting for later viewing. MiniTool Screen Recorder is a reliable option for recording Webex meetings as a participant.
About MiniTool Screen Recorder
MiniTool Screen Recorder is a free screen recorder designed for Windows users. Featuring an intuitive interface and versatile functionality, MiniTool Screen Recorder can meet your expectations for capturing Webex meetings.
MiniTool Screen Recorder comes with a custom region selection. It allows you to select whether record a full screen or a specified region. It also offers flexible control over audio. You can record the system audio and microphone input separately or simultaneously. The custom capture and flexible audio make it easy to record Webex meetings without distractions.
What’s more, MiniTool Screen Recorder enables you to adjust the video frame rate, including 15fps, 20fps, 25fps, 30fps, and 50 fps. You can also customize the video quality, such as original, standard, and high quality. The recording settings ensure the recorded meeting plays smoothly with a professional look.
MiniTool Screen Recorder also includes webcam recording and screen annotation with a login account. With the robust annotation tools, you can add text, highlight important information, and mark step numbers to your recorded meeting.
Detailed Steps to Record a Webex Meeting Using MiniTool Screen Recorder
Follow the steps below to record a Webex meeting as a participant with MiniTool Screen Recorder.
Step 1: Download and Install
Click the button below to download MiniTool Screen Recorder. Then, follow the on-screen instructions to complete the installation.
MiniTool Screen RecorderClick to Download100%Clean & Safe
Step 2: Select a Custom Recording Region
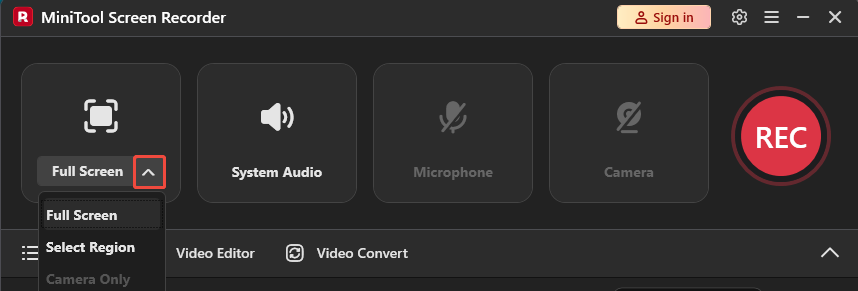
Open MiniTool Screen Recorder to enter its main interface. This software defaults to capturing the full screen. If you want to capture the meeting window only, click the Arrow icon next to the Full Screen option and choose Select Region. You can drag the red dashed rectangle to choose your desired recording area.
Step 3: Check Audio
By default, the microphone input and the system audio are recorded with the screen.
Step 4: Adjust Other Settings
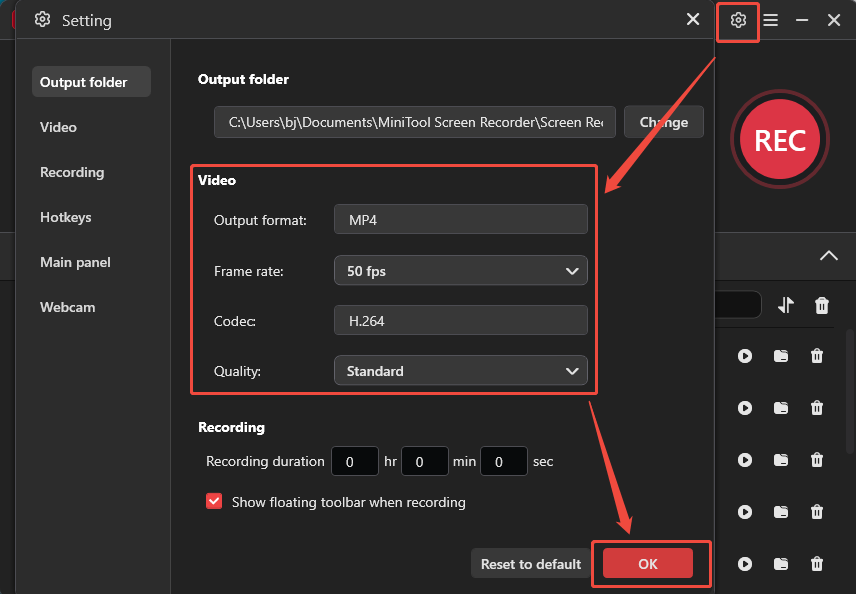
For more advanced settings, click the Gear icon in the upper-right corner of the interface. Next, you can select a desired frame rate and video quality. You can also enter a precise value for the recording duration. And the application will stop and save the recording when it reaches the scheduled time. Once all settings are done, click OK to save them.
Step 5: Start Recording and Add Annotation
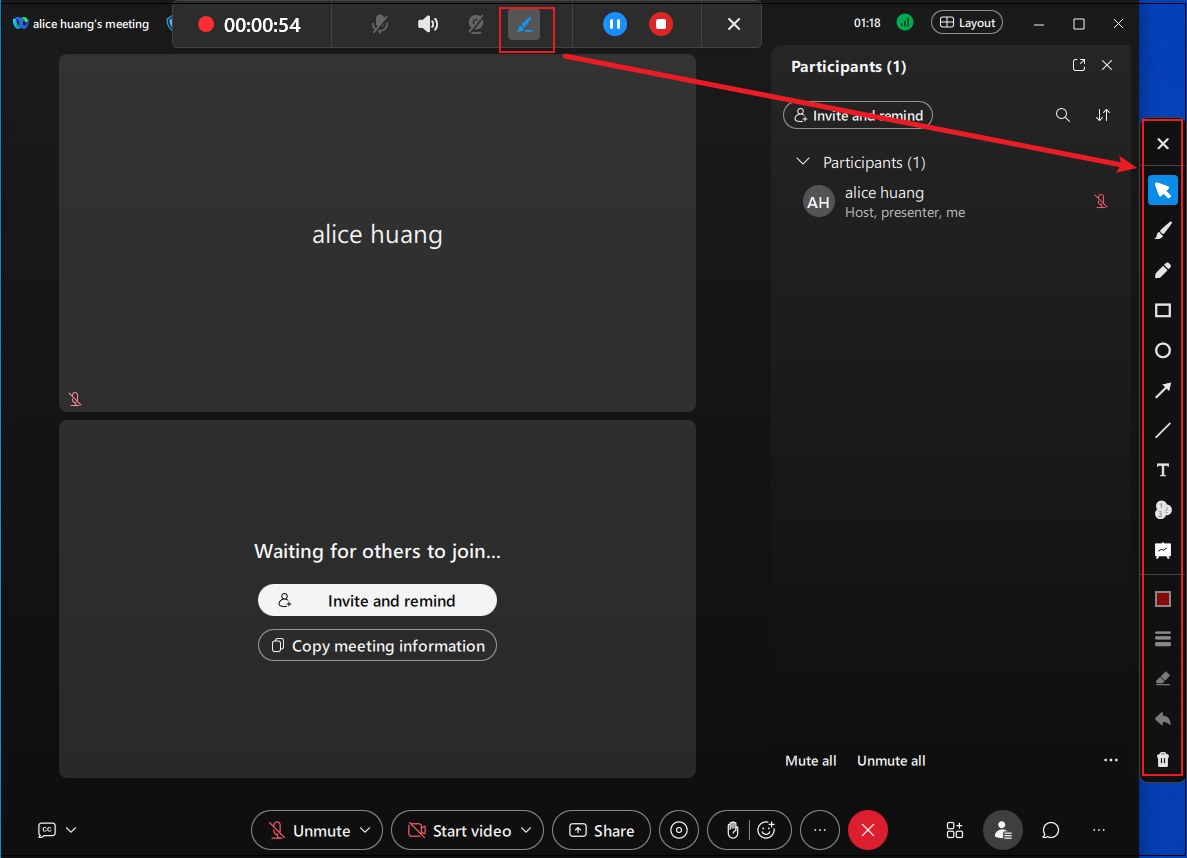
Click the REC button. The recording will start after a 3-second countdown. Alternatively, you can press the F6 Key on your keyboard to start recording. To add annotations, click the Pen icon on the floating bar to open the annotation panel in the right column of your computer. Here, you can click your preferred tool to draw or add content for better review. Press F9 to pause and resume the recording when you need to skip unnecessary parts.
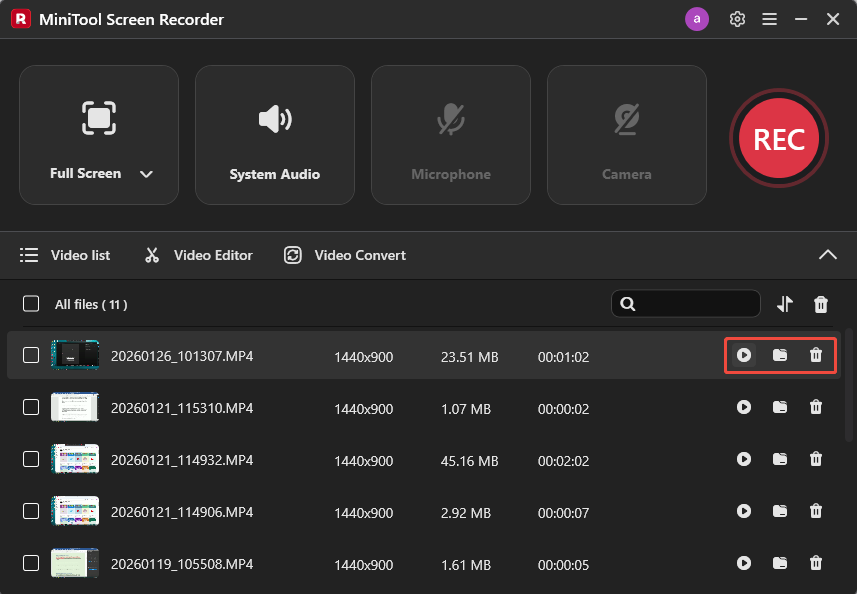
Step 6: End and Check Recording
Click F6 again to stop the recording. Then, the meeting recording will appear at the top of the video list in the MiniTool Screen Recorder interface. You can click the Play icon to watch it or click the Folder icon to find its location on your computer. Click the Delete icon to remove it from your computer.
As you can see, recording Webex meetings using MiniTool Screen Recorder is easy and worth trying.
Conclusion
This post demonstrates how to download Webex recordings on Windows. Whether you are a host or a participant, there are effective ways to achieve the goal. Hosts can access local or cloud recordings, while participants rely on shared links to download. The participants can also record the Webex meetings using third-party screen recorders like MiniTool Screen Recorder.
If you have any questions or suggestions about MiniTool Screen Recorder, please don’t hesitate to email us at support@minitool.com.