This article explains how to use Loom and recommends 6 of the best Loom alternatives that offer an exceptional video capture experience, including MiniTool Screen Recorder, Xbox Game Bar, Snipping Tool, Clipchamp, Camtasia, and Zight.
Loom is a screen recording and communication tool that I use frequently. It allows users to record screen, webcam footage, and audio, sharing the recordings instantly with team members. In addition, Loom includes built-in editing tools, enabling users to trim and edit their recordings directly within the software.
How to Screen Record with Loom
Here is an effective workflow for recording with Loom that I’ve developed based on my own experience.
Step 1: Launch Loom
Open Loom on the computer.
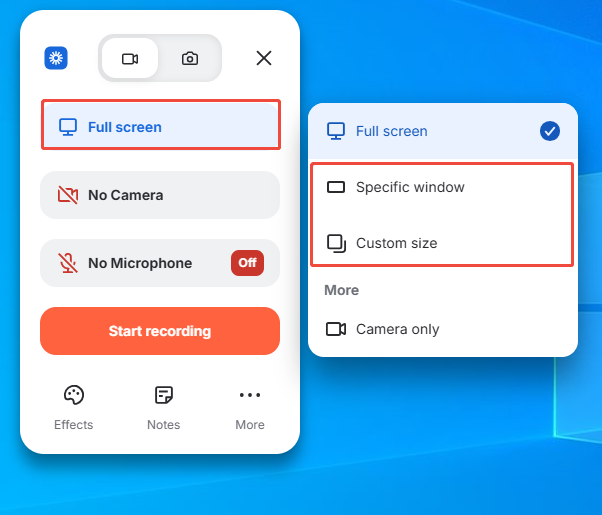
Step 2: Choose the Recording Area
Loom defaults to recording the entire screen. To capture a particular window or area, click the Full Screen option. Then choose the Specific window or Custom size option in the menu on the right.
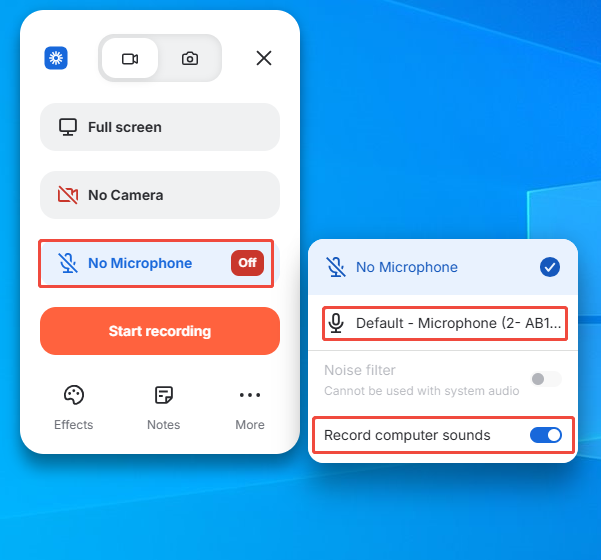
Step 3: Control the Audio
1. To record the microphone audio and system audio, click the No Microphone option.
2. Then, choose the Default-Microphone option and check the Record computer sounds option in the menu on the right.
Step 4: Start and End Recording
1. To start the recording process, click the Start recording option. After a 3-second countdown, open the target content.
2. To end the recording, click the Stop icon in the floating bar.
Why I Started Looking for Loom Alternatives
After using Loom for a month, I have to admit that, as an all-in-one tool, it excels at facilitating team collaboration. However, I’ve found that the free version has too many restrictions on recording: individual recordings are limited to 5 minutes, and there’s a cap of 25 videos in total.
So, I decided to upgrade to the commercial version, only to find that it was quite expensive: $18 per user per month. Moreover, I frequently encountered situations where Loom would freeze while I was using it, or cause other software on my system to freeze as well. As a result, I started looking for alternatives to Loom that offered better performance at a lower price.
Top 6 Alternatives to Loom
After testing more than a dozen screen recording tools, I’ve narrowed it down to the 6 best Loom alternatives that I believe are worth recommending:
- MiniTool Screen Recorder
- Xbox Game Bar
- Snipping Tool
- Microsoft Clipchamp
- Camtasia
- Zight
Here are the specific reasons why I chose them.
Option 1: MiniTool Screen Recorder
After trying out various options, MiniTool Screen Recorder has become my go-to tool to replace Loom, whether for work or everyday use.
Why I Choose MiniTool Screen Recorder:
- No Watermarks and No Time Limits: MiniTool Screen Recorder does not add watermarks to recorded videos. Furthermore, unlike Loom, which requires a paid subscription to remove recording time limits, this software allows me to record for unlimited durations for free.
- Multiple Recording Area Options: MiniTool Screen Recorder can meet the recording needs of most users, as it not only supports full-screen and window recording but also allows me to customize the recording area.
- Flexible Audio Control: MiniTool Screen Recorder gives me complete control over audio recording. I can choose to record system audio and microphone audio simultaneously or separately.
- Support Camera Recording: With MiniTool Screen Recorder's webcam recording feature, I can overlay my face on the screen in picture-in-picture mode while recording.
- Provide Annotation tools: During recording, I can use the built-in annotation tools to draw rectangles, circles, and arrows in real time, or add text. This is particularly useful when recording tutorial videos or noting down key points during meetings.
- Support Preset Recording Duration: I am delighted to find that MiniTool Screen Recorder allows me to set the recording duration before I start recording. This has been a great help in overcoming my habit of frequently forgetting to stop the recording.
Limitations of MiniTool Screen Recorder:
MiniTool Screen Recorder is currently only available to Windows users.
How to Screen Record with MiniTool Screen Recorder
Step 1: Download and Install MiniTool Screen Recorder
Click the button below to download and install MiniTool Screen Recorder on the PC.
MiniTool Screen RecorderClick to Download100%Clean & Safe
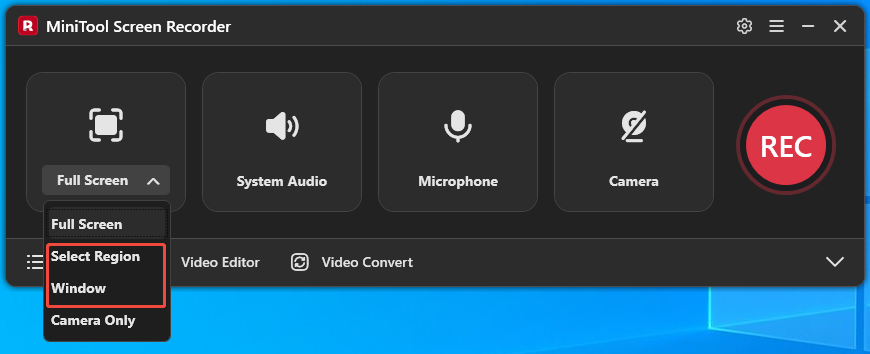
Step 2: Select the Recording Area
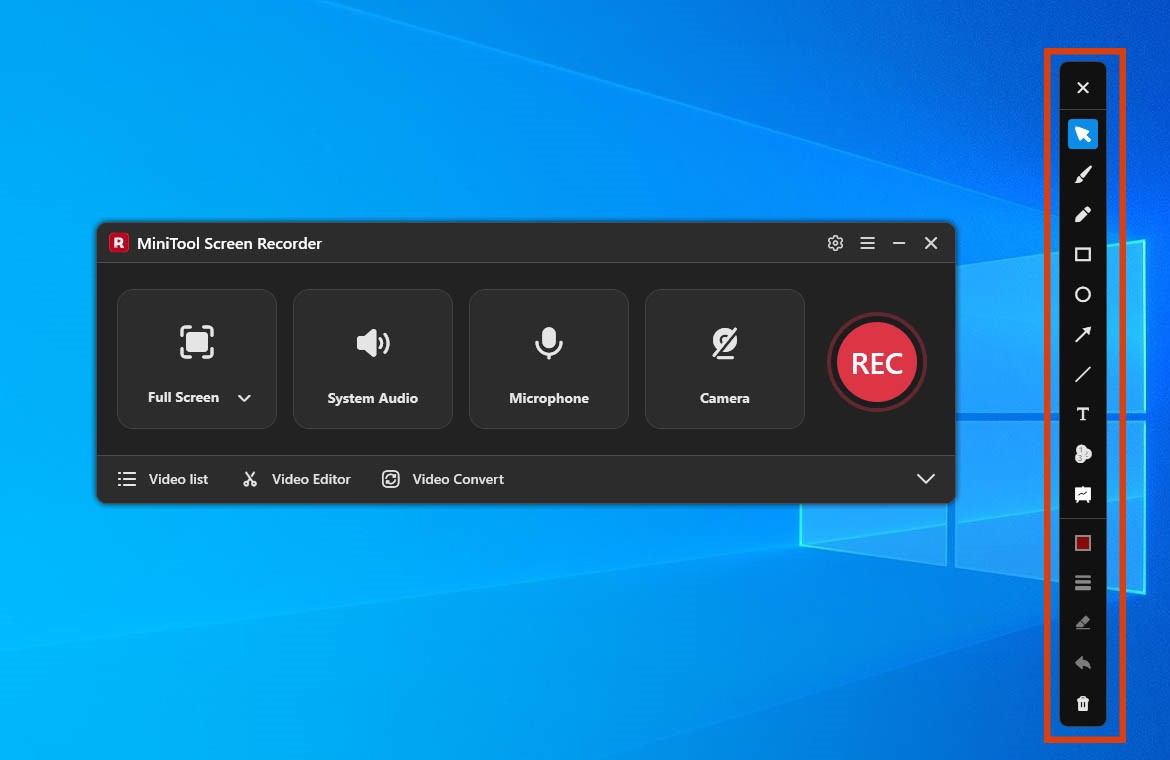
1. Launch MiniTool Screen Recorder.
2. MiniTool Screen Recorder defaults to capturing full-screen. To record a specific area or window, simply expand the dropdown menu next to the Full Screen option and choose the Select Region or the Window option.
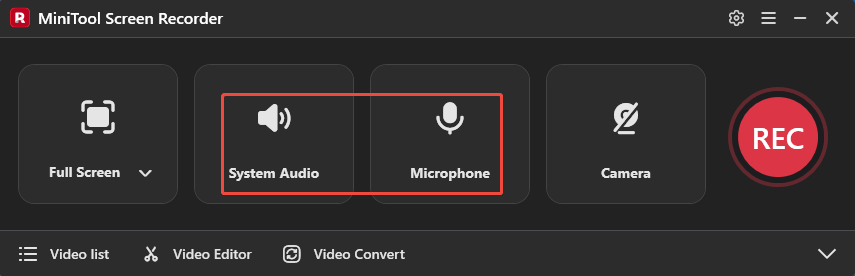
Step 3: Control the Audio
By default, the system audio and microphone audio recording features are enabled. To disable these features, click respectively on the System Audio icon and the Microphone icon.
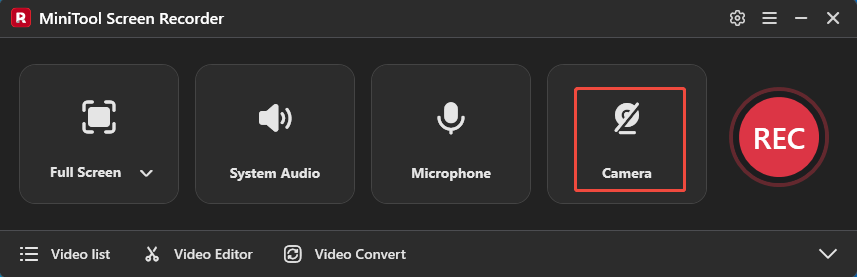
Step 4: Manage the Camera Recording
To record a video with your face, simply click on the Camera icon on the right.
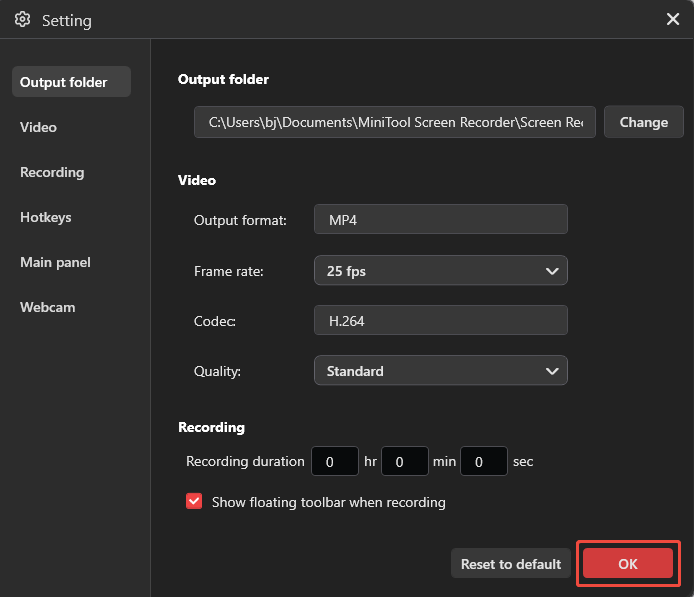
Step 5: Configure Recording Parameters
1. Click on the Settings icon in the upper-right corner of the main interface.
2. Then, configure video recording parameters under the corresponding tabs, such as setting the video frame rate, quality, presetting the recording time, and adjusting the webcam parameters.
3. Finally, click the OK button to save the changed parameters.
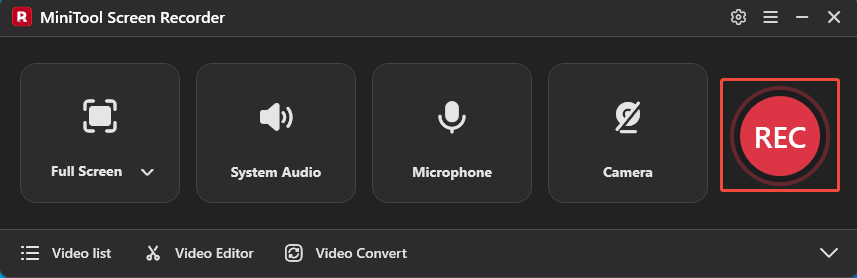
Step 6: Start and End Recording
1. To start the recording process, simply click the REC button or press the F6 key.
2. After a 3-second countdown, go to the target content.
3. I can also select the appropriate tool from the annotation toolbar on the right side of the screen to annotate the screen.
4. To end the recording process, press the F6 key again.
5. Finally, check the recorded video under the Video list module.
Option 2: Xbox Game Bar
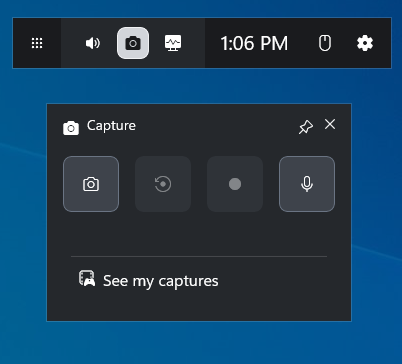
I looked into Windows' built-in screen recording tools; the Xbox Game Bar is one of them. It is an overlay tool that comes pre-installed on Windows systems.
Why I Choose the Xbox Game Bar:
- Completely Free and Require No Installation: This is precisely the main reason I chose it. Compared to Loom's steep price, Xbox Game Bar is completely free, while still ensuring that I can make full use of all its features. Furthermore, I can start using it immediately without needing to perform any manual installation beforehand.
- Offer Basic Recording Functionality: Although the Xbox Game Bar was originally designed specifically for gamers, it now also allows me to record specific windows or applications. It also supports simultaneous recording of system audio and microphone audio.
- Flexible Customization: As a basic recording tool, what surprises me most about Xbox Game Bar is the flexible customization features it offers. For instance, I can adjust audio quality and volume levels, set the maximum recording duration, and configure parameters such as video frame rate and quality.
Limitations of the Xbox Game Bar:
However, the Xbox Game Bar does have some limitations. It does not support recording File Explorer or the desktop. Furthermore, the Xbox Game Bar does not offer the ability to customize the recording area.
Option 3: Snipping Tool
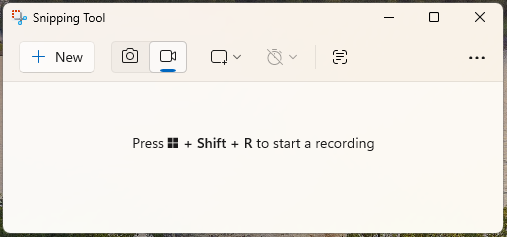
I recently discovered that the built-in Windows Snipping Tool, which I rarely use, has actually been updated. This is a tool that comes standard with Windows, and it now includes a screen recording feature.
Why I Choose Snipping Tool:
- Completely Free: Just like the Xbox Game Bar, the Snipping Tool is also one of the free Loom alternatives.
- Offer a Variety of Recording Options: This is the main reason I chose Snipping Tool. Although the recording features are relatively basic, it allows me to select specific areas or windows to record. Additionally, it gives me full control over the microphone and system audio recording.
- Easy to Use: While browsing other windows, I simply to press the Windows + Shift + S keys to quickly launch the Snipping Tool. Then, press the Windows + Shift + R keys to start recording the screen.
- Support Basic Editing Features: To my surprise, after recording, the Snipping Tool lets me edit the video directly within the software. Plus, I can go straight from the Snipping Tool to Clipchamp to use more advanced editing features.
Limitations of the Snipping Tool:
Unfortunately, the free Snipping Tool currently only supports screen recording on Windows 11. Additionally, it does not support webcam recording.
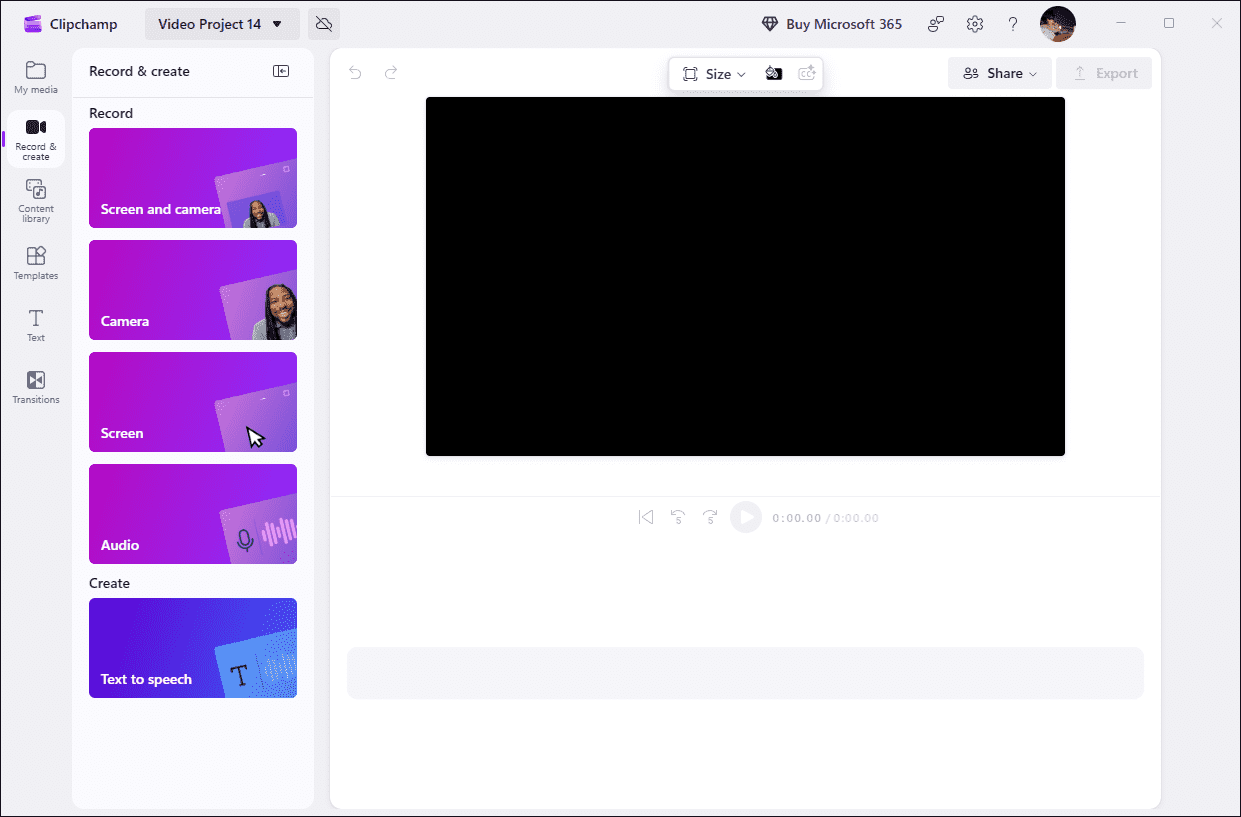
Option 4: Microsoft Clipchamp
In addition to the two tools built into Windows mentioned above, I have also discovered a new tool: Microsoft Clipchamp. However, as this tool comes pre-installed with Windows 11, users of older versions will need to install it themselves from the Microsoft Store.
Why I Choose Microsoft Clipchamp:
- Flexible Recording Options: Compared to the two built-in Windows tools mentioned above, Clipchamp offers a wider range of recording options. It allows me to record the screen, webcam footage, and audio either separately or simultaneously.
- Convenient Editing Features: Clipchamp isn’t just a screen recording tool; it’s also an editing tool. Once I’ve finished recording, Clipchamp takes me straight to the video editing interface. Here, I can trim the video or add filters, text, and other elements.
- Support Cloud Storage: I think this is Clipchamp’s standout feature. The videos I record can be saved directly to OneDrive, which is incredibly handy for users who are short on hard drive space.
Limitations of the Snipping Tool:
While using Clipchamp, I also noticed some of its shortcomings. For instance, the maximum duration for a single recording is limited to 30 minutes. Additionally, the tool lacks options for controlling system audio recording, requiring users to manually check their system audio status prior to recording.
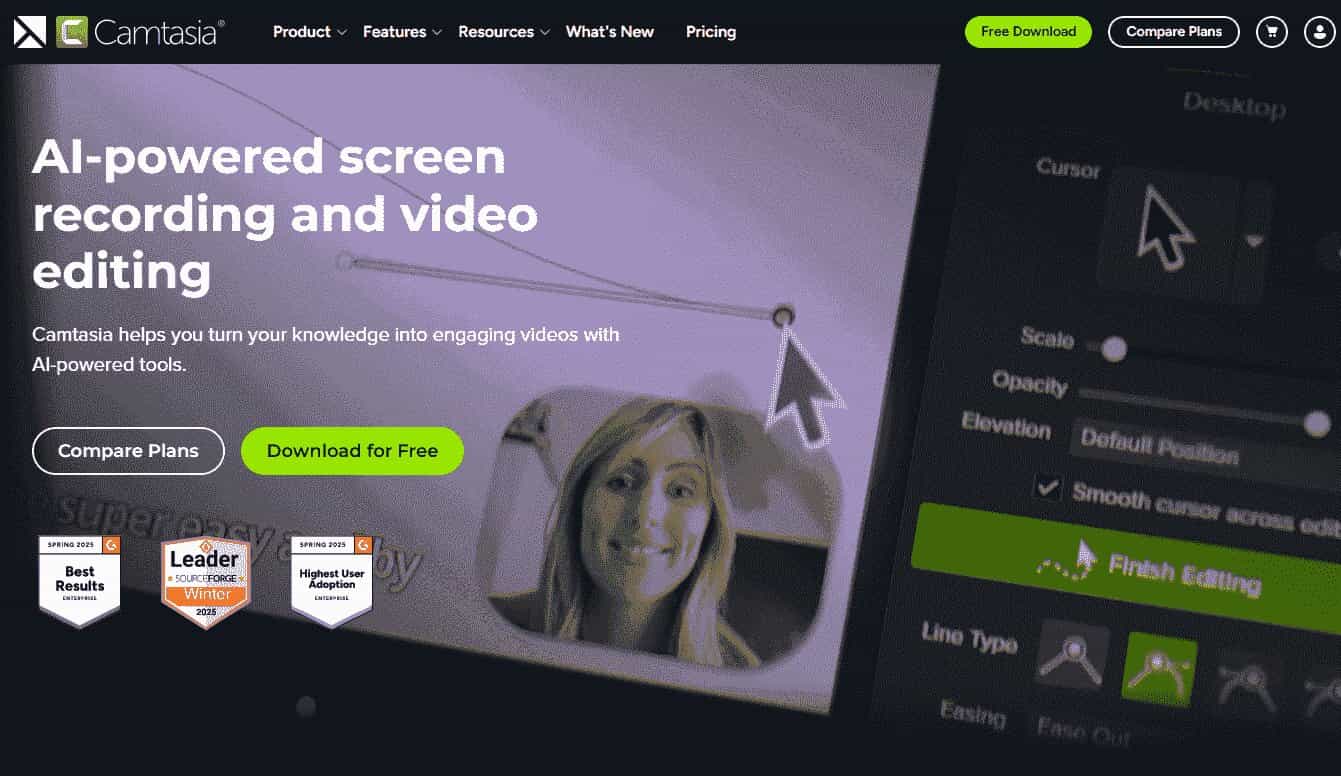
Option 5: Camtasia
Camtasia is one of the Loom alternatives for screen recording, which combines editing functions. Although it is a paid program, users can obtain a lifetime license for a one-off payment of $299.99. Compared to Loom, it offers better value for money.
Why I Choose Camtasia:
- Offer Web and Desktop Versions: This is my favorite feature of Camtasia. I can freely choose to use either the web-based or the desktop version. This is particularly convenient when using someone else's computer, as the web version saves me the time of having to download the software.
- Multiple Recording Options: Camtasia allows me to record the full screen, a specific region, or webcam footage, depending on my needs. It also supports recording both system audio and microphone audio.
- Convenient Editing Features: Camtasia also integrates convenient editing features, allowing me to easily edit and optimize my recordings directly within the software.
- Real-time Sharing: Once recording is complete, Camtasia generates a link to the recording, allowing me to easily invite others to collaborate or share the content with them.
Limitations of Camtasia:
After purchasing a perpetual license for Camtasia, users must pay an additional fee to upgrade to a new version. Furthermore, the free version of the software automatically adds a watermark to videos.
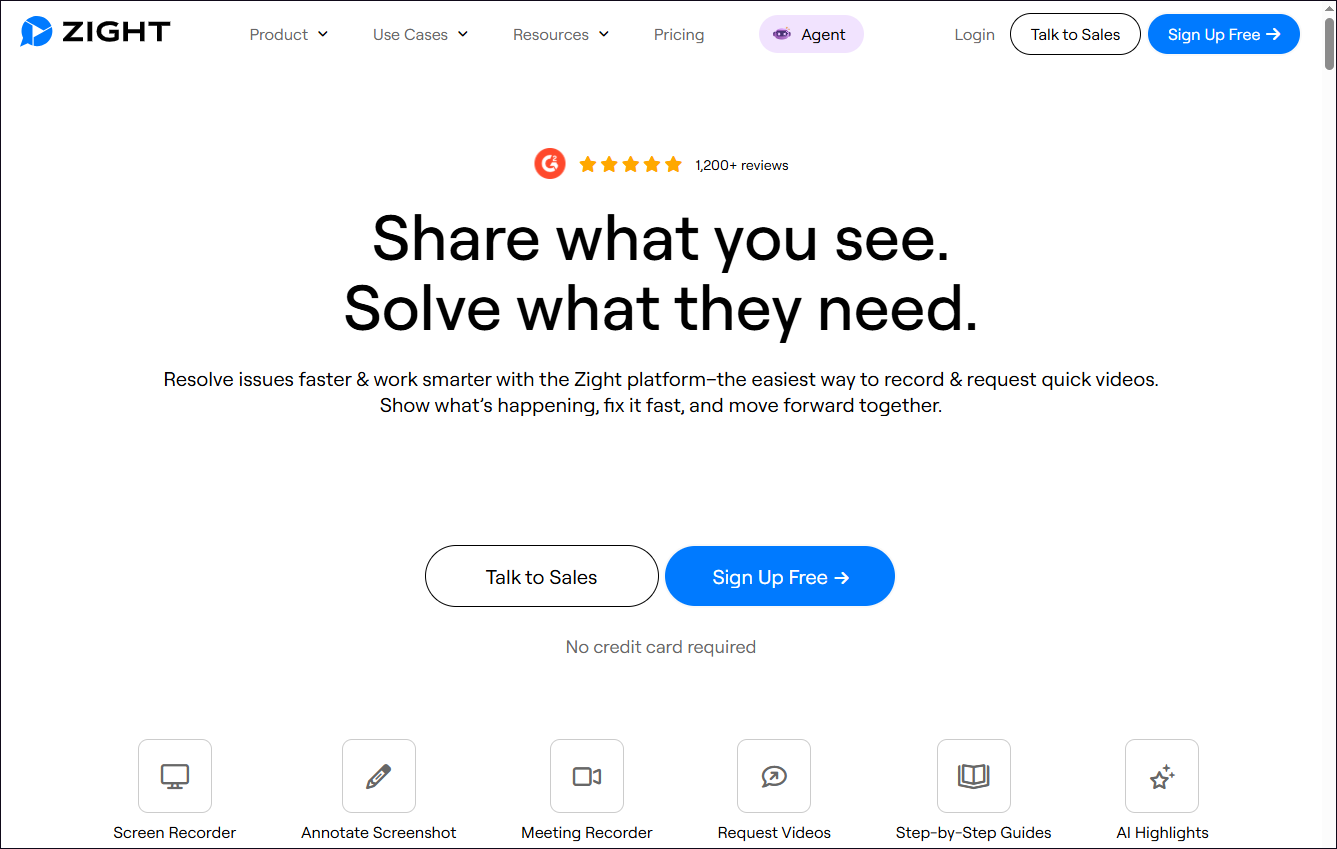
Option 6: Zight
Zight offers a browser extension version, which helps me work efficiently. It is a cloud-based asynchronous communication platform designed specifically for communication and collaboration among remote teams.
Why I Choose Zight:
- All-in-One Functionality: Zight offers features similar to Loom, seamlessly integrating screen recording, editing, screenshots, meeting tools, annotations, and GIF creation into a single platform. Undoubtedly, it is the ultimate choice for boosting workplace efficiency.
- Instant Sharing: As soon as a recording is finished, Zight immediately generates a link, allowing me to share it with others. Furthermore, the software supports sharing recordings directly to social media platforms such as Facebook, Twitter, LinkedIn, and other platforms.
- Integrated AI Tools: Among the many tools of its kind, Zight stands out primarily due to its powerful AI capabilities. It leverages AI to automatically generate summaries, subtitles, and titles for recorded content, a feature I find particularly useful for meeting documentation and summarization.
Limitations of Zight:
Zight's free version imposes limits on both the number and duration of recordings. To unlock additional features, users will need to pay $9 per month for the Personal plan or $11 per month for the Team plan. But in my view, Zight is a more cost-effective option compared to Loom.
The 6 Loom alternatives I have carefully selected each possess unique strengths, covering a diverse range of options, from free choices to cost-effective paid versions. Based on my own hands-on testing, every single one is well worth a try.
Final Thoughts
This article introduces 6 reliable Loom alternatives, including MiniTool Screen Recorder, Xbox Game Bar, Snipping Tool, Clipchamp, Camtasia, and Zight. These options span a variety of categories, ranging from desktop applications and built-in Windows tools to browser extensions. Not only do they help save money, but they also offer a smoother screen recording experience.
If you run into any issues when trying out MiniTool Screen Recorder, send an email to support@minitool.com.