GoodNotes is a digital note-taking app released in 2011. Users can use a stylus to take notes, organize documents, annotate PDFs, and perform other tasks on their devices. In addition, GoodNotes incorporates artificial intelligence features designed to help users review their handwritten content.
Can You Record on GoodNotes
GoodNotes supports audio recording. A few years ago, when I first started using GoodNotes, I discovered that it had a built-in audio recording feature, which allows me to record lecture on GoodNotes in real time. This greatly improved my efficiency in capturing and organizing important content.
However, when I wanted to take it a step further and record content directly within GoodNotes, it didn’t work. That said, this doesn’t mean I can’t record the GoodNotes interface. I eventually managed to do so using a free Windows screen recorder.
Next, I’ll explain in detail how to record audio directly in GoodNotes and how to record on GoodNotes using a third-party screen recorder.
How to Record Audio on GoodNotes
The first time I used GoodNotes’ recording feature, I was completely blown away. Not only does it let me browse through my entire note while listening to the recording, but it also allows me to tap anywhere in the note to jump directly to the corresponding audio segment. Here’s a brief guide on how to use GoodNotes’ audio recording feature.
Step 1: Open GoodNotes
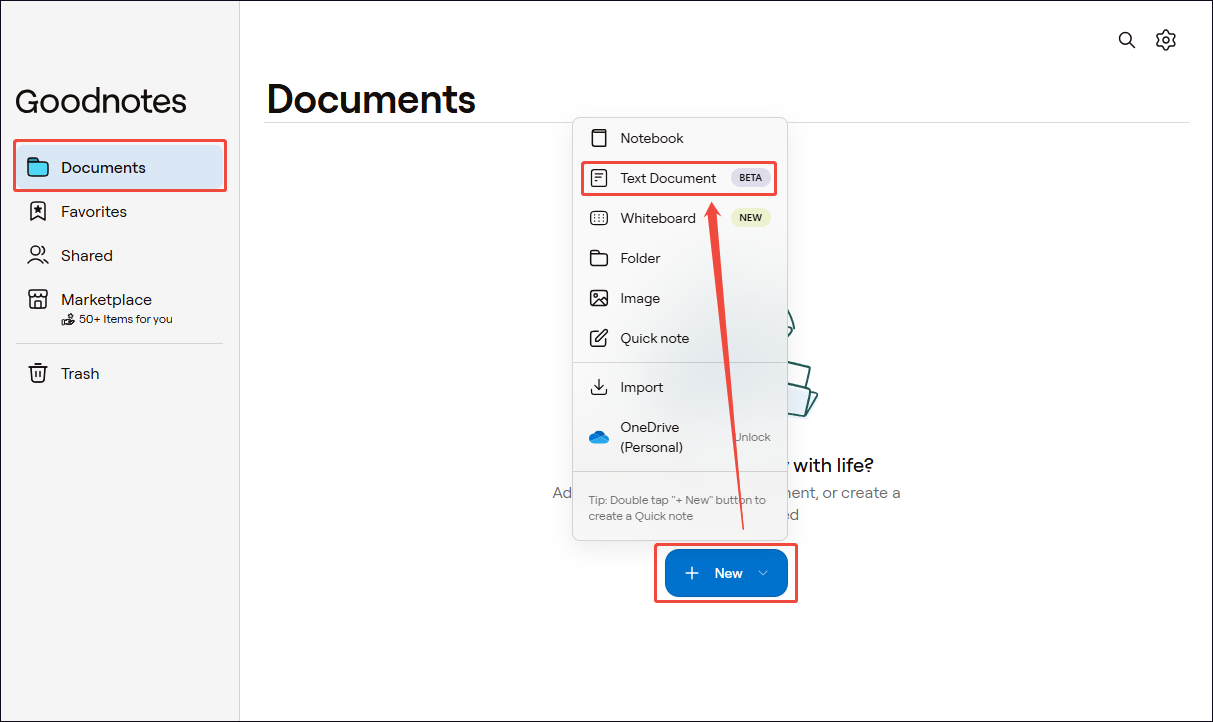
1. Open the browser and go to the GoodNotes website.
2. Click the New button, then choose the Text Document option to create a new note.
Step 2: Begin and End Audio Recording
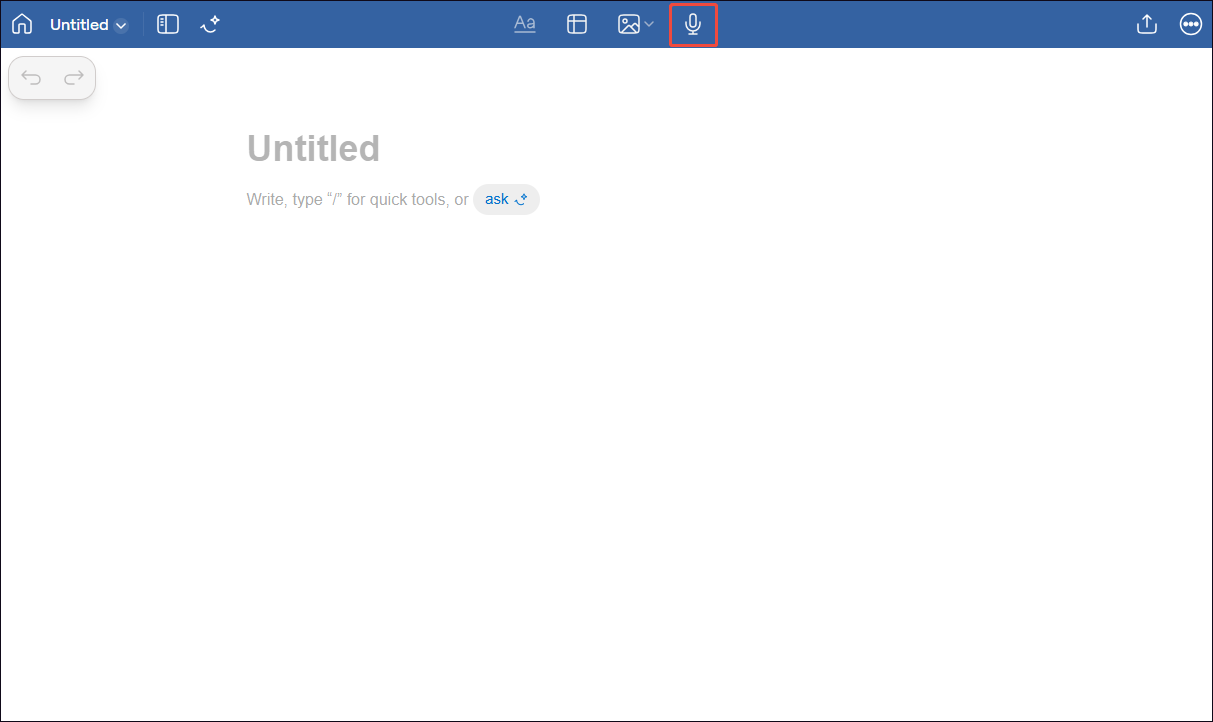
1. To start the audio recording process, click the Microphone icon in the top menu bar.
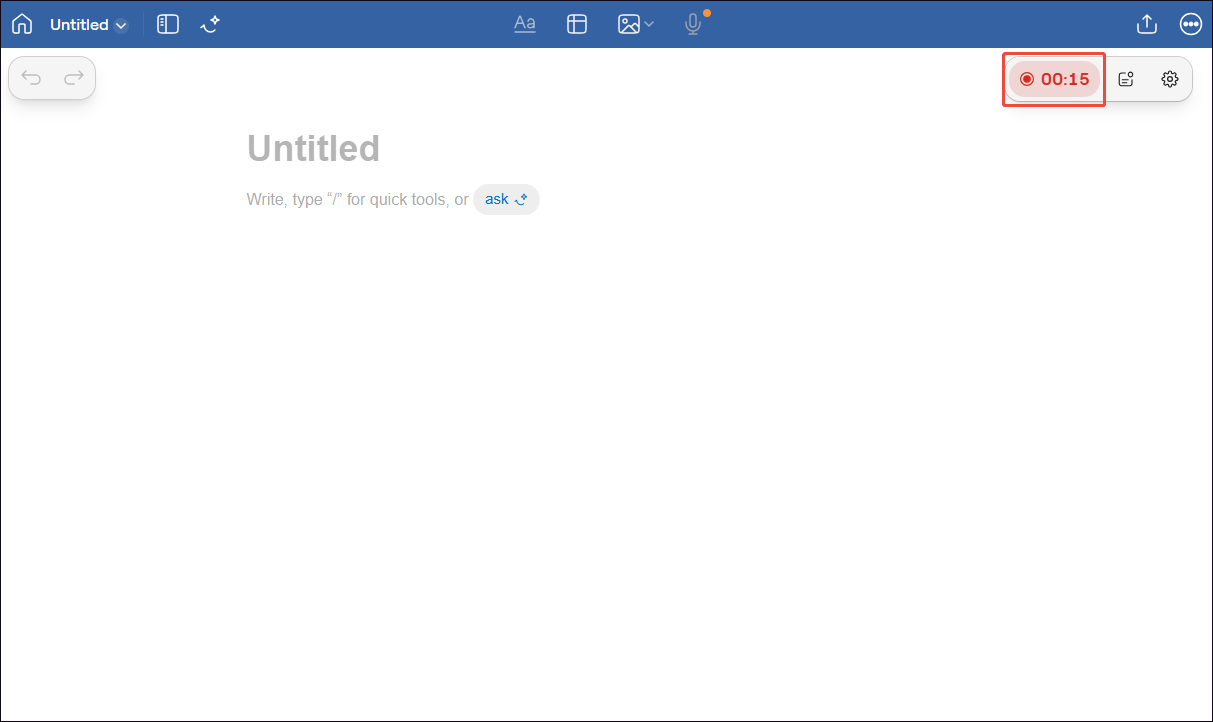
2. To end the audio recording process, click the Stop option.
Step 3: Find and Check the Recorded Audio
1. When the recording ends, click the Book icon in the top menu bar. Then, click the Wave icon to switch to the Audio Tab.
2. Select the audio to access the audio control panel.
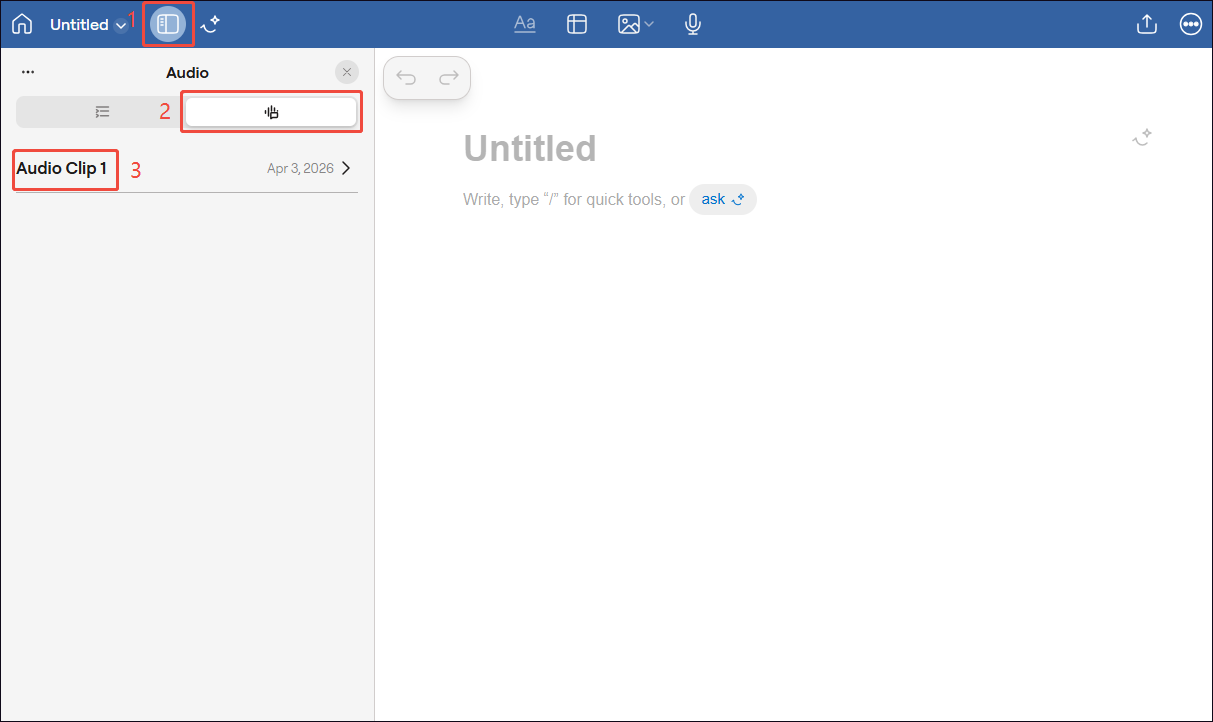
3. Finally, click the Play icon to check the recorded audio.
In addition to playing back recorded audio, GoodNotes automatically summarizes the key points of the audio and generates a transcript.
How to Screen Record on GoodNotes
When I need to record my drawing process in GoodNotes, I usually use third-party screen recording software. After trying several tools, I ultimately chose MiniTool Screen Recorder, which not only offers advanced recording features but is also free.
MiniTool Screen Recorder allows me to capture the full screen, a specific region, or a window. It also supports me in recording the microphone audio and system audio recording. The main reason I chose MiniTool Screen Recorder is that it offers annotation tools. Whenever I forget to highlight key points while taking notes, I use this tool to make annotations during the recording process.
Furthermore, MiniTool Screen Recorder also supports webcam recording, which means I can create more personalized picture-in-picture videos. Best of all, unlike other screen recording tools I’ve tried, this software doesn’t add a watermark to the recorded videos. Here’s how I record GoodNotes with MiniTool Screen Recorder.
Step 1: Download and Install MiniTool Screen Recorder
MiniTool Screen RecorderClick to Download100%Clean & Safe
Click the button above to download MiniTool Screen Recorder. Then, follow the prompts to install it on the PC.
Step 2: Choose the Recording Area
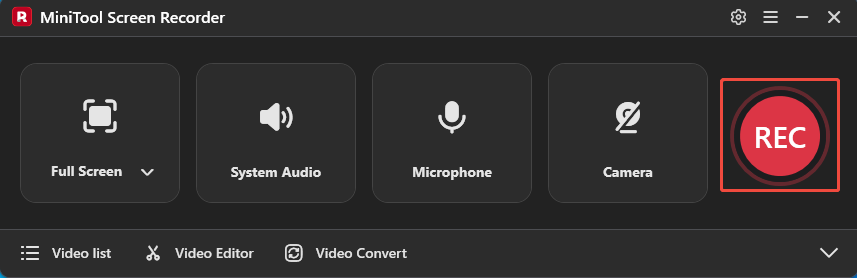
1. Run MiniTool Screen Recorder.
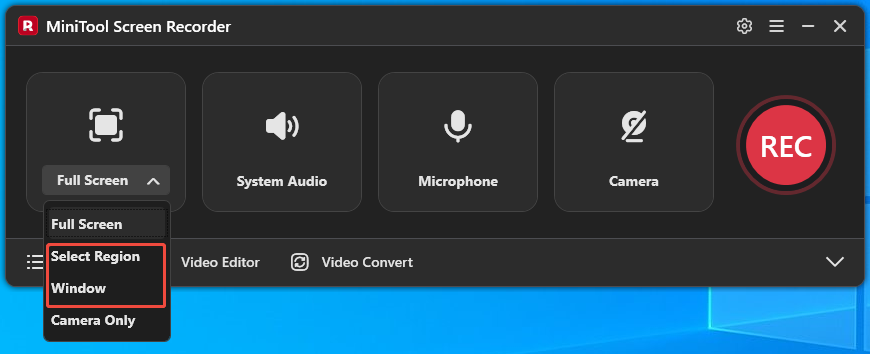
2. By default, MiniTool Screen Recorder records full screen.
2. To capture a specific region or a particular window, expand the drop-down menu next to the Full Screen option. Then, choose the Select Region option or the Window option.
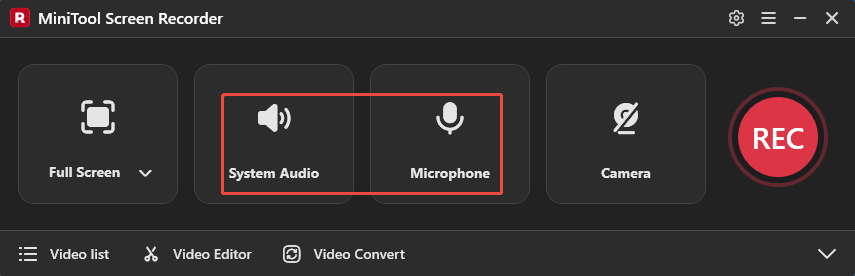
Step 3: Manage the Audio Recording
System and microphone audio recording features are enabled by default. To turn off either of them, click the System Audio icon and the Microphone icon, respectively.
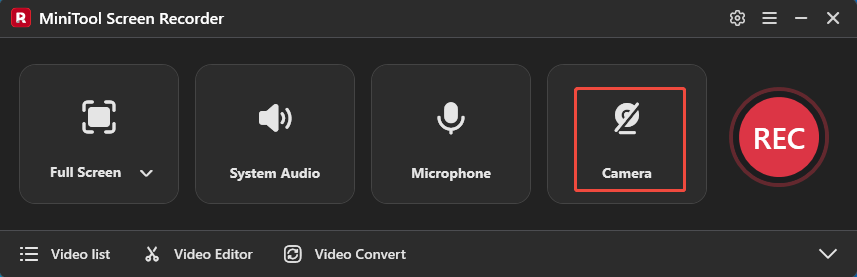
Step 4: Control the Camera Recording
To record GoodNotes with webcam footage, click the Camera icon to enable webcam recording.
Step 5: Start and End Recording
1. To start the recording process, click the REC button or press the F6 key.
2. After a 3-second countdown, open GoodNotes on the computer.
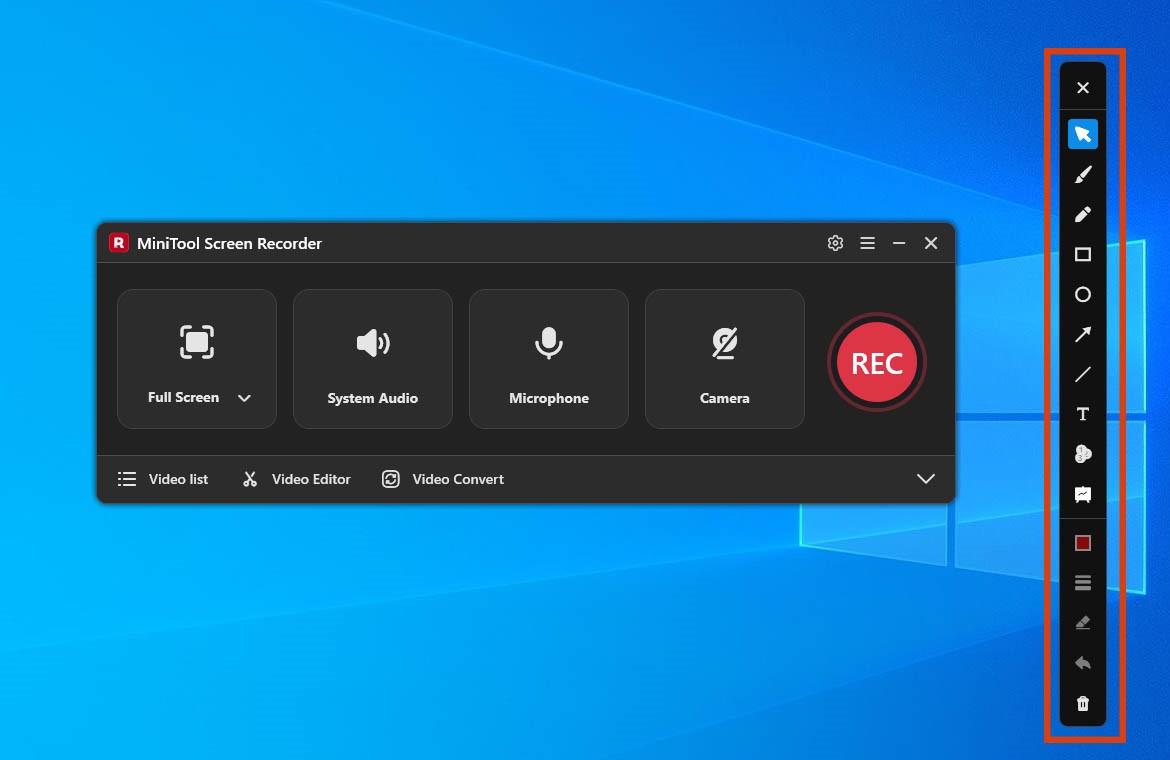
3. To annotate the screen while recording, just choose the tool from the annotation toolbar on the right of the screen.
3. To end the recording process, press the F6 key again.
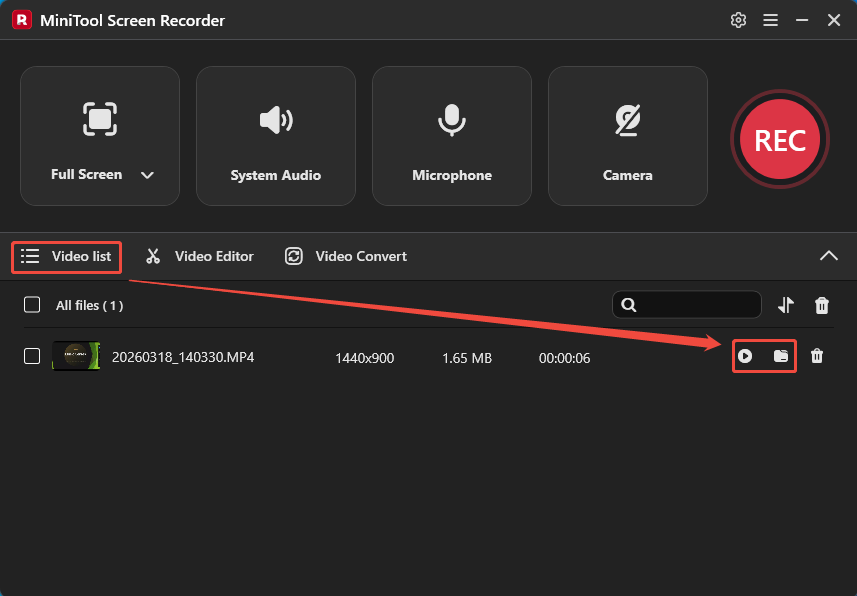
Step 6: Check the Recorded Content
When the recording ends, MiniTool Screen Recorder will automatically switch to the Video list section. Then, click the Play icon to check the recorded GoodNotes video. Or, click the Folder icon to access it on the computer.
MiniTool MovieMakerClick to Download100%Clean & Safe
Final Words
How to record on GoodNotes? GoodNotes supports pure audio recording within the app. If you need to capture the GoodNotes interface, this article provides detailed instructions on how to use MiniTool Screen Recorder to record both the screen and audio simultaneously. I hope these tips will help you complete the recording with ease.
If you run into any issues when trying out MiniTool Screen Recorder or MiniTool MovieMaker, send an email to support@minitool.com.