This article compares 30 vs 60 FPS video recording side by side and tells you the best frame rate for video recording. To enable you to record videos at various frame rates, this article also introduces the usage of MiniTool Screen Recorder and Xbox Game Bar.
What Does 30 FPS and 60 FPS Mean
30 fps vs 60 fps, which one is better? Before we explore this question, let’s learn what FPS means first.
What Is FPS
In video screen recording, FPS stands for Frames Per Second, equivalent to frame rate. It indicates how many individual images are displayed per second in a video. These images are called frames. The higher the FPS of a video, the more images are displayed per second, resulting in a smoother and more natural video.
Common video frame rates include 24 fps, 30 fps, 60 fps, 120 fps, and higher.
- 24 fps is usually the standard for movies or television programs.
- 30 fps is often used for live television broadcasts, especially sporting events. Many smartphones also default to recording video at this frame rate.
- 60 fps provides a smoother picture and is typically used for professional video editing.
- 120 fps supports ultra-smooth and realistic visuals, ideal for slow-motion editing.
30 vs 60 FPS Video Recording
You can set the frame rate when screen recording. Common frame rates are 30 fps and 60 fps. Which of these two is the best FPS to record video? This depends on what you want to record on your computer screen.
For most tutorials and presentations, such as PowerPoint presentations, 30 fps is generally enough. This is because these recordings don’t require slow motion or complex animation details. Therefore, 30 fps is adequate to meet the needs of routine screen recordings.
To record gameplay, sports events, or other high-definition footage, 60 fps is more suitable than 30 fps. Some games feature fast-moving camera movements and rapid character actions. These require recording at a higher frame rate to ensure clear, smooth footage. In addition, most computer monitors have a fixed refresh rate of 60 Hz. 60 fps matches this refresh rate, so recording your computer screen at this resolution will keep the image sharp.
Overall, 30 fps vs 60 fps video recording, which one is better? If you prioritize smooth visuals and clear details, 60 fps is clearly the best choice. 30 fps is also a good option for simple screen recording, as it takes up less storage space.
How to Record Video at a Specific Frame Rate
Are there any screen recording programs that let you choose the frame rate before you start recording? The answer is yes! Xbox Game Bar and MiniTool Screen Recorder both support presetting screen recording frame rates.
1. Use Xbox Game Bar
30 fps vs 60 fps video recording, the latter is superior. The Xbox Game Bar is a built-in screen recording feature in Windows 10 and 11. It allows you to set the desired frame rate before recording. However, it is worth keeping in mind that the Xbox Game Bar can’t capture the File Explorer window or any other applications that have screen recording disabled.
Next, let’s see how to choose the best FPS to record video with Xbox Game Bar (Take Windows 10 as an example):
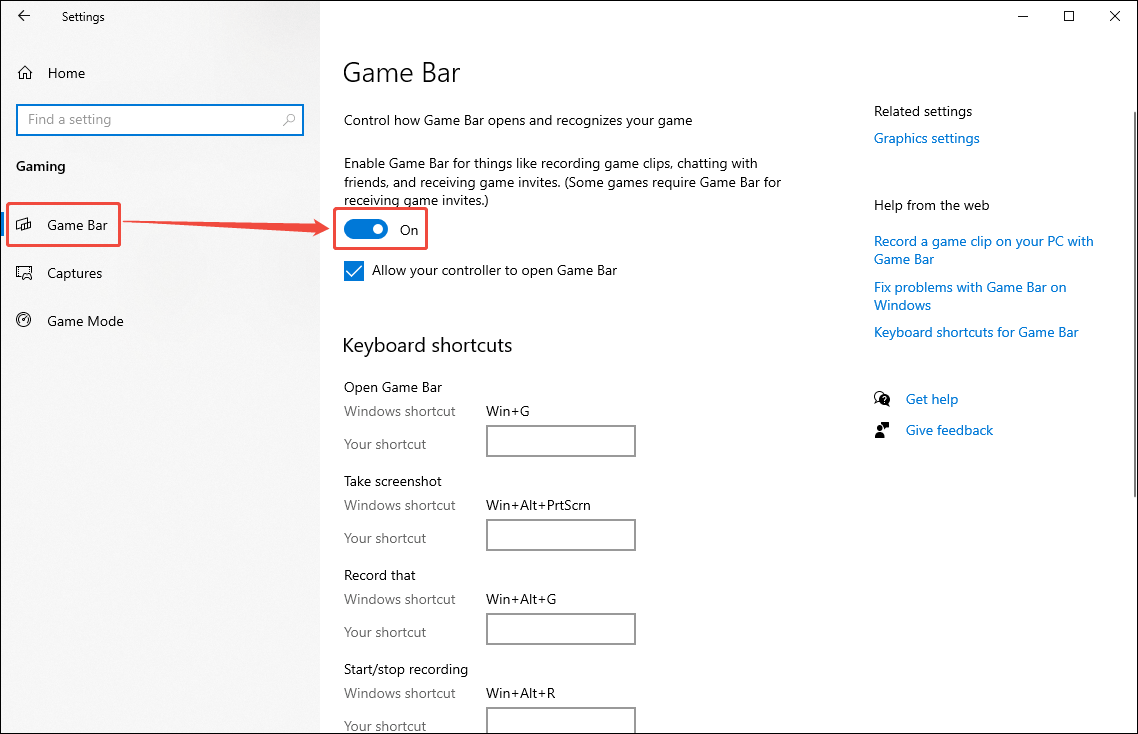
Step 1: Enable Game Bar
First, check if your computer has Xbox Game Bar enabled. Click the Start menu, choose Settings, and click Gaming. Then, in the Game Bar tab, check whether the toggle is turned on in the right panel.
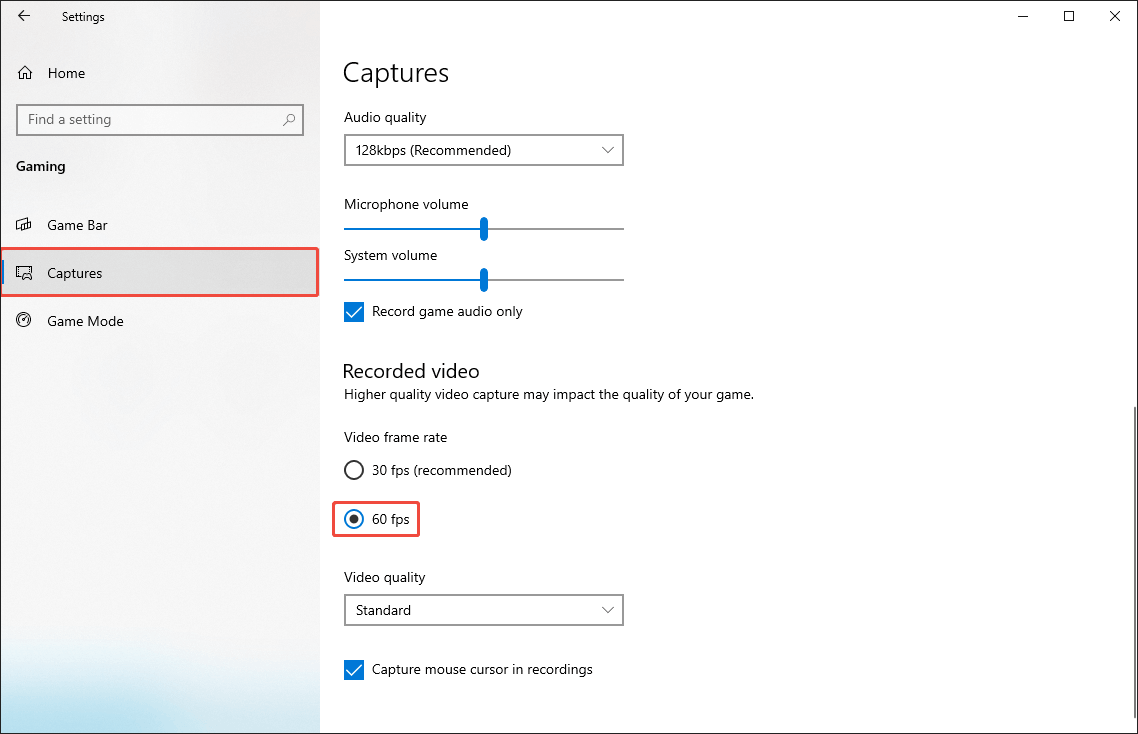
Step 2: Set the Best Frame Rate for Screen Recording
Switch to the Captures tab, select the 60 fps option in the Recorded video section.
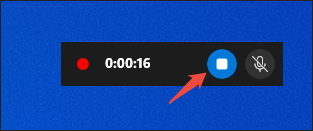
Step 3: Start/End Recording
Press Win + Alt + R to open Xbox Game Bar. When you’re finished, press the same shortcut once more to end recording, or click the Stop recording option on the small floating toolbar.
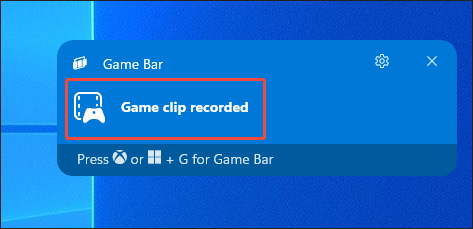
Step 4: Check the Recorded File
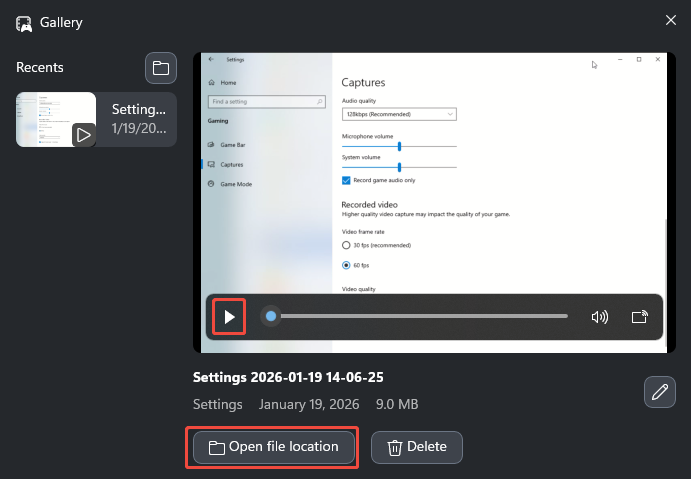
In the pop-up Game Bar window, click on the Game clip recorded area to open the Gallery window.
In the Gallery window, choose the clip you just captured, click the play icon if you want to watch it immediately, or select Open file location to jump straight to the folder where the recording is stored.
The Xbox Game Bar offers two frame rates for screen recording: 30 fps and 60 fps. You need to set the recording frame rate in the system settings beforehand. If you want more frame rate options to choose from, try MiniTool Screen Recorder.
2. Use MiniTool Screen Recorder
MiniTool Screen Recorder is a completely free screen recorder. Besides your computer screen, it also supports recording your webcam, system audio, and microphone audio. It does not add watermarks and has no recording time limit. Furthermore, this screen recording software also allows you to add annotations to the screen during recording, including arrows, lines, rectangles, ellipses, numbers, and text.
Here’s how to set the frame rate and start recording the full screen with MiniTool Screen Recorder:
Step 1. Download and Install MiniTool Screen Recorder
Download and install MiniTool Screen Recorder by clicking on the download button below. Then, launch this screen recorder.
MiniTool Screen RecorderClick to Download100%Clean & Safe
Step 2. Choose the Recording Area and Audio
Click the arrow next to the Full Screen option to open the drop-down menu, then select to record the entire screen, a specific area, or only the camera. Then, toggle System Audio and Microphone on or off to choose whether to record system audio and microphone input.

Step 3: Select the Save Location and Frame Rate
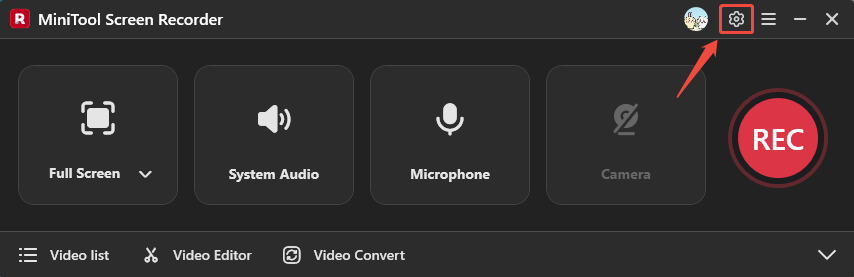
Click the settings icon at the top-right.
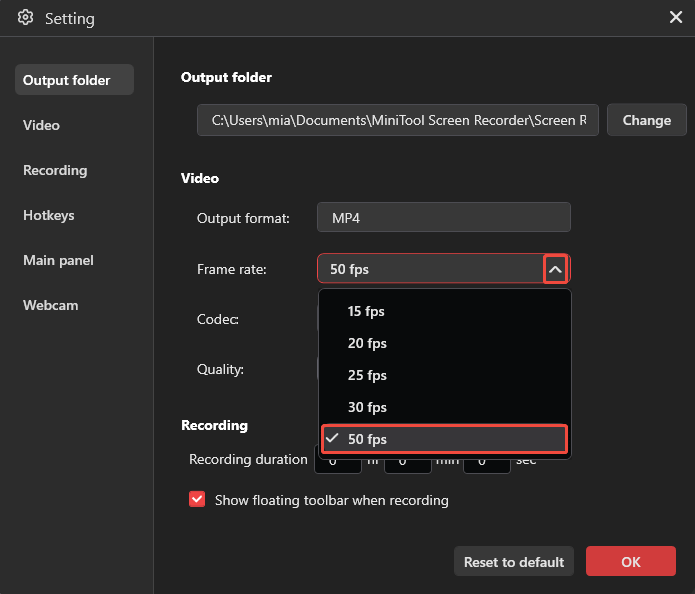
In the Output folder area, click Change and pick the folder where you want your recordings stored. MiniTool Screen Recorder offers multiple resolution options, including 15 fps, 20 fps, 25 fps, 30 fps, and 50 fps. You can choose 50 fps as the screen recording frame rate to ensure smooth footage. Then, click OK to save changes.
Step 4: Start/End Recording
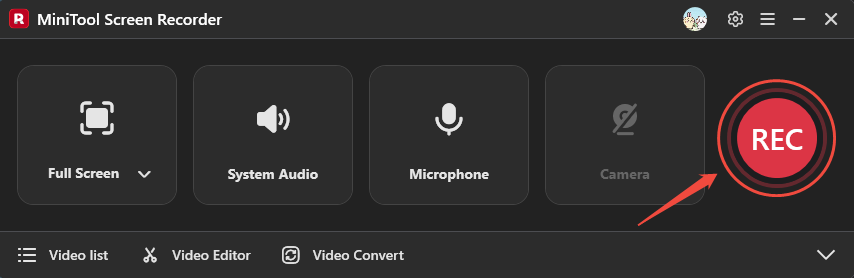
Press the REC button. After the three-second countdown finishes, the recording will begin. When you’re ready to stop, simply tap the F6 key.
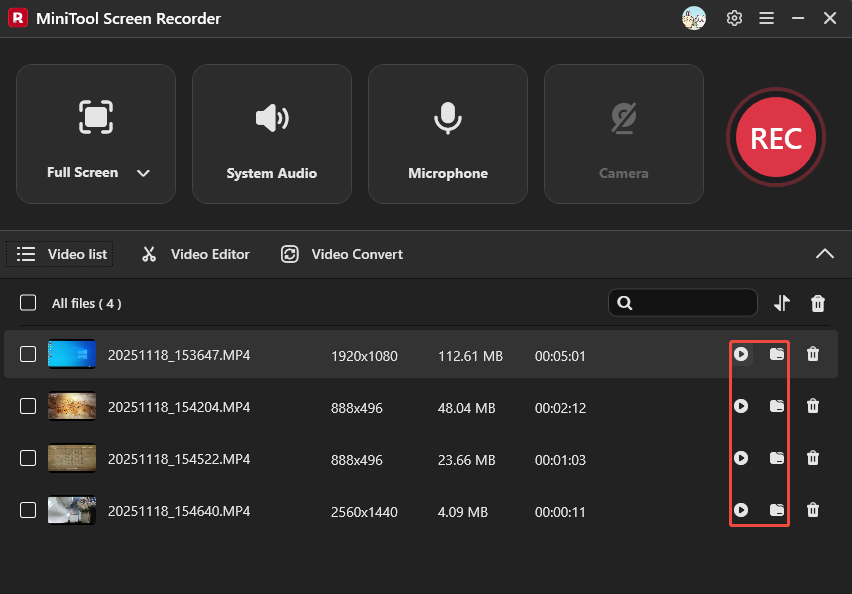
Step 5: Check the Recorded Video
As soon as you end the recording, the recorded video appears instantly in the Video list. Click the play icon to watch it right away, or the folder icon to navigate to the folder where it was saved.
MiniTool Screen Recorder offers a variety of frame rate options for recordings and enables capture of any application window.
Conclusion
30 vs 60 FPS video recording, the latter is better. However, you can still choose 30 fps or other frame rates for screen recording. The Xbox Game Bar, the recording tool that comes with Windows 10 and 11, supports pre-specifying the desired frame rate at 30 fps or 60 fps. MiniTool Screen Recorder allows you to select the frame rate at 15 fps, 20 fps, 25 fps, 30 fps, or 50 fps.
If you have questions when using MiniTool Screen Recorder, please feel free to contact us at support@minitool.com for help.