As one of the most popular gaming consoles at home and on the go, Nintendo Switch offers the best games and accessories. You may have noticed that more and more game lovers start recording the gameplay process when they play Nintendo Switch games.
Whether you want to share a clutch victory for Mario Kart 8 Deluxe, The Legend of Zelda: Breath of the Wild, Super Smash Bros, Splatoon 3, etc., recording Nintendo Switch gameplay is simpler than you think. Let’s discuss the recording phenomenon first before we learn how to record Nintendo Switch gameplay.
Why Choose Record Switch Gameplay
Now, let’s dive into the reasons why recording has become an essential part of the Switch experience for millions of gamers.
Share Your Achievements
As a versatile Switch player, I believe that you often make epic moments while playing on your Nintendo Switch. Everyone wants to share their joy with others or on social media. Recording these highlights and sharing them with your friends gives you a sense of accomplishment. Plus, when you share these highlights on social media platforms and obtain many likes, you’re happy.
Save Memorable Moments
Capturing hilarious glitches, unexpected reactions, or heartwarming co-operation moments with friends is worthy. Imagine how wonderful it would be to watch old game videos together at a friend’s gathering and reminisce about the past. Also, it’s so nice to watch your highlight reels of gaming when you have some free time.
Track Your Progress
Recording Switch gameplay is one of the best methods to track your progress, that keep a visual diary of your gaming journey and how you’ve improved. You can see where you messed up, summarize the experience and lessons, and figure out better strategies by watching the recorded gameplay videos. In this method, you can effectively improve your gameplay skills.
Create Funny Videos
As a game video content creator, recording Switch gameplay allows you to create funny videos to appeal to more viewers. A lot of people prefer to watch funny gameplay videos on social media platforms, like YouTube, TikTok, and Twitch, to pass the time and make them laugh. Of course, you can also record the Switch gameplay videos to produce tutorials, walkthroughs, and reviews.
After learning these benefits of recording Switch gameplay, can’t wait to record your videos? The next section will offer step-by-step tutorials on how to record short and long Switch gameplay.
How to Capture Switch Gameplay
From quick 30-second clips to high-quality unlimited recordings, there are 2 methods tailored to your needs. Follow the tutorials and capture the Switch gameplay now!
Method 1. With Built-in Recording Tool (Limited Time)
The Nintendo Switch comes with a native recording feature that requires no extra hardware or software, making it perfect for capturing any other short moment you want to share. This method is simple and straightforward. If you’re using the consoles with system menu version 4.0.0 or higher, you can perform video capture directly with the built-in tool.
Here’s the step-by-step guide to using the built-in recorder to record Switch gameplay.
Step 1. Play the Game on the Switch
Start your gameplay for which you want to record on the Nintendo Switch console.
Step 2. Record the Switch Gameplay
Here’s a capture button, which is a square button with a circular indent in the middle. Press and hold it for a long time to save up to 30 seconds of gameplay to the system memory.
Step 3. Locate and Export the Recorded Gameplay
1. Wait for the Saving message to appear in the upper left corner of the screen. You can view the captured video in the Album.
2. You can export Nintendo Switch videos wirelessly to your phone via the Nintendo Switch Online app using QR codes or to your computer using a USB-C cable in Data Management settings.
If you want to screenshot while playing video games on Nintendo Switch, a single press of the capture button captures a static screenshot, which will display the word Screenshot. Plus, if you want totake some screenshots from the recorded video, please follow this guide:
Step 1. Find the Recorded Gameplay Video
1. From the Switch home screen, select Album.
2. Go to All Screenshots and Videos and choose the video that you want to screenshot.
Step 2. Screenshot and Save the Image
1. The recorded video will be played automatically and press Y to pause the video when it shows the window you want to record.
2. Press the A Button to bring up the menu and select Save as Screenshot.
3. Repeat these steps to take more screenshots.
In short, there are two drawbacks when I use this method to record my Switch gameplay: Only 30 seconds of gameplay is recorded and I need to transfer clips from the console to my PC for sharing or editing. If you want to record longer gameplay videos, try method 2.
Method 2. With MiniTool Screen Recorder (No Time Limit)
In order to record longer game videos, using MiniTool Screen Recorder is the best option. As the name suggests, it is a powerful and free screen recorder on PC that enables you to capture full or selected gameplay screen activity without time restrictions. You can record microphone audio, system audio, or even webcam simultaneously with ease.
You can make adjustments for recording settings before you record your Switch gameplay with MiniTool Screen Recorder, such as adjusting the video frame rate, quality, webcam position, shape, and size. What makes MiniTool Screen Recorder special is that it offers a screen annotation and drawing tool. You can note the important place when you record the gameplay.
Best of all, the recordings can be saved in high-quality and common MP4 format without watermarks, which means that you can upload your files to various platforms with ease.
Before capturing Switch gameplay, you should prepare the Nintendo Switch Dock, a capture card, two HDMI cables, a USB cable, and a computer, then download MiniTool Screen Recorder in advance.
MiniTool Screen RecorderClick to Download100%Clean & Safe
Now, read the instructions below on how to record on Switch with MiniTool Screen Recorder.
Step 1. Connect the Nintendo Switch to the Capture Card
1. Connect your Nintendo Switch to the Nintendo Switch Dock you prepared.
2. Plug one end of the first HDMI cable into the HDMI OUT port on the Nintendo Switch Dock and the other end into the HDMI IN port on the capture card.
Step 2. Connect the Capture Card to the Computer
1. Use the second HDMI cable to connect the HDMI OUT port on the capture card and the other end to the HDMI IN port on your computer monitor.
2. Then, connect your capture card to the desktop computer via a USB cable.
Step 3. Launch the Gameplay
Open the gameplay you want to record on your Switch.
Step 4. Record Switch Gameplay with MiniTool Screen Recorder
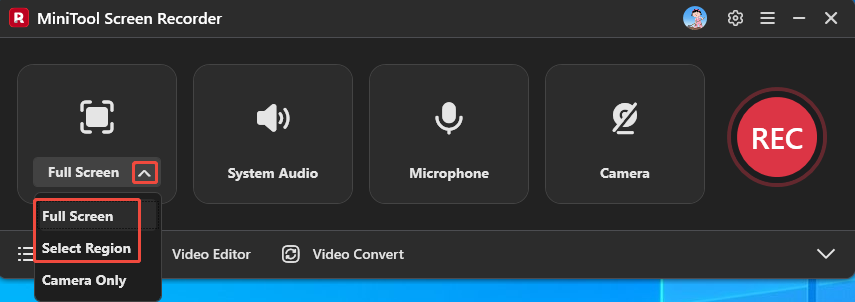
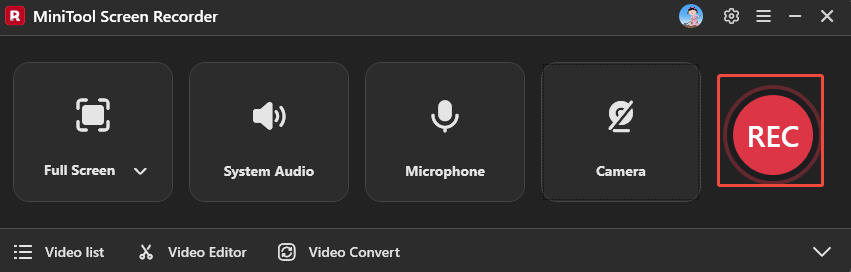
1. Open MiniTool Screen Recorder, expand the drop-down menu of the Full Screen option to decide whether to record part of the screen or the full screen.
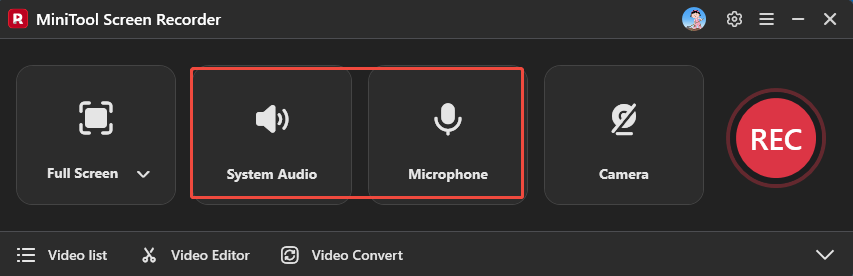
2. The system audio and microphone audio will be recorded by default. You can click on the System Audio icon or the Microphone icon to disable them.
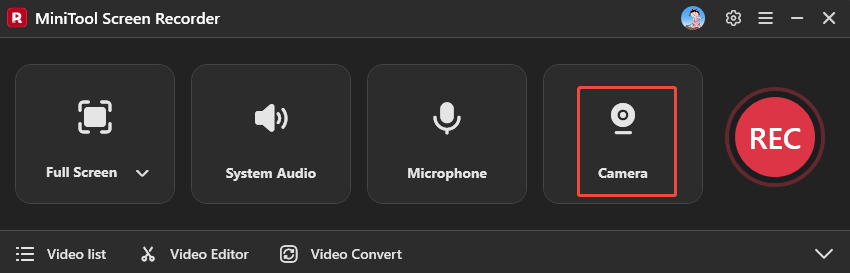
3. If you want to record your reactions while playing Switch, simply click the Camera icon on the right.
4. Press the REC button on the right side of the MiniTool Screen Recorder main interface or press the default key F6 on your keyboard to start the recording process. To end the Switch gameplay recording, press the default F6 again.
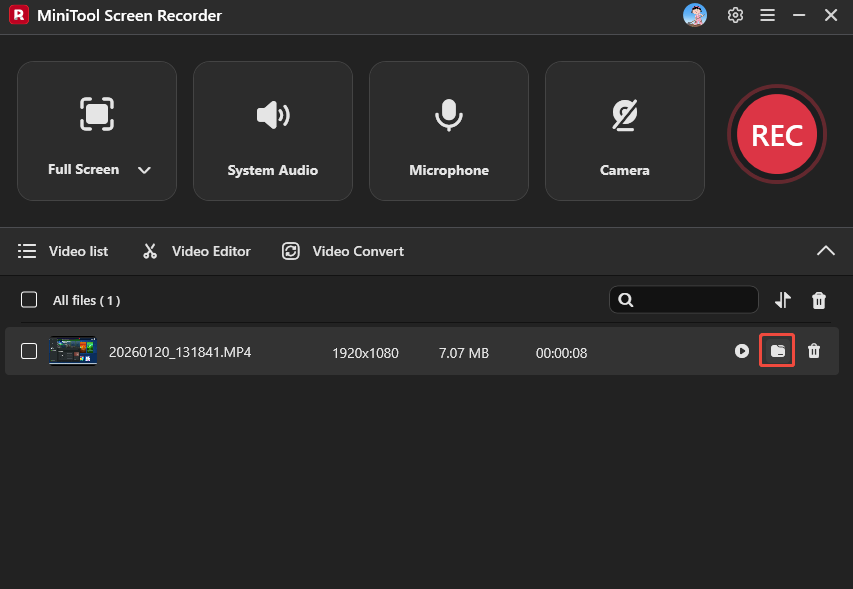
Step 5. Check the Recorded Switch Gameplay
Click on the folder icon in the file list to locate and check your recording Switch file.
All in all, two methods are feasible. If you just capture the amazing clips group of 30 seconds or less, using the Nintendo Switch built-in recorder is the best choice. If not, try using MiniTool Screen Recorder.
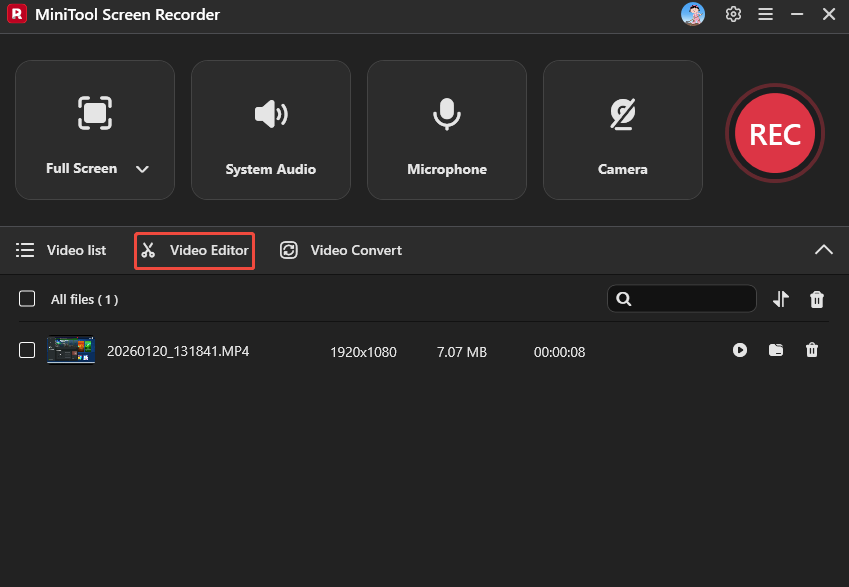
How to Edit Switch Gameplay Recording
To make your gameplay recordings more appealing, editing them is crucial. How to edit the gameplay recording to create funny videos? Click the Video Editor option at the bottom of the MiniTool Screen Recorder homepage to get professional video editing software.
I have used it for over 2 years and it is suitable for beginners, with a simple-to-use interface. It supports some basic editing functions, like cropping, trimming, cutting, flipping, adjusting speed, etc. You can use it to splice the small clips recorded by the above built-in tool together. Additionally, this handy video editor with an extensive library allows users to add free materials to their videos, such as beauty filters, transitions, effects, motions, etc.
You can add background music or tricky sounds for your gameplay video from your computer or directly from the free library. Once you’re satisfied with the edited Switch gameplay video, you can import the most popular video formats, including MP4, MOV, AVI, WMV, MKV, WebM, and so on.
Don’t hesitate to try it. Alternatively, click the download button below to get the installation package.
MiniTool MovieMakerClick to Download100%Clean & Safe
Final Words
Recording Switch gameplay can share your achievements, save memorable moments, track your progress, and create funny videos. This article discussed two methods on how to record Switch gameplay. If the recording time is less than 30 seconds, you can capture the Switch gameplay with the built-in recorder. If you desire a complete recording, using MiniTool Video Converter is the best choice. Whatever you choose, make sure the solution suits you best.
If you encounter any issues while using MiniTool Screen Recorder or MiniTool MovieMaker, feel free to email us via support@minitool.com or send me a message on X for assistance.