How to record a PowerPoint presentation? This article gives you the reasons to record a PowerPoint showcase and instructs you on how to choose a great video recorder. It will also show you how to record it with 3 fabulous methods, including PowerPoint's built-in screen recorder, MiniTool Screen Recorder, and Online Screen Recorder.
Why Record a PowerPoint Presentation
What are the reasons for recording a PowerPoint presentation? I want to explain it from the audience's and presenters’ perspectives.
For Audiences
If the audience doesn't understand the PowerPoint presentation during the live session, they can record it for later review. The recorded presentation not only includes the content of the presentation itself, but also the presenter's simultaneous explanation, helping the audience to deeply understand the content. Furthermore, the recorded videos are easy to transmit and share.
For Presenters
Using a screen recording application allows presenters to add annotations or texts, making the final recorded video more detailed and more professional. Besides, recording PowerPoint presentations makes them easier to archive.
Presenters can turn their PowerPoint presentations into videos and share them on social media platforms to increase their online visibility and attract potential fans or customers. This can effectively expand their audience, increase traffic to their social media accounts, and boost them as industry experts.
How to Choose a Suitable Recording Application
Which screen recorder is right for you to record a PowerPoint presentation? 6 aspects to help you choose the right one.
#1. Recording Length Support
If your PowerPoint presentation is very long, you’d better choose screen recording software without a recording duration limit, so you can capture the entire presentation.
#2. Audio Capture Support
If your PowerPoint presentation includes videos or audio, you may need a screen recording tool that can record system audio. Additionally, if you want to speak during the presentation, you will need a screen recorder that supports microphone audio recording.
#3. Webcam Capture Support
Also, to capture your facial expressions and gestures on-screen, you should select a screen recorder that includes a built-in webcam recording, which helps you present a better demonstration.
#4. Pre-recording Timer Settings
In addition, if you know the recording duration in advance, choose a screen recording app that allows you to preset a recording duration. Pre-recording Timer settings can effectively help avoid forgetting to end the recording after the presentation.
#5. Real-time Annotation Support
Adding highlights, annotations, or texts during recording will enrich the screen recording, make the explanations more vivid, and yield a more professional final product. Moreover, picking a screen recorder with a whiteboard to display complex content, such as formulas and principles, would make the content more intuitive.
#6. Recording Region Customization
Furthermore, customizing the recording area will make the recorded video highlight the PowerPoint content more effectively, allowing the audience to pay more attention to the PowerPoint presentation.
How to Record a PowerPoint Presentation with the Built-in Recorder
PowerPoint is a robust tool that offers a built-in reorder. You can easily get it without launching other applications. It enables you to record your presentation with the system audio and microphone sound, helping you speak your idea during the presentation. In addition, it allows you to specify a recording area, making it easier to share your content and focus your audience's attention on that area.
PowerPoint also provides you with the laser pointer, pen, eraser, and highlighter tools while recording, empowering you to make annotations for the audience. Furthermore, it prepares a screenshot feature that is helpful to capture amazing content and add it to your document promptly.
Here, let’s focus on how to record a PowerPoint presentation with the built-in tool.
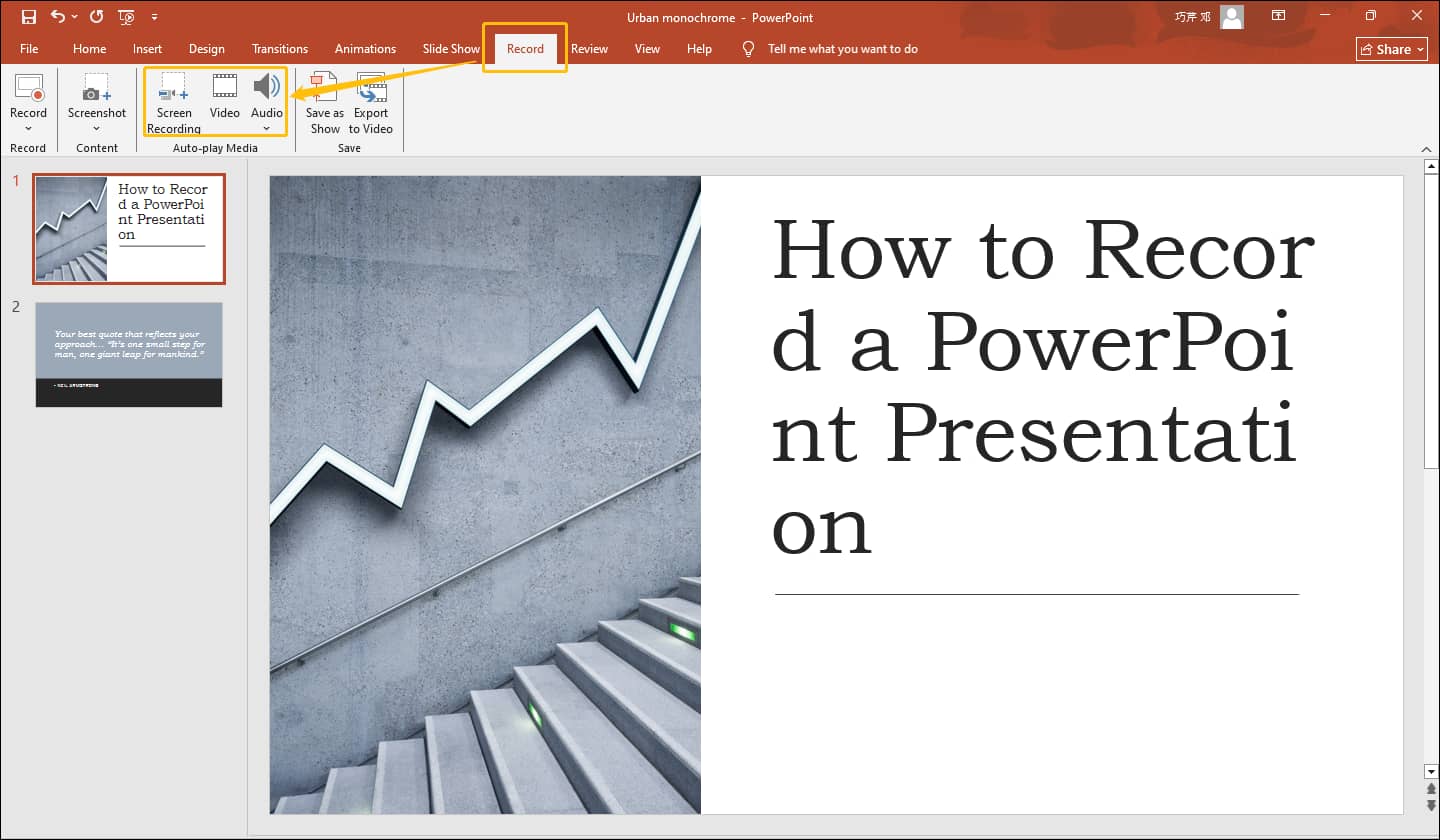
Step 1. Set the Auto-play Media Section
Open the PowerPoint and toggle to the Record tab to focus on the Auto-play Media section. There, in the Screen Recording option, you can record new videos from the computer and insert them into your presentation. Alternatively, in the Video option, you can import local videos. Besides, in the Audio option, select to import audio from your computer and choose whether to record microphone audio.
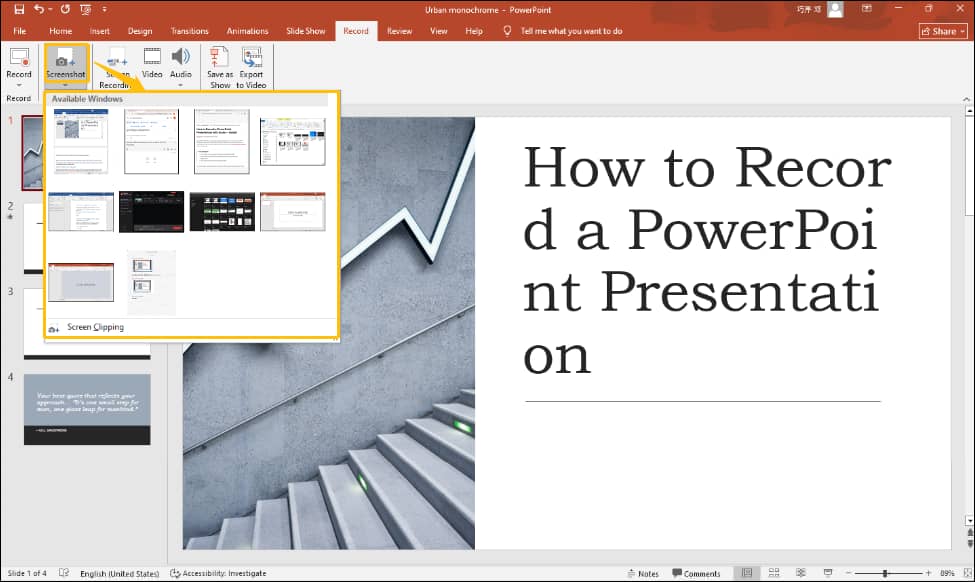
Moreover, you can click on the Screenshot option to choose a window that you want to capture, enriching your presentation.
Step 2. Start the Recording
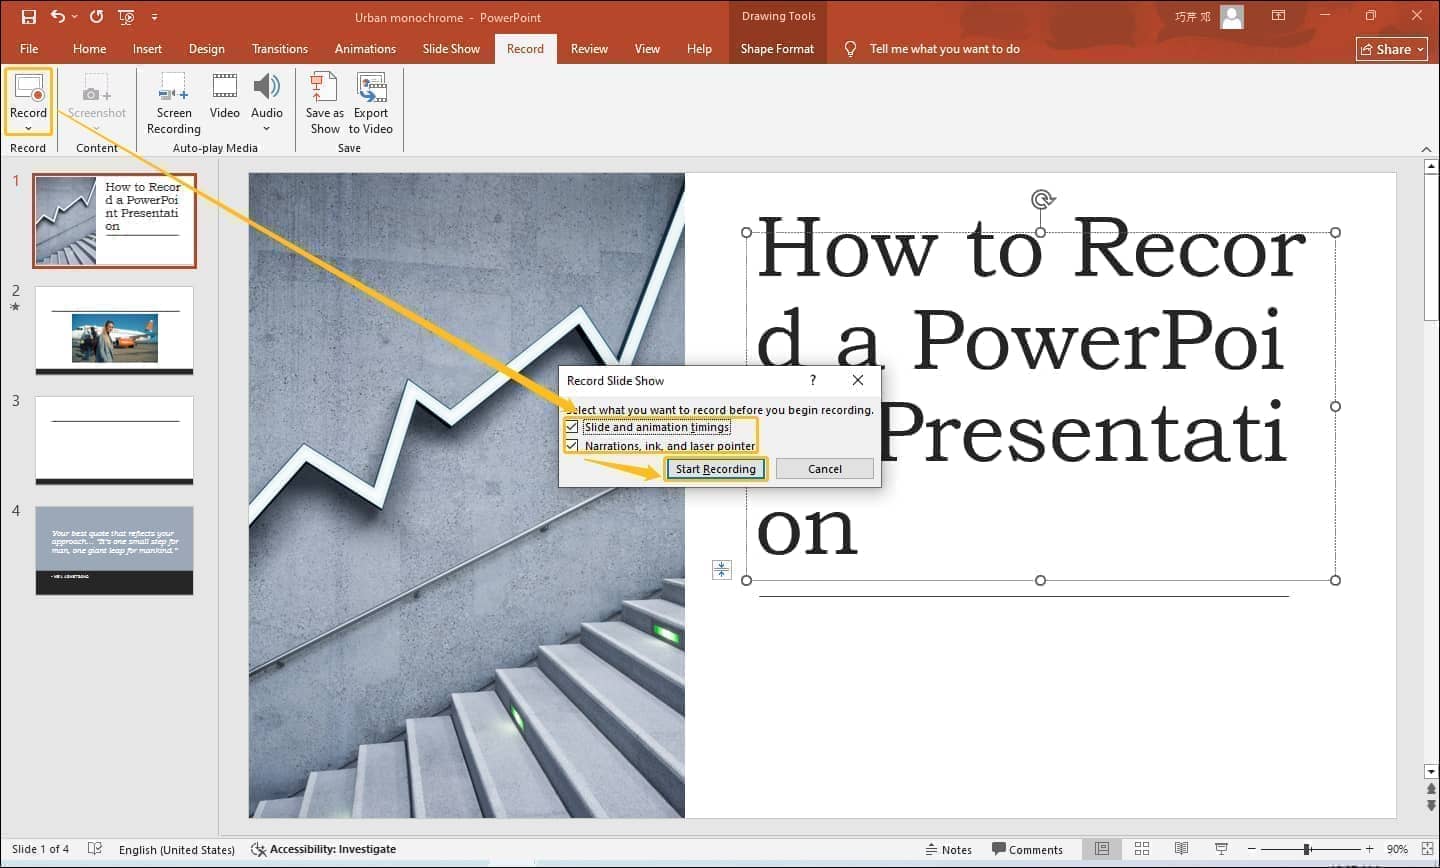
Expand the Record option. Here are the From Current Slide and the From Beginning options. Just choose one according to your needs. After choosing that, the Record Slide Show window will pop up. There, check Slide and animation timings and Narrations, ink, and laser pointer. Then, click on the Start Recording button to start recording.
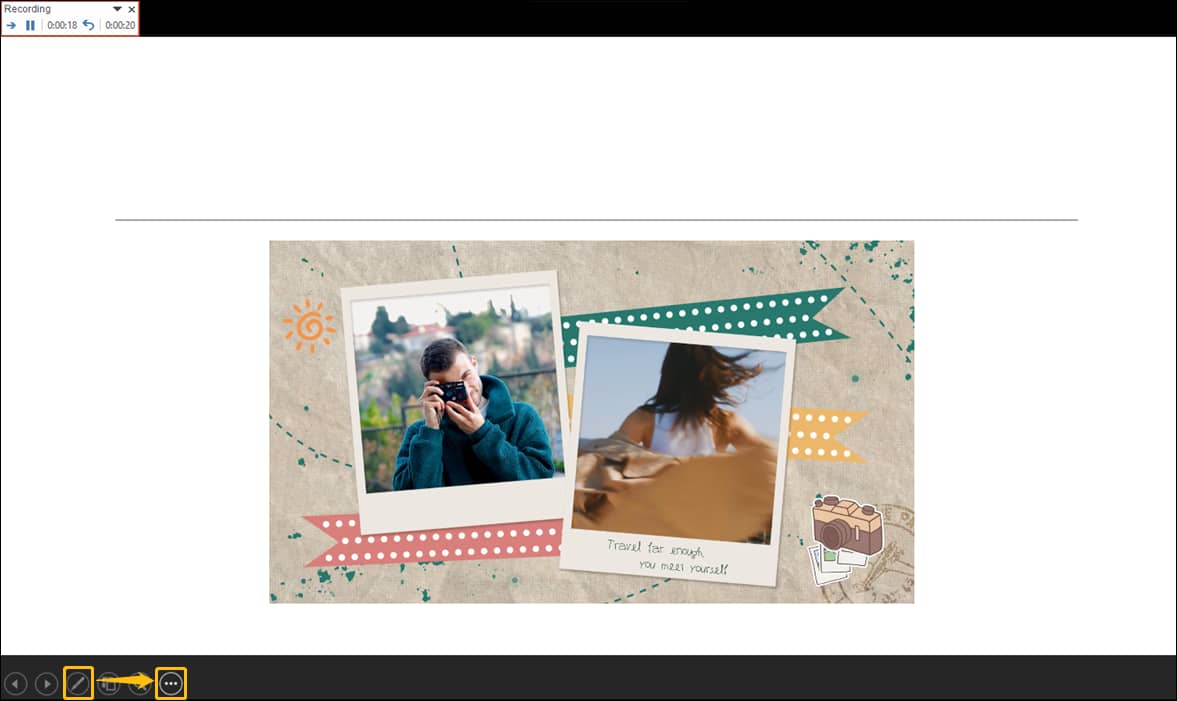
During the recording, click on the Edit icon. There, you use the pen, eraser, and highlighter tools to annotate and supplement your presentation. When you want to end this recording, click on the More icon and choose the End Show option to finish.
Step 3. Save the Recorded Video
Once the recording ends, in the Save section, click on the Export to Video option to save the recorded video.
The steps above are about how to use PowerPoint’s built-in tool to record a presentation.
How to Record a PowerPoint Presentation with Third-Party Applications
Are you still looking for a suitable recorder to record a PowerPoint showcase? I would like to recommend 2 ways that can fit your recording needs.
Option 1. MiniTool Screen Recorder
MiniTool Screen Recorder is a completely free screen recorder for PowerPoint presentations. It enables you to record your screen without time limits. What’s more, MiniTool Screen Recorder supports real-time annotation recording, inspiring more creative ideas. It also provides the Full Screen, Select Region, and Camera Only options, freeing your recording.
MiniTool Screen Recorder also supports recording system audio, microphone audio, or both. In addition, it also includes a customizable hotkey feature to suit your usage habits. MiniTool Screen Recorder empowers you to adjust frame rates and video quality for the recorded videos. Besides, it doesn’t have ads, watermarks, or bundles.
The following section will show you how to record a PowerPoint lecture with MiniTool Screen Recorder.
Step 1. Download and Install MiniTool Screen Recorder
Click on the download button below to download and install MiniTool Screen Recorder. Then, launch it.
MiniTool Screen RecorderClick to Download100%Clean & Safe
Step 2. Customize the Recording Settings
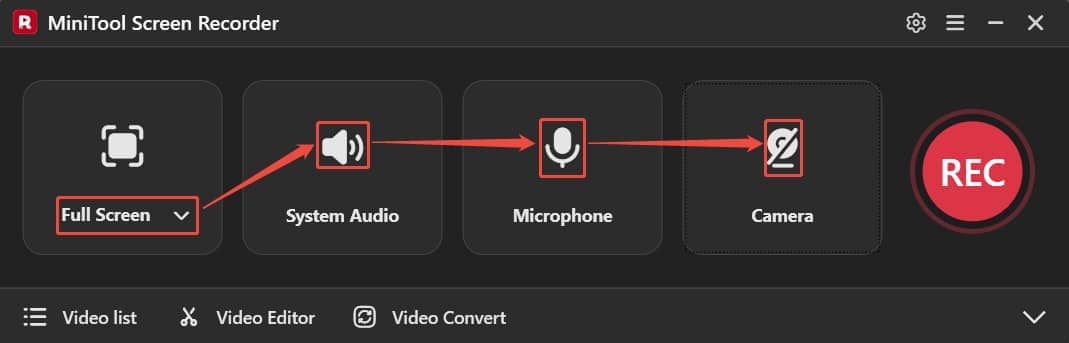
After running this application, expand the dropdown list to choose the recording region. Here, I choose Full Screen. Next, choose whether to record system audio or microphone audio. Then, click on the Camera icon to decide whether to open the webcam.
Step 3. Start the Recording Process
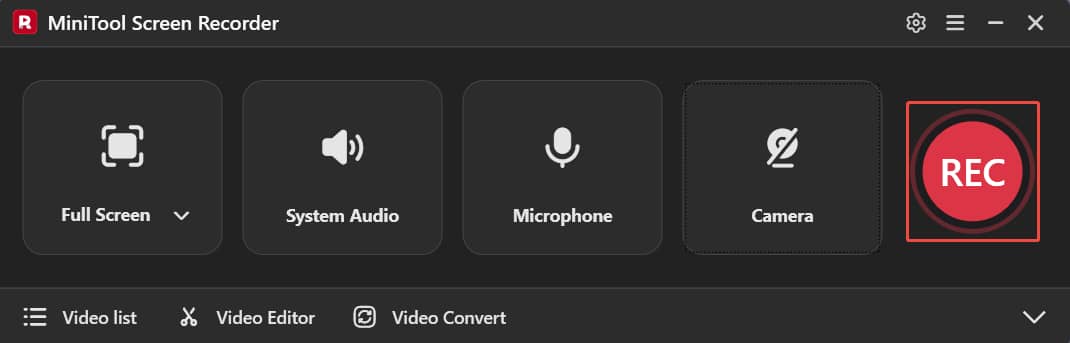
Once the recording settings end, click on the REC button. After a three-second countdown, the screen recording begins.
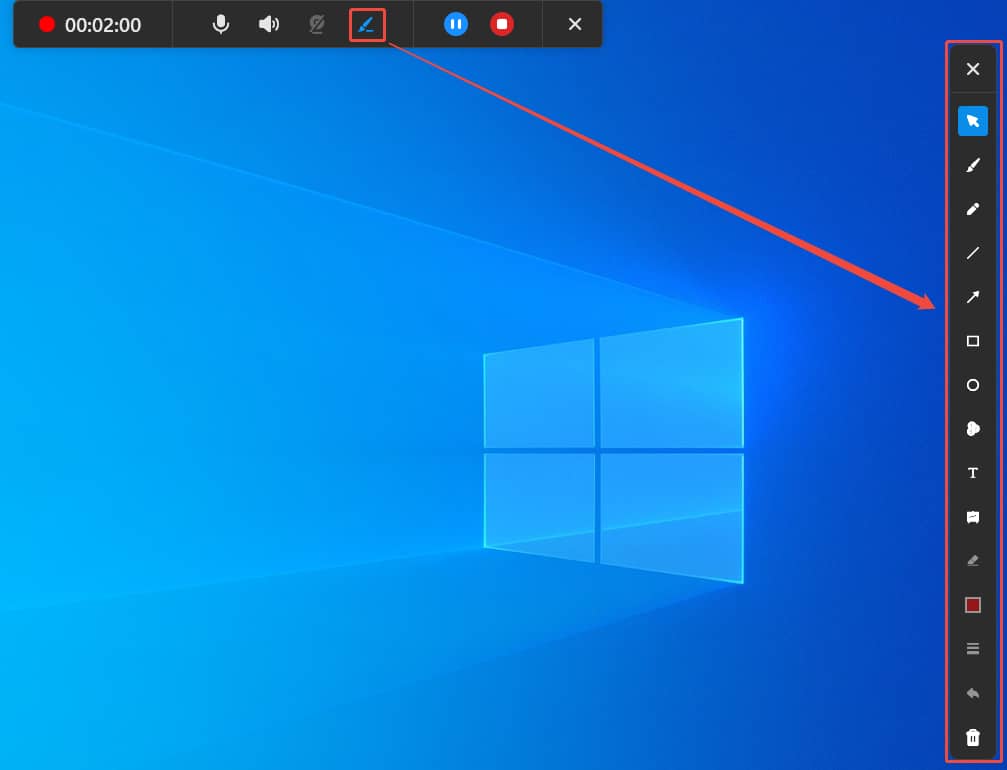
When you start the recording, move your mouse to the top center of your computer screen. Here, a floating bar will appear automatically. Click on the Brush icon in the bar. There, a real-time annotation column will appear on the right side of the screen. Then, select the desired tool in this column to add annotations or use the whiteboard.
During the recording, you can press the F9 key to pause or resume this recording or press the F6 key to end it.
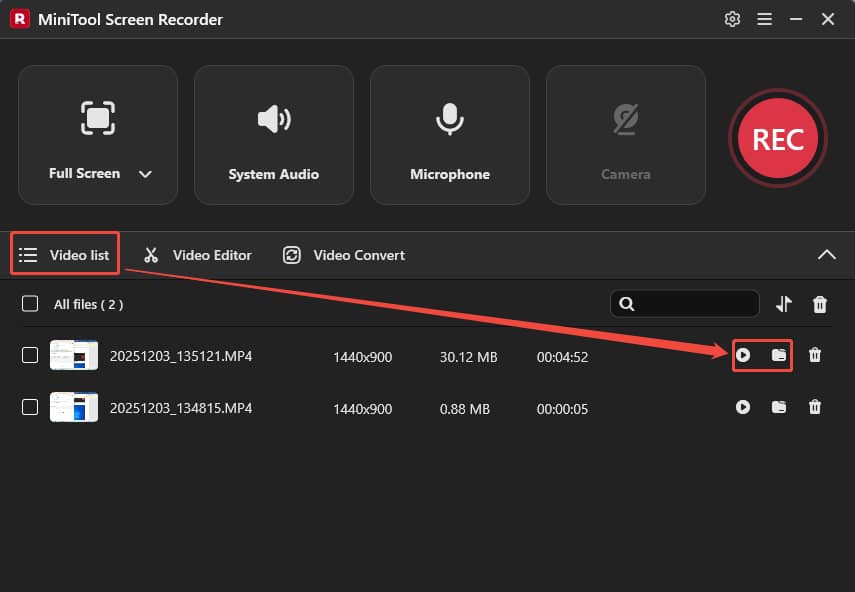
Step 4. Check the Recorded Video
Once the recording task finishes, the recorded video will appear in the Video list module. Here, click on the Play icon or the Folder icon to check or locate it on your computer.
Advantages:
- No recording size limits.
- Unlimited quantity or length of the recordings.
- Custom hotkeys.
- Free and safe.
- Adjust video quality and frame rate.
- Specify the recording region.
- Supports the annotations tool and whiteboard.
- Offers webcam.
Disadvantages:
- Only supports recording videos in Windows.
MiniTool Screen Recorder makes PowerPoint recording much richer and professional.
Option 2. Online Screen Recorder
Online Screen Recorder is a browser-based recorder. It allows you to record on Firefox, Chrome, and Edge. Online Screen Recorder enables you to record your webcam and voice. What’s more, it also supports adding annotations to the recording.
The following steps are how to complete a PowerPoint presentation recording step by step with Online Screen Recorder.
Step 1. Visit the Online Screen Recorder’s Webpage
Navigate to https://screen-recorder.com/ to open Online Screen Recorder’s homepage. There, select Free online screen recorder. Then, click on the Start Recorder option to open a pop-up window.
Step 2. Choose the Recording Region
In the pop-up window, switch to Window. There, select your PowerPoint window. Then, click on the Share button to apply the choice.

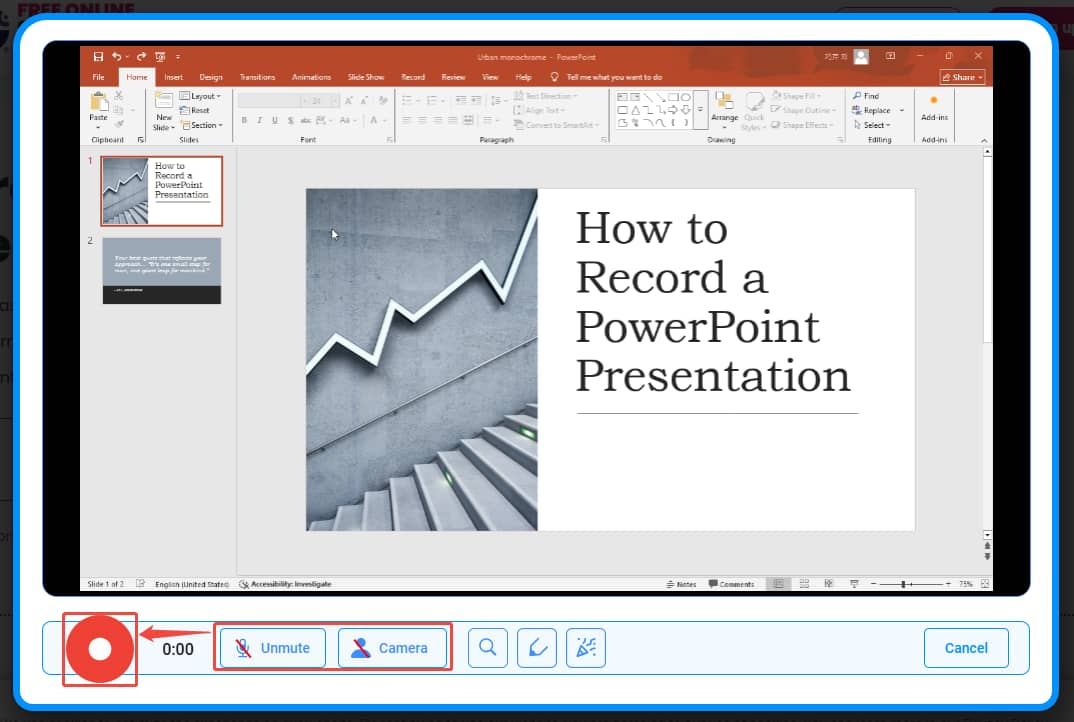
Step 3. Begin the Recording
Choose whether to open the microphone sound and camera. Then, click on the Record button to begin the recording.
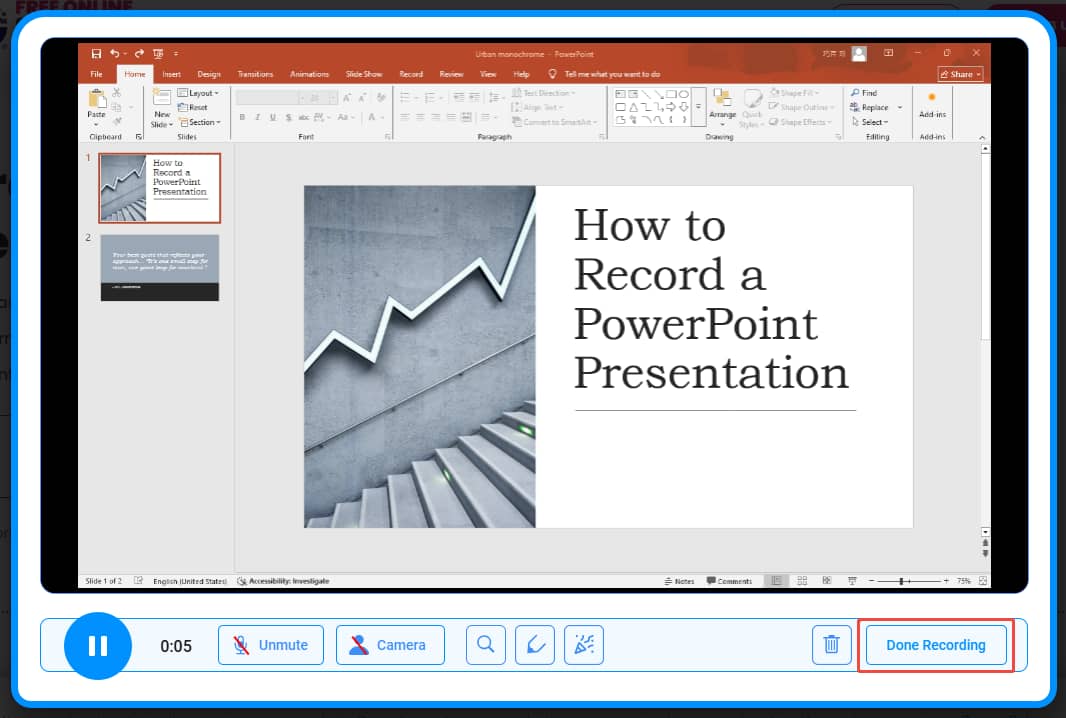
Click on the Done Recording button to end the recording. Then, this online recorder will switch to a webpage with the recorded video. Here, click on the Download icon to the recorded video.
Advantages:
- No download and installation.
- Supports adding annotations during recording.
- Enables recording of microphone audio and system audio.
- Allows a camera recording.
- Provides editing options for the recorded videos.
Disadvantages:
- Requires high network speed.
- Probably exists information security risks.
Using Online File Compressor to capture a PowerPoint presentation is an efficient way.
Bonus: How to Edit the Recorded PowerPoint Presentation Video
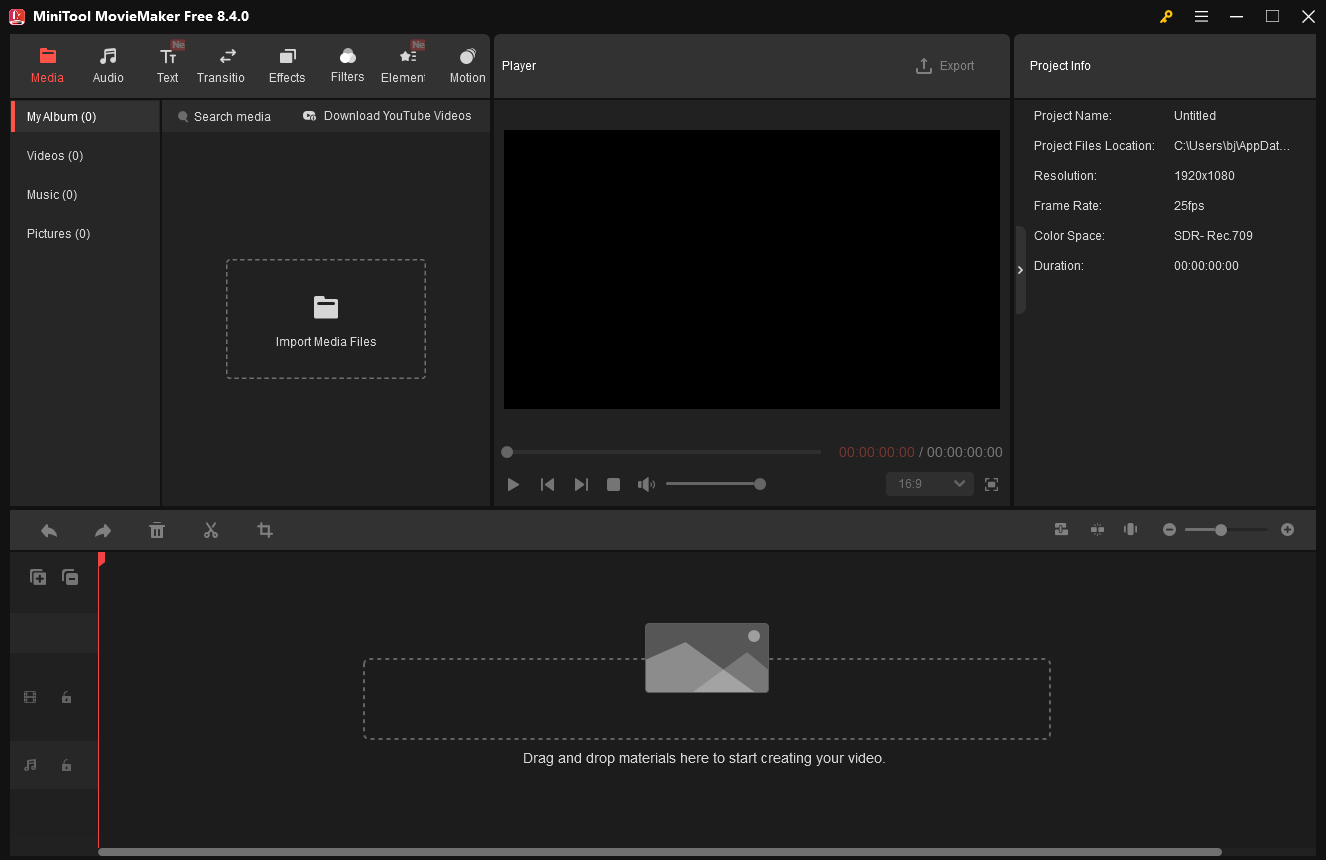
To edit your recorded presentation, I think MiniTool MovieMaker is a professional editor that you can’t miss. MiniTool MovieMaker supports adding audio effects, texts, transitions, effects, elements, motions, and filters into your PowerPoint presentation recordings. It also allows you to trim, crop, split, and merge videos. Plus, you can fine-tune the frame rate, resolution, aspect ratio, brightness, contrast, and saturation.
MiniTool MovieMaker can not only add background music to your recordings, but also add fade-in and fade-out effects to the background music, making your videos look better. Accordingly, it supports speeding up, reversing, flipping, and rotating your recordings.
MiniTool MovieMakerClick to Download100%Clean & Safe
Wrap Things Up
This article explains why you should record a PowerPoint showcase from both the audience's and the presenter's perspectives and how to choose a suitable screen recorder. It also tells how to record a PowerPoint presentation with 3 marvelous ways, including PowerPoint’s built-in tool, MiniTool Screen Recorder, and Online Screen Recorder.
If you have any problems when using MiniTool Screen Recorder, please send an email to support@minitool.com to ask for help. Also, you can directly send me a message on X. I will help you as quickly as possible.
How to Record a PowerPoint Presentation FAQ
Step 2. Go to Insert > Video > Video on My PC or Online Videos. Then, import your video.
Step 3. Switch to the File tab and go to the Export tab.
Step 4. Choose the Create a Video option. Then, click on Create Video to save it to your computer.
Step 2. Switch to the Slide Show tab.
Step 3. Click on the Set Up Slide Show option.
Step 4. Check the Loop continuously until ‘Esc’ option.
Step 5. Click on the OK button.
Step 2. Toggle to the File tab. Then, switch to the Options tab.
Step 3. Select Customize Ribbon.
Step 4. Choose the Record option and click on the Add option.
Step 5. Click on the OK button.