This post introduces 6 reliable high quality screen recorders, including MiniTool Screen Recorder, Xbox Game Bar, Clipchamp, Bandicam, ShareX, and OBS Studio, which can capture the screen smoothly with stable performance, clear audio, and high-resolution output for different needs.
I have a lot of screen recording needs in my daily life, such as recording online meetings, course presentations, gameplay, and other screen activities. Over the years, I've used many recording tools and found that not all of them provide a good experience. Some tools have problems such as blurry recordings, video stuttering, unclear audio, and more.
As such, this prompted me to begin searching for a high quality screen recorder for PC. Based on a range of criteria, including video quality, performance, audio fidelity, smoothness, etc., I ultimately narrowed my selection down to the following 6 screen recording tools that I believe are worth a try:
- MiniTool Screen Recorder
- Xbox Game Bar
- Clipchamp
- Bandicam
- ShareX
- OBS Studio
Additionally, below is a quick comparison table for your reference.
| Tool | Best for | Video Quality | Audio Recording | Webcam Recording | Watermark |
| MiniTool Screen Recorder | All on-screen activities | Up to 4K | System audio and microphone | Yes | No |
| Xbox Game Bar | Game recording | Up to 1080P | System audio and microphone | No | No |
| Clipchamp | Beginner-friendly recording and video editing | Up to 4K (Paid version) | System audio and microphone | Yes | No |
| Bandicam | Game recording and other daily recording activities | Up to 4K | System audio and microphone | Yes | Yes (free version) |
| SharX | Lightweight recording | Up to 4K | System audio and microphone | No | No |
| OBS Studio | Professional recording and live streaming | Up to 4K | System audio, microphone, and advanced audio mixing | Yes | No |
1. MiniTool Screen Recorder
MiniTool Screen Recorder is a free high quality screen recorder designed for Windows users. I stumbled upon this tool while browsing the web; given that it is currently completely free and offers full access to all its features, I decided to give it a try.
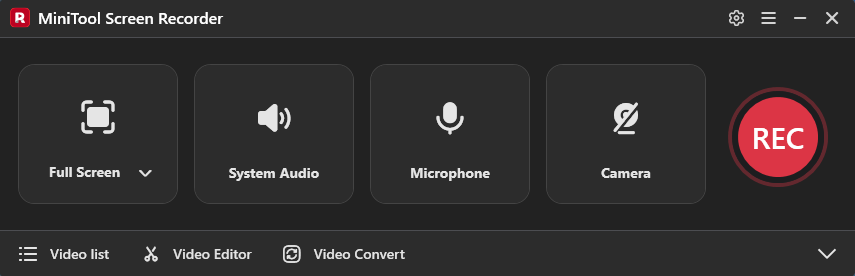
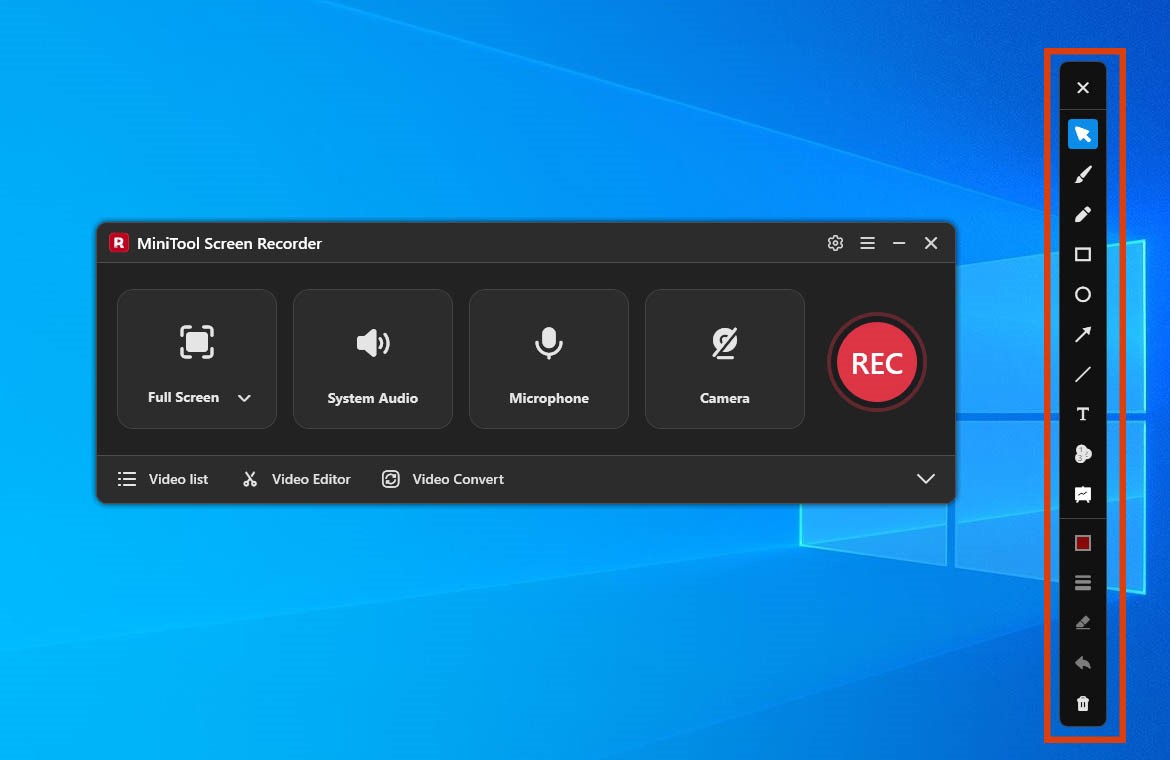
The interface of MiniTool Screen Recorder is remarkably clean and minimalist; upon launch, all functional areas and options are immediately visible. Users can choose to record the entire screen, a specific region, or a single window. Furthermore, the tool supports independent control over the recording of both system audio and microphone audio.
Besides, MiniTool Screen Recorder offers webcam recording capabilities and features built-in screen annotation tools that users can utilize in real time during the recording process. Most importantly, it allows users to customize recording parameters: supporting adjustments to recording quality, frame rate, keyboard shortcuts, webcam settings, and more.
MiniTool Screen RecorderClick to Download100%Clean & Safe
My Experience
After using MiniTool Screen Recorder for a while, I found its performance to be very stable. Even during long recording sessions, the software didn't crash. Furthermore, I didn't encounter any lag or blurry videos.
What I'm most satisfied with is that I was able to quickly master the MiniTool Screen Recorder’s functions, and videos recorded with this tool don't have watermarks. In short, MiniTool Screen Recorder achieves a perfect balance between ease of use and recording quality.
| Pros | Cons |
| Easy to use. No watermark, no ads, and no bundles. 4K HD recording support. Webcam recording and annotation tools provide. Flexible recording area options. | Only for Windows users. |
2. Xbox Game Bar
In my experience with screen recording, I often encounter situations where I need to record immediately but don't have time to open the software. Therefore, I started trying to use the Xbox Game Bar.
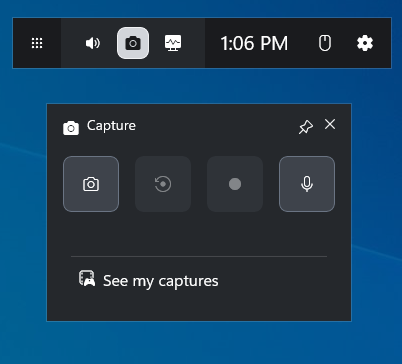
The Xbox Game Bar is a built-in and pre-installed overlay in Windows. Originally designed for gamers, it was used to record gameplay, chat with friends, and monitor performance. Now, the Xbox Game Bar has been upgraded to record other applications and windows in addition to games. This tool can also capture system audio and microphone audio.
In addition, the Xbox Game Bar allows users to set recording parameters, such as setting the maximum recording time (4 hours), selecting video frame rate and quality, as well as controlling audio recording volume, etc.
My Experience
As a gamer, I record gameplay videos in my spare time and share them on social media platforms. The Xbox Game Bar is incredibly fast when I need to record; it activates quickly with just a press of the Windows + G keys. I've also discovered that this tool can record the last 30 seconds of video, which is extremely convenient for capturing exciting moments.
However, I found that the Xbox Game Bar does not allow for capturing a part of the screen, nor can it record the desktop or File Explorer. Therefore, overall, this tool is not well-suited for professional screen recording.
| Pros | Cons |
| Completely free. No installation required. Customizable recording settings support. Flexible audio controls. Last 30 seconds recording support. | Desktop and File Explorer recording does not support. Recording time is limited. Not suitable for professional recording. |
3. Clipchamp
Since I frequently need to edit videos after recording them, I have long been searching for a high quality screen recorder that offers an all-in-one solution, combining both recording and editing capabilities. Ultimately, I chose Microsoft Clipchamp. My primary reason for choosing it is that it comes pre-installed on Windows 11.
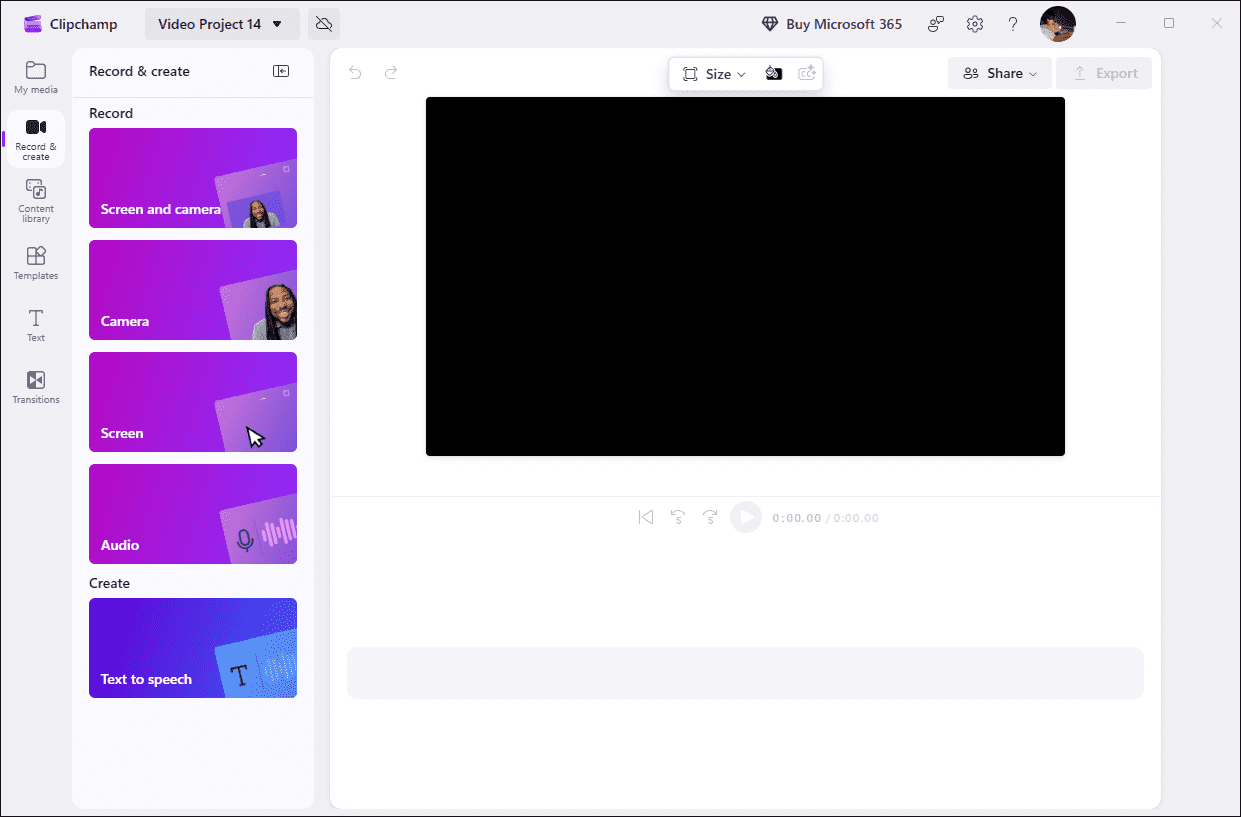
What’s more, Clipchamp offers a comprehensive range of recording options, supporting the separate recording of the screen, audio, and webcam footage. Once recording is complete, the application automatically switches to the editing interface, where users can crop and trim the video, or add overlay elements such as filters, text, and subtitles.
Besides, Clipchamp supports selecting the video resolution during export and allows users to save the recording as an animated GIF. Another practical feature of this tool is that users can save their recorded videos directly to OneDrive, thereby effectively saving local disk storage space.
My Experience
After using Clipchamp for a while, I found that it genuinely helps me save time on video recording and editing; moreover, compared to professional editing tools, it is much easier to get the hang of.
However, I also discovered some limitations: the maximum duration for a single recording session is capped at 30 minutes, and if you wish to save videos in 4K high definition, you need to upgrade to the premium version.
| Pros | Cons |
| User-friendly interface. Suitable for content creation. Combine recording and editing features. Cloud storage support. | Limited recording settings customization. The free version does not support 4K recording. Recording time limit is 30 minutes. |
4. Bandicam
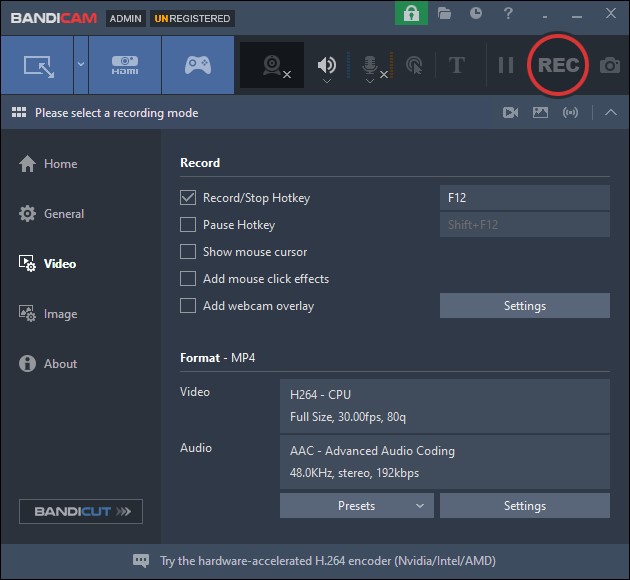
Bandicam is a high quality screen recorder that I frequently use to capture games. It's small in size and has extremely low CPU usage. Bandicam offers flexible recording area options, and its game recording performance is its standout feature. For example, this software can record not only 2D and 3D games on a PC, but also games on a game console.
Another standout feature of Bandicam is its high recording frame rate of up to 480 FPS, which ensures the smoothness of the recorded game footage to the maximum extent.
My Experience
Bandicam's game recording experience is indeed superior to other software, and I found its decoder to minimize file size. However, the free version of this tool adds a watermark to the video, and each recording session is limited to a maximum of 10 minutes.
| Pros | Cons |
| Best suitable for gaming recording. High recording frame rate support. Combine recording and editing features. | The free version will add a watermark to the video. The recording time limit is 10 minutes in the free version. |
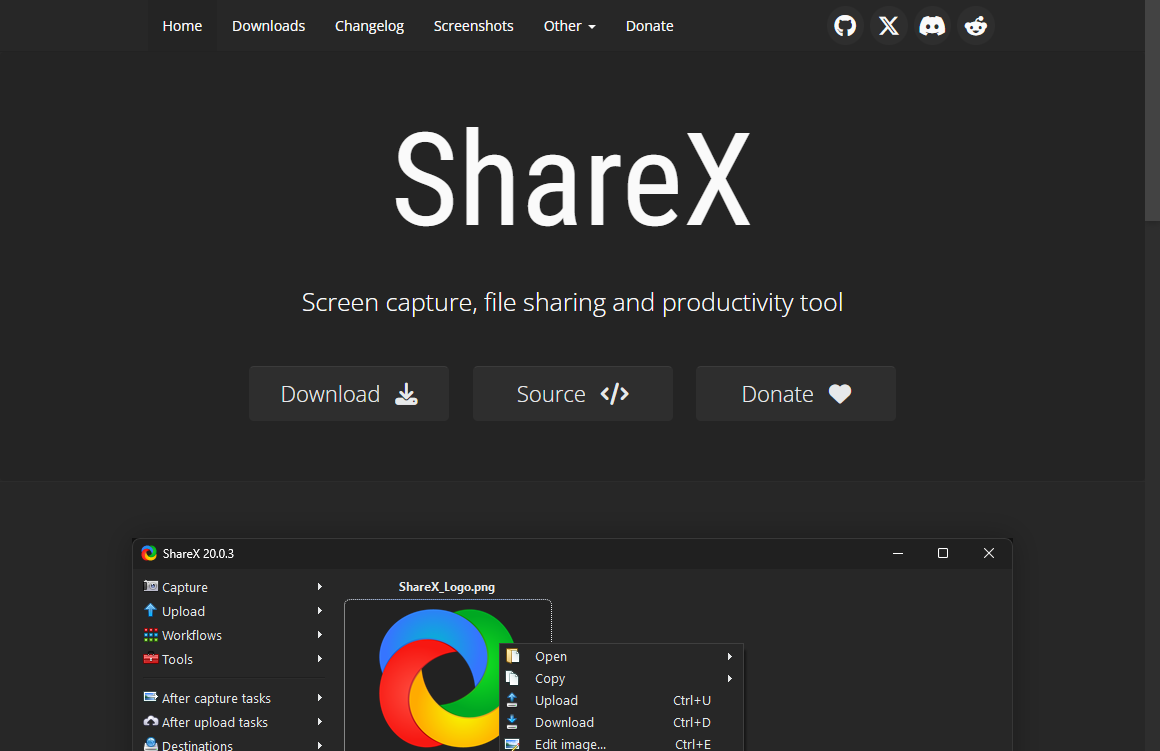
5. ShareX
While searching for the high quality recording software, I discovered a lightweight application called ShareX. It's completely free and requires no account registration. ShareX offers powerful recording capabilities as well as convenient screenshot functionality. Besides, it supports instant sharing of the recorded file to over 80 platforms, including GitHub Gist, Google Drive, Discord, and more.
What I like most about is ShareX’s automated workflow. Users can set post-recording tasks according to their preferences. The tool automatically executes preset instructions after the task is completed, greatly simplifying the workflow.
My Experience
After using ShareX for an extended period, I believe it's more suitable for users with advanced recording needs. Compared to other tools, its interface is slightly more complex, resulting in a steeper learning curve.
| Pros | Cons |
| Completely free. Quick sharing support. Convenient automated workflow support. Flexible recording settings. | Complicated user interface. The learning curve is steep. |
6. OBS Studio
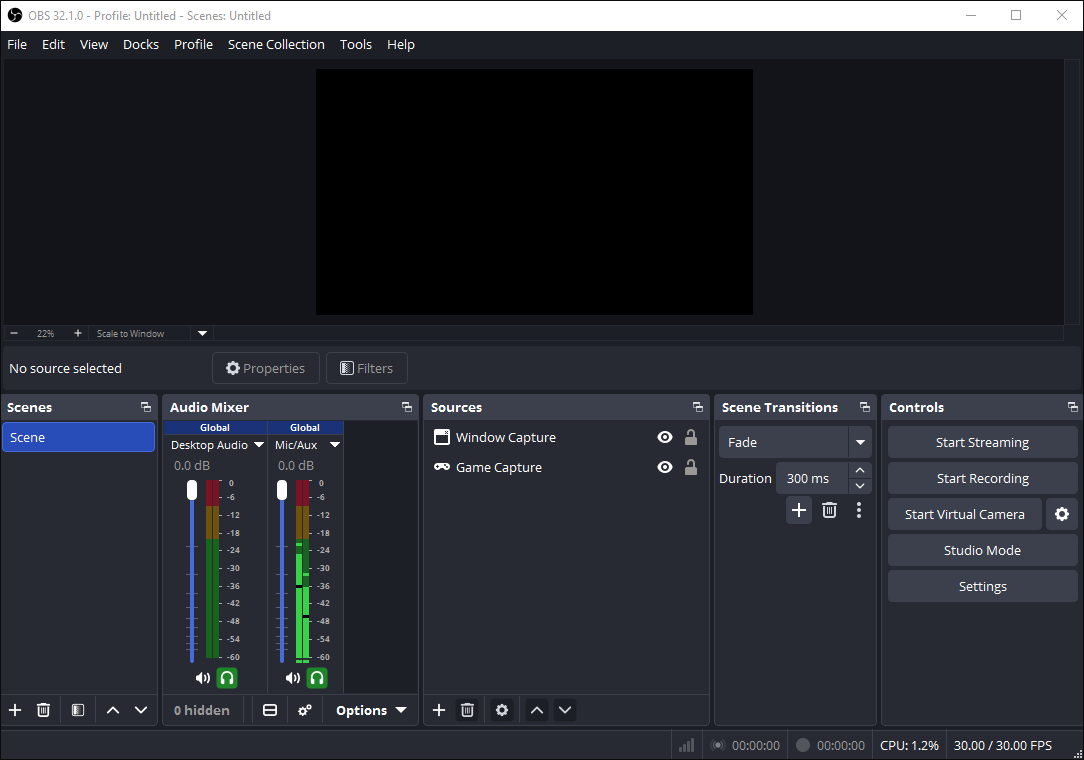
OBS Studio is widely recognized for its superior quality. It is ideal for live streaming professionals and content creators. While its interface is slightly complex, this is mainly due to its comprehensive functionality.
OBS Studio offers more precise control over video, audio, browser windows, and other text layers, and allows users to customize layouts. Additionally, it supports plugins and hardware acceleration, further enhancing user flexibility. More importantly, OBS Studio has no recording time limit and does not add watermarks to videos.
My Experience
OBS Studio offers a very high degree of customization. I have complete control over audio settings, adjusting recording resolution, bitrate, frame rate, and so on. However, it took me a considerable amount of time to learn the workflow and master these features. Therefore, its learning curve is quite steep.
| Pros | Cons |
| Completely free. Flexible video and audio controls. Highly recording customized support. A live streaming function is provided. | Complicated user interface. Steep learning curve. |
In summary, all six tools mentioned above offer high-quality recording capabilities, but each has its own advantages and focuses on different aspects. Therefore, choosing the right screen recording software ultimately depends on which features and flexibility you need most.

How to Screen Record with High Quality
The recording process of the above 6 tools is similar in principle. Below, we will use MiniTool Screen Recorder as an example to introduce how to screen record in high quality. Here is an overview of the basic recording steps:
- Get and Launch MiniTool Screen Recorder
- Configure the Recording Settings
- Select the Recording Region
- Manage the Audio
- Control the Camera
- Start and End Recording
- Check and Locate the Recorded Video
Step 1: Get and Launch MiniTool Screen Recorder
MiniTool Screen RecorderClick to Download100%Clean & Safe
1. Click the button above to install MiniTool Screen Recorder.
2. Follow the on-screen instructions to install it on the PC. Then, launch it.
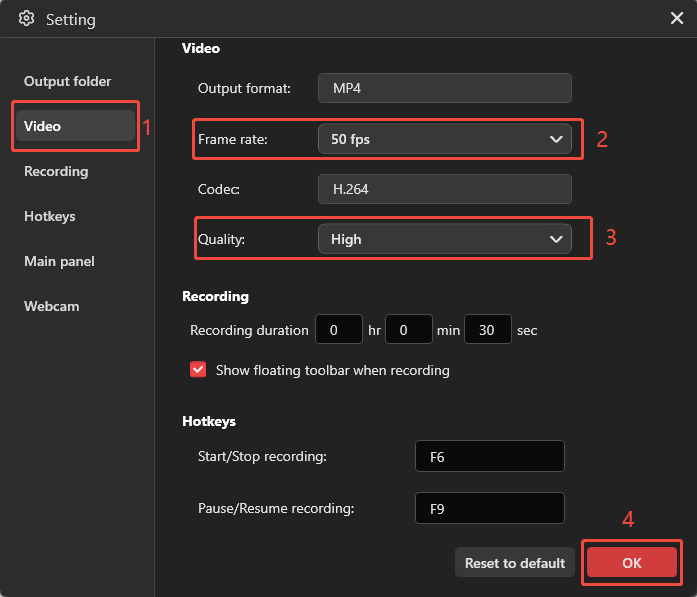
Step 2: Configure the Recording Settings
1. Click the Settings icon in the upper-right corner of the main interface to enter the Settings interface.
2. Navigate to the Video section.
3. Then, expand the Frame Rate option and choose the 50 fps option. To ensure the recording quality, expand the Quality option and choose the High option.
4. Finally, click OK to save the changes.
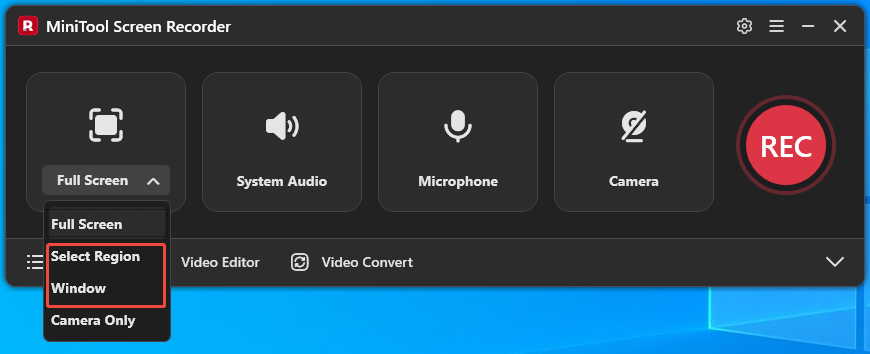
Step 3: Select the Recording Region
1. MiniTool Screen Recorder defaults to capturing the full screen.
2. To record the specific region or window, expand the Full Screen option, then choose the Select Region option or the Window option.
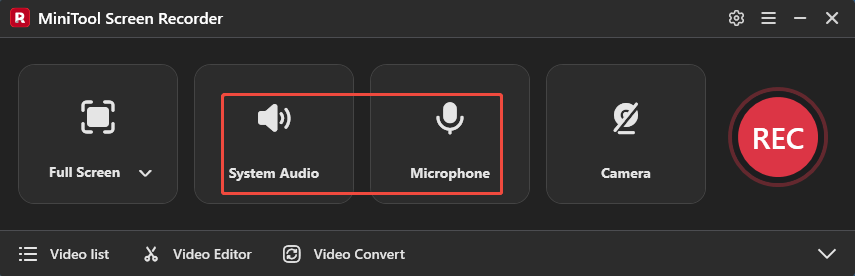
Step 4: Manage the Audio
1. By default, the computer audio and voiceover will be automatically recorded.
2. To turn them off, click the System Audio icon and the Microphone icon, respectively.
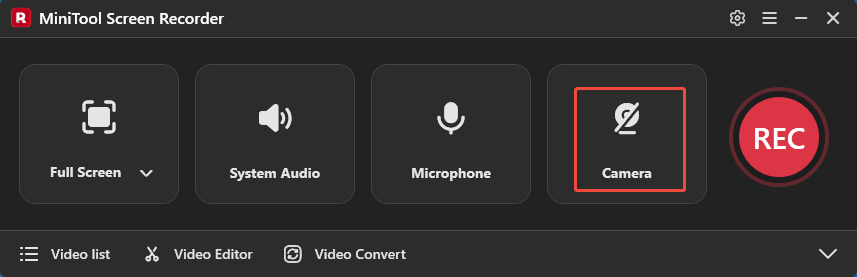
Step 5: Control the Camera
To capture the screen with a webcam, click the Camera icon to enable the webcam recording feature.
Step 6: Start and End Recording
1. Click the REC button or press the F6 key to begin the recording process.
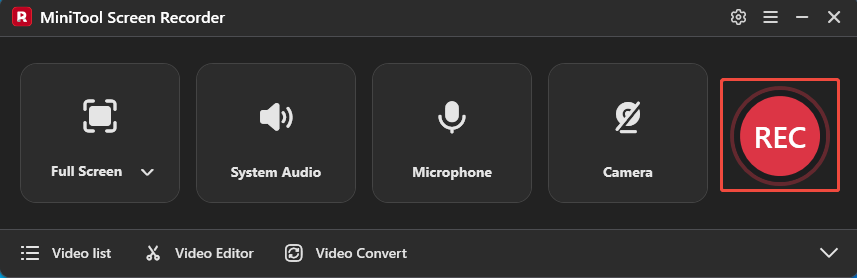
2. After a 3-second countdown, choose the target content.
3. When I need to create a tutorial video, I typically use the annotation tools on the right side of the screen to add step-by-step notes.
4. To end the recording process, press the F6 key again.
Step 7: Check and Locate the Recorded Video
1. This tool will automatically switch to the Video list section after the recording ends, where the recorded video is listed.
2. Then, click the Play icon to check the recorded video and click the Folder icon to locate it on the PC.

Final Thoughts
A high quality screen recorder should excel in areas such as video clarity, audio quality, and recording stability. The 6 tools introduced in this article, MiniTool Screen Recorder, Xbox Game Bar, Clipchamp, Bandicam, ShareX, and OBS Studio, all provide reliable recording capabilities to meet a variety of recording needs.
If you run into any issues when trying out MiniTool Screen Recorder, send an email to support@minitool.com.