How to record a Teams meeting easily? Meeting organizers can use the built-in recording feature in Teams and have the authority to grant recording permission, while guests will need to use a third-party video recorder, such as MiniTool Screen Recorder.
Microsoft Teams is a cloud-based team collaboration platform developed by Microsoft that supports use across multiple platforms and devices, including Windows, Mac, Linux, Android, iOS, and more. It offers a wide range of features, including video conferencing, online chat, phone integration, file storage, etc.
Moreover, Microsoft Teams employs top-grade security technologies designed to protect collaboration information between users and team members from being disclosed.
Can You Record a Teams Meeting
The answer is absolutely yes. However, I used to struggle with this myself. During remote meetings, I often found that I couldn’t use the recording feature in Teams. Later, I learned that recording permissions depend on my role in the meeting. If I’m the meeting organizer, or if I’ve been granted the organizer’s recording permissions as a participant, I can record the meeting.
However, users cannot use Teams’ built-in recording feature in the following situations:
- Use the free version of Teams.
- Join a meeting as a guest or a member of an external organization.
- The meeting organizer has disabled the recording feature.
- The meeting organizer has not granted recording permissions to participants.
In these cases, I’ve found that using a professional third-party video capture makes it easy to capture Teams meetings.

How to Record a Teams Meeting
In this section, I’ll explain how to record Teams meetings using Teams’ built-in recording feature and a third-party screen recording tool.
#1 Use Teams' Built-in Screen Recording Feature
Here are the specific instructions for capturing a Teams meeting with its built-in recording feature.
Step 1: Go to Microsoft Teams
1. Open the browser and go to the Microsoft Teams website.
2. Then, log in to the account.
Step 2: Start or Join a New Meeting
1. Switch to the Meet section.
2. Click the Create a meeting link option to create a new meeting; or, click the Join with a meeting ID option to join a new meeting.

Step 3: Start and End Recording
1. In the meeting interface, click the More option and choose the Start recording option to begin the recording process.
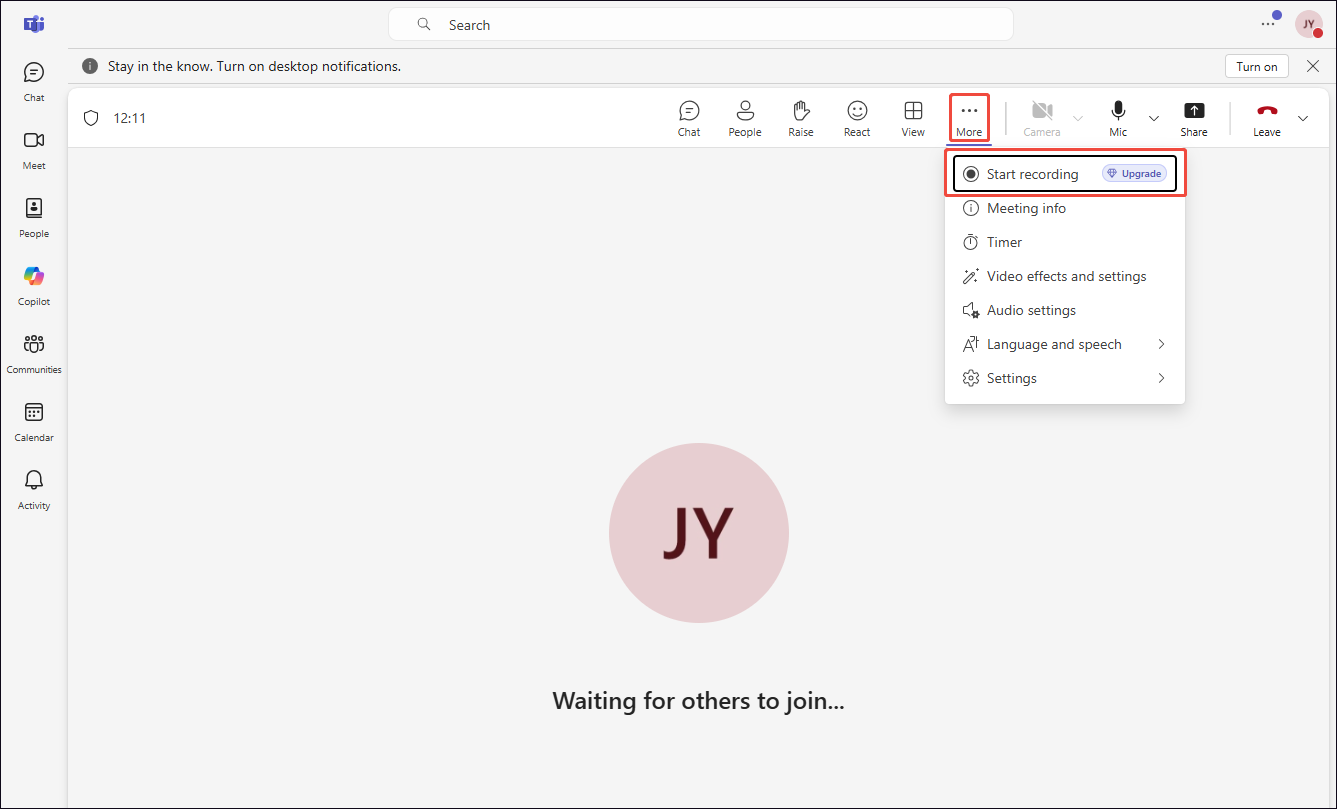
2. To end the recording process, click the More option again and choose the Stop recording option.
Step 4: Check the Recorded Meeting
Teams recordings are stored in different locations depending on the meeting type. Recordings of channel meetings are stored in the Recordings file of the channel. Recordings of non-channel meetings are stored in OneDrive.

#2 Use a Third-Party Screen Recorder
When I join a Teams meeting as a regular participant or guest, I usually use MiniTool Screen Recorder, a professional third-party screen recording tool, to avoid wasting time requesting recording permissions. It offers more flexible recording options than Teams’ built-in recording feature. For example, I can freely choose to record the entire screen, a specific area, or a particular window.
I can also record my face using MiniTool Screen Recorder’s webcam recording feature. Meanwhile, with this tool, I can record system audio and microphone audio simultaneously or separately.
What’s more, I think the most standout feature of MiniTool Screen Recorder is the annotation tools it provides. I often use them to highlight key information when recording meetings. Best of all, it doesn’t add a watermark to the recorded videos.
Here are the steps on how to record a Teams meeting outside of Teams.
Step 1: Download and Install MiniTool Screen Recorder
Click the button below to download MiniTool Screen Recorder. Then, follow the prompts to install it on the PC.
MiniTool Screen RecorderClick to Download100%Clean & Safe
Step 2: Select the Recording Area
1. Launch MiniTool Screen Recorder.
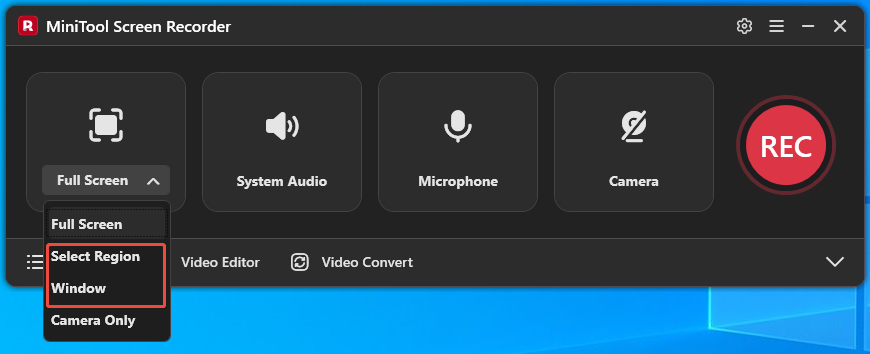
2. MiniTool Screen Recorder defaults to capture full-screen, to record a specific area or a particular window, expand the drop-down menu of the Full Screen option.
3. Then, choose the Select Region option or the Window option.
Step 3: Manage Audio Recording Settings
The system and microphone audio recording features are enabled by default. To disable them, click the System Audio icon and the Microphone icon, respectively.

Step 4: Control the Camera Recording
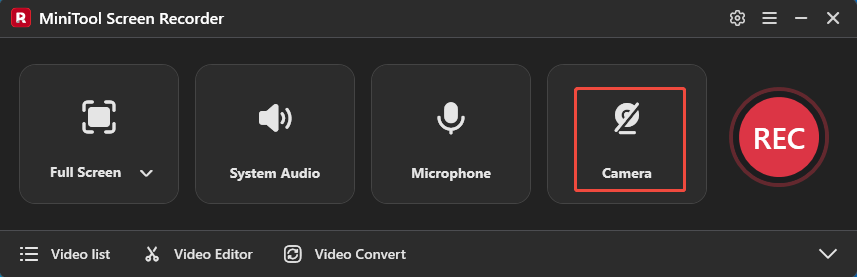
To capture the Teams meeting showing the face, click the Camera icon on the right to enable the webcam recording feature.
Step 5: Start and End Recording
1. Click the REC button or press the F6 key to begin the recording process.
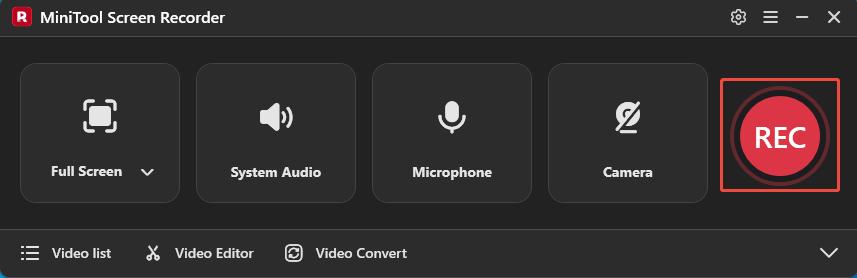
2. After a 3-second countdown, open the browser and go to Teams. Then, start or join in a new meeting.
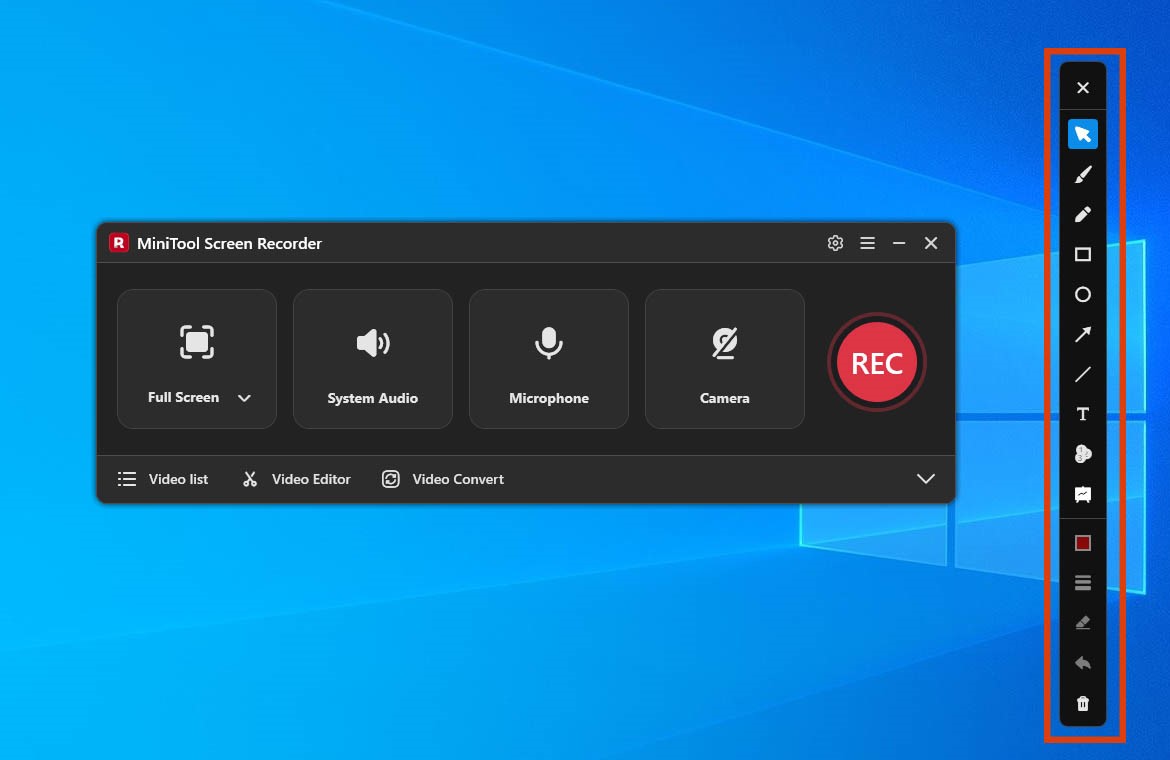
3. During the recording process, I often use the annotation toolbar on the right side of the screen to highlight important and key information.
4. To end the recording process, press the F6 key again.
Step 6: Check the Recorded Meeting
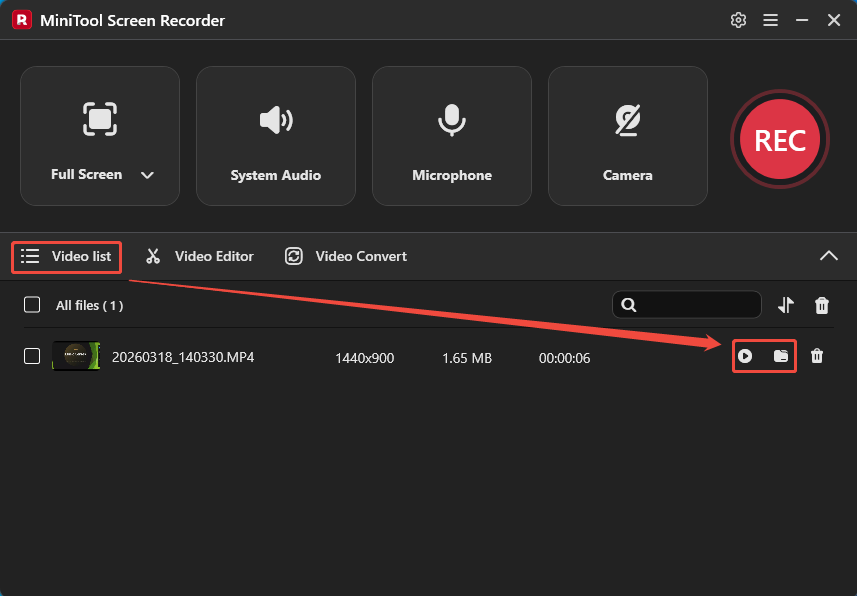
1. When the recording process ends, MiniTool Screen Recorder will automatically switch to the Video list section, where the recorded video is listed.
2. Click the Play icon to check the recorded meeting; or, click the Folder icon to access it on the PC.
MiniTool MovieMakerClick to Download100%Clean & Safe
Bottom Line
This article explains how to record a Teams meeting based on different scenarios. Users with recording permissions can use the built-in recording feature directly. If you do not have these permissions, use the third-party recording tool described in this article: MiniTool Screen Recorder.
If you run into any issues when trying out MiniTool Screen Recorder or MiniTool MovieMaker, send an email to support@minitool.com.