This article explains why you need to record part of screen and shows you how to choose a fantastic screen recorder. Meanwhile, it recommends a remarkable screen recorder and offers you a professional screen recording editor: MiniTool MovieMaker.
Capturing your computer activities, such as video calls and online courses, is helpful for those who want to keep the memories with friends or review the knowledge. Although you know how to capture the screen, have you grasped how to screen record part of screen? Read the following content to find out.
Why Record Part of Screen
Here are the reasons for Windows record part of screen.
Reason 1. The Improvement of Focus
Once you have configured a specific recording area, some factors, like unimportant background tabs and desktop elements, can be excluded during the recording process. This way, the viewers can get a more focused watching experience.
Reason 2. Privacy Protection
Since you have selected the recording region based on your needs, it is impossible to expose your private information, such as emails, phone numbers, address, and more, to the audience, which ensures the protection of your privacy.
Reason 3. Facilitation for Social-Media Sharing
Some social media platforms like TikTok and YouTube require the aspect ratio of the uploaded videos. 1080x1920 is a good example. As such, if you record a part of your screen, you can directly adjust the aspect ratio, which enables you to share your screen recordings on social platforms more effortlessly.
Reason 4. A Smaller File Size
Compared with recording the whole screen, recording a part of the screen means a smaller file size. This way, these recordings will take up less storage space on your PC. Simultaneously, it takes you less time to upload the recordings to other platforms.
Moreover, because some platforms, such as TikTok and Facebook, set a file size limit for uploaded videos, it is more likely for you to upload a part-screen recordings with a small file size instead of a full-screen version with large files.
How to Choose a Robust Screen Recorder
How to select a robust screen recorder to conduct a regional recording? Here is some advice. Firstly, selecting a tool with an intuitive interface is advisable. This way, even if you are an entry-level user, you can accomplish the recording tasks. Meanwhile, it is workable for you to use a free tool without any watermarks, helping you save more costs.
In addition, to facilitate the sharing and editing of recordings, it is suggested that you find an MP4 recorder. Meanwhile, the annotation function that enables you to highlight the key points of the screen recording is also important. With it, your screen recording can be more understandable for the audience.
How to Record Part of the Screen
A reliable screen recorder helps record a part of your screen effortlessly. Here, I highly recommend MiniTool Screen Recorder.
What Is MiniTool Screen Recorder
MiniTool Screen Recorder is an easy-to-use, watermark-free screen recorder that features both regional and full-screen recording. Meanwhile, it allows you to preset the recording duration without any time limits. Moreover, MiniTool Screen Recorder allows you to capture audio from your PC easily.
More importantly, MiniTool Screen Recorder enables you to record the webcam and annotate your screen. In addition, it will automatically save the recordings in the MP4 format, which facilitates your sharing and video playback. Plus, MiniTool Screen Recorder, which doesn’t require any payment for screen recording, is a can’t-miss option for people on a tight budget.
How to Record Part of Screen with MiniTool Screen Recorder
Below is a detailed guide on how to record a part of your screen using MiniTool Screen Recorder.
Step 1. Download and install MiniTool Screen Recorder.
MiniTool Screen RecorderClick to Download100%Clean & Safe
Download MiniTool Screen Recorder by clicking on the download button above. Then, follow the on-screen prompts to install this application on your PC.
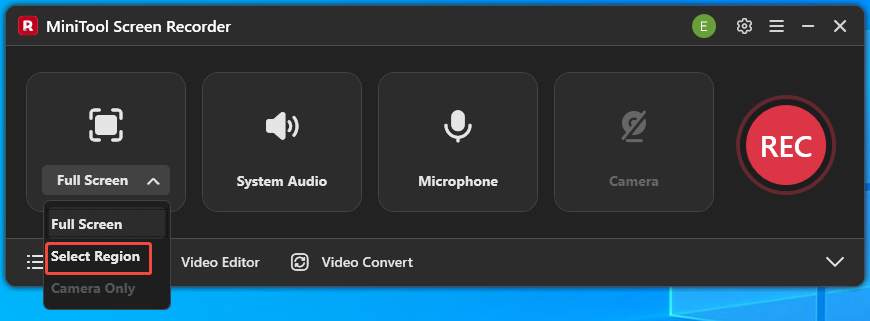
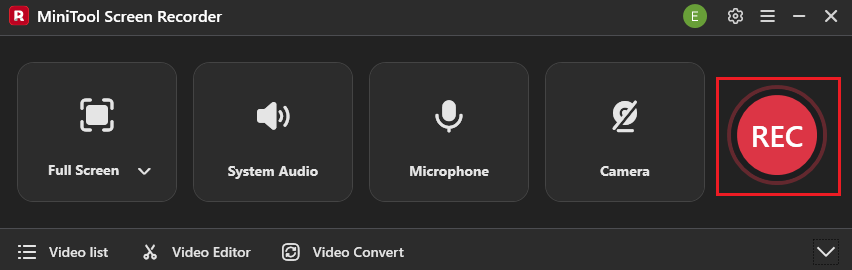
Step 2. Select the recording area.
Launch MiniTool Screen Recorder. By default, this screen recorder will adopt a full-screen recording mode. Press the Alt + R keys to activate the selection of the recording area.
Step 3. Manage the audio recording and enable the webcam recorder.
Click on the System Audio icon and the Microphone icon to turn on/off the system and microphone sounds according to your needs. Next, click on the Camera icon to enable the webcam recording if you want.

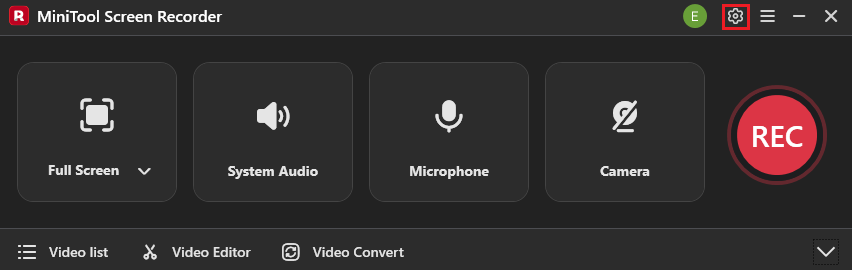
Step 4. Configure other recordings.
Click on the upper-right Settings icon to enter the Settings window.
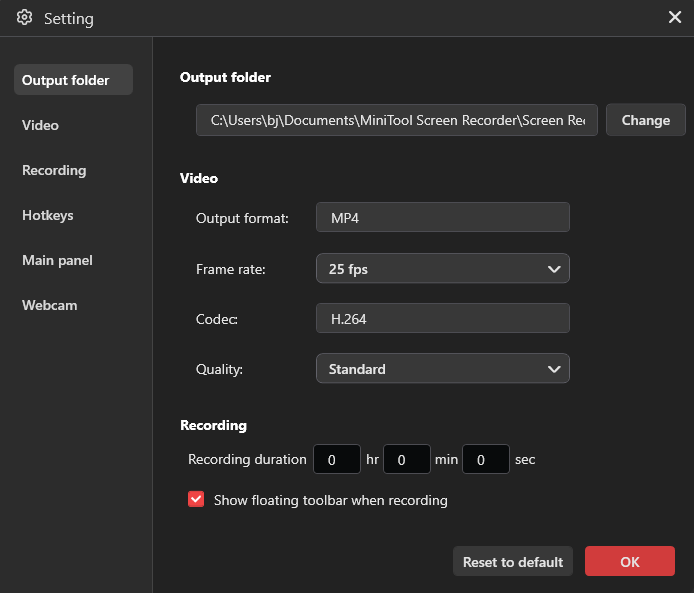
In the pop-up window, you can select an output folder for the recorded videos. Meanwhile, you are free to set the frame rate as 15fps, 20fps, 25fps, 30fps, or 50fps. In addition, you can specify the recording quality as High, Original, or Standard. Finally, click on the OK button to confirm the changes.
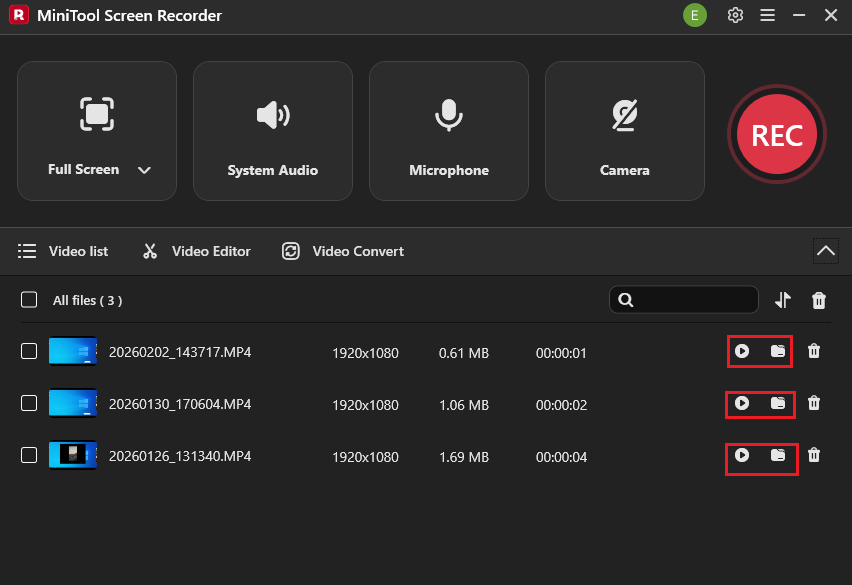
Step 5. Start/end the recording and check the output files.
Begin the recording process by clicking on the REC button. After a 3-second countdown, play the computer activities that you want to record. When the recording process ends, stop the recording by pressing the F6 key.
In the expanded file list, click on the Play icon to directly view the recordings. If you want to locate them, click on the Folder icon.
MiniTool Screen Recorder is also a good choice for you when encountering OBS game capture black screen.
Bonus: How to Edit Your Screen Recordings
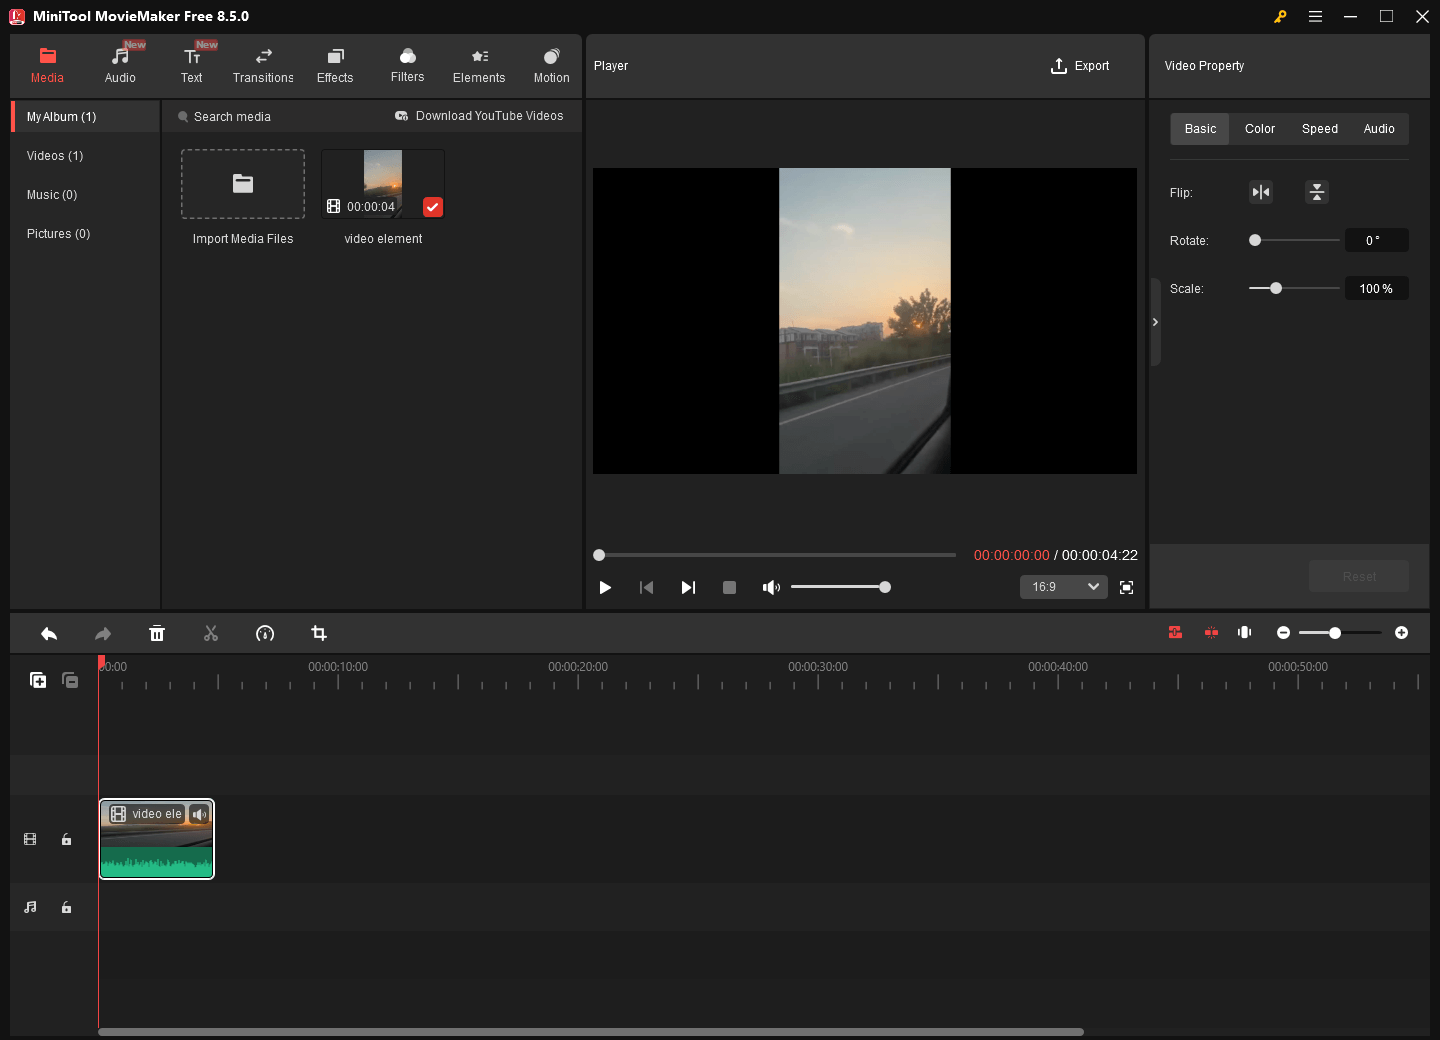
Do you want to edit your screen recordings? If yes, MiniTool MovieMaker can help. It allows you to add various elements to your screen recordings, including filters, effects, motions, transitions, captions, and more.
What’s more, MiniTool MovieMaker offers you a variety of editing functions, allowing you to trim, merge, crop, reverse, or speed up your recordings. Plus, it enables you to change the volume and aspect of your recordings. Meanwhile, MiniTool MovieMaker can save your files in multiple formats like MP4, MKV, GIF, WMV, MOV, and more.
MiniTool MovieMakerClick to Download100%Clean & Safe
To Wrap Things Up
Capturing a part of your screen helps to improve the focus of the recording, to protect your privacy, to facilitate your sharing on different social platforms, and to reduce the video file size. To record part of screen without effort, MiniTool Screen Recorder can help.
If you have encountered any problems when using MiniTool Screen Recorder or MiniTool MovieMaker, please ask for help by sending an email to support@minitool.com. Also, you can directly share your problems with me on X. I will help you as quickly as possible.