This post explains what a GIF recorder is and introduces six practical tools for recording screen activity as GIFs on Windows and online, including MiniTool Screen Recorder, ScreenToGif, GifCam, Gifcap, Screenshots & GIFs, and Screencastify. It also provides a step-by-step guide on how to record the screen to a GIF using MiniTool Screen Recorder.
Short for Graphics Interchange Format, GIF is a popular image format that supports both static images and short animations. Compared with full-length videos, GIFs are easier to create, share, and load, making them ideal for capturing reactions, highlights, or short moments.
Recording screen activities as GIFs is a practical and efficient way to create these short animations. This post will introduce six powerful GIF recorders to help you create high-quality GIFs with ease.
Before we start, let’s take a look at what a GIF recorder is and why you might want to record a screen to GIF.
What Is a GIF Recorder
Unlike traditional screen recorders that mainly output video files, GIF recorders can capture on-screen activity and save it directly as a silent, looping animated GIF. This makes them a convenient choice for recording short clips and sharing them quickly.
When choosing a suitable GIF video recorder, the following key features and capabilities are worth considering.
1. Selective Recording.
A GIF screen recorder should allow you to capture a specific window, a selected region, or the entire screen, depending on your needs. This flexibility helps you focus on the most relevant content while avoiding unnecessary background distractions.
2. Built-in Editor.
Basic editing features such as trimming, cropping, and resizing are essential for creating polished GIFs. A built-in GIF editor can also let you add text or watermarks, giving a personal and engaging touch to GIFs.
3. Customization Options.
A good GIF video recorder should provide flexible settings for adjusting the frame rate, quality, and resolution. These options help you balance visual quality and file size, ensuring the GIF looks smooth without becoming too large.
4. Ease of Use.
A user-friendly interface and intuitive controls make it easier for beginners to get started. Convenient features such as hotkey controls and clear previews encourage users to create engaging and professional-looking GIFs with minimal effort.
Why Record Your Screen as a GIF
Recording your screen as a GIF offers several practical advantages, especially when you need to capture short actions or visual highlights.
1. Smaller File Size
GIFs are generally smaller than video files, making them faster to load and easier to store or share. This also makes GIFs easy to embed on websites, in emails, or on social platforms, allowing viewers to preview the animation without using a video player.
2. Automatic Playback
GIFs play and loop automatically, which is ideal for demonstrating quick steps, UI interactions, or reactions. Even without sound, the looping playback helps convey ideas and actions engagingly.
3. Clear Visual Focus
Recording your screen as a GIF helps highlight key content by removing unnecessary parts. Viewers can quickly understand the message at a glance, keeping the animation concise, professional, and visually appealing.
4. Boost Engagement
Short as well as looping GIFs naturally attract attention and encourage interaction. They are more likely to be viewed and shared than long videos, making them effective for tutorials, product demos, and social content.
Considering different device needs, this post compiles a list of six of the best GIF recorders, including Windows software, online tools, and Chrome extensions:
- MiniTool Screen Recorder
- ScreenToGif
- GifCam
- Gifcap
- Screenshots & GIFs
- Screencastify
Let’s begin with the Windows GIF recorders.
Top 3 GIF Recorders for Windows
MiniTool Screen Recorder
When it comes to the best GIF recorders, the first tool that springs to mind is MiniTool Screen Recorder. As a professional screen recording solution for Windows, it offers flexible capture options and customizable settings, making it a practical choice for creating GIFs from on-screen activities.
MiniTool Screen Recorder allows you to record the full screen, a selected region, or your webcam, enabling you to capture exactly what you need without extensive post-editing. You can record webcam footage or screen activity separately to create GIF reactions, or capture simultaneously to produce a picture-in-picture effect.
In addition, MiniTool Screen Recorder provides real-time annotation tools such as drawing pens, arrows, step numbers, and text. These features are especially useful for creating short tutorial GIFs or highlighting key actions during recording.
Another advantage is that MiniTool Screen Recorder can record up to 4K resolution with no watermarks or time limits. It also offers multiple frame rate options, including 15, 20, 25, 30, and 50 fps, along with adjustable video quality settings such as Original, Standard, and High. You can also preset the recording duration based on your need for precise recording.
Although MiniTool Screen Recorder outputs recordings in MP4 format only, its companion video editor, MiniTool MovieMaker, makes it easy to convert MP4 recordings to GIF format. MiniTool MovieMaker also provides a wide range of editing tools to further refine and edit your GIFs.
To learn how to record your screen and convert the recording into a GIF using MiniTool Screen Recorder and MiniTool MovieMaker, follow the step-by-step guide below.
Step 1: Download MiniTool Screen Recorder
Click the button below to download the free screen recorder. Then, complete the installation by following the instructions.
MiniTool Screen RecorderClick to Download100%Clean & Safe
Step 2: Select the Recording Area
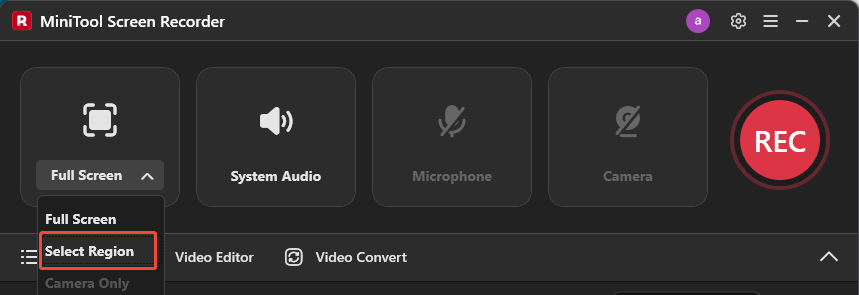
Open MiniTool Screen Recorder. By default, the program captures the full screen. To change the recording area, click Full Screen to expand the drop-down menu. Click Select Region to choose a specified area. Drag the red dotted border to define the recording region. If you want to create facial reaction GIFs, you can also choose Camera Only to record webcam footage.
Step 3: Customize Recording Settings
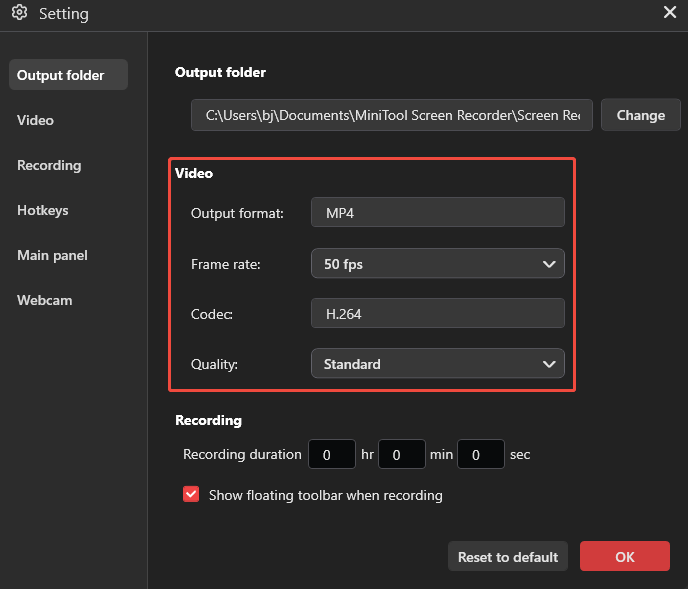
Click the Gear icon in the upper-right corner to enter the settings window. Click the Frame Rate drop-down list and select an appropriate option based on your needs. For smoother and clearer recordings, you can set the frame rate to 50 fps and choose High video quality. You can also customize the hotkeys according to your preferences. After making the adjustments, click OK to save the settings.
Step 4: Start Recording and Add Annotations
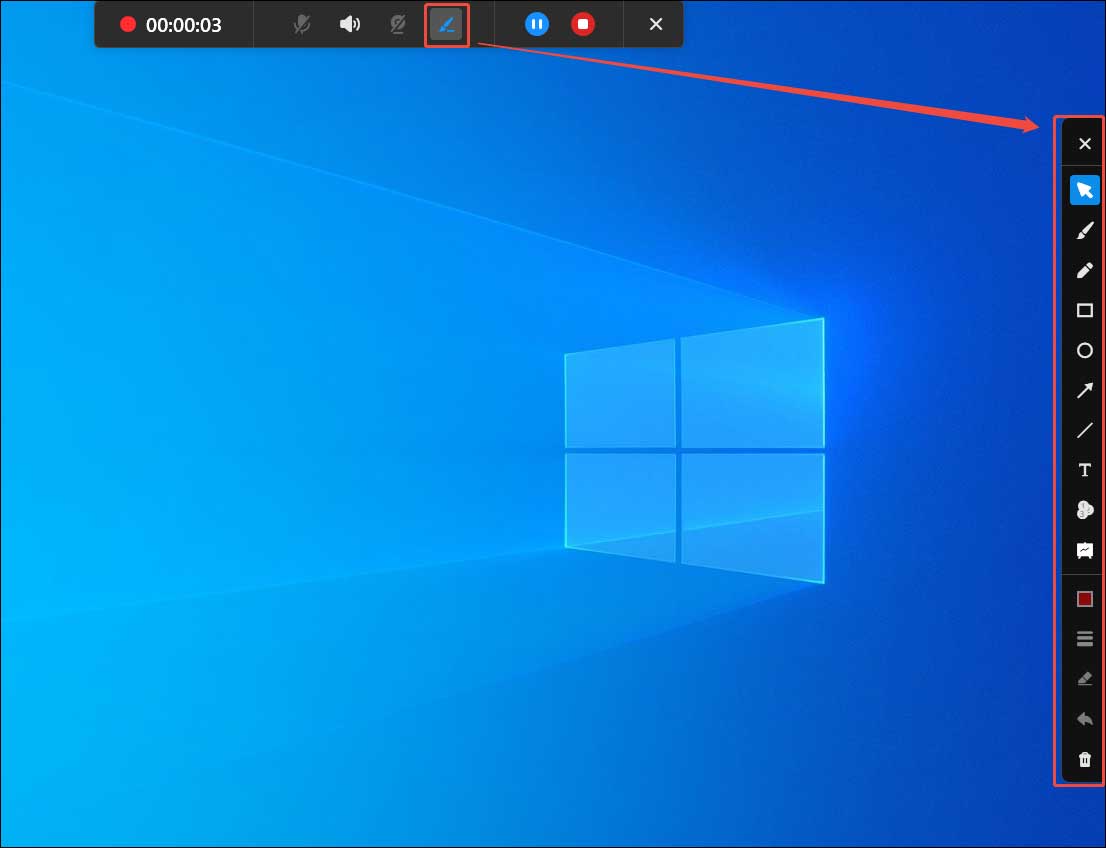
Click the red REC button in the main interface to start recording. Alternatively, press the default F6 key on your keyboard. The recording will begin after a 3-second countdown. During recording, click the Pen icon on the floating toolbar at the top of the screen to open the annotation panel. Choose the desired tools to add annotations to your recording in real time.
Step 5: End and Check the Recording
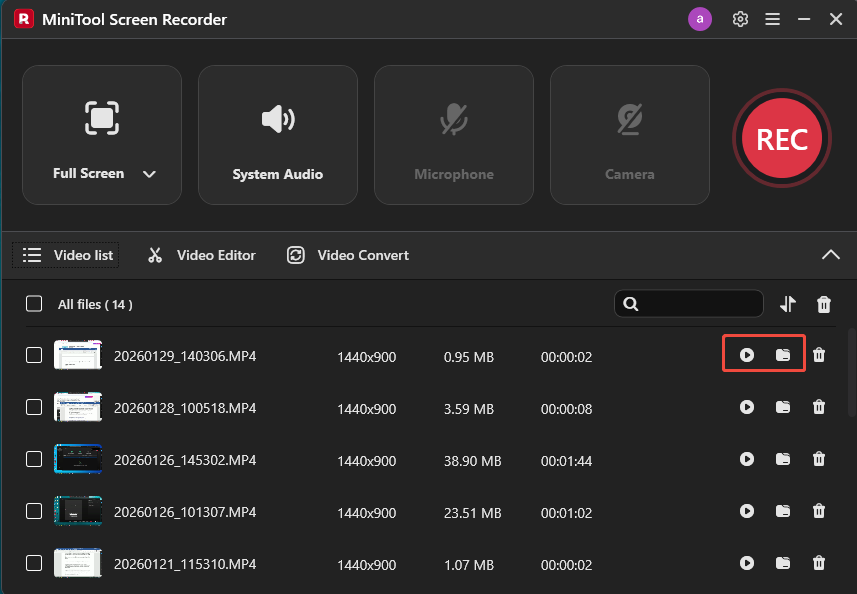
Click the Stop icon in the floating toolbar or press F6 again to stop recording. Then, the latest recording will appear at the top of the video list module in the interface. Here, you can click the Play icon to preview the recording and click the Folder icon to check its file location.
Step 6: Edit the Recording
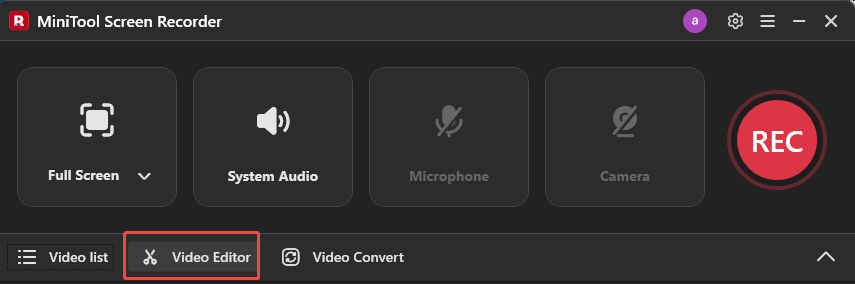
Click the Video Editor option next to the Video list to launch MiniTool MovieMaker.
If the editor is not installed, you can download it by clicking the button below.
MiniTool MovieMakerClick to Download100%Clean & Safe
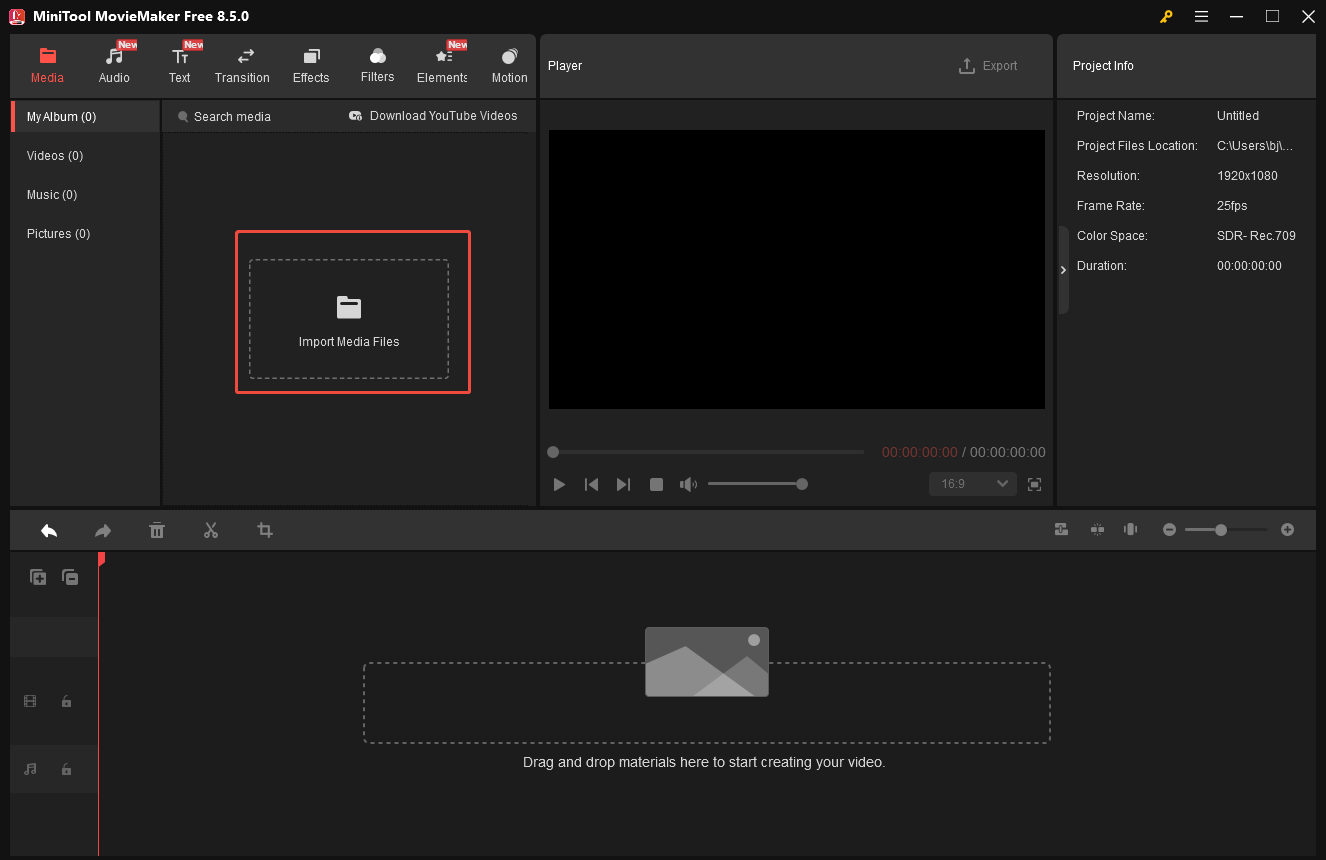
After MiniTool MovieMaker opens, close the pop-up project window to enter its main interface. Click the Import Media Files option to upload the recording.
Drag the imported video to the timeline. You can trim, rotate, crop, and cut the recording based on your needs. MiniTool MovieMaker also includes a massive collection of resources, including text templates, transitions, effects, filters, elements, and motion templates. You can explore each tab to enhance and refine your recording.
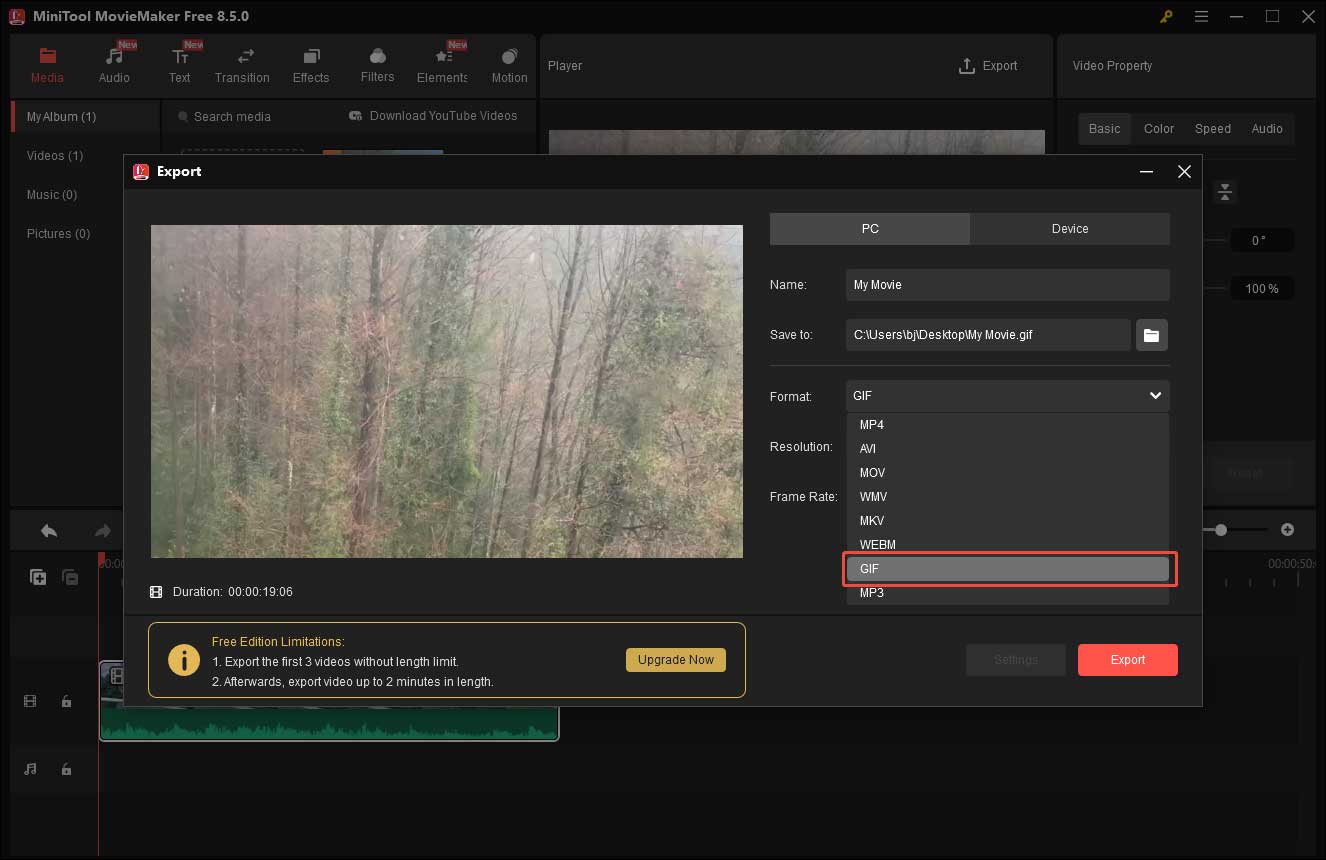
Step 7: Export the Recording as GIF
Once you finish the editing, click the Export icon above the player window. Select the Format as GIF. Then, click Export at the bottom of the export window to save it to your computer.
As you can see, recording your screen activity as a GIF with MiniTool Screen Recorder and MiniTool MovieMaker is a straightforward process. Simply follow the steps above to create your stunning GIF.
ScreenToGif
ScreenToGif is another free yet powerful GIF recorder available for Windows. It supports screen recording, webcam capture, and sketchboard drawings, making it suitable for a variety of use cases. With its intuitive interface, you can easily select the recording area and start capturing content.

In addition to GIF output, ScreenToGif offers multiple export formats, including GIF, APNG, video, image, PSD, and ScreenToGif project files, which help meet different editing and sharing needs. It also allows you to adjust the capture frequency, enabling you to use it as a timelapse screen recorder.
After recording, ScreenToGif provides a frame-by-frame editor that lets you fine-tune every frame of the capture. You can delete or reverse selected frames, as well as add captions, freehand drawings, shapes, watermarks, and other elements to enrich the content.
GifCam
GifCam is another free GIF screen recorder for Windows worth recommending. It is a lightweight, portable application that requires no installation, making it convenient to use on different devices.
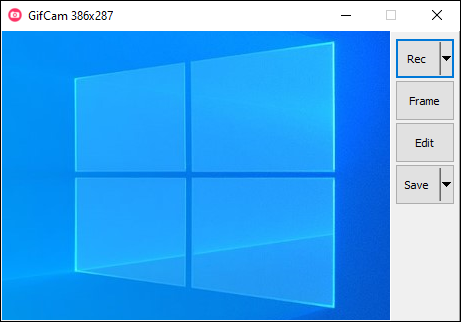
GifCam allows you to adjust the frame rate, with options such as 10, 16, and 33 fps, depending on your recording needs. You can simply drag the application window over the area you want to capture or manually select a specific region on the screen.
In addition to exporting recordings as GIF files, GifCam also lets you save the captured content as AVI or MP4 without quality loss, providing more flexibility for editing or sharing.
3 Online & Chrome GIF Recorders
Online GIF recorders are especially useful when you don’t want to install additional software or need to create a GIF quickly.
Gifcap
Gifcap is a web-based GIF screen recorder that is fast, lightweight, and free to use. It allows you to record your entire screen, a specific window, or a Chrome tab directly from your browser.
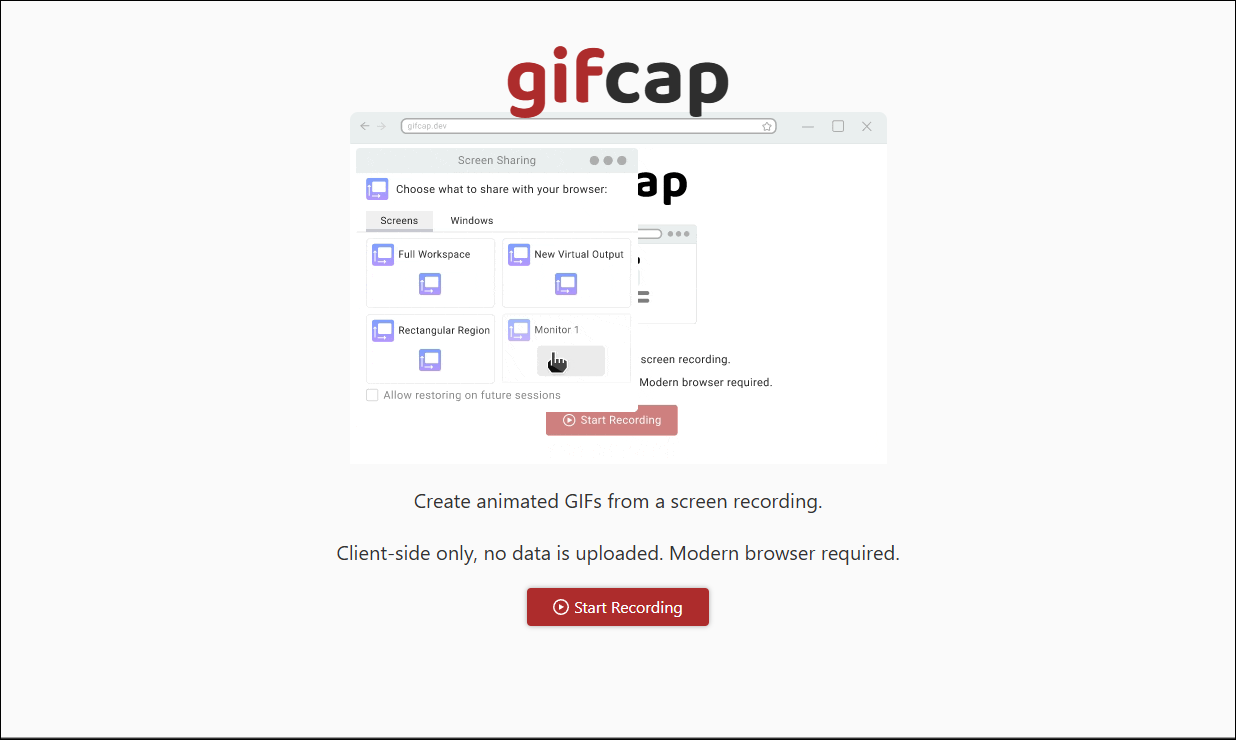
Although Gifcap does not support selecting a custom recording region, it provides basic editing options such as resizing and cropping after recording. Once the recording is complete, the GIF will automatically download to your computer through the browser.
With its clean interface and simple controls, Gifcap is well-suited for users with basic recording needs or those who want to create GIFs without hassle.
Screenshots & GIFs
Screenshots & GIFs is a Chrome extension that lets you capture screenshots or record your screen quickly and easily. It offers multiple recording modes, including a selected area, the visible tab, and the full screen or app, allowing you to choose the most suitable option for different scenarios.
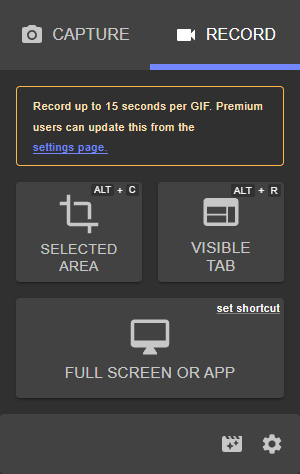
The extension provides several advanced settings, such as customizable capture frames and recording resolution. You can save recordings in GIF, WebM, or MP4 format. After recording, it allows you to edit the GIF by adding drawings, arrows, circles, or text. However, some advanced features, such as 4K resolution, step numbering, and speed adjustment, are only available with an upgraded plan.
Screencastify
Screencastify is another Chrome extension worth recommending. It supports recording a browser tab, the full screen, or the webcam only. Before recording, you can customize settings such as the recording size, resolution, frame rate, maximum recording duration, and countdown timer. It also includes a teleprompter tool that allows you to enter and read your script while recording.
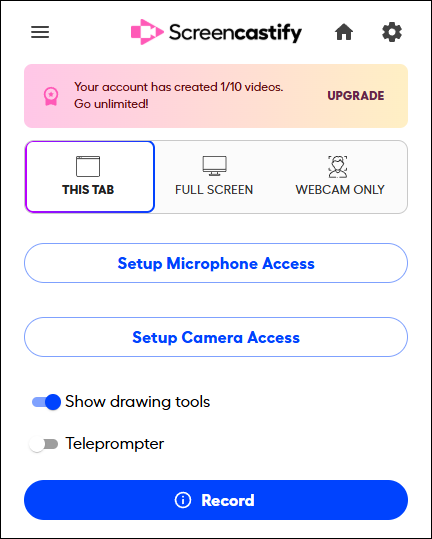
During recording, you can add real-time drawings to highlight key points. Screencastify offers multiple output formats, including GIF, MP4, and MP3, and lets you share recordings via a link. However, the free plan comes with some limitations: you can record only up to 10 times and export GIFs up to five times.
Conclusion
With a powerful GIF recorder, you can easily create attractive and engaging GIFs. Each of the six tools mentioned above has its own strengths and can meet different recording needs. Desktop software offers more advanced and customizable controls, while online GIF recorders are ideal for quick and simple tasks.
Select the one that best suits your preference and give it a try. Finally, if you have any questions or suggestions when using MiniTool Screen Recorder as well as MiniTool MovieMaker, please don’t hesitate to contact us via support@minitool.com.