Timelapse videos are popular for clearly visualizing long processes in a short time. If you’re wondering how to record a timelapse video on Windows, this post introduces six reliable timelapse screen recorders, including MiniTool Screen Recorder, Debut Video Capture Software, VideoVelocity, Bandicam, OBS Studio, and CamStudio.
Before exploring the best timelapse screen recorders for Windows, it is helpful to first understand what a timelapse screen recorder is and the key features that define a good one.
What's a Timelapse Screen Recorder
First of all, timelapse photography captures images at a much lower rate than the playback frame rate. As a result, the timelapse video appears to move much faster than normal speed. This technique is widely applied to capture changes in natural scenes, such as cloud movements or sunsets.
Based on this concept, it is easier to understand what a timelapse screen recorder is. A timelapse screen recorder is a tool that records your on-screen activities at extended capture intervals and then plays back the captured frames at a standard frame rate.
For example, if you want to record a 2-hour software installation, you can set the capture interval to 5 seconds. At this interval, the recorder captures 1440 frames in total. After recording, you can playback the timelapse video with a frame rate of 30 fps. As a result, the final video lasts 48 seconds, meaning that 1 second of video represents 150 seconds of real time.
That’s why timelapse screen recorders have gained popularity. They can not only shorten the video duration but also present a clear progress visualization for viewers. What’s more, this recording method significantly reduces the file size, making videos easier to upload and share. Next, let’s take a look at the key features that make a good timelapse screen recorder.
What Makes a Good Timelapse Screen Recorder
Typically, a good timelapse screen recorder offers several essential features, such as reliable capture settings, adjustable frame rate control, and high video quality. When selecting a suitable timelapse screen recorder, you should consider not only the final video quality but also how flexible and reliable the recording process is.
The following key aspects can help determine whether a tool is well-suited for timelapse screen recording.
Ease of Use
Ease of use is one of the most important factors, especially for beginners without advanced experience. An intuitive and clean interface helps users start recording quickly without a steep learning curve. Besides, the recorder should offer simple setup options for common tasks, such as selecting a screen area and enabling or disabling audio sources.
Capture Control
Capture control is another critical feature. Some timelapse screen recorders support interval-based or scheduled capture, enabling the software to automatically record frames at fixed time intervals, which is particularly useful for long-term tasks such as design projects.
For some recorders without the interval capture feature, it should be stable enough to handle long continuous recording without interruptions.
Frame Rate Flexibility
Frame rate flexibility primarily affects the smoothness and file size of the final timelapse video. For extremely long recordings, using a lower playback frame rate can help reduce file size while maintaining acceptable visual continuity. For screen recorders that rely on post-recording speed-up to create a timelapse effect, a lower recording frame rate, such as 15-20 fps, is sufficient for activities with slow on-screen changes.
Output Options
Output options play an important role in the overall video quality. Saving recordings in widely compatible formats such as MP4 makes them easier to edit, upload, and share across different platforms. In addition, customizable resolution settings help ensure that on-screen content and important details remain clear, even after the footage is accelerated for timelapse playback.
Now, it is time to take a closer look at the best 6 timelapse screen recorders available for Windows.
Best 6 Timelapse Screen Recorders for Windows
This section compiles a list of the best timelapse screen recorders, including:
- MiniTool Screen Recorder
- Debut Video Capture Software
- VideoVelocity
- Bandicam
- OBS Studio
- CamStudio
Below is a detailed introduction to each timelapse screen recorder.
MiniTool Screen Recorder
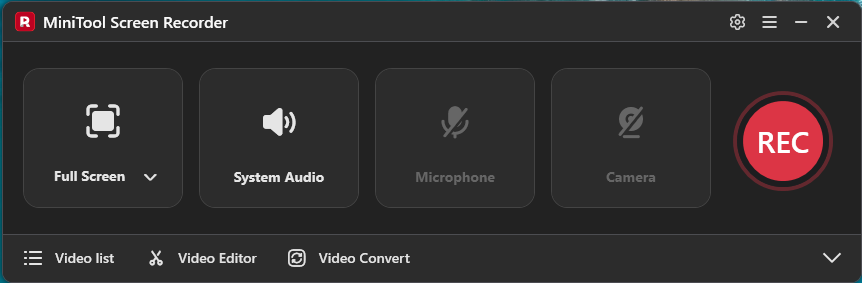
MiniTool Screen Recorder is a versatile screen recording software designed for Windows users. It offers flexible recording options, including system audio, microphone, webcam, and custom screen regions, allowing you to capture various screen activities without time limits. The software also includes built-in screen annotation tools such as highlights, lines, and whiteboards, making it easy to add visual notes during recording.
MiniTool Screen RecorderClick to Download100%Clean & Safe
When it comes to creating timelapse screen videos, MiniTool Screen Recorder supports flexible recording frame rates, including 15fps, 20fps, 25fps, 30fps, and 50fps. For slow-changing tasks such as software installations, setting the frame rate to 15-20 fps is sufficient to ensure smooth playback after speed-up.
What’s more, MiniTool Screen Recorder offers duration presets that allow recordings to stop automatically at a specified time, which is helpful for long recordings. It also supports up to 4K video capture and saves recordings in MP4 format. Its straightforward interface and easy-to-use features also make it easy for beginners to record the screen. Overall, it is a practical screen recorder that meets most needs for video recording.
Debut Video Capture Software
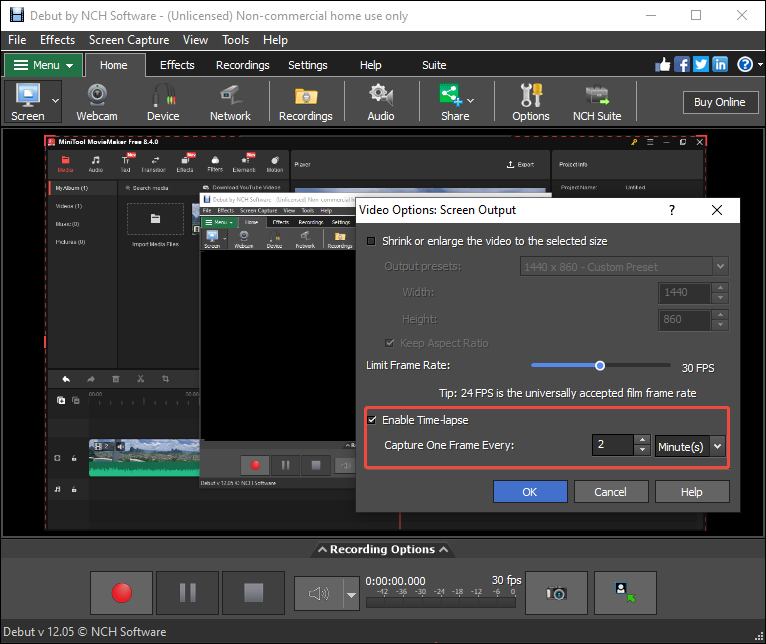
Debut Video Capture Software is a user-friendly screen recording tool available for both Windows and macOS. For timelapse screen recording, Debut Video Capture Software lets you set the capture interval- how often a frame is captured. This interval-based recording method makes it easy to record long screen activities in a condensed format without relying on post-editing.
In addition to timelapse recording, Debut Video Capture Software offers a wide range of customization features. You can apply video filters, replace the background with an image, adjust color settings, add text captions, and apply watermarks during recording. The software also supports multiple output formats, including AVI, WMV, FLV, MPG, and MP4, providing flexibility for playback and sharing.
VideoVelocity
VideoVelocity is advanced timelapse capture and video creation software working on Windows. It can not only record timelapse from any webcam, screen capture, IP camera, or DSLR, but also convert image or video files to timelapse video in bulk.
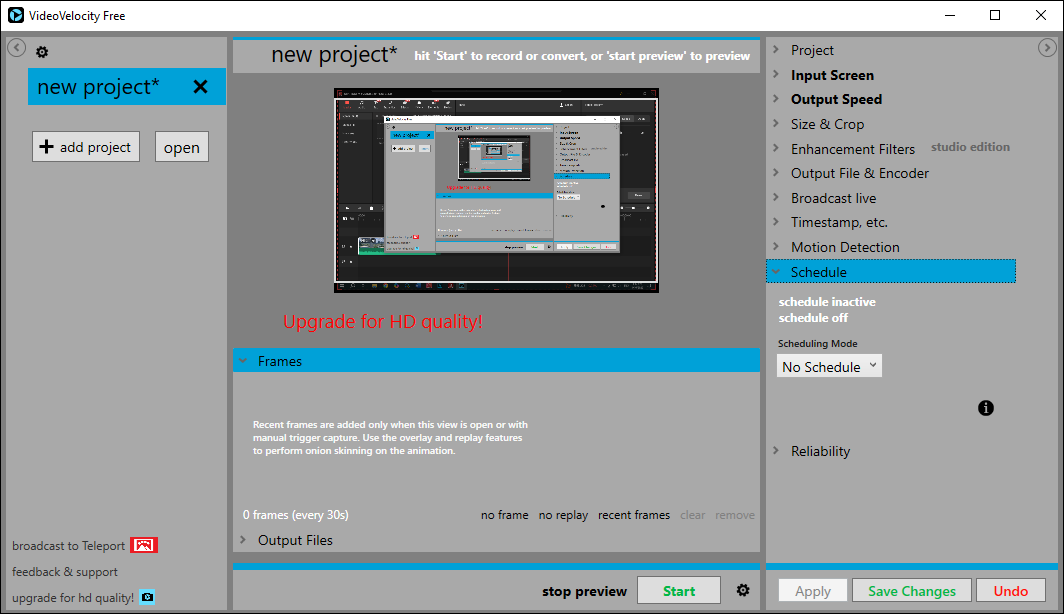
What makes VideoVelocity outstanding is its built-in customizable capture interval. You can set how often frames are recorded before the recording begins. It offers a wide range, from every 1 second to every 12 hours. In addition, it also provides a scheduling feature that allows you to preset the start and end times of a recording.
In addition, VideoVelocity offers flexibility and control over timelapse video output options. It supports MP4 and WMV video formats and allows you to customize frame rate and resolution. Furthermore, you can also add a timestamp that shows the date and time to your timelapse video to document long-term screen activity.
Bandicam
Bandicam is widely considered one of the best screen recorders for Windows, known for its stable performance and rich features. It supports screen and webcam recording, real-time drawing tools, mouse click effects, and simultaneous recording of system audio and microphone input. In addition, Bandicam allows you to take screenshots and save them as BMP, PNG, AND JPG.
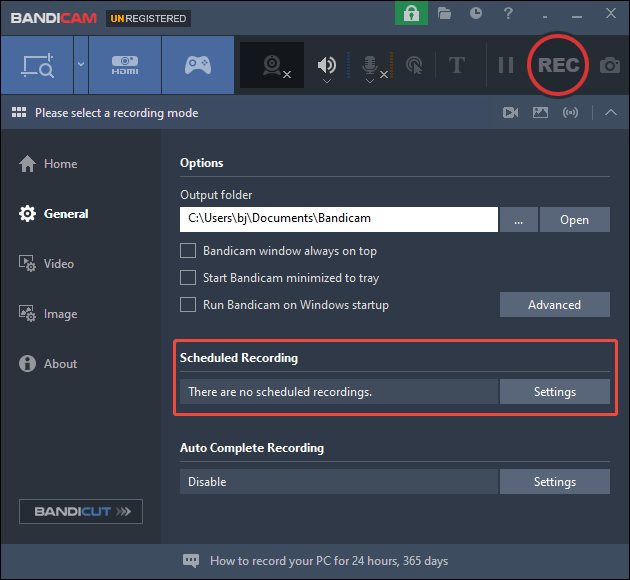
In terms of recording timelapse screen video, Bandicam offers a scheduled recording feature. It allows you to preset the recording start time, end time, duration, and recurring schedules, making it possible to record short videos at certain intervals automatically. Then, you can merge those clips into a timelapse video.
However, the free version has a 10-minute scheduled recording time limit and puts a watermark on the output video.
OBS Studio
OBS Studio is a free and open-source software for Windows, Mac, and Linux. It is widely used for screen capture and live streaming thanks to its powerful performance, flexible settings, and support for high-quality video output.
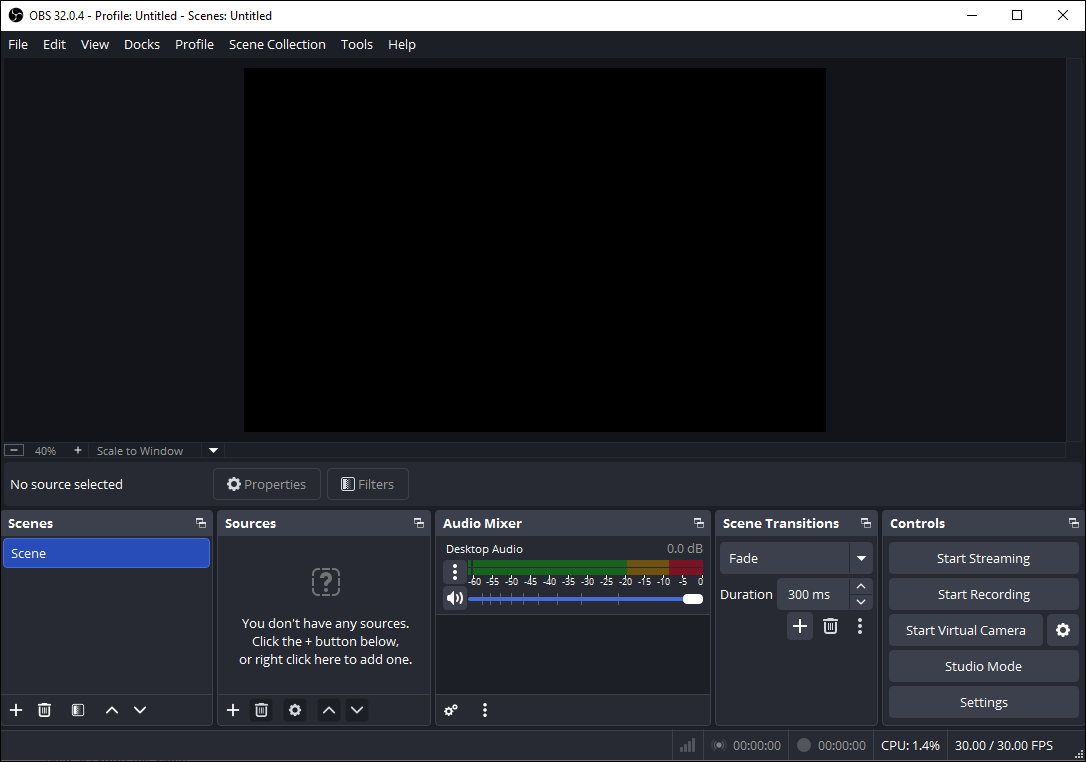
For recording timelapse screen video, OBS Studio enables you to customize a specified frame rate and capture long screen sessions continuously. By speeding up the recorded footage during post-processing, you can condense hours of screen activity into a short timelapse video.
In addition, it offers detailed control over recording parameters such as resolution, bitrate, and encoder settings, making it a reliable option for advanced users who prefer greater control over recording quality.
CamStudio
CamStudio is an easy-to-use screen recording program for Windows users. With an intuitive interface and simple keyboard shortcuts, it is well-suited for basic screen capture tasks such as creating tutorials.
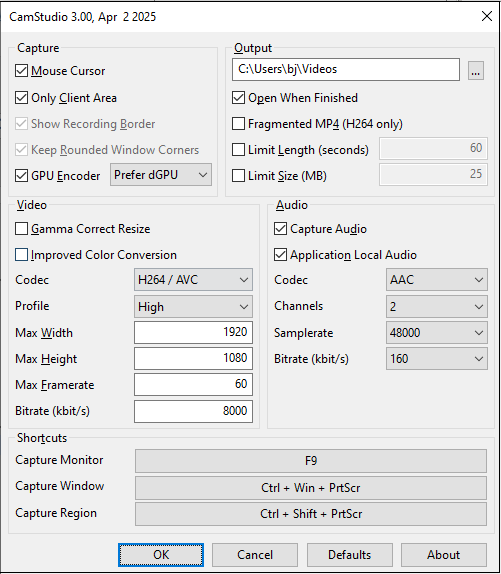
For recording timelapse screen videos, CamStudio supports continuous screen recording with adjustable frame rate settings. It also allows you to customize resolution, capture microphone or system audio, and hide the mouse cursor if needed. Additionally, it offers options to limit recording duration or file size, allowing for more control over long recording sessions.
What makes CamStudio stand out is its lightweight design and low system resource usage, allowing it to run smoothly in the background with minimal impact on overall performance. Moreover, it saves recordings as MP4 files, which are easy to share and edit.
How to Record a Timelapse Video on Windows
After reviewing the key features of each timelapse screen recorder, this section walks you through the steps to record a timelapse video on Windows, using MiniTool Screen Recorder as an example.
Step 1: Download and Install
Click the button below to start downloading MiniTool Screen Recorder. Then, follow the on-screen instructions to complete the installation on your computer.
MiniTool Screen RecorderClick to Download100%Clean & Safe
Step 2: Choose Recording Area
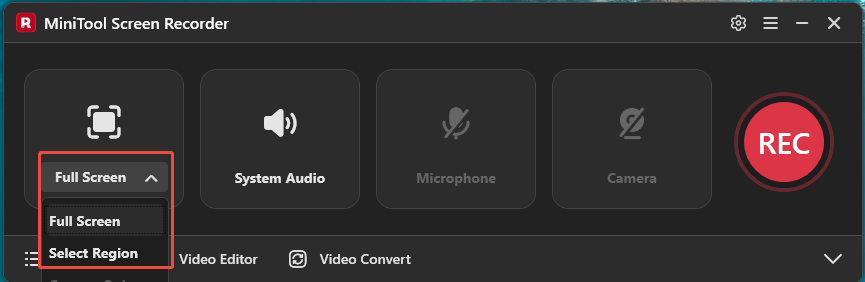
Open MiniTool Screen Recorder to enter its main interface. Click Full Screen to capture the entire screen. If you want to capture part of the screen or your activity window, expand the drop-down menu of the Full Screen option and choose Select Region. Then, drag the red dashed border to select your recording area.
Step 3: Check Audio
By default, the screen is recorded together with system audio and microphone input. If you want to turn them off, simply click System Audio or Microphone.
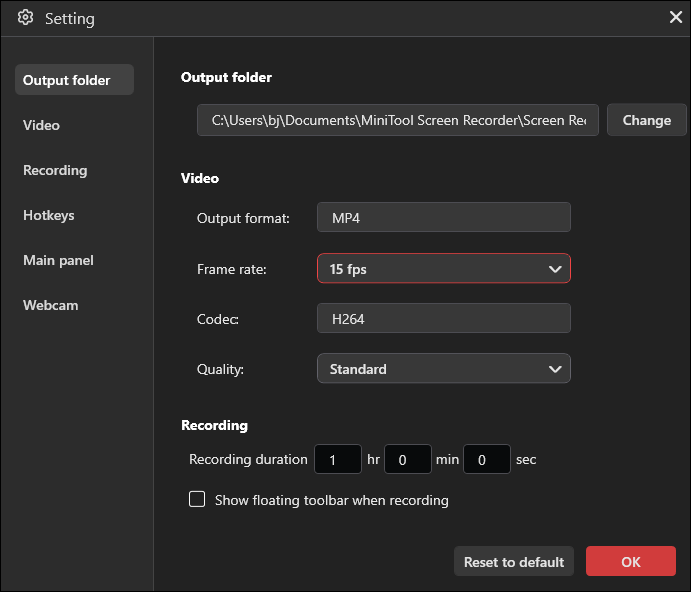
Step 4: Set Frame Rate and Recording Duration
Click the Gear icon in the upper-right corner to open settings. Click the drop-down list of Frame Rate and select the appropriate one based on your needs. Then, input a precise value for recording duration. Finally, click on the OK option to confirm the changes that you have made.
Step 5: Start the Recording
Click the REC button on the right side of the main interface or press the default key F6 on your keyboard to start the recording process. After a 3-second countdown, it will record your screen activities. Once the preset recording duration is reached, the recording will stop automatically. But if you want to end it in advance, you can press the F6 Key again to stop it.
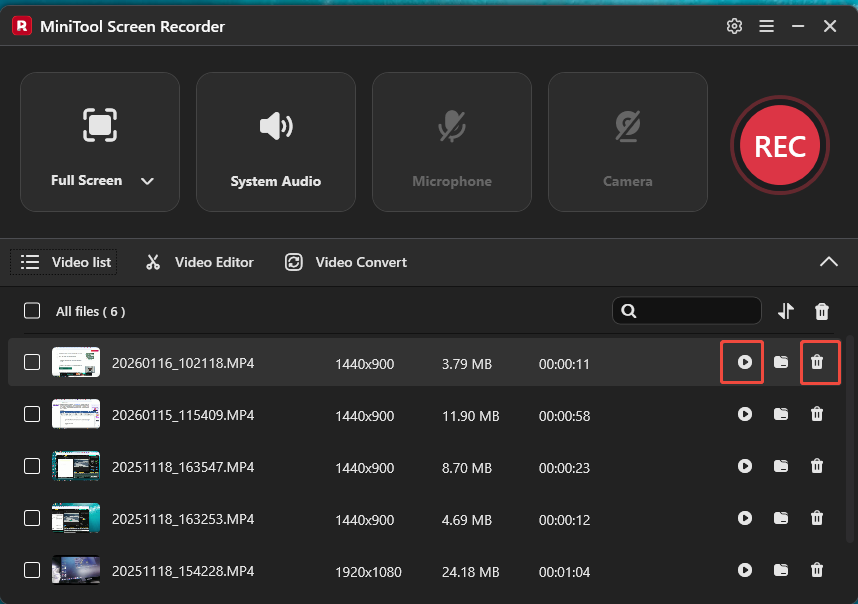
Step 6: Check the Recorded Video
After the recording stops, the main interface of MiniTool Screen Recorder will appear and display a list of recorded videos. You can see all the recorded videos. Click the Play icon to watch the video. If you are not satisfied with it, click the Delete icon to remove it. After that, you need to find a specialized video editor to speed up the video.
As you can see, MiniTool Screen Recorder is an easy-to-use timelapse screen recorder.
How to Make a Timelapse from a Recording Without Interval Capture
For recordings made with MiniTool Screen Recorder, OBS Studio, and CamStudio, a video editor is required to speed up playback and achieve a timelapse effect. Adjusting the playback speed in post-production also allows a standard screen recording to be converted into a timelapse video.
MiniTool MovieMaker is the most recommended video editor for changing video playback speed. It provides flexible speed options, including 0.5X, 0.25X, 0.1X, 0.05X, 0.01X, 2X, 4X, 8X, 20X, and 50X, which perfectly meets your expectation. In addition, it is equipped with a complete suite of editing tools, such as splitting, trimming, cropping, and merging videos. You can also use the advanced features to create picture-in-picture effects.
How to make a timelapse from a screen recording without interval capture using MiniTool MovieMaker? Follow the steps below.
Step 1: Download and Install
Download MiniTool MovieMaker by clicking the button below. Then, complete the installation and launch this application.
MiniTool MovieMakerClick to Download100%Clean & Safe
Step 2: Import Your Video
Close the pop-up project window to enter the editing interface. Click Import Media Files to upload your video. Next, click the Plus icon to add it to the timeline.
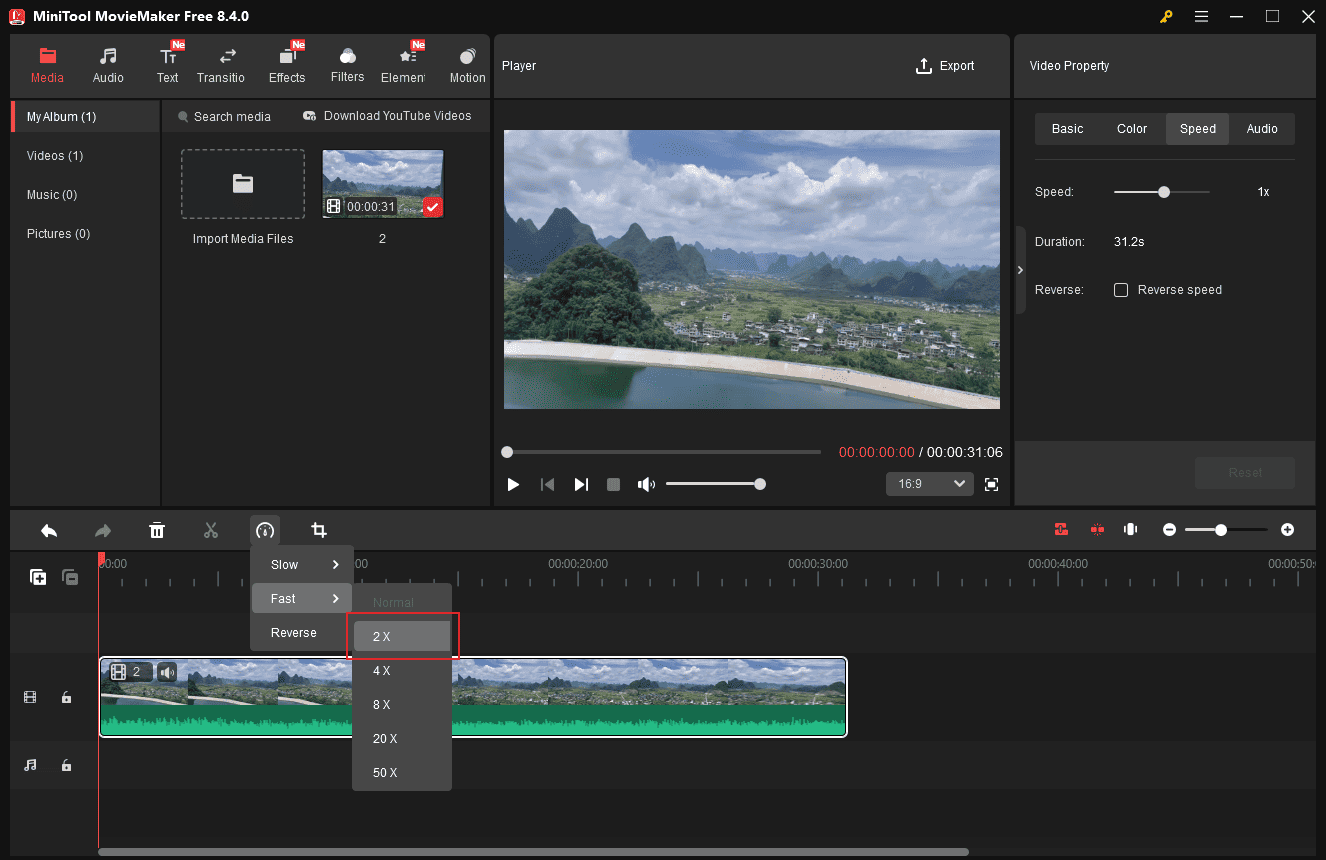
Step 3: Adjust the Video Speed
Click the Speed icon on the timeline toolbar. Then, select Fast and choose your desired speed to apply it to the video. Alternatively, you can also click the video and adjust its speed by moving the speed sliders in the right video property panel to accelerate the video.
Step 4: Export the Timelapse Video
Once the editing is done, click the Export option at the top of the menu to access the export window. Customize the video format, resolution, and frame rate. Then, click Export at the bottom of the window to save the video to your computer.
Conclusion
This post recommends the top six timelapse screen recorders for Windows. Each of them is easy to use and meets your expectations. Just pick the one that suits your preference by following the instructions provided above.
Finally, if you have any questions or suggestions when using MiniTool Screen Recorder as well as MiniTool MovieMaker, please don’t hesitate to contact us via support@minitool.com.