VLC is more than a free media player, and it’s also capable of capturing screen activities. However, some users encountered the issue of VLC not recording. Here are nine 100% working solutions for that issue, such as disabling video acceleration, changing the audio output format, and using a VLC alternative – MiniTool Screen Recorder.
Introduction to VLC Media Player
VLC, short for VLC Media Player, is a powerful and cross-platform media player software that has various functions. It allows for cropping, trimming, and rotating video clips, streaming online videos, setting a video as your background, adding subtitles to your video, downloading YouTube videos, and converting videos between different formats, etc.
Another great advantage that has to be mentioned is that it features screen capture. When you watch streaming videos in VLC, you can use the screen capture function to record the streaming audio/video or take a screenshot from it. How to capture your screen using VLC Media Player? Let’s explore the next section.
How to Record with VLC Media Player
Here are the step-by-step guides on how to record a computer screen with VLC Media Player.
Step 1. Download and Install VLC
Go to the official website of VLC to download and install VLC Media Player on your computer.
Step 2. Choose Capture Mode and Frame Rate
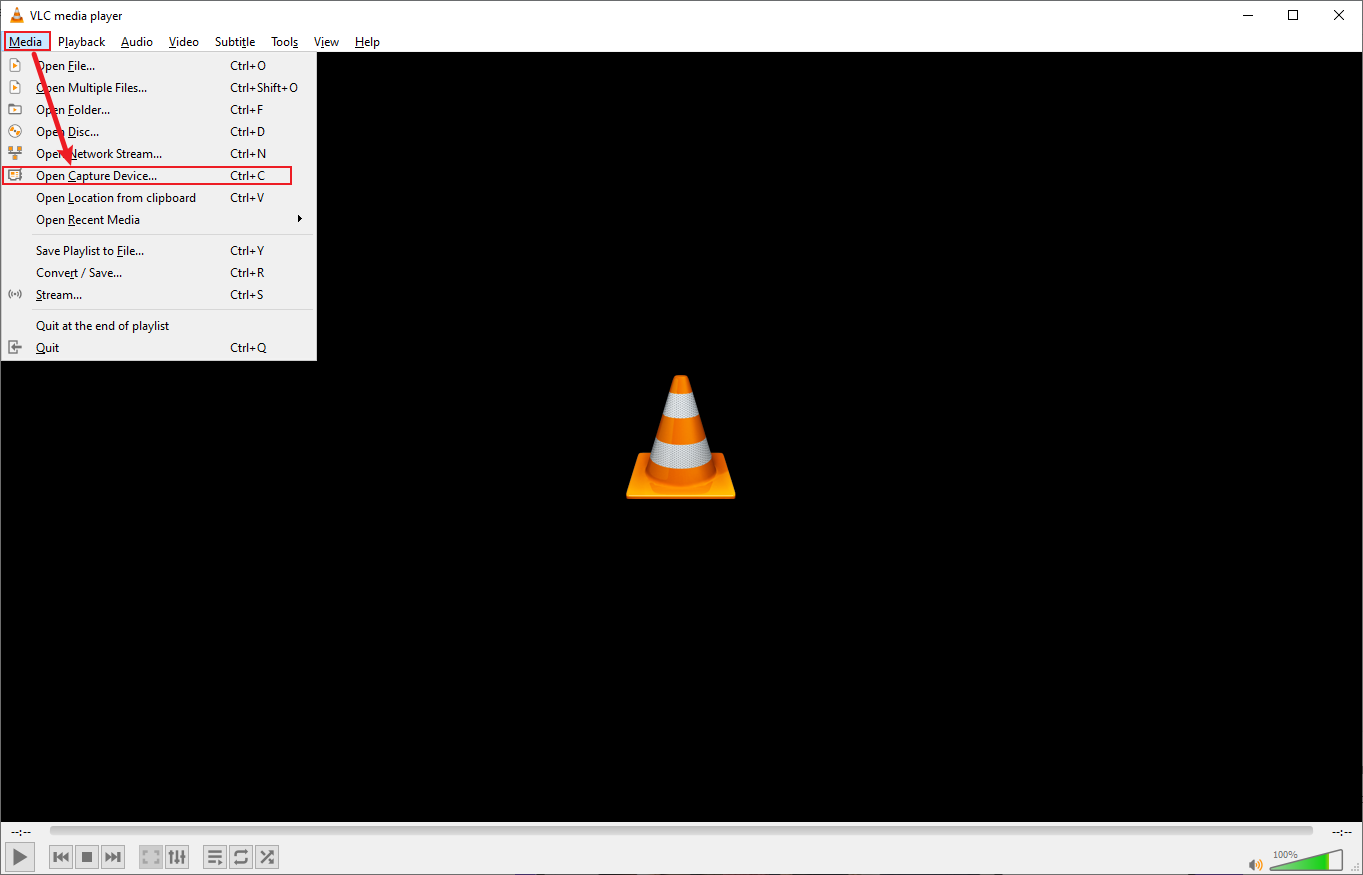
1. Open VLC, click on Media on the top-right toolbox, and choose Open Capture Device.
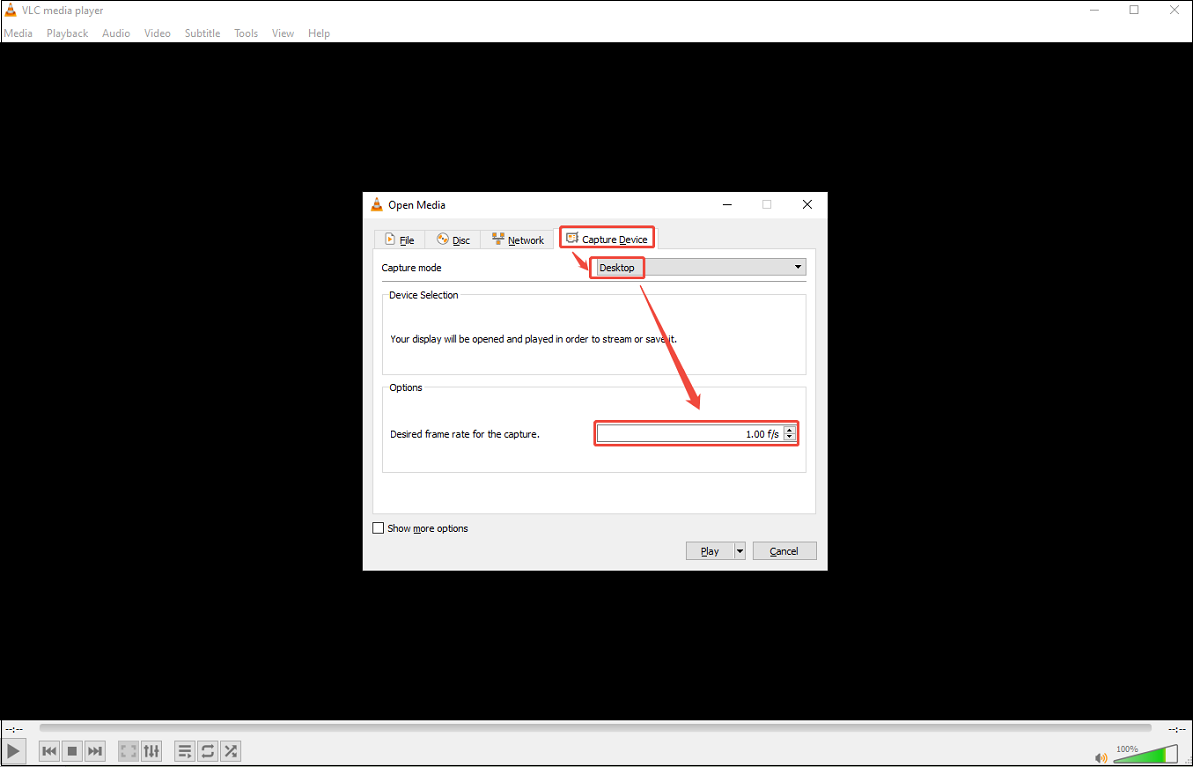
2. Expand the Capture mode option to choose Desktop.
3. You can set the higher frame rate based on your needs.
Step 3. Choose Output Format and Destination Folder
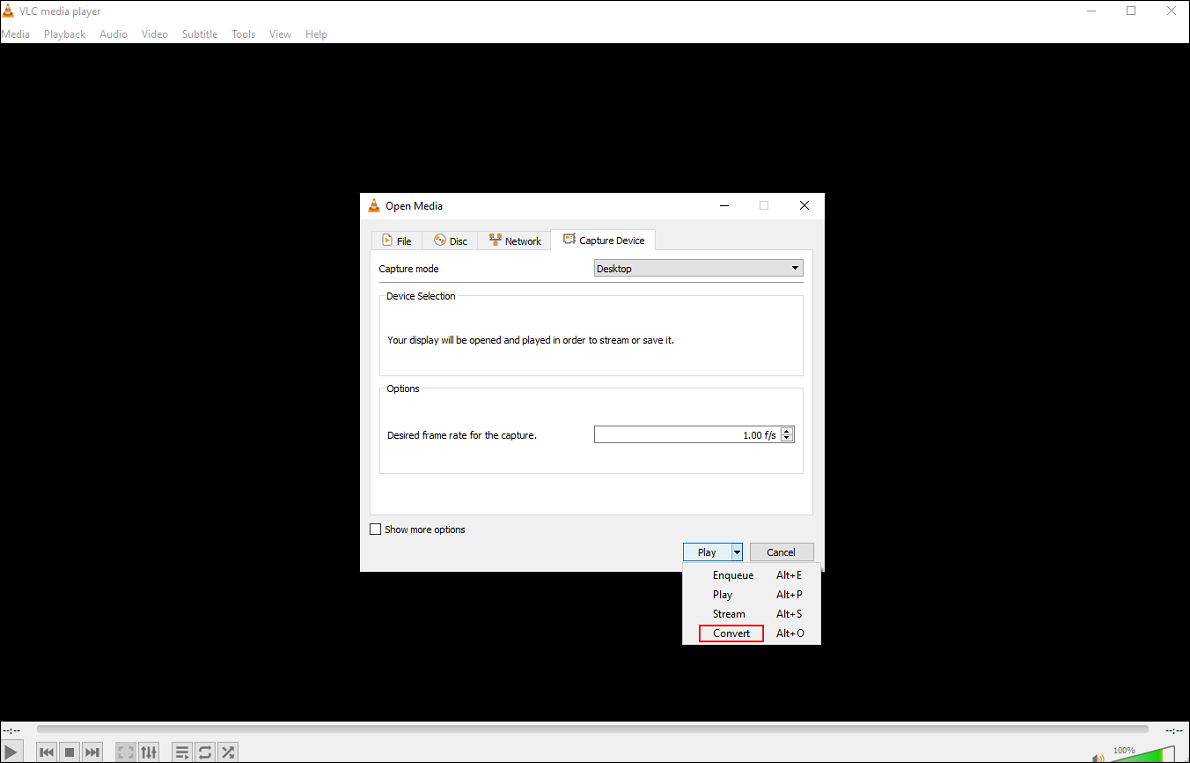
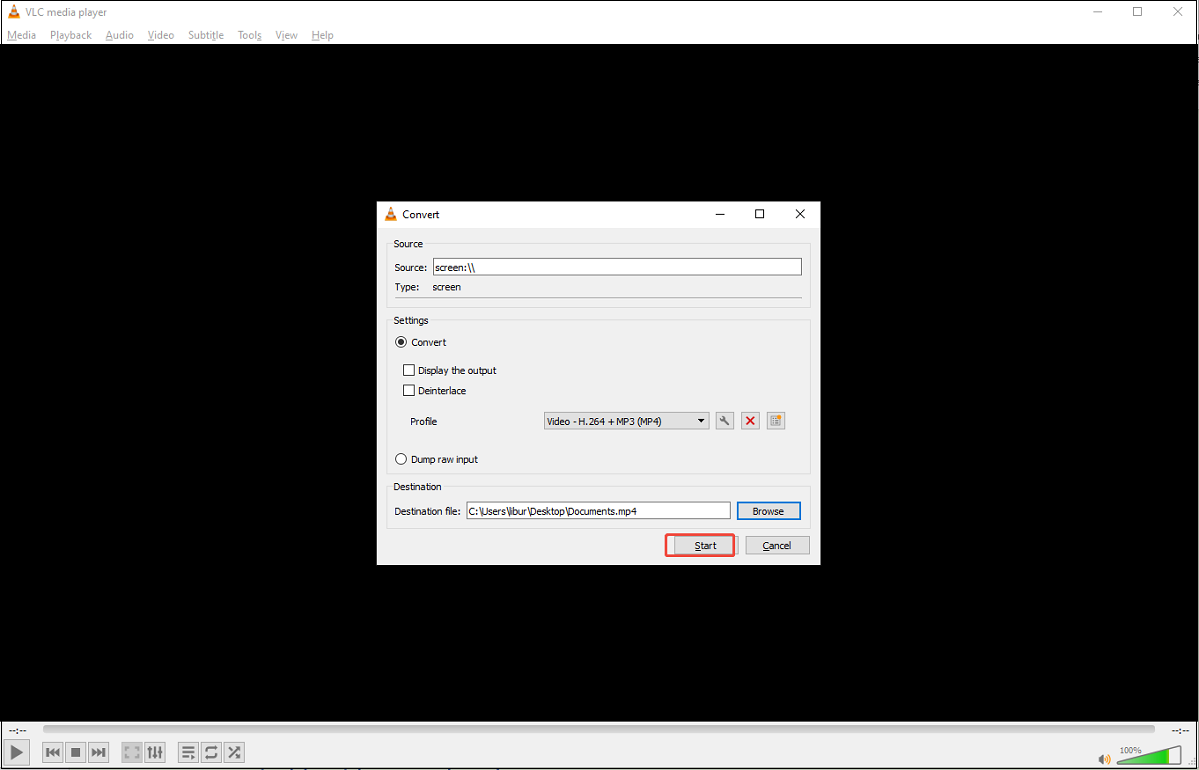
1. Expand the drop-down menu next to the Play button and choose Convert.
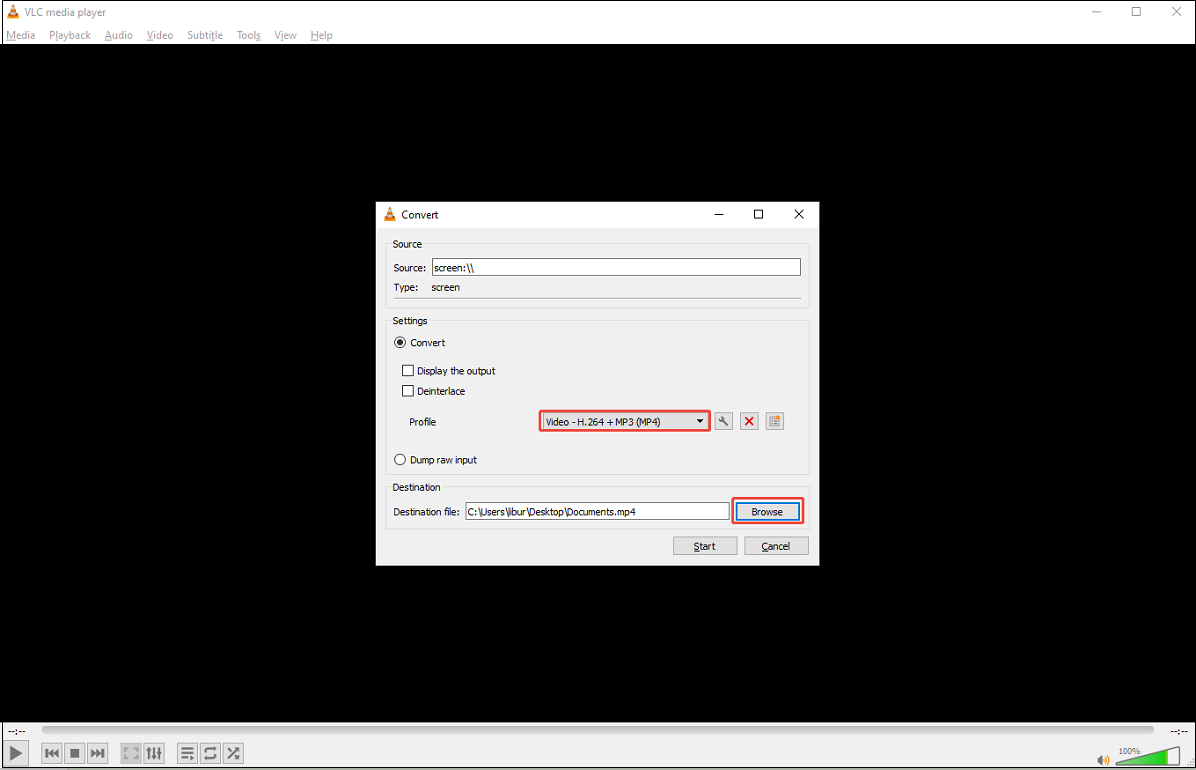
2. Expand the Profile option to choose the output format you want and click the Browse button to choose an output destination.
Step 4. Start/Stop Recording Screen
1. Click the Start button to start recording your computer screen.
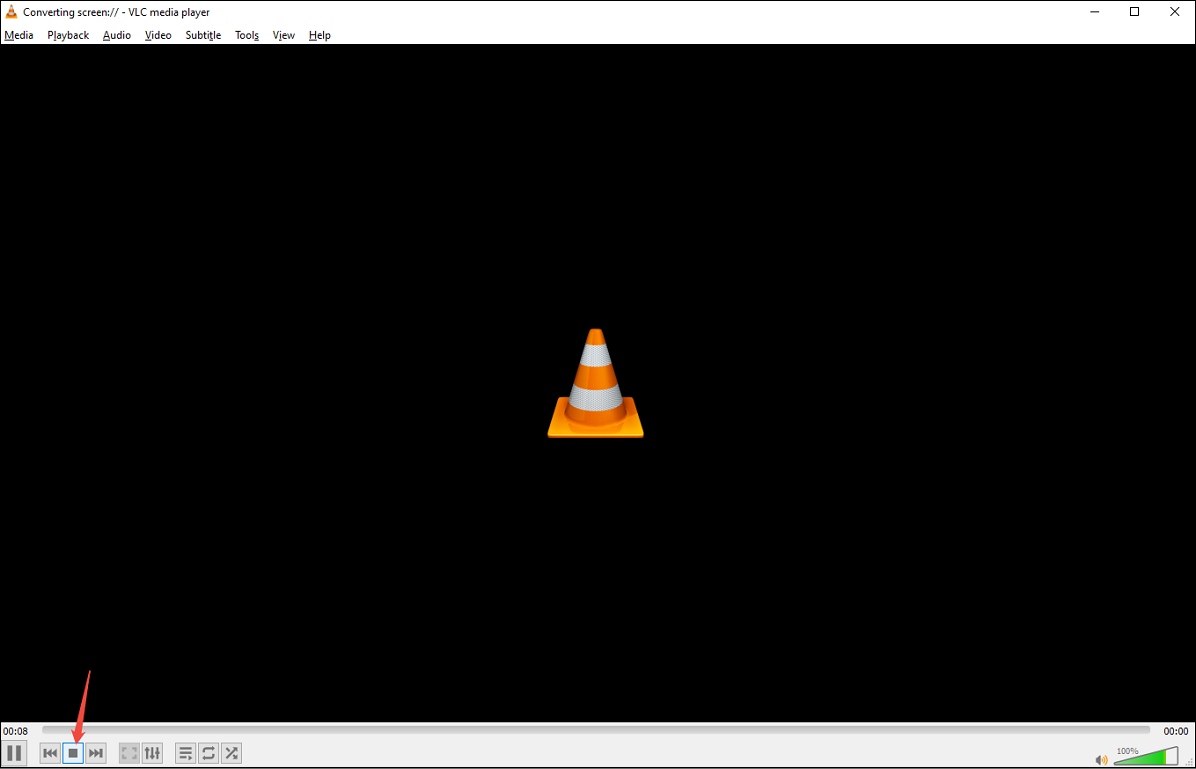
2. After finishing your recording, click on the Stop playback button. You can get your recording in your folder.
But sometimes, you may encounter a problem like “VLC record not working.” The result could be a black screen with or without sound when you attempt to record a video on your computer. How can I fix the problem? Read the following content for 9 solutions.
9 Solutions to Fix the VLC Not Recording Issue
Can’t VLC record screen or audio after following the steps above? The following content covers 9 effective solutions for this issue.
#1. Restart the Computer
Restarting the computer is a quick way to resolve any issues with the VLC media player.
#2. Change the Audio Output Module
If VLC does not record audio, you can change the audio output module.
Step 1. Go to the Simple Preferences Window
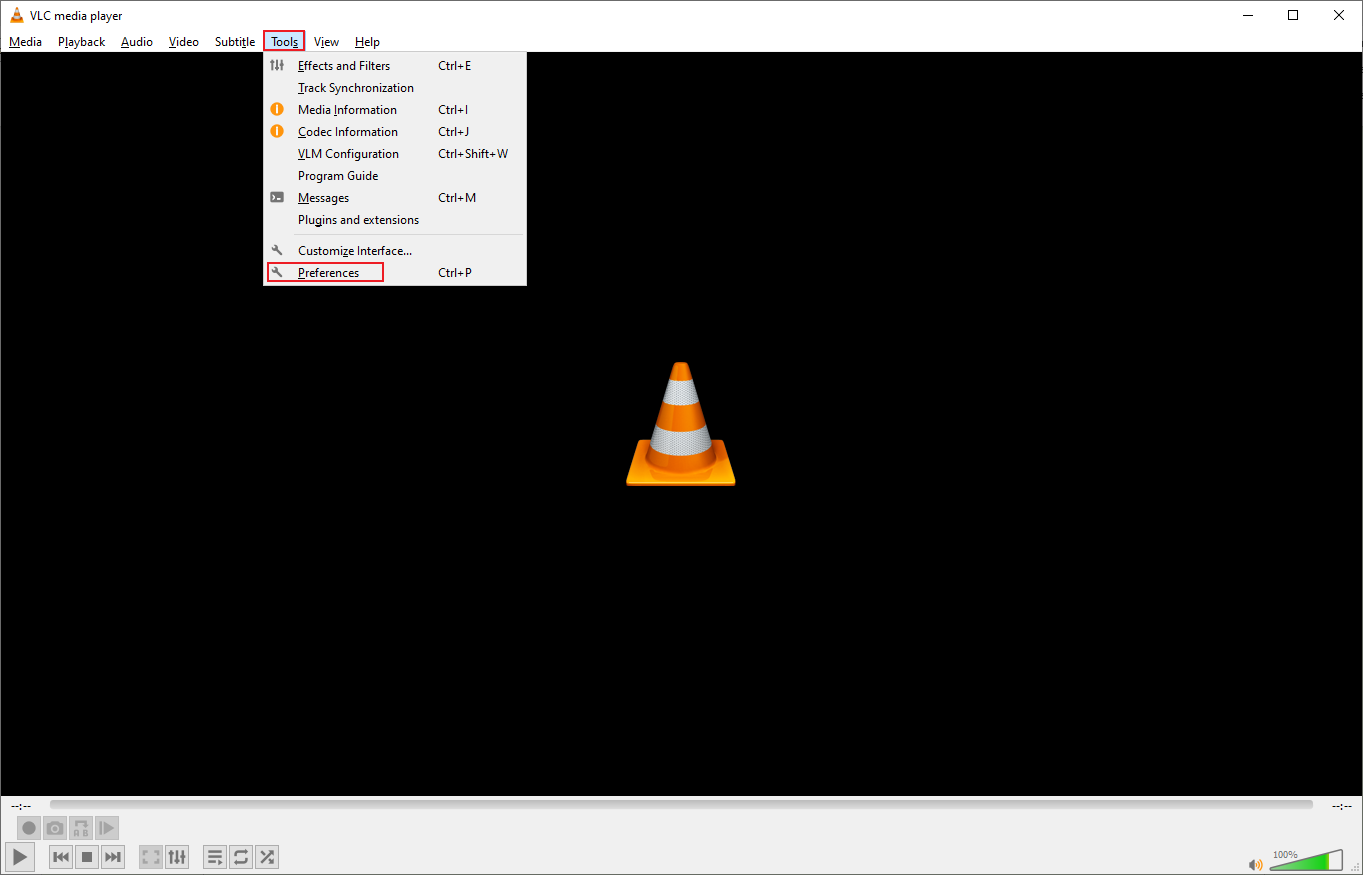
In VLC Media Player, choose the Tools option on the top menu bar and click the Preferences button to open the Simple Preferences window.
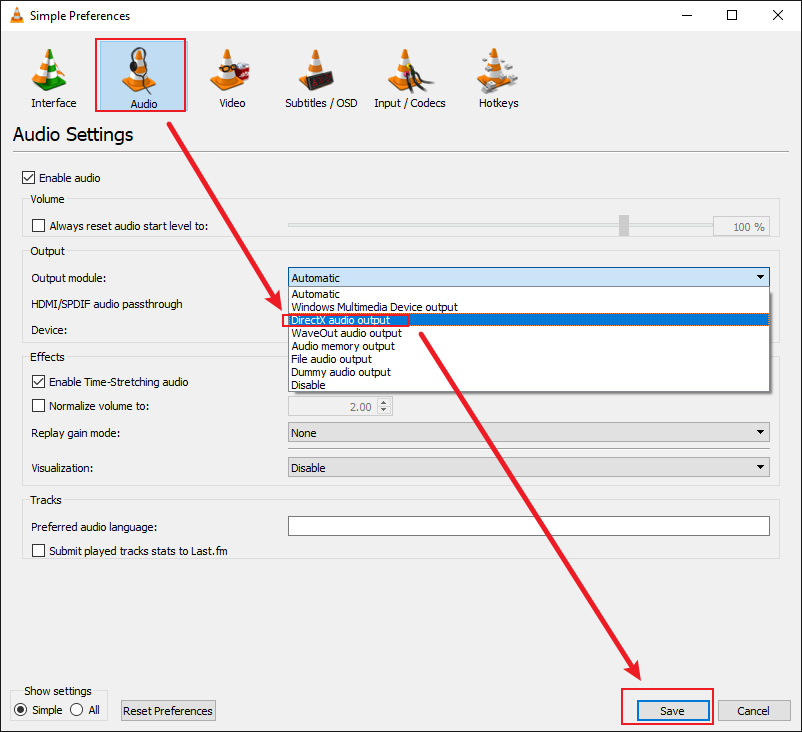
Step 2. Change Audio Output Module
1. Navigate to Audio and expand the Output module to choose the DirectX audio output.
2. Click on Save to enable VLC to capture audio.
#3. Change Video Output Module
Apart from changing the audio output format, you can try to change the video output settings to fix VLC not recording video.
Step 1. Go to the Simple Preferences Window
In VLC Media Player, choose the Tools option on the top menu bar and click the Preferences button to open the Simple Preferences window.
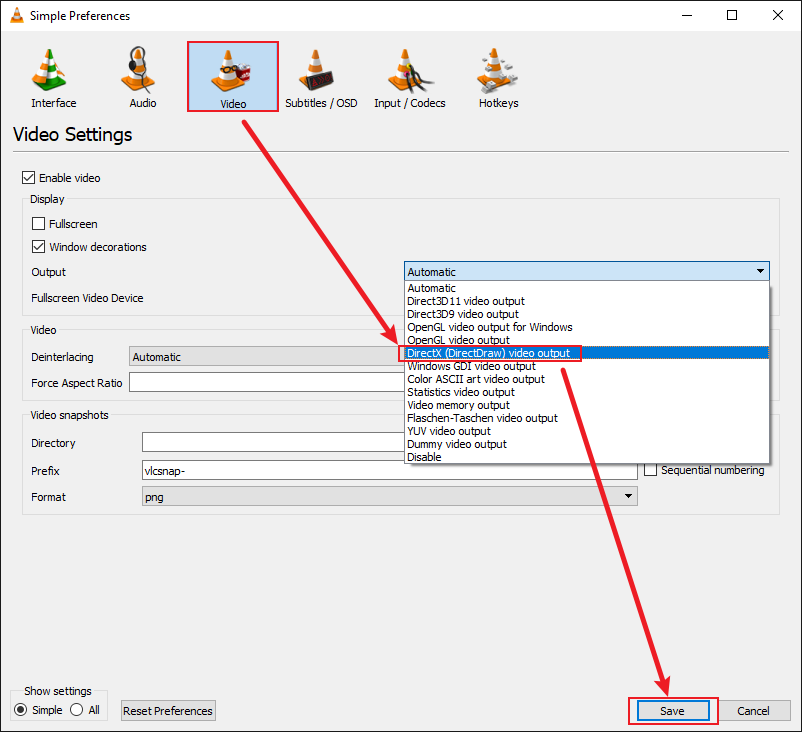
Step 2. Change Video Output Module
1. Navigate to Video, expand the Output option, and select DirectX (DirectDraw) video output.
2. Click on Save.
#4. Restart the Sound Card
If the VLC recording doesn’t have audio, you can check if other programs on your computer are using the sound card. Trying to restart the sound card is a quick fix to correct VLC’s video-only recording problem.
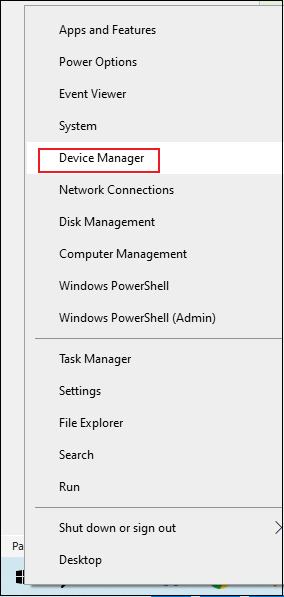
Step 1. Access the Device Manager Window
Right-click the Start button on your computer, select Device Manager.
Step 2. Restart the Sound Card
1. Double-click the Sound, video, and game controllers option, right-click the Realtek(R) Audio button, and choose the Disable device option.
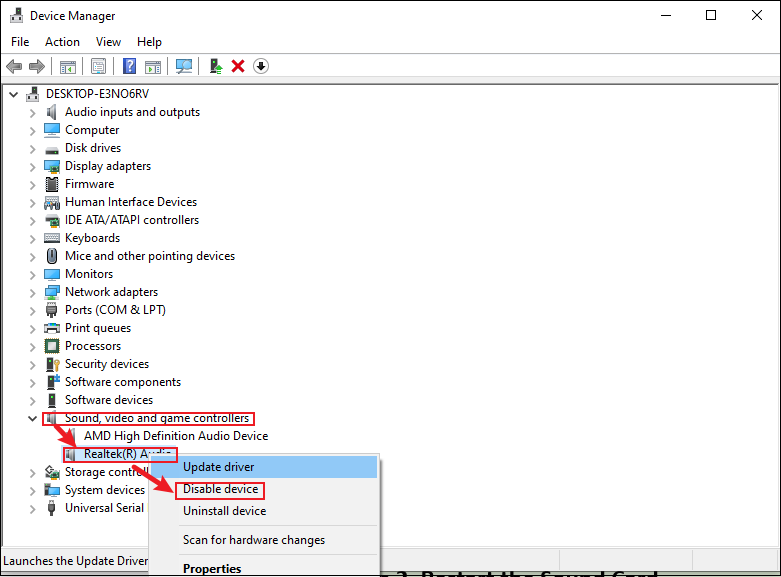
2. After a few seconds, right-click it again and choose Enable device.
#5. Disable Video Acceleration
Sometimes, hardware acceleration may cause the VLC screen capture not working. To resolve this issue, you can disable video acceleration.
Step 1. Go to Preferences
1. Open VLC Media Player on your computer and click on the Tools tab in the top menu bar.
2. From the drop-down menu, select the Preferences option.
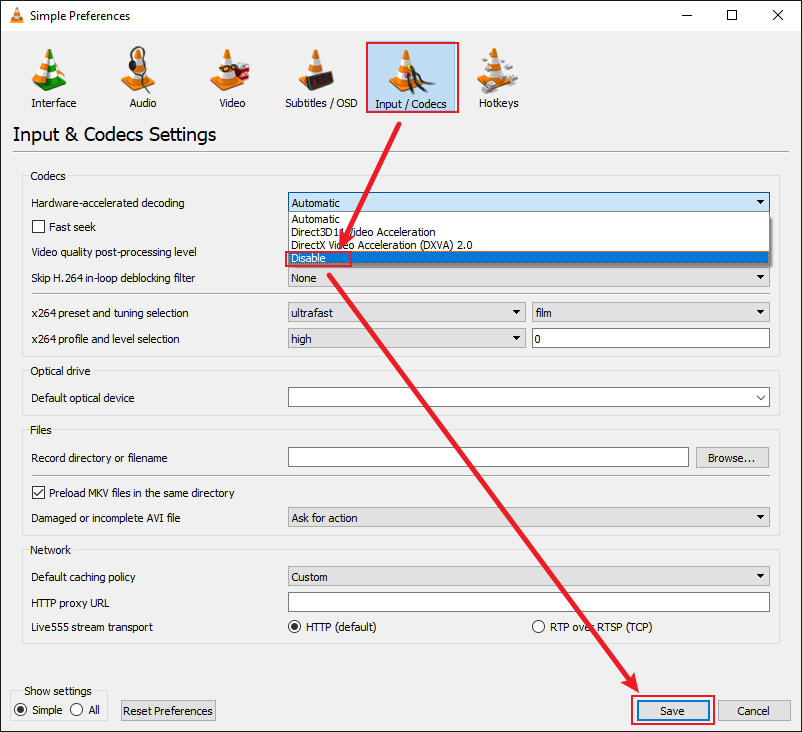
Step 2. Disable Video Acceleration
1. In the Simple Preferences window, go to the Input / Codecs tab, expand the Hardware-accelerated decoding menu, and choose the Disable option.
2. After that, click the Save button to keep the changes you just made.
#6. Open Advanced Controls
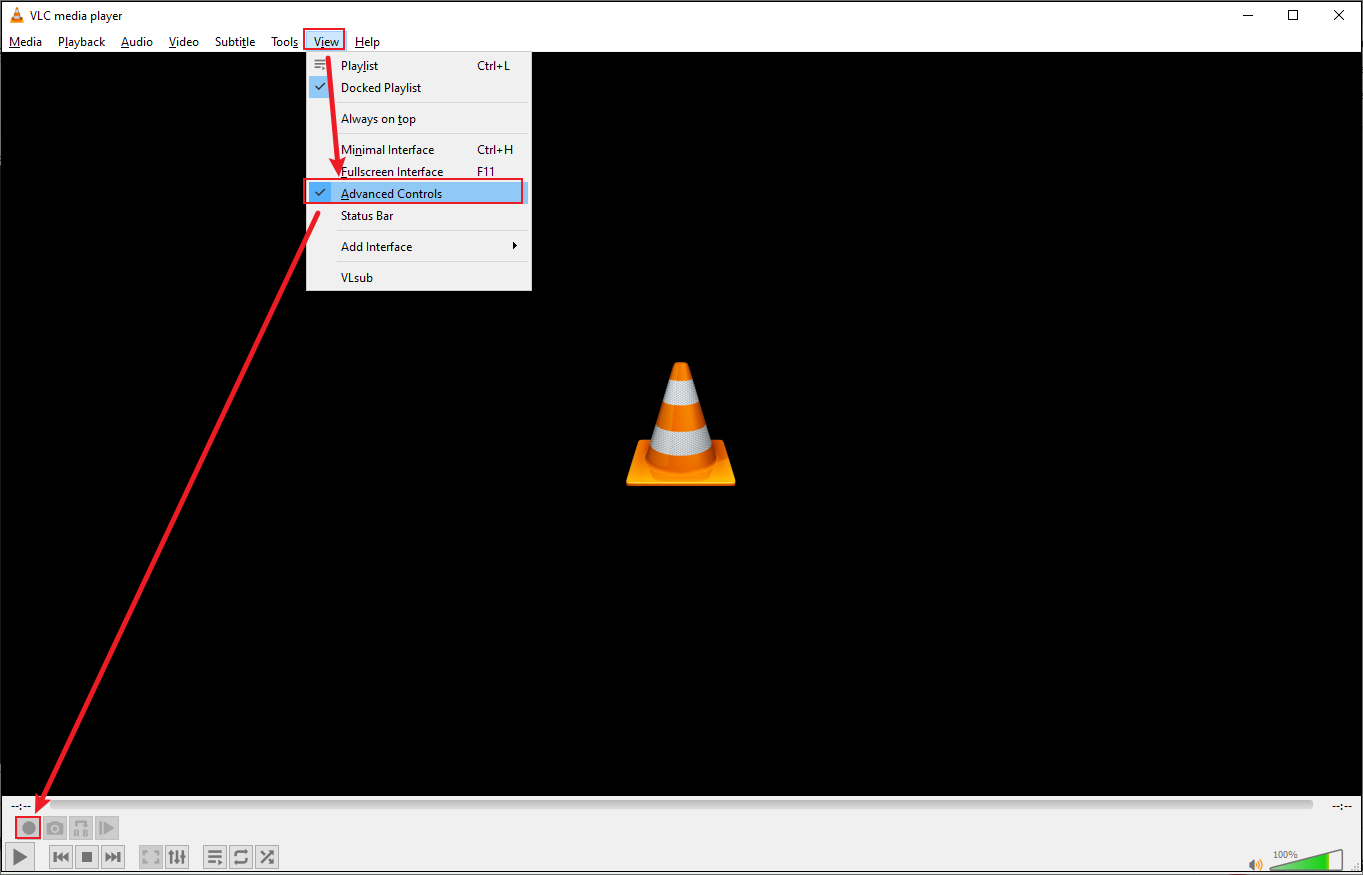
Can’t find the record button on VLC? The recording button will not appear on the interface of VLC by default. You need to open the advanced controls.
Open VLC Media Player, click on the View drop-down list, and select Advanced Controls. And then the record button will show up above the Play button at the bottom-left corner.
#7. Restart/Update/Reinstall VLC
For the VLC not recording issue, try restarting, updating, or reinstalling VLC on your computer.
Restart VLC
When it comes to an application that doesn’t work, restarting the application is also a feasible solution. Close the VLC interface and double-click the application to reopen.
Update VLC
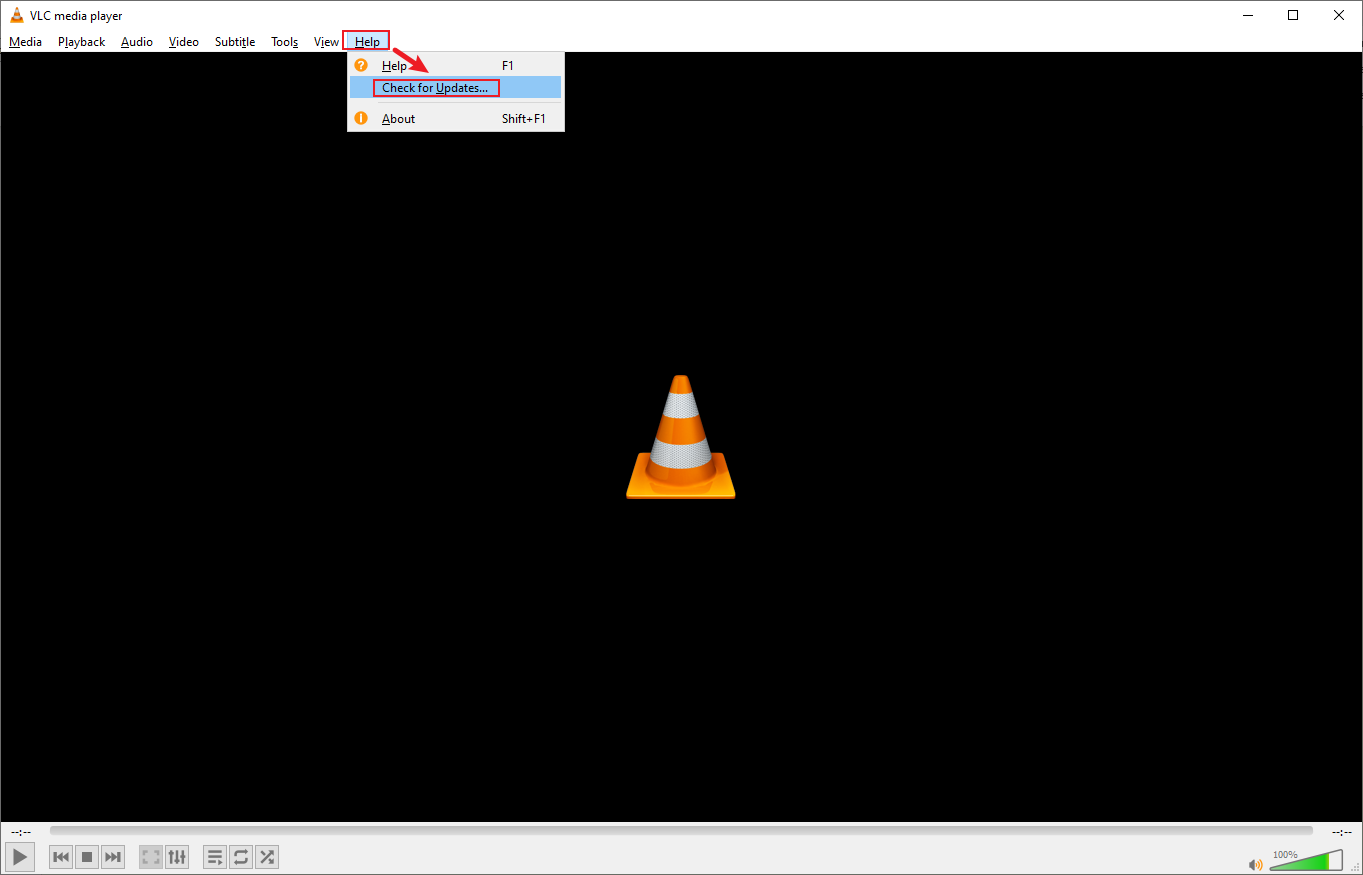
You may be using an outdated version of VLC, leading to multiple minor glitches. The developer releases the latest version of VLC to ensure the smooth functioning of the app, so try to update VLC to the latest version.
Click on the Help tab on the horizontal taskbar and click on Check for updates. If there is any update available, the interface will show it. Then, follow the onscreen instructions to install the latest update.
Reinstall VLC
If restarting and updating VLC still doesn’t work, reinstalling VLC is also a great option.
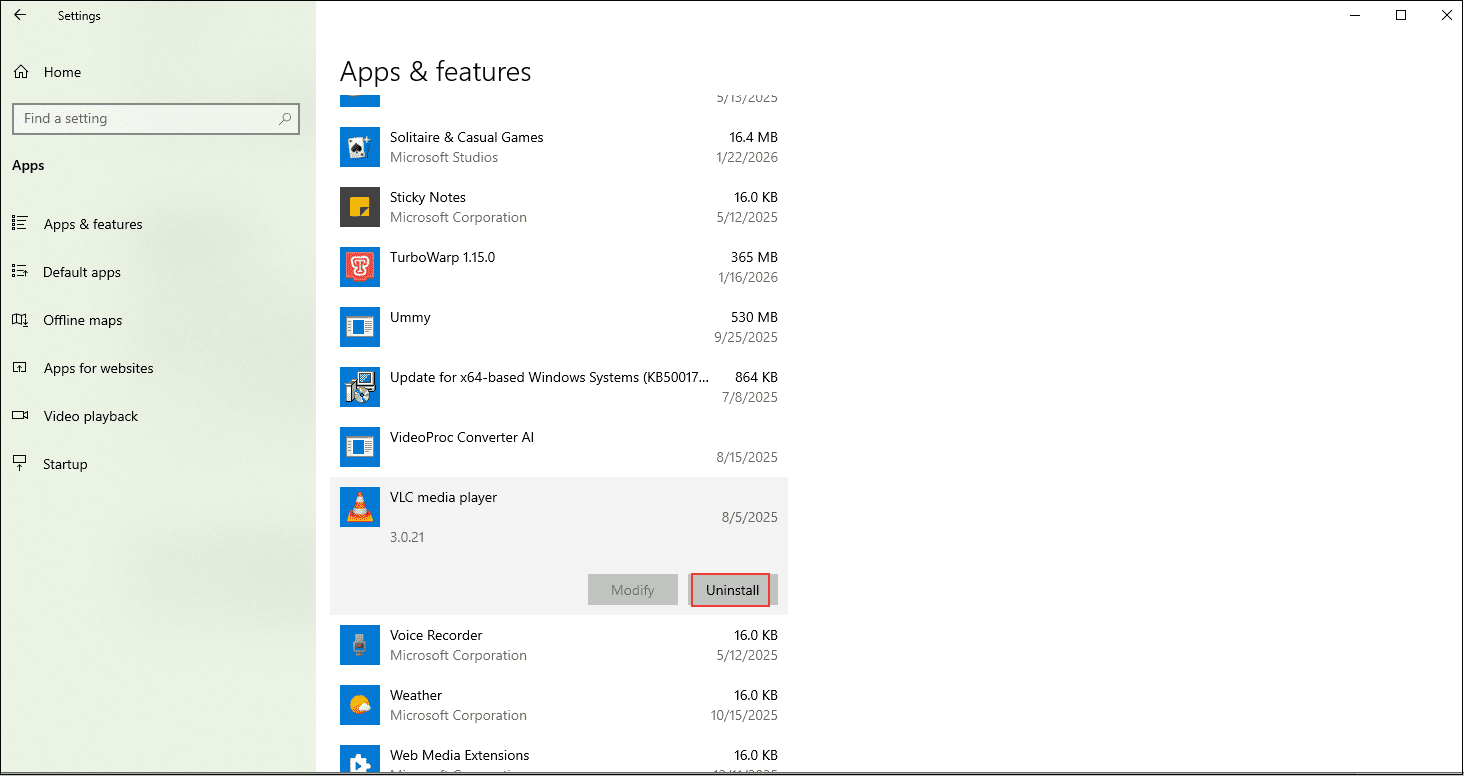
Step 1. Uninstall VLC
1. Go to Windows Settings > Apps and scroll down to locate VLC Media Player.
2. Click on VLC and choose Uninstall.
Step 2. Reinstall VLC
Go to the official VLC website to download and install the latest version.
#8. Disable Windows Defender
VLC not recording may be caused by Windows Defender. Temporarily disable real-time protection in Windows Security settings.
Step 1. Go to Virus & Threat Protection Settings
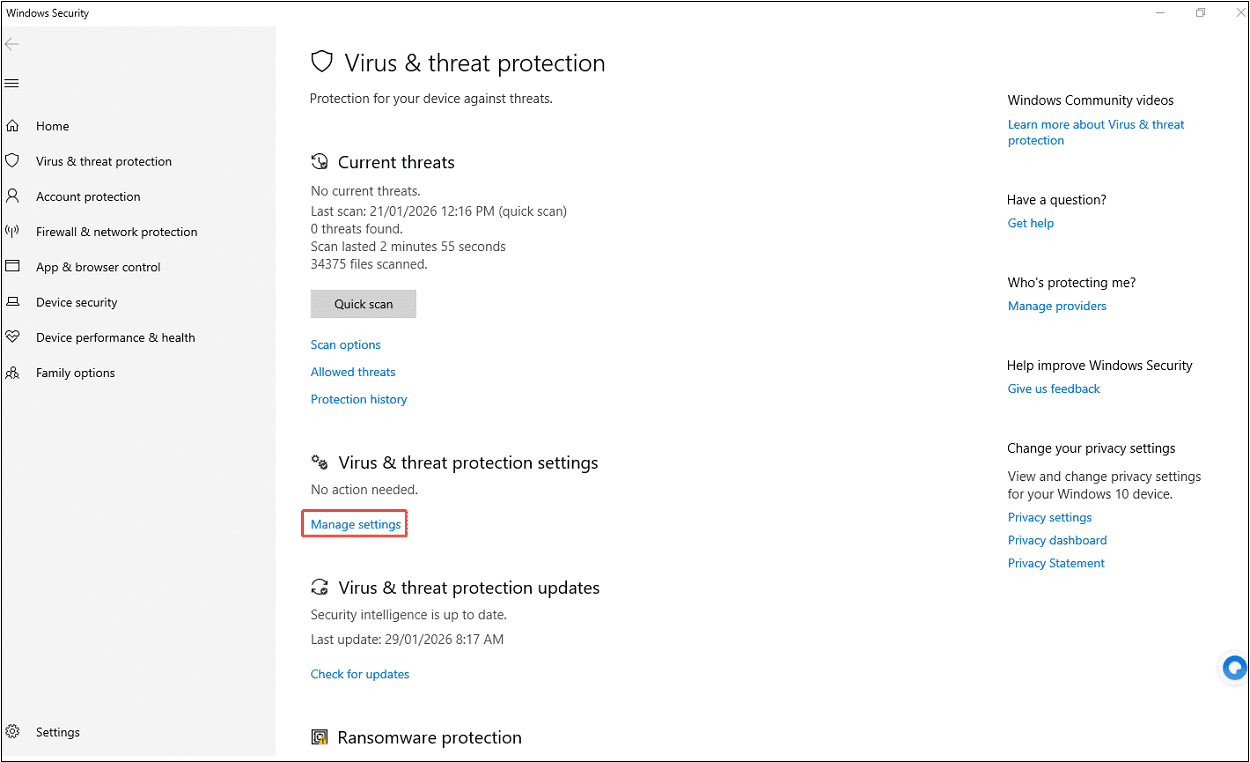
1. Open Windows Security and select Virus & threat protection.
2. Scroll down to click on Manage settings.
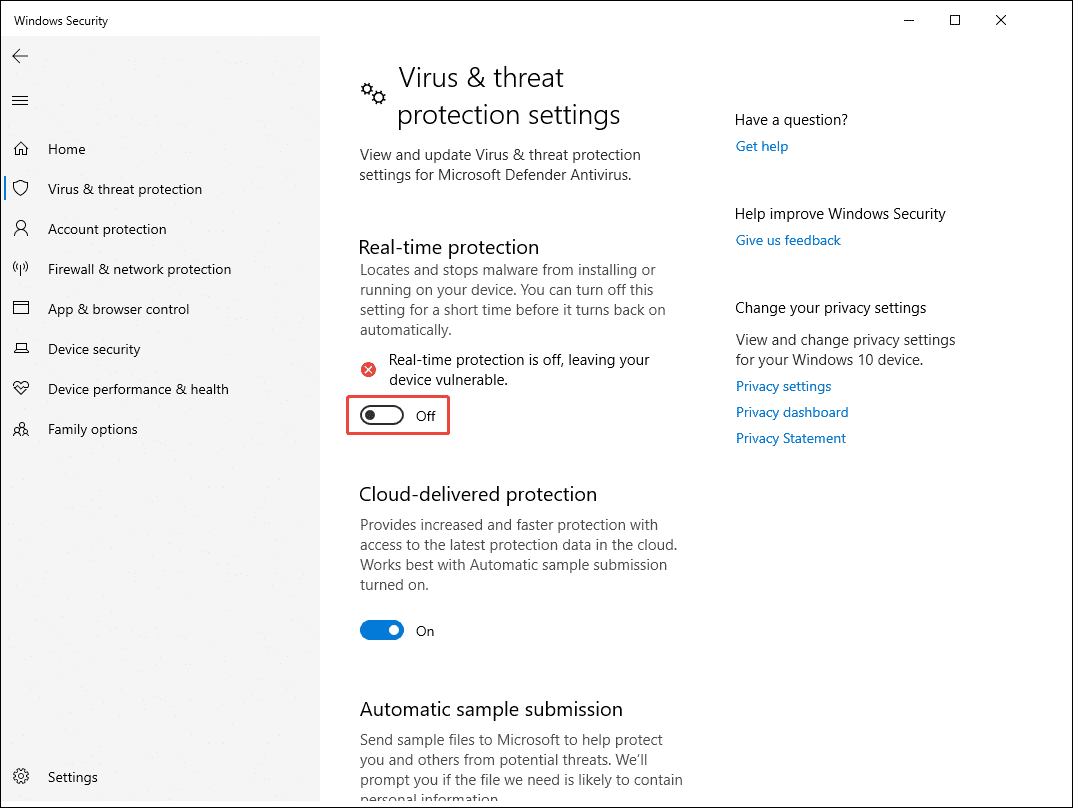
Step 2. Turn off Real-Time Protection
Toggle off the Real-time protection option.
#9. Use a VLC Alternative
Usually, by performing these troubleshooting steps, you can resolve the VLC not recording issue. If the problem persists, it’s time to use a VLC alternative. MiniTool Screen Recorder is the top 1 in my mind.
MiniTool Screen Recorder is a free screen recorder supporting recording any activities happening on your computer, such as gameplays, online meetings, online teaching tutorials, presentations, sports events, website videos, mouse movements, etc.
You can select any screen area, including full screen, part of the screen, or a specific window that flexibly meets all your recording needs. What makes MiniTool Screen Recorder more brilliant than VLC is that the former can record the screen with the webcam in high quality and add annotations to mark important screen information.
MiniTool Screen Recorder is really a great VLC alternative for video recording. Here’s how to use it.
Step 1. Download and Install MiniTool Screen Recorder
Download and install MiniTool Screen Recorder by clicking on the download button below. Then, launch this screen recorder.
MiniTool Screen RecorderClick to Download100%Clean & Safe
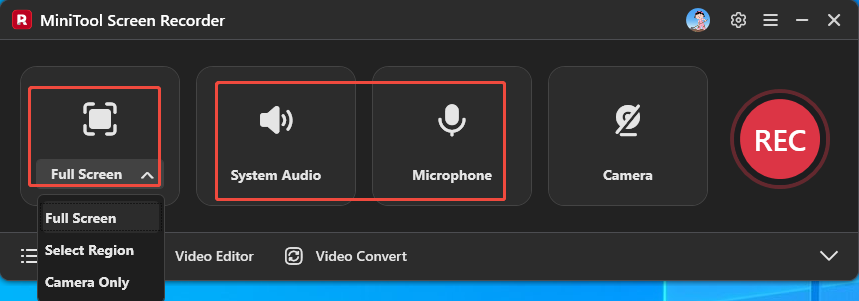
Step 2. Choose the Recording Area and Audio
1. Expand the Full Screen menu to select to record the entire screen, a specific area, or only the camera.
2. Click on System Audio and Microphone to choose whether to record system audio and microphone input.
Step 3. Start/End Recording
1. Press the red REC button. After three-seconds countdown, the recording will begin.
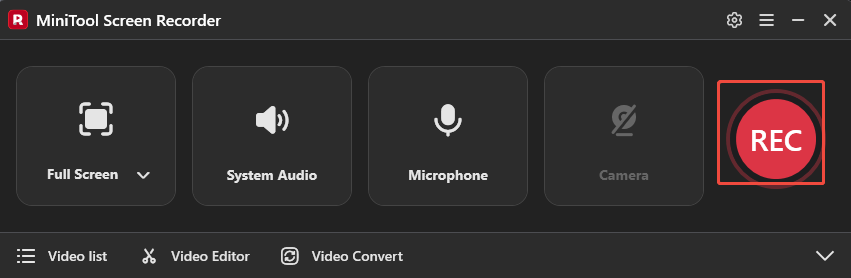
2. Press F6 to end the recording.
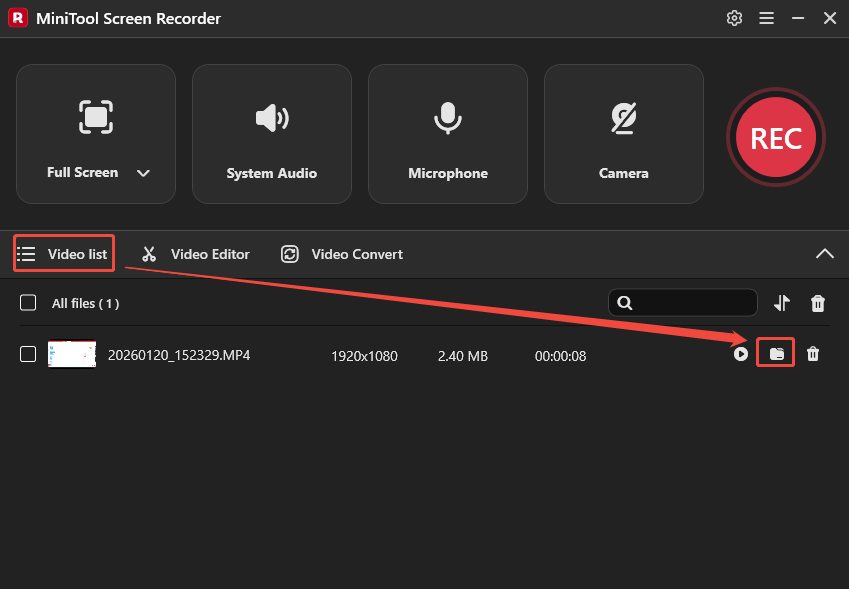
Step 4. Check the Recorded Video
The recorded video will be saved in the Video list. Click on the folder icon to find the save path on your computer.
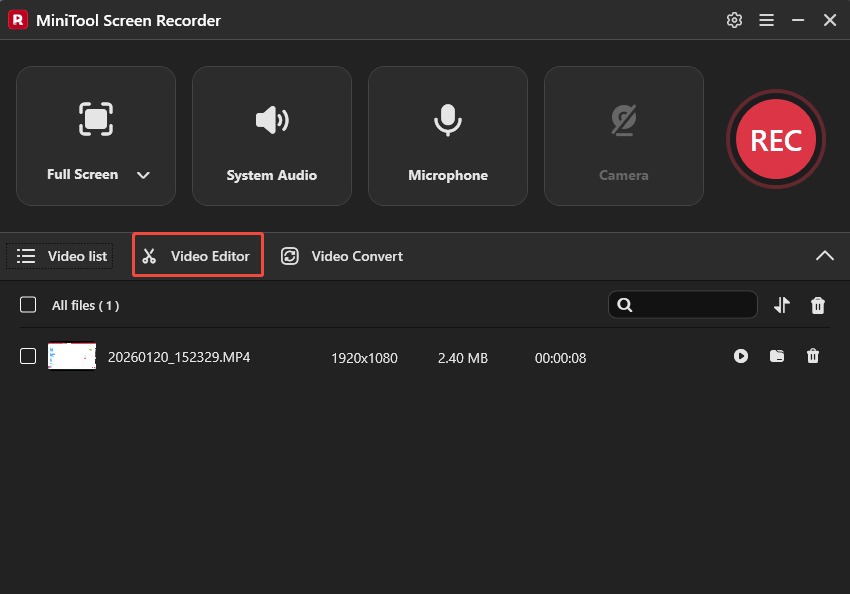
Bonus: How to Edit Recordings
After recording the activity happening on your computer, edit the videos to make them more appealing if you want to share them on your social media. You can adjust the audio volume, add background music, crop/split the recording, add filters, transitions, effects, animations, motion, and text to your recorded video.
Now, click on the Video Editor option in MiniTool Screen Recorder’s main interface to start editing your recording with ease. Alternatively, directly click on the download button to get the editor on your computer.
MiniTool MovieMakerClick to Download100%Clean & Safe
Conclusion
VLC Media Player is an excellent player and recorder. Encountering problems like VLC not recording is pretty normal; you can follow the 9 solutions above to let it work again, such as changing the video or audio output module, restarting the sound card, disabling video acceleration, using its alternative, MiniTool Screen Recorder, etc.
For recorded videos, use MiniTool MovieMaker to cut the unwanted parts and add elements to make it amazing. If you have any questions while using MiniTool products, please email us at support@minitool.com for help.