Teams is a team collaboration platform developed by Microsoft that allows users to conduct video conferences, engage in online chat, store files, and collaborate on documents. As an experienced Teams user, I frequently need to record myself on Teams.
Sometimes, this involves recording my presentations during formal meetings; at other times, I record my performance during informal practice sessions before the actual meeting, so I can review and refine it later to optimize the effectiveness of my delivery.
After some exploration and research, I discovered that this task can be accomplished either by utilizing Teams itself or by leveraging a third-party screen recorder.
How to Record Yourself on Teams
The following sections outline the specific steps I took to record myself on Teams using its built-in recording feature and a third-party screen recorder.
1. Use Teams’ Built-in Recording Feature
Teams offers users a built-in recording feature. However, the method for recording myself varies depending on whether I am currently in a meeting. Below, I have provided specific recording instructions for both scenarios.
#1 Record Yourself on Teams with a Meeting
This is the most frequently requested feature. I found that many users like to record their own contributions during meetings so that they can review them later, or keep a record as evidence in case of future disputes. In such cases, we can record not only ourselves but the entire Teams meeting.
Step 1: Start or Join a Meeting on Teams
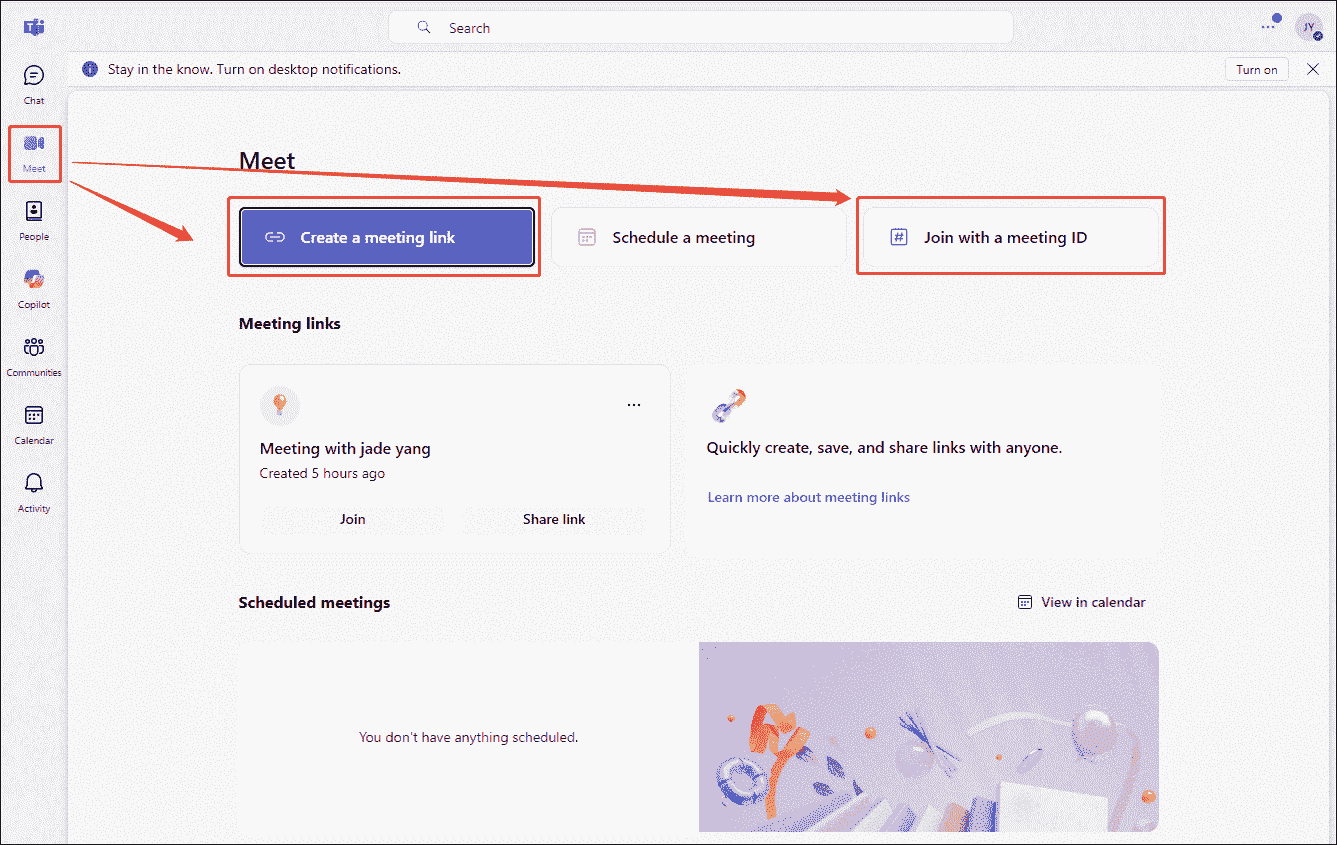
1. Go to Teams and log in to the account.
2. Then, click the Create a meeting link option to start a new meeting. Or, click the Join with a meeting ID option to join a meeting.
Step 2: Control the Camera and Audio
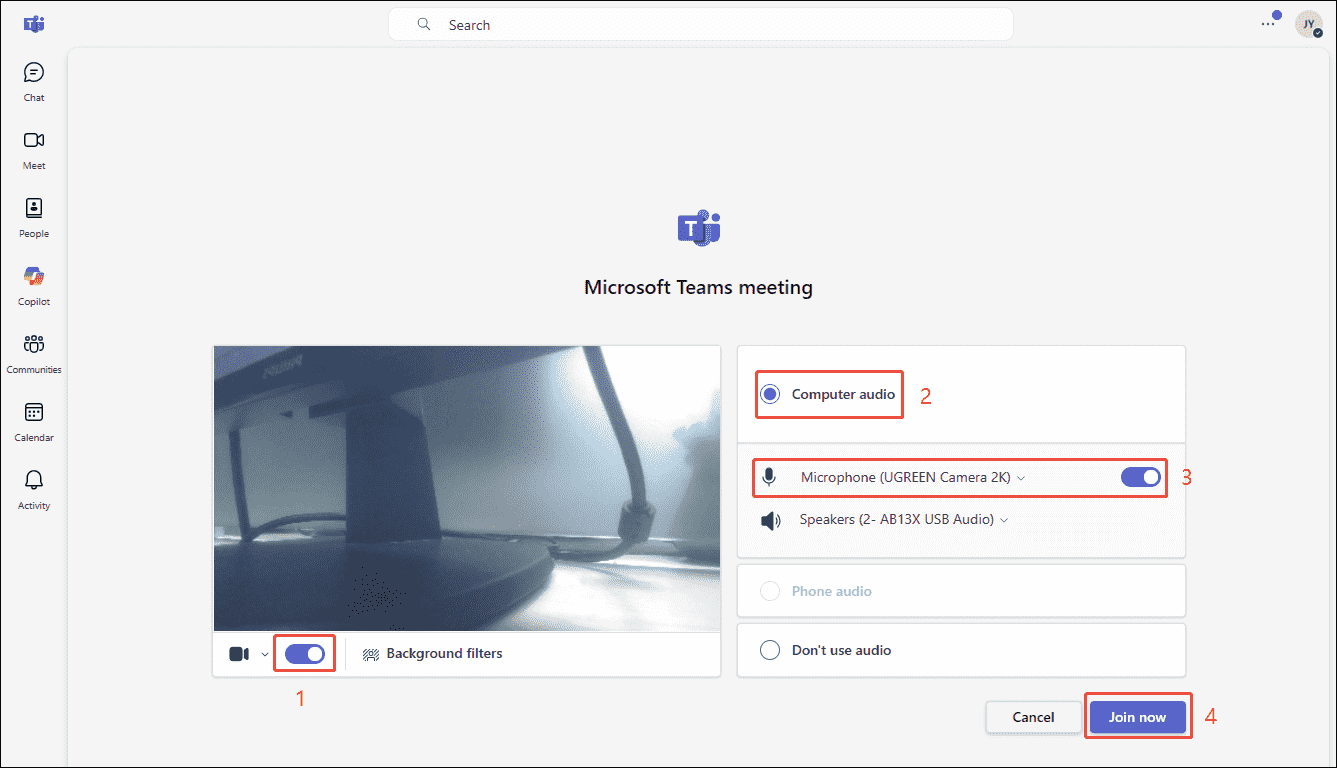
1. In the new interface, check the Camera option to enable the webcam.
2. Choose the Computer audio option and check the Microphone option to grant the meeting access to the relevant audio permissions.
3. Then, click on Join now.
Step 3: Start and End Recording
1. Click the More options. Then, select the Start recording option in the drop-down menu to begin recording.
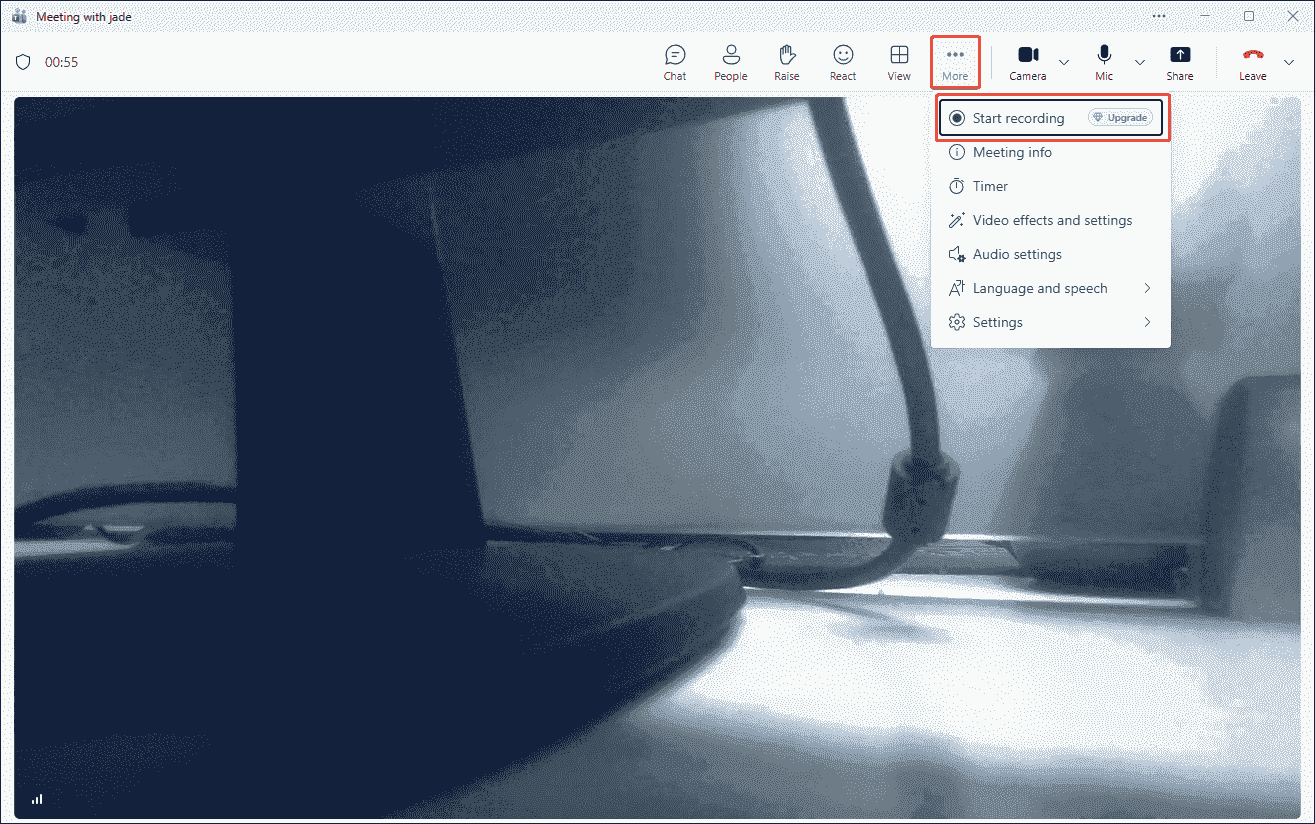
2. Then, make sure the face is visible in the camera frame.
3. To end the recording process, click the More option again, then select the Stop recording option in the drop-down menu.
Step 4: Check the Recorded Video
Depending on the type of meeting, Teams recordings will be stored in OneDrive, SharePoint, or Microsoft Stream.
#2 Record Yourself on Teams Without a Meeting
Can I record myself on Teams without a meeting? Of course, Teams fully supports this. I imagine that most users, myself included, like to familiarize themselves with the process and record their presentation in advance when preparing for important meetings. In such cases, we need to record the meeting without actually participating.
Here are the specific steps on how to record yourself on Teams without a meeting.
Step 1: Launch Teams
Go to the website of Teams.
Step 2: Start a Solo Meeting
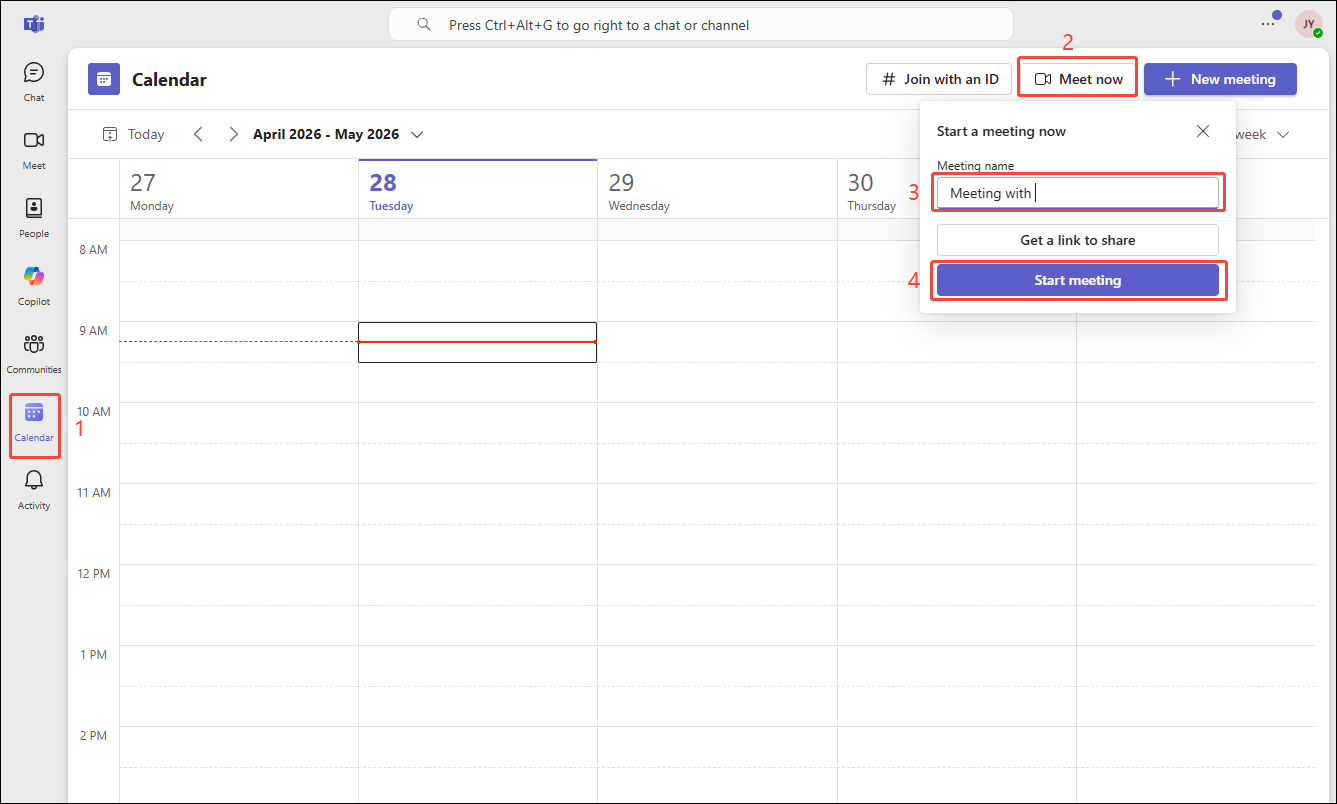
1. Navigate to the Calendar section and choose the Meet now option.
2. Then, in the new pop-up window, set the meeting name and click the Start meeting option to create a solo meeting.
Step 3: Start and End Recording
1. Make sure the camera and microphone are enabled.
2. Then, click the More option and choose the Start recording option in the drop-down menu to begin the recording process.
3. To end the recording process, click the More option again, then select the Stop recording option.
Step 4: Check the Recorded Video

2. Use a Third-Party Screen Recorder
However, not all users can freely utilize Teams' built-in recording feature to record themselves; this functionality is available to users subscribed to a business plan. Furthermore, even those who have purchased a business plan will be unable to record if they are not the meeting organizer or do not possess recording permissions.
Given these limitations, I highly recommend using my preferred third-party recording tool: MiniTool Screen Recorder.
Why Use MiniTool Screen Recorder
First, MiniTool Screen Recorder offers a free recording service, eliminating the need for me to purchase a Teams business plan. Second, this tool provides flexible recording area options, allowing me to record the full screen, a specific region, or a single window. Furthermore, MiniTool Screen Recorder gives me complete control over recording the microphone and system audio.
What satisfies me most is that MiniTool Screen Recorder features a built-in webcam recording function, meaning I can simultaneously record my own video feed, even when participating in meetings that are not video conferences.
Additionally, MiniTool Screen Recorder offers a comprehensive suite of annotation tools, allowing me to use arrows, lines, circles, and other shapes to highlight key information directly during the screen recording process.
Finally, another reason I chose MiniTool Screen Recorder is the high degree of customization control it grants users; I can adjust various settings, such as video frame rate, quality, webcam parameters, recording shortcuts, and more.
How to Record Yourself on Teams with or Without a Meeting with MiniTool Screen Recorder
I summarize the comprehensive steps below on how to self record on Teams with or without a meeting using MiniTool Screen Recorder.
Step 1: Download and Install MiniTool Screen Recorder
Click the download button below to get the MiniTool Screen Recorder. Then, follow the prompts to install it on the PC.
MiniTool Screen RecorderClick to Download100%Clean & Safe
Step 2: Choose the Recording Region
1. Launch MiniTool Screen Recorder.
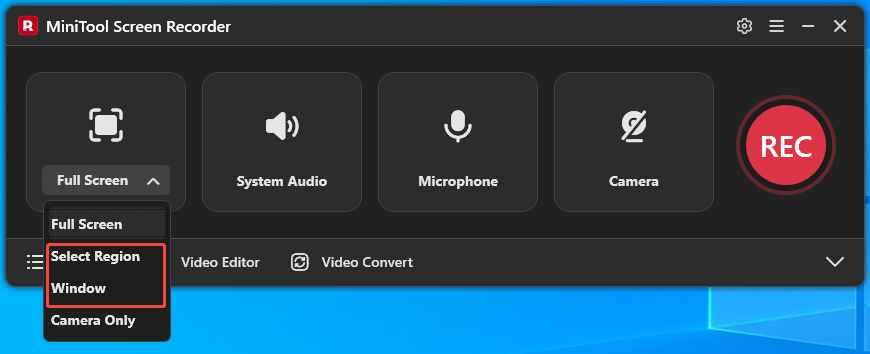
2. I found that the tool records in full-screen mode by default, but also offers several other recording area options.
3. Since I often need to record specific regions and windows, I can simply expand the drop-down menu of the Full Screen option, then choose between the Select Region option or the Window option.
Step 3: Control the Audio
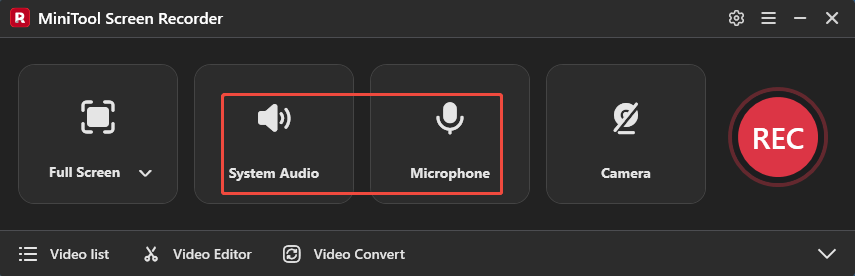
By default, system audio and microphone audio are recorded along with the screen. To turn them off, click the System Audio icon and the Microphone icon.
Step 4: Manage the Camera
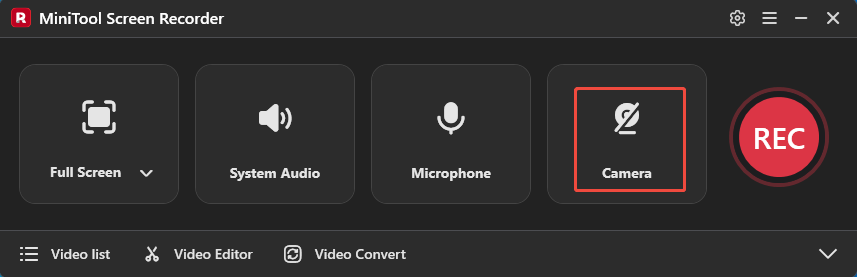
To record yourself on Teams, click the Camera icon to turn on the webcam.
Step 5: Start and End Recording
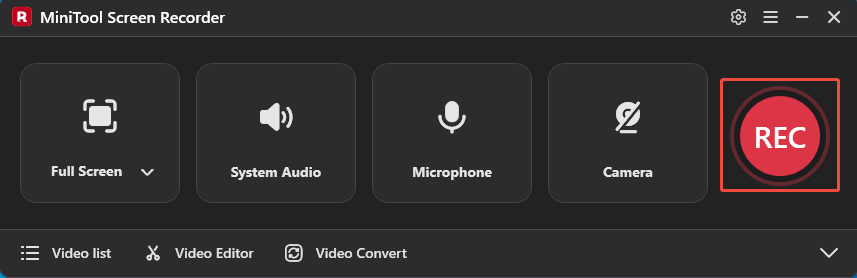
1. To begin the recording process, click the REC button or press the F6 key.
2. After a 3-second countdown, go to Teams. Then, choose to record the meeting or any other event as needed.
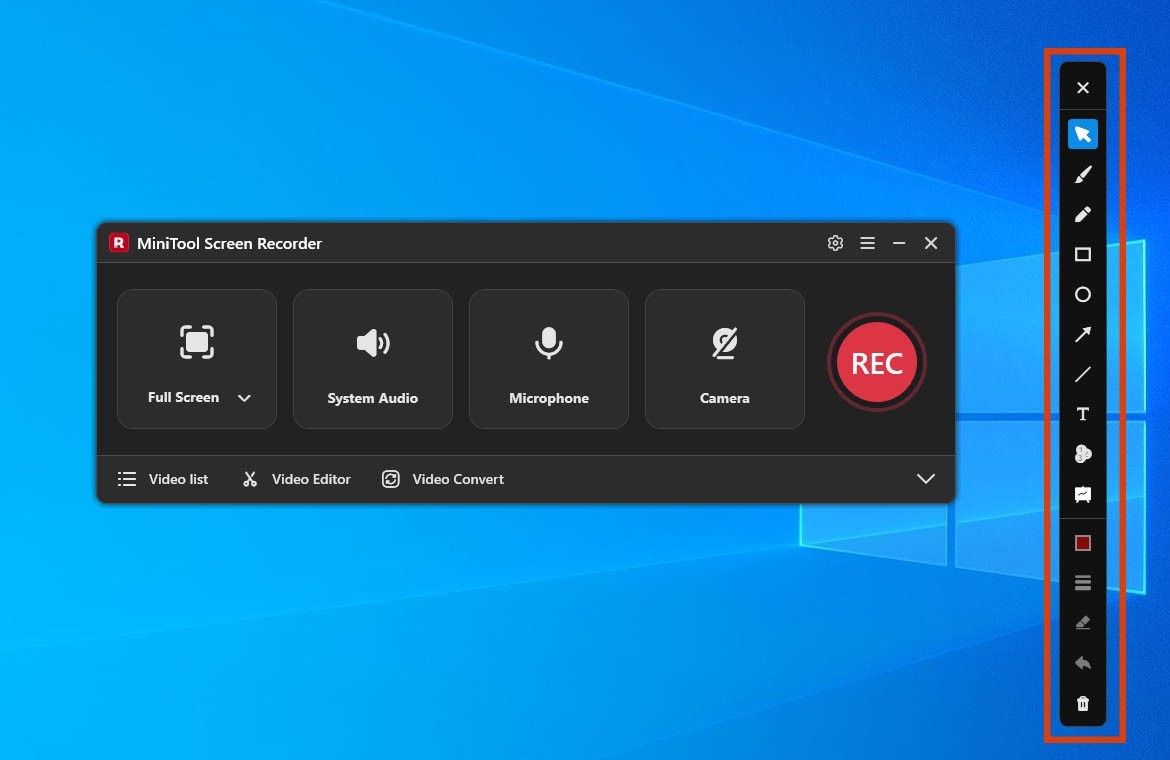
3. To mark key points while screen recording, select tools from the annotation bar on the right of the screen.
4. To end the recording process, press the F6 key again.
Step 6: Check the Recorded Video
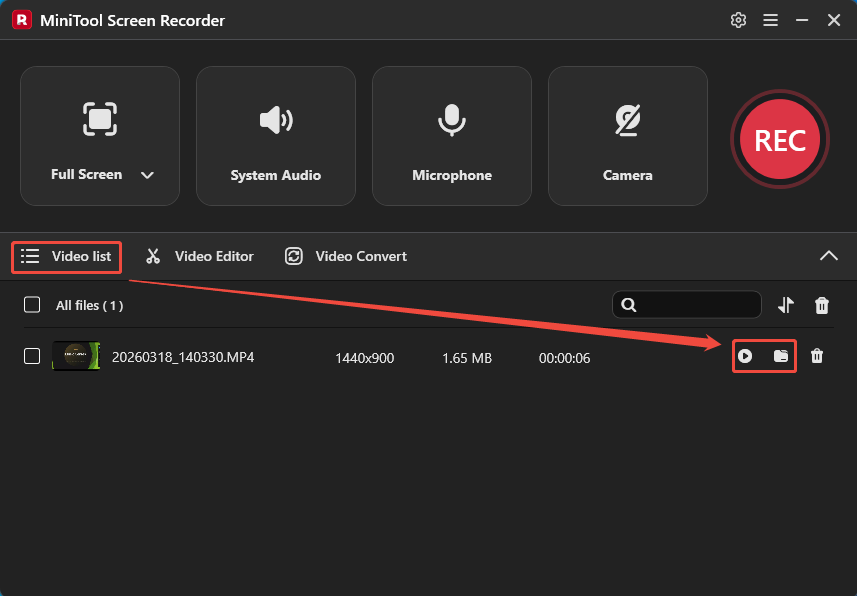
1. When the recording ends, it will automatically switch to the Video list module, where the recorded video is listed.
2. Finally, click the Play icon to check the recorded video. Or, click the Folder icon to locate it on the PC.
MiniTool Screen Recorder’s comprehensive screen recording features allow me to capture any activity on the screen, such as gameplay, online meetings, webinars, live streams, video calls, etc., fully meeting all our day-to-day screen recording needs.
Final Words
How do you record yourself in Teams? It’s actually quite simple: if users have recording permissions in Teams, simply use its built-in recording feature. If not, try a more professional third-party recording tool, such as MiniTool Screen Recorder.
If you run into any issues when trying out MiniTool Screen Recorder, send an email to support@minitool.com.