Teams is a platform designed specifically for team communication and collaboration. It enables users to engage in real-time chat, file storage, video conferencing, voice calls, and a range of other activities.
Can You Record a Video on Teams Without a Meeting
The answer is absolutely yes. As a loyal user of Teams, I have deeply appreciated the convenience it offers. I frequently utilize Teams' meeting recording feature to organize and review content.
Furthermore, quite by accident, I discovered that the Teams chat interface actually features a built-in video recording function. This feature allows users to record short video clips directly within a channel conversation and send them instantly after some simple editing.
Teams’ Video Recording Limitations
However, Teams' video recording feature does have certain limitations:
- Recording Duration: When I first used the video recording feature within the chat interface, the recording process abruptly cut off. Initially, I suspected a technical glitch, but I later discovered that the feature imposes a one-minute time limit on recordings.
- Storage and Sharing: Videos recorded within the chat interface are stored in the cloud; furthermore, I am unable to share them with others or download them to my local device for more advanced editing and optimization.
How to Record a Video in Teams Without a Meeting
Although Teams' built-in video clip recording feature has certain limitations, the convenience it offers in a professional work environment is irreplaceable. Meanwhile, given that many users require the ability to record longer videos, I have also specifically sought out a third-party Teams video recording tool dedicated to capturing a video in Teams without a meeting.
The following sections provide detailed operational guides for both of these methods.
Method 1: Use Teams’ Video Clip Recording Feature
The following is a step-by-step guide on how to use Teams to record a video based on my own practical experience.
Step 1: Launch Teams
Open Teams on the PC.
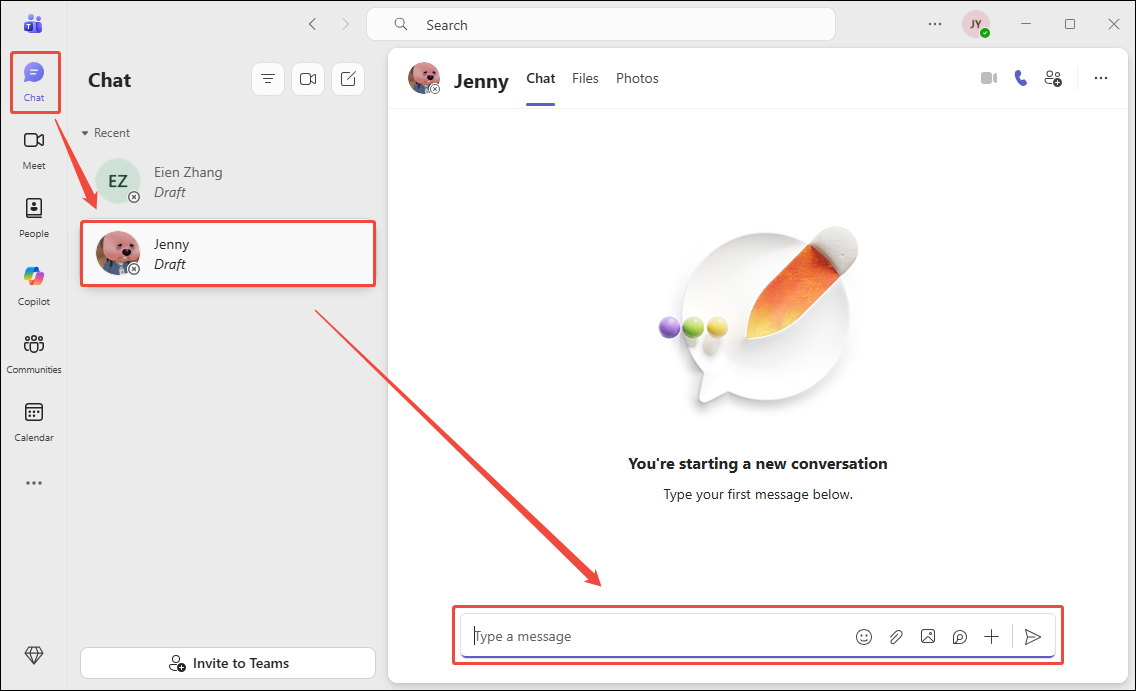
Step 2: Start a Chat
1. In the Chat interface, choose the target people to start a chat.
2. Then, send a video to the contact people.
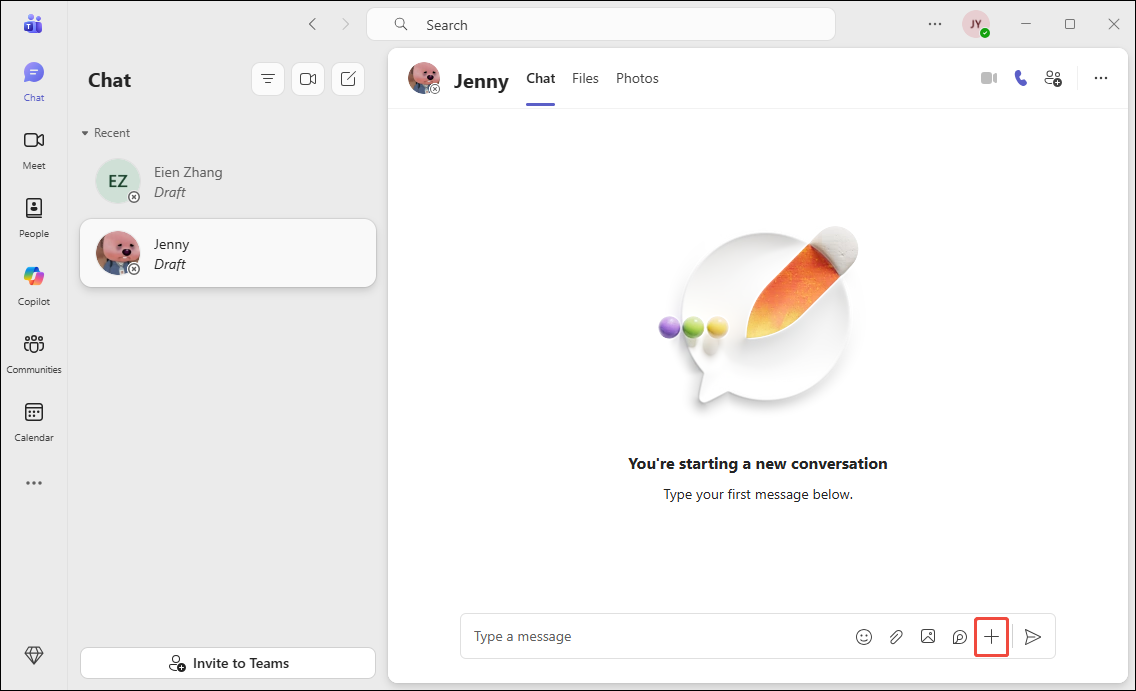
Step 3: Start and End Recording
1. Click the + icon, then choose the Record video clip option.
2. In the new pop-up window, control the camera and enable the microphone.
3. Click the Screen option to share the activity on the screen while screen recording.
4. Click the Start screen recording option in the middle of the pop-up window.
5. Choose the target screen and click the Share option to begin the recording process in the new pop-up window. Then, paly the target video in the Teams chat interface.
6. To end the recording process, click the Stop and review option.

Method 2: Use a Third-Party Screen Recorder
When recording long videos on Teams, I typically turn to my trusty third-party screen recording software: MiniTool Screen Recorder. Thanks to its powerful recording capabilities, it has become an indispensable tool, an absolute essential in both my daily life and my professional work.
MiniTool Screen Recorder offers a richer set of recording options than Teams' built-in recording feature; it allows me to record not only specific regions or windows but also the entire screen. Furthermore, MiniTool Screen Recorder enables me to independently control the recording of microphone audio and system audio.
As a professional screen recording tool, MiniTool Screen Recorder also offers more advanced recording capabilities. For instance, it features a webcam recording function that allows me to simultaneously capture the screen with the camera. Furthermore, I can utilize its convenient annotation tools to mark up the screen during the recording process.
My favorite feature is that MiniTool Screen Recorder allows me to record videos of unlimited duration, and the entire recording process remains consistently smooth and completely free of lag. Furthermore, with MiniTool Screen Recorder, I can even preset the recording duration before I begin.
Below is a detailed guide on how to record a video on Teams longer than 1 minute using MiniTool Screen Recorder.
Step 1: Get MiniTool Screen Recorder
MiniTool Screen RecorderClick to Download100%Clean & Safe
Click the button above to download and install MiniTool Screen Recorder on the PC.
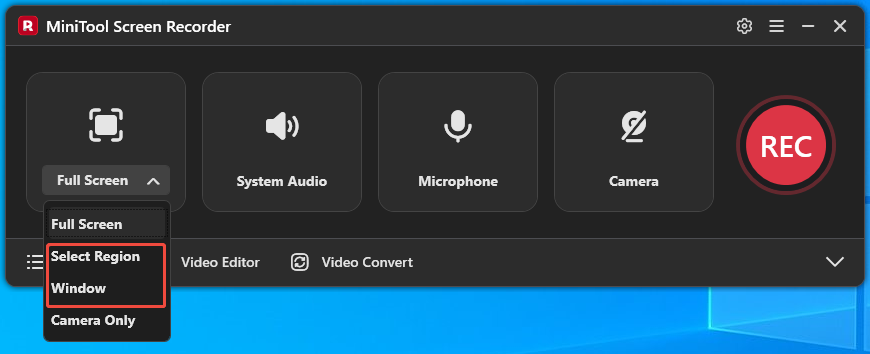
Step 2: Select the Recording Area
By default, this tool records full-screen. Since I want to record the Teams interface, I can expand the drop-down menu of the Full Screen option. Then, choose the Select Region or the Window option.
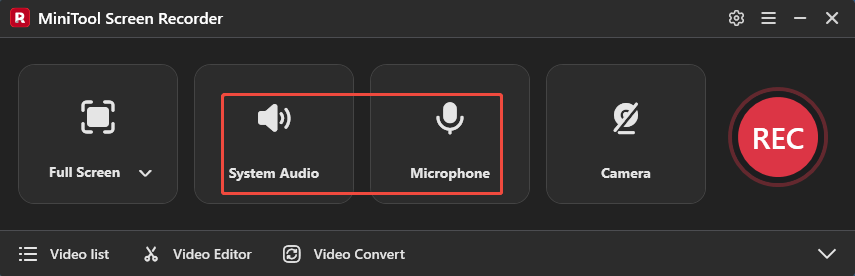
Step 3: Control the Audio Recording
MiniTool Screen Recorder defaults to capturing the system audio and microphone audio. To turn them off, click the System Audio icon and the Microphone icon.
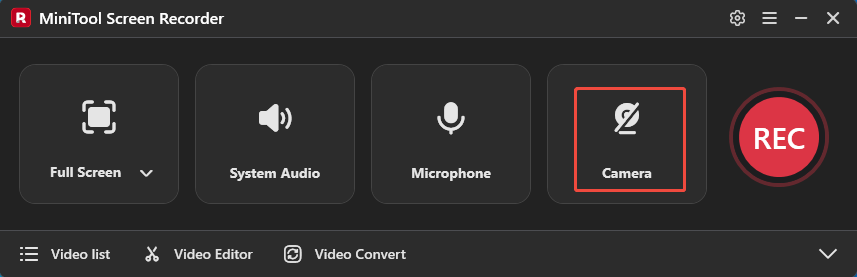
Step 4: Manage the Camera
To record the video in Teams with the camera, click the Camera icon to enable it.
Step 5: Start and End Recording
1. To start the recording process, click the REC button or press the F6 key.
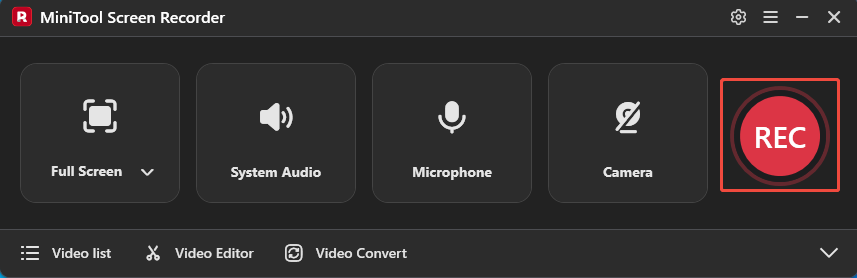
2. After a 3-second countdown, go to Teams and play the target video.
3. To end the recording process, press the F6 key again.
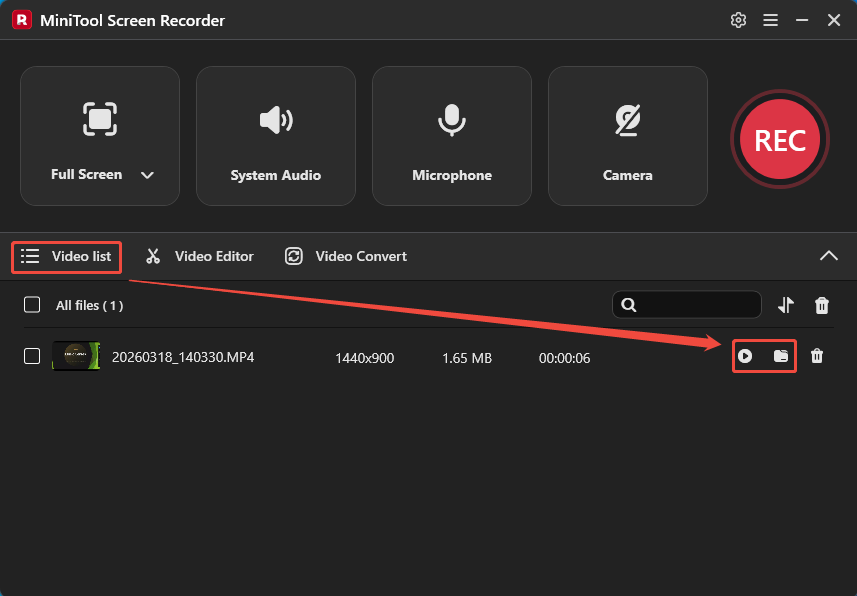
Step 6: Play and Locate the Recorded Video
1. When the recording ends, MiniTool Screen Recorder will automatically switch to the Video list section, where the recorded video is listed.
2. Then, click the Play icon to check the recorded video. Or, click the Folder icon to locate it on the PC.
MiniTool MovieMakerClick to Download100%Clean & Safe
To Wrap Things Up
This article explains how to record a video in Teams without a meeting using its video clip recording feature. It also provides a method to record a long video in Teams with a third-party screen recording tool, MiniTool Screen Recorder.
If you run into any issues when trying out MiniTool Screen Recorder or MiniTool MovieMaker, send an email to support@minitool.com.