This article introduces the QuickTime Player to you and walks you through the reasons for QuickTime Player not recording audio. Simultaneously, it offers you 6 amazing fixes for that issue, including using a QuickTime alternative, checking the volume slider/audio source/microphone permissions/system input, updating the macOS, and installing BlackHole.
Recently, more and more users are complaining that they can’t use the QuickTime Player to capture audio. Why does that problem happen? If you want to know how to solve the problem of QuickTime Player not recording audio, read the following content to find out.
What Is QuickTime Player
Developed by Apple, QuickTime is the default media player for Mac users. It enables you to play all kinds of video, audio, and image files. Besides, QuickTime Player is also a one-stop solution for audio/video recording, video editing, and file conversion.
QuickTime Player used to be available on Windows. However, Apple has ended its support for Windows systems. As such, if you are a Windows user and want a robust, versatile media player, try the VLC media player.
Why Is QuickTime Not Recording Audio
Here are many reasons that may lead to the issue of QuickTime Player not recording audio.
Reason 1. Wrong Audio Source Selection
If you have chosen the wrong audio source during the audio recording process, it is common to see the problem of QuickTime screen recording not capturing audio. Specifically, QuickTime Player only empowers you to capture the audio from a single input that has been designated automatically. It doesn’t support the detection of active audio sources.
Therefore, if you have plugged in an external USB mic and want to record the audio from it, check whether the QuickTime Settings are set appropriately. If not, all the captured audio will be silent.
Reason 2. Denied Microphone Permissions
Due to privacy protection, macOS requires your permission for QuickTime Player to access some hardware, such as the camera and microphone. In other words, if you have denied the microphone permissions, it is common for you to be bothered by QuickTime Player not recording audio.
Reason 3. Low Input Volume
Before recording audio with QuickTime Player, ensure that the audio signal is above a certain decibel level. On condition that the input volume is low, QuickTime Player can only capture the silence.
Reason 4. The Lack of a Virtual Audio Driver
QuickTime Player can’t capture the system sounds directly. Therefore, if you want to use QuickTime Player to record the system audio, ensure that the virtual audio driver has been installed on your computer.
Reason 5. Outdated QuickTime Player/macOS
An outdated QuickTime Player or macOS also contributes to QuickTime Player not recording screen audio. For instance, if you haven’t updated your operating system in time, the obsolete sound drivers may not work well with the QuickTime Player anymore, which causes the audio recording to fail.
Provided that you are using an old version of QuickTime Player, there may be some bugs that haven’t been fixed, which prevent you from capturing the audio with the QuickTime Player.
How to Fix QuickTime Player Not Recording Audio
Here are 6 feasible methods to fix QuickTime Player not recording audio. Before trying the methods below, you can try restarting the QuickTime Player.
Method 1. Check the Volume Slider
To ensure that you can use QuickTime Player to record audio effortlessly, one of the most effortless ways is to check the volume slider and avoid a low input volume. Below is a step-by-step tutorial on how to check the volume slider within the QuickTime Player app.
Step 1. Enable the recording function.
After launching the QuickTime Player, click on the upper File option and select New Audio Recording.
Step 2. Go to the recording settings interface.
Click on the small arrow next to the Record button to access the recording settings interface. There, go to the Microphone list and choose the microphone source as you want.
Step 3. Adjust the volume slider.
Once you have selected the microphone source, adjust the volume slider manually.
You can also check the volume slider in system settings. If you want to do that, follow the steps below.
Step 1. Access the system settings page.
Click on the top-left Apple menu and select System Settings. For people who use an old Mac, choose System Preferences.
Step 2. Specify the microphone source.
Choose the Control Center option. Next, scroll down to the Sound section and switch to the Input tab.
Step 3. Adjust the volume slider.
Choose the microphone source you are using. Then, adjust the input volume by dragging the input volume slider. Ensure that the input volume is high enough.
With the above-detailed steps, you are more likely to capture the audio using QuickTime Player.
Method 2. Check the Audio Source
For a smooth audio recording process, you need to match the QuickTime Player with the audio source you are using. To do that, follow the guidance below.
Step 1. Go to the recording window.
After running the QuickTime Player, click on the File option in the menu bar. Then, select the New Audio Recording option or the New Screen Recording option to enter the recording window.
Step 2. Check the audio source.
Click on the arrow icon next to the Record button to expand the drop-down menu. There, you will see an audio source with a checkmark. It means that the audio source is selected by the QuickTime Player. If you find that the audio source is not the one you want to record audio from, select a desired audio source in the source list.
After checking the audio source, if you still can’t use QuickTime Player to record the audio, try the other methods below.
Method 3. Check Microphone Permissions
Microphone permissions are also an integral part of audio recording within QuickTime Player. To avoid the potential no-permission problem, follow the tutorial below to enable the microphone permission for QuickTime Player.
Step 1. Go to the Settings window of your Mac.
Click on the Apple menu and select System Settings to enter the Settings window.
Step 2. Check the microphone permissions.
Choose the Privacy & Security option. In the left-side bar, click on the Microphone option to access the app list. There, find QuickTime Player and ensure the microphone permissions have been turned on.
Method 4. Update the Operating System
If the issue of QuickTime Player not recording audio is caused by an outdated QuickTime Player or macOS, you can fix that issue by updating the operating system. Since QuickTime Player is a built-in player on Mac, you just need to update macOS. Before the update process, remember to back up the data. Next, just follow the instructions below to update macOS.
Step 1. Access the settings page of your Mac.
Click on the top-left Apple menu and choose the System Settings option or the System Preferences option to enter the settings window.
Step 2. Check for updates.
After choosing the General option, click on Software Update. If the update is available, click on the Update Now button to begin the update process.
When the updating process ends, try to record the audio with QuickTime Player to check whether this method is effective.
Method 5. Install BlackHole
BlackHole is a free virtual audio driver that enables you to record the system sounds with QuickTime Player. Below are the detailed steps to install BlackHole on your Mac.
Step 1. Download and install BlackHole.
Go to https://existential.audio/blackhole/ to download and install BlackHole on your PC.
Step 2. Configure Audio MIDI setup.
Press the Command + Space keys to activate the Spotlight Search function. Next, type Audio MIDI Setup. Once the search result appears, open Audio MIDI setup. Next, click on the bottom-left Plus icon and choose Create Multi-Output Device. Then, name the output device. Navigate to the right panel. There, check BlackHole 2ch and the listening device you are using.
Step 3. Specify the system output.
Click on the top-left Apple menu and select System Settings or System Preferences. Next, go to the Sound section. There, select Output. Then, choose the Multi-Output Device you named before as the output of the system.
Step 4. Begin recording.
Run QuickTime Player and click on the File option in the menu bar. Next, choose New Screen Recording or New Audio Recording. Click on Options or the arrow icon next to the Record button. Then, choose BlackHole 2ch under the Microphone section. Finally, click on the Record button to begin the recording and play the system audio you want to capture.
Method 6. Try QuickTime Alternative for Audio Recording
If the methods above don’t work, you can also try a QuickTime alternative to record the audio. Considering that some of you may not know how to select a standout screen recorder, I will recommend a fabulous screen recorder called MiniTool Screen Recorder.
What Is MiniTool Screen Recorder
MiniTool Screen Recorder is a watermark-free, feature-rich screen recorder that enables you to record the computer audio effortlessly. It is completely free and empowers you to record the screen without time constraints.
Moreover, MiniTool Screen Recorder enables you to annotate the screen, allowing you to use various elements to highlight the key points in your recordings. Meanwhile, this screen recorder empowers you to record the webcam. Additionally, MiniTool Screen Recorder automatically saves recordings in the MP4 format, which facilitates playback on a wide range of devices.
How to Record Audio with MiniTool Screen Recorder
Below is a detailed guide on how to record audio using MiniTool Screen Recorder.
Step 1. Download and install MiniTool Screen Recorder.
MiniTool Screen RecorderClick to Download100%Clean & Safe
Download MiniTool Screen Recorder by clicking on the download button above. Then, follow the on-screen prompts to install this screen recorder on your PC.
Step 2. Choose the recording area and manage the audio recording.
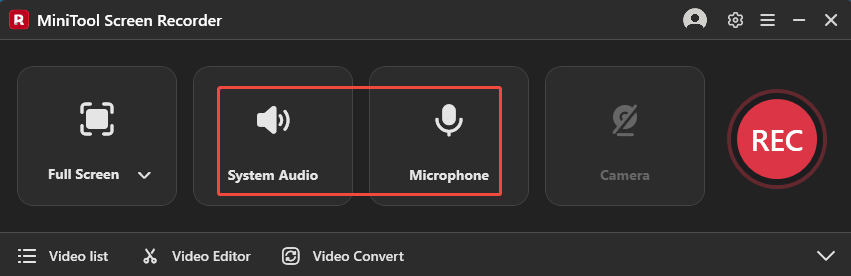
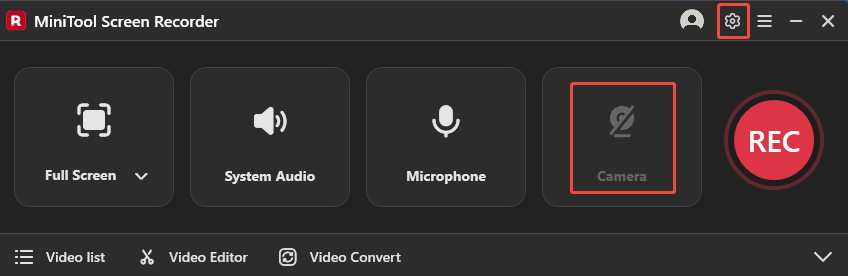
By default, MiniTool Screen Recorder will adopt a full-screen recording mode. If you want to customize the recording area, press the Alt + R keys to specify the recording region. Click on the System Audio icon and the Microphone icon to turn on/off the recording of system and microphone sounds.
Step 3. Enable the webcam recording and configure other recording settings.
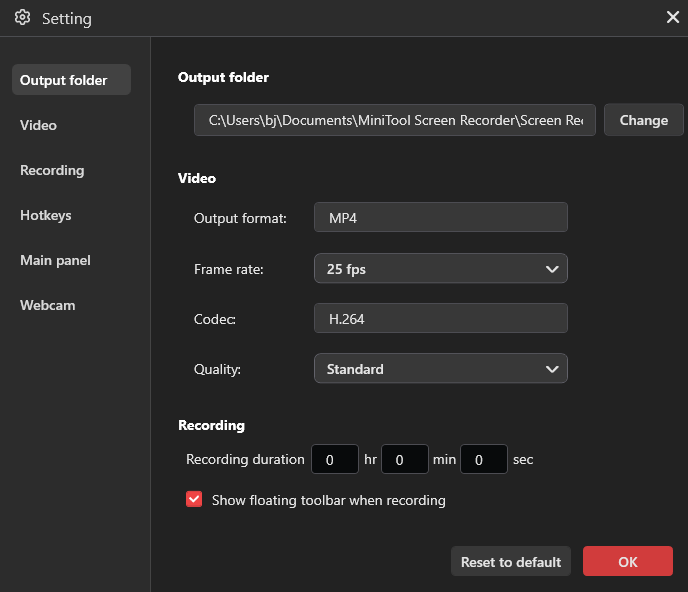
If you want to record the audio and webcam simultaneously, click on the Camera icon to activate the webcam pop-up. Next, click on the upper-right Settings icon to access the Settings window.
In the Settings window, you can determine where to save the recorded video. Meanwhile, you can customize the frame rate (15fps, 20fps, 25fps, 30fps, or 50fps). Plus, you are free to set the recording quality as Standard, High, or Original. Also, you can preset the recording duration. Finally, click on the bottom-right OK button to save the changes.
Step 4. Start/end recording and check the recording file.
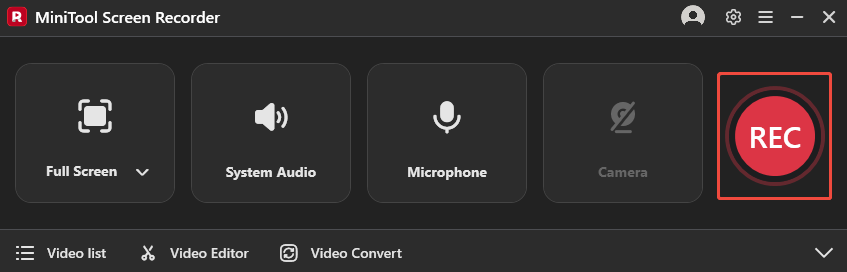
Begin the recording process by clicking on the REC button. After a 3-second countdown, play the audio that you want to record. When the recording process ends, press the F6 key to stop the recording.
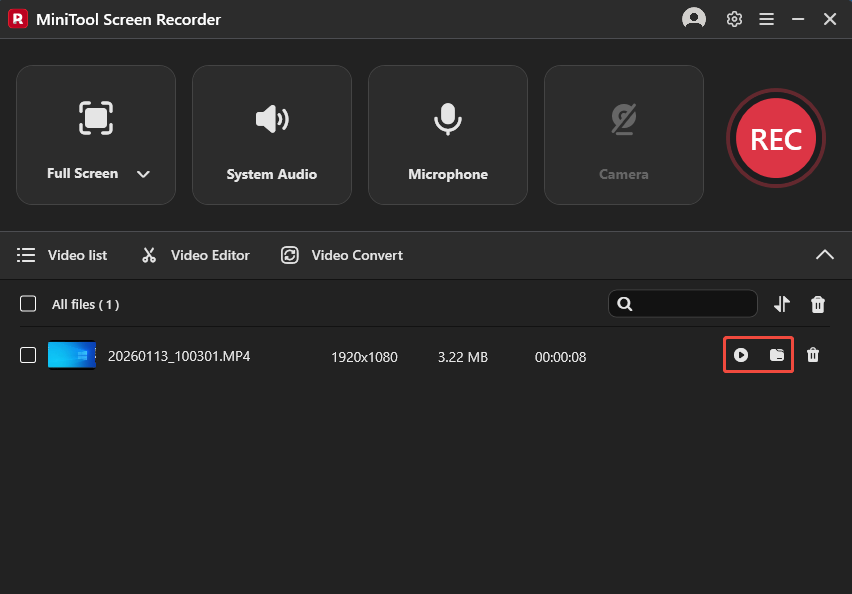
Click on the Play icon to view the recorded video. If you want to locate the output video, click on the Folder icon.
As a remarkable QuickTime alternative, MiniTool Screen Recorder enables you to fix QuickTime not recording audio easily and quickly. In addition, it also enables you to fix other issues, like Bandicam not recording audio.
Bonus: How to Convert the QuickTime Recording to Other Formats
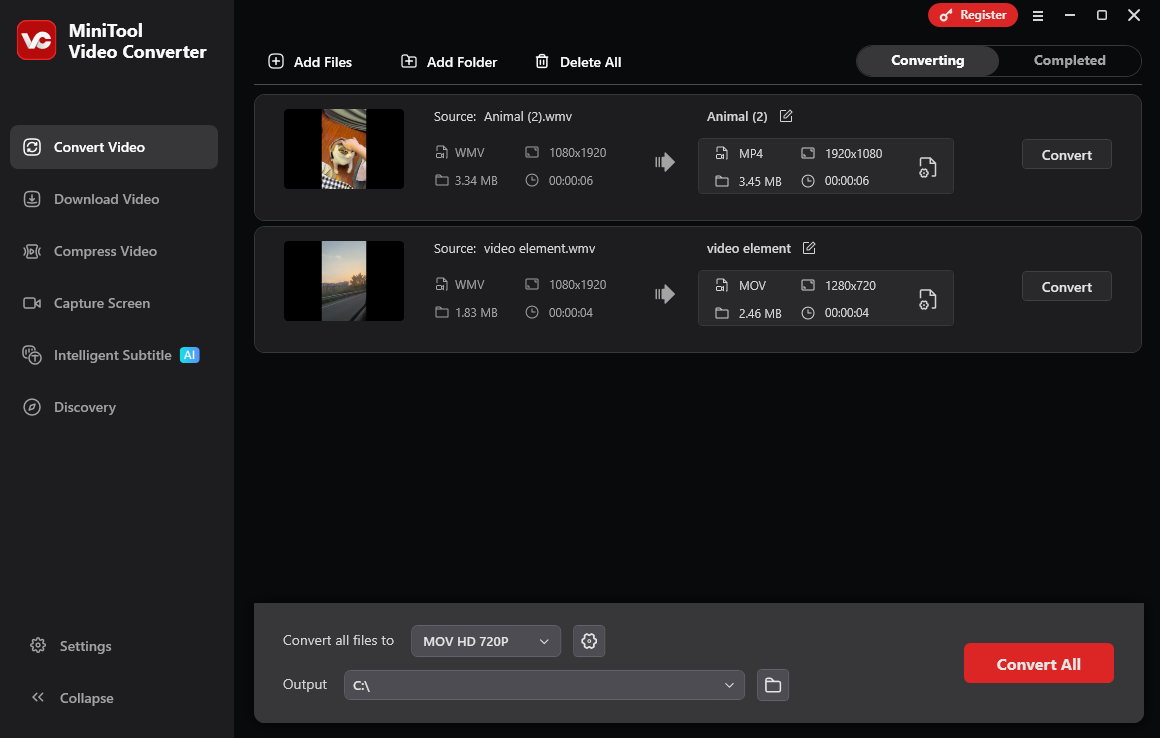
If you want to convert the screen recording to other audio/video formats, MiniTool Video Converter can help! It allows you to convert MP4 to MKV, MOV, WMV, MP3, WAV, AIFF, M4A, and so on. Furthermore, MiniTool Video Converter supports batch conversion, allowing you to convert up to 5 screen recordings at the same time.
More importantly, MiniTool Video Converter features an intuitive interface, which means that this tool is easy to use for novices. Unlike some online converters, MiniTool Video Converter never costs you a dime for file conversion and doesn’t have any file size limit.
MiniTool Video ConverterClick to Download100%Clean & Safe
To Wrap Things Up
In conclusion, there are 5 possible reasons for QuickTime Player not recording audio: selecting the wrong audio source, blocking the microphone permissions, setting the input volume to low, ignoring the update, and lacking a virtual audio driver.
For a successful audio recording process, you can set a high input volume by dragging the volume slider. Also, checking the audio source or microphone permissions is also workable. In addition, the macOS update is indispensable. If you want to capture the system audio with QuickTime Player, remember to install BlackHole. Finally, you can use MiniTool Screen Recorder as a QuickTime alternative to capture the audio.
If you have any problems when using MiniTool Screen Recorder or MiniTool Video Converter, please send an email to support@minitool.com to ask for help. Also, you can share your problems with me on Twitter. I will help you as quickly as possible.