Recently, more and more users have been asking how do you record an MP3 file on Windows. To facilitate your recording tasks, the following content, which includes 2 detailed recording methods, is written here.
Is It Necessary to Record an MP3 File?
Here are many reasons that encourage you to capture an MP3 file.
Reason 1. A Small File Size
Compared with uncompressed formats, such as WAV, MP3 is more compressed and offers a smaller file size. As such, if you record MP3 files, you can store more songs or hours of audio on your device, which only requires low storage capacity.
Specifically, if you want to store more audio content on your USB drives, older MP3 players, phones, or other devices, it is advisable for you to record them in MP3. What’s more, the MP3 format strikes a good balance between file compression and audio quality, which makes it an ideal choice for podcast production.
In addition, when you want to upload the MP3 files to social platforms, it requires less time for the file upload due to their small file sizes. Especially for the platforms that set a file size limit, smaller MP3 files make it more possible for you to bypass that limit.
Reason 2. Universal Compatibility
MP3 is an audio format with universal compatibility. For instance, MP3 is supported by most media players and all kinds of operating systems, such as VLC, QuickTime Player, Windows, macOS, Linux, Android, iOS, and more. Hence, if you want to effortlessly listen to multimedia content with low compatibility, it is suggested that you record it to MP3.
Reason 3. Metadata Support
MP3 offers metadata support, which makes it easier for you to accomplish file organization. Specifically, an MP3 file supports ID3 tags, enabling you to directly embed important information, such as album art, artist name, and lyrics, into the audio file.

Preparations for MP3 Recording
How do you record an MP3 file with high quality? To do that, you need to make some preparations for the recording.
Preparation 1. Set a Quiet Recording Environment
If you want to capture the microphone sounds as a high-quality MP3 file, a quiet recording environment is important. For instance, if you record in a quiet room, the output audio file is less likely to contain background noise, which makes your recording more understandable.
On the other hand, if you plan to record the system audio as MP3 files, ensure that you have disabled other unnecessary sounds from the software notifications or videos that are playing on the web browsers.
Preparation 2. Choose a High-Quality Audio Device
Although MP3 offers acceptable audio quality, it applies lossy compression and removes some audio data. In this background, selecting an outstanding audio device like a microphone empowers you record the original audio with great clarity and detail.
For example, if you want to capture the microphone audio as an MP3 file, USB-C dynamic microphones, which help reduce background noise, can be an ideal choice. In contrast, some built-in mics themselves will generate some noise to frustrate the recording.
Preparation 3. Select a Robust Recording Tool
When selecting a recording tool, it is suggested that you try an easy-to-use tool with an intuitive user interface. This way, even if you are a beginner in MP3 recording, you can access the tool effortlessly. Meanwhile, use a recording software that doesn’t set any limit for the recording duration, which enables you to record content that lasts a long time without any interruption.
Preparation 4. Conduct a Recording Rehearsal
A recording rehearsal helps you to record an MP3 file more efficiently. For example, if you spend hours recording an MP3 file, only to find that there is no sound at all, that can be extremely frustrating.
If you conduct a rehearsal, you can find and solve the problems, like incorrect audio settings, more quickly. Compared with capturing MP3 files directly, such a rehearsal helps save more time and avoid recording failure as quickly as possible.
How to Record an MP3 File with a Built-in Tool
How do you record an MP3 file without downloading extra software? The Sound Recorder app, also known as the Voice Recorder app and preinstalled on your Windows PC, can help. It enables you to specify the output format as MP3 and accomplish the recording with simple clicks.
Below is the detailed guidance on how to capture an MP3 file using the Sound Recorder app on Windows 11.
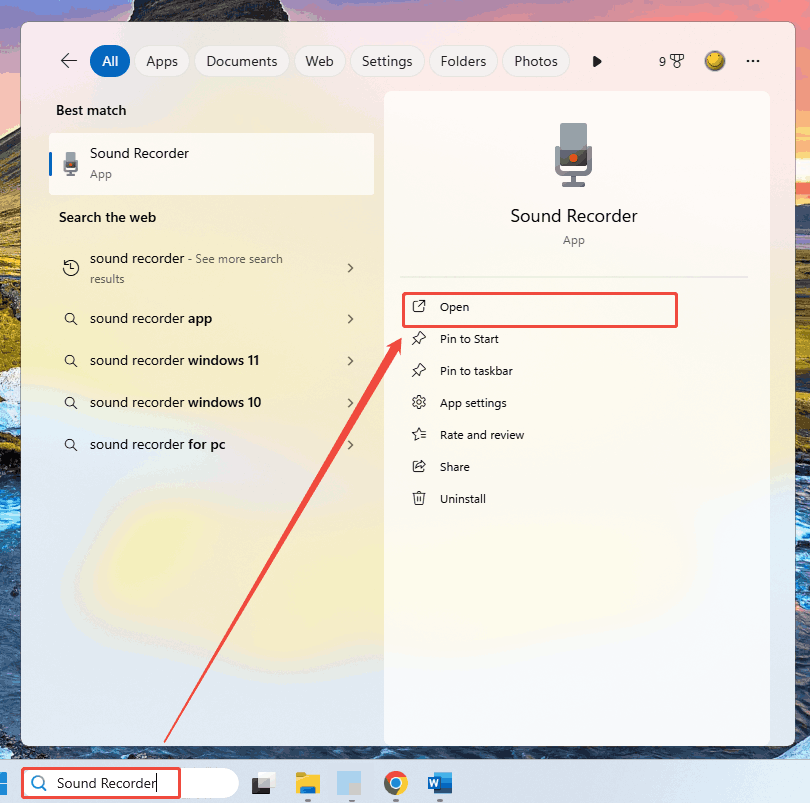
Step 1. Launch Sound Recorder.
In the bottom-left Search box, type Sound Recorder and click on the Open option to access the Sound Recorder app.
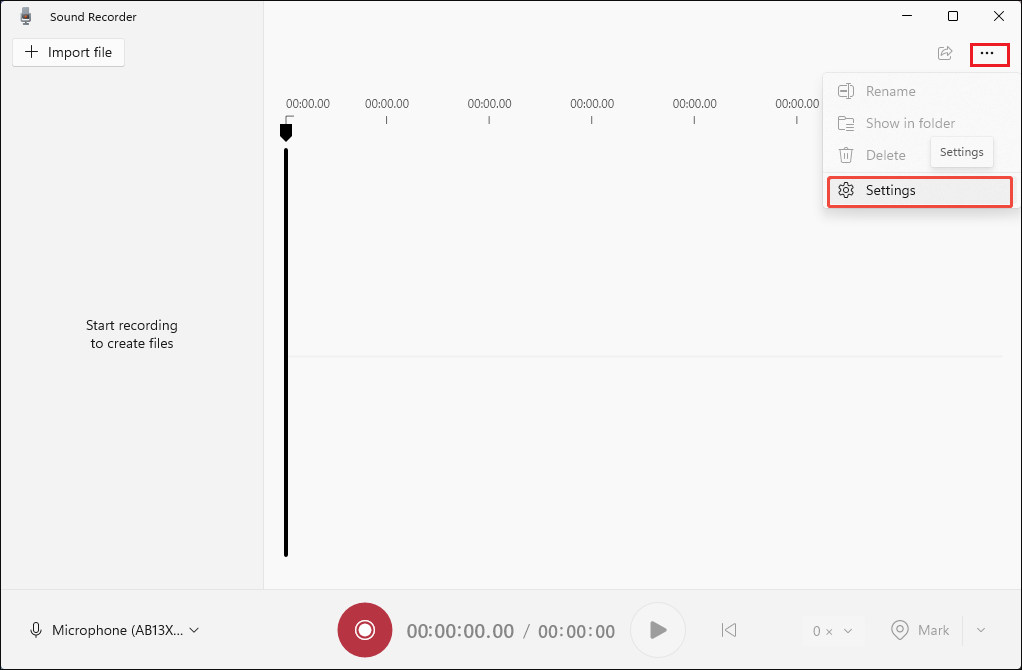
Step 2. Configure MP3 as the output format.
Click on the upper-right More icon to expand the option menu. There, choose the Settings option.
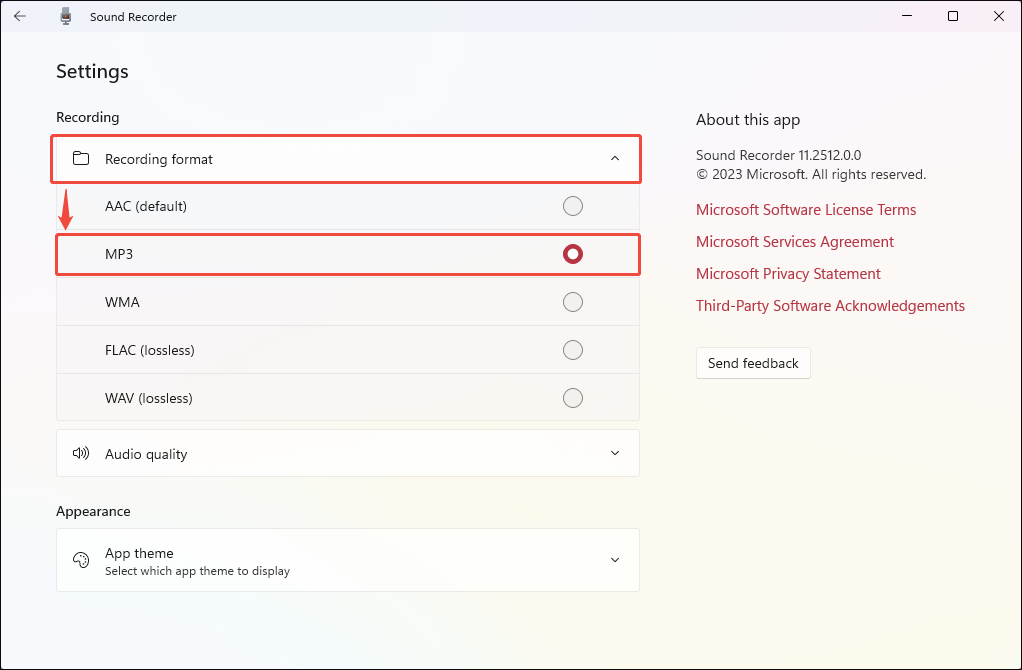
In the Settings page, expand the Recording format option and choose MP3.
Step 3. Begin/end the recording.
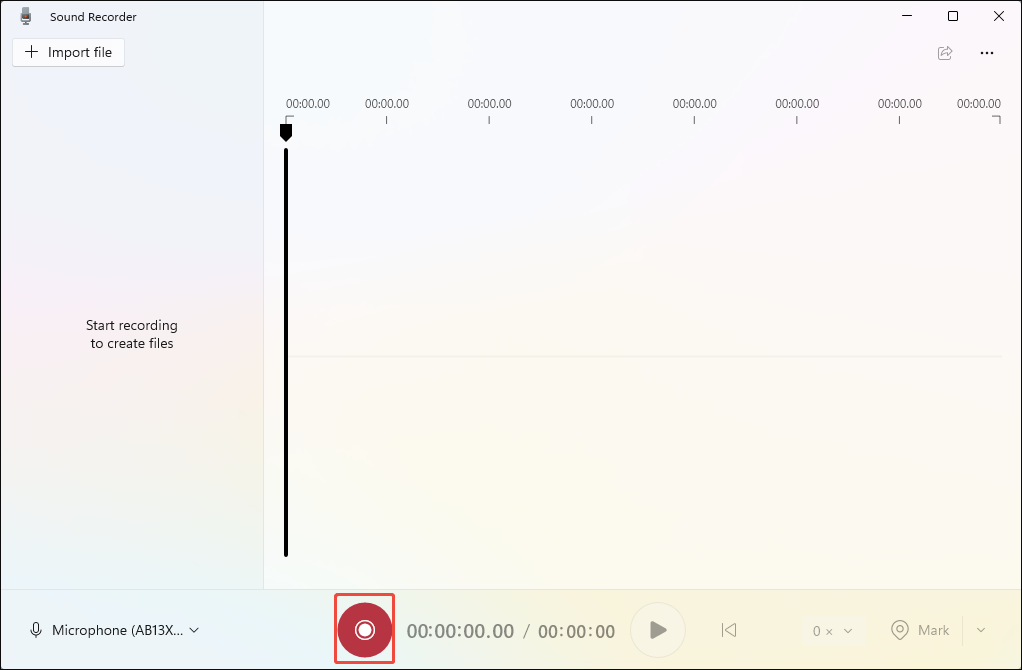
Go back to the main interface. There, click on the Record button at the bottom to begin the recording process.
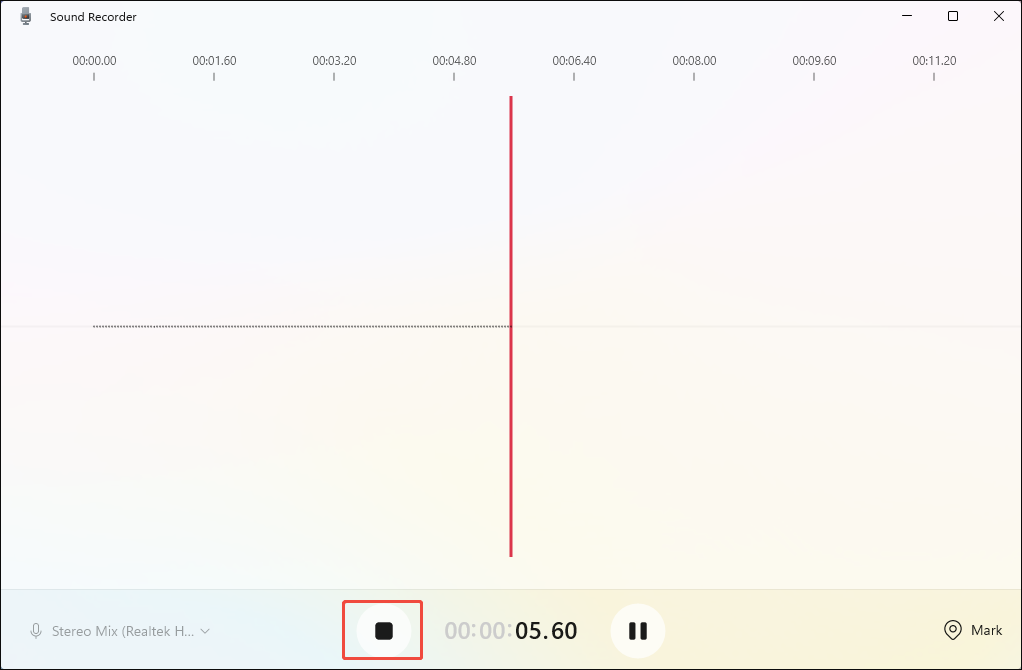
Then, play the file that you want to record to MP3. When you have captured what you want. Click on the Stop button at the bottom to end the recording.
Step 4. Check the output recording.
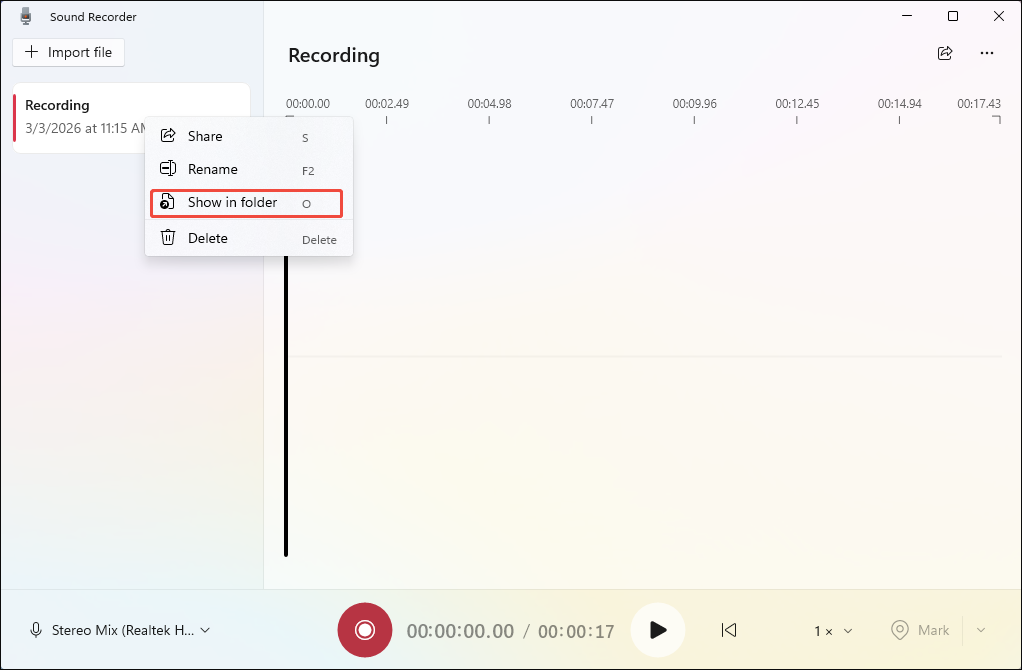
You can see the output file list in the left-side bar. Next, right-click on the recorded MP3 file and choose the Show in folder option to locate and check the output file.
Undoubtedly, the Sound Recorder app is one of the most effortless solutions to MP3 recording.
How to Record an MP3 File with Downloaded Tools
How do you record an MP3 file on Windows? Here, I will recommend 2 fabulous applications: MiniTool Screen Recorder and MiniTool Video Converter, to help you.
The Best Tools for Your MP3 Recording
MiniTool Screen Recorder is a watermark-free screen recorder without time limits. Emphasizing ease of use, this screen recorder features a well-organized interface. Meanwhile, MiniTool Screen Recorder will automatically save the recordings in the MP4 format, showing outstanding compatibility.
MiniTool Screen Recorder is also a one-stop solution for screen recording, webcam recording, and screen annotation. In addition, it offers you the necessary advanced options to customize the recording parameters, like frame rate and recording quality.
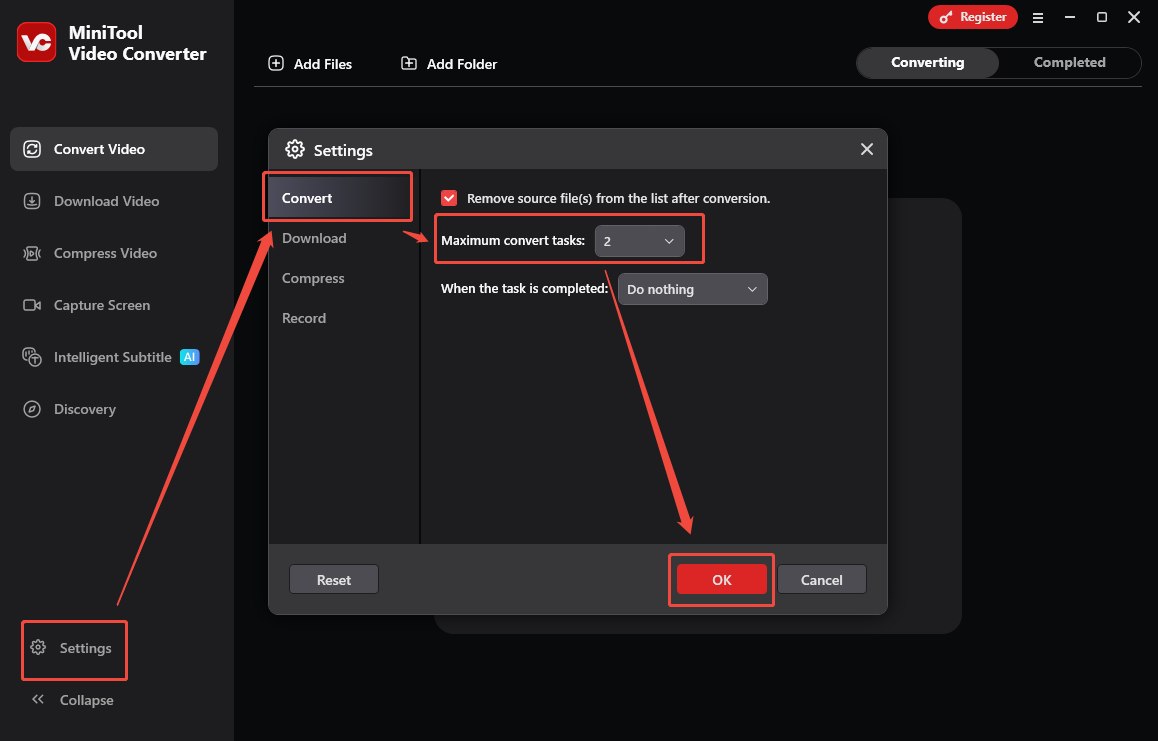
MiniTool Video Converter is a robust audio/video converter that empowers you to convert various files, such as MP4, MKV, AVI, MOV, WMV, WEBM, WMA, AIFF, M4R, and more, to MP3. In addition, MiniTool Video Converter supports batch conversion, allowing you to convert up to 5 files to MP3 at a time.
More importantly, MiniTool Video Converter is free for file conversion. Plus, it doesn’t set any file size limit, which means that you can use MiniTool Video Converter to convert countless large files to MP3 smoothly. Furthermore, this converter has many customization options to help you adjust the encoder, audio channel, bitrate, and other parameters of the output files.
Part 1. Record the File to MP4
Below are the detailed steps to capture the screen with MiniTool Screen Recorder.
Step 1. Download and install MiniTool Screen Recorder.
MiniTool Screen RecorderClick to Download100%Clean & Safe
Download MiniTool Screen Recorder by clicking on the download button above. Then, follow the on-screen prompts to install this audio recorder on your PC.
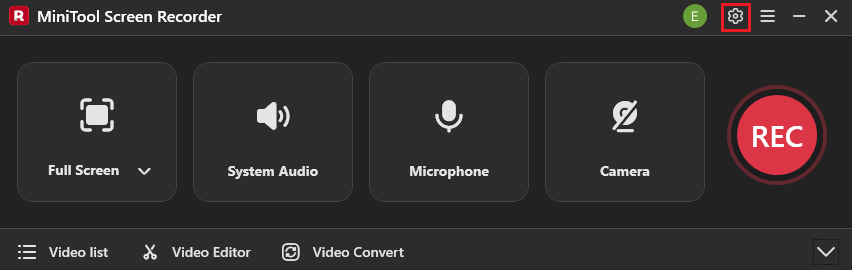
Step 2. Manage the audio recording.
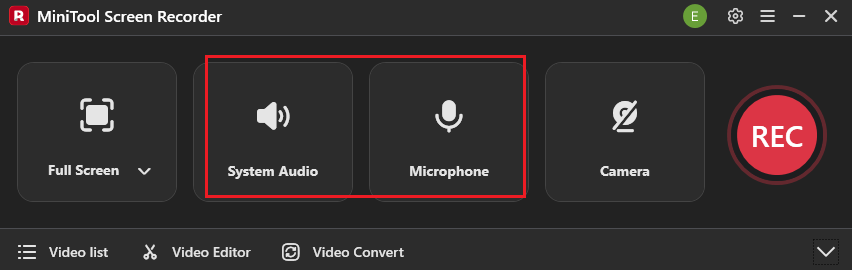
Click on the System Audio icon and the Microphone icon to turn on/off the recording of system and microphone sounds. Considering that you plan to record an MP3 file, ensure that you have enabled the system audio recording.
Step 3. Configure other recording settings.
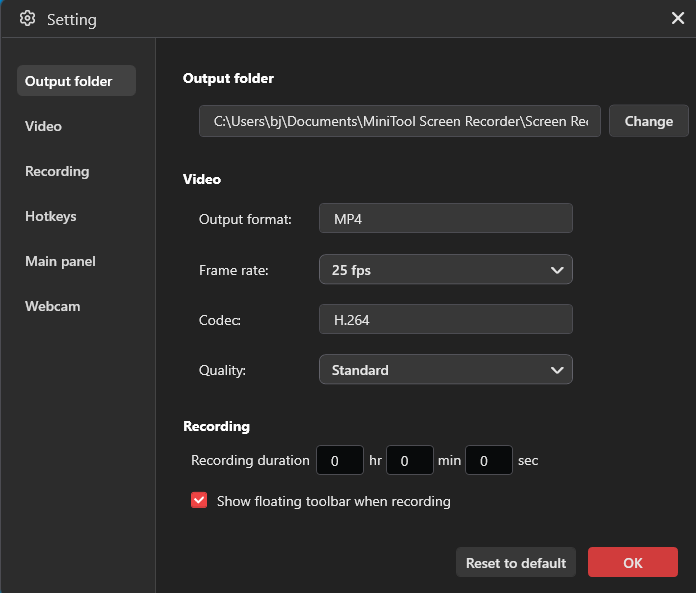
Click on the upper-right Settings icon to enter the Setting window.
There, click on the Change option to select a destination folder for the recorded files. If necessary, customize the recording quality and frame rate as you want. Also, you can preset the recording duration. Finally, click on the OK button to save the changes.
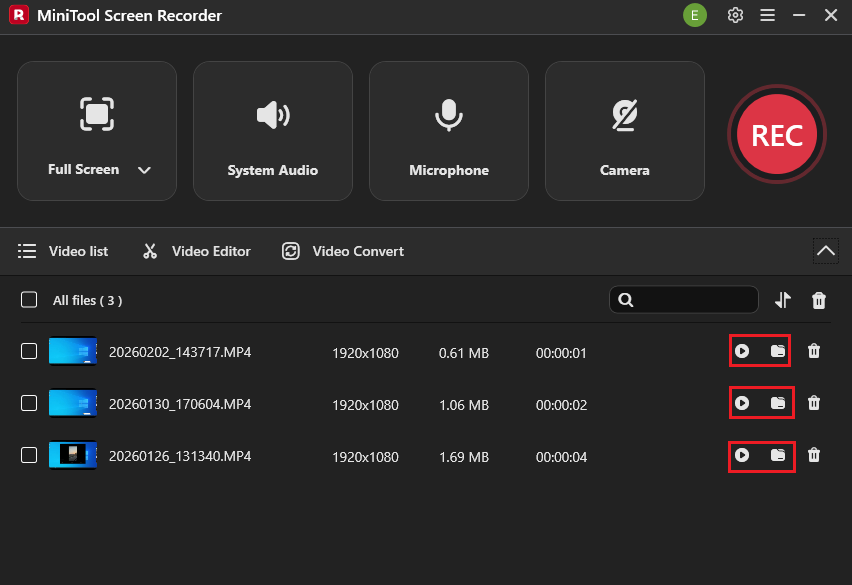
Step 4. Start/end the recording and check the output files.
Press the F6 key to begin the recording process. After a 3-second countdown, play the file that you want to record to MP3. When you have finished, end the recording by pressing the F6 key again. In the expanded file list, if you want to view the recorded files, click on the Play icons. Provided that you need to locate the output files, click on the Folder icons.
With the above-detailed steps, you can record any computer activity to MP4.
Part 2. Convert the MP4 File to MP3
Next, follow the step-by-step tutorial to save the recorded videos in MP3 format.
Step 1. Download and install MiniTool Video Converter.
MiniTool Video ConverterClick to Download100%Clean & Safe
Click on the download button above to download and install this MP3 converter on your PC. Then, launch MiniTool Video Converter.
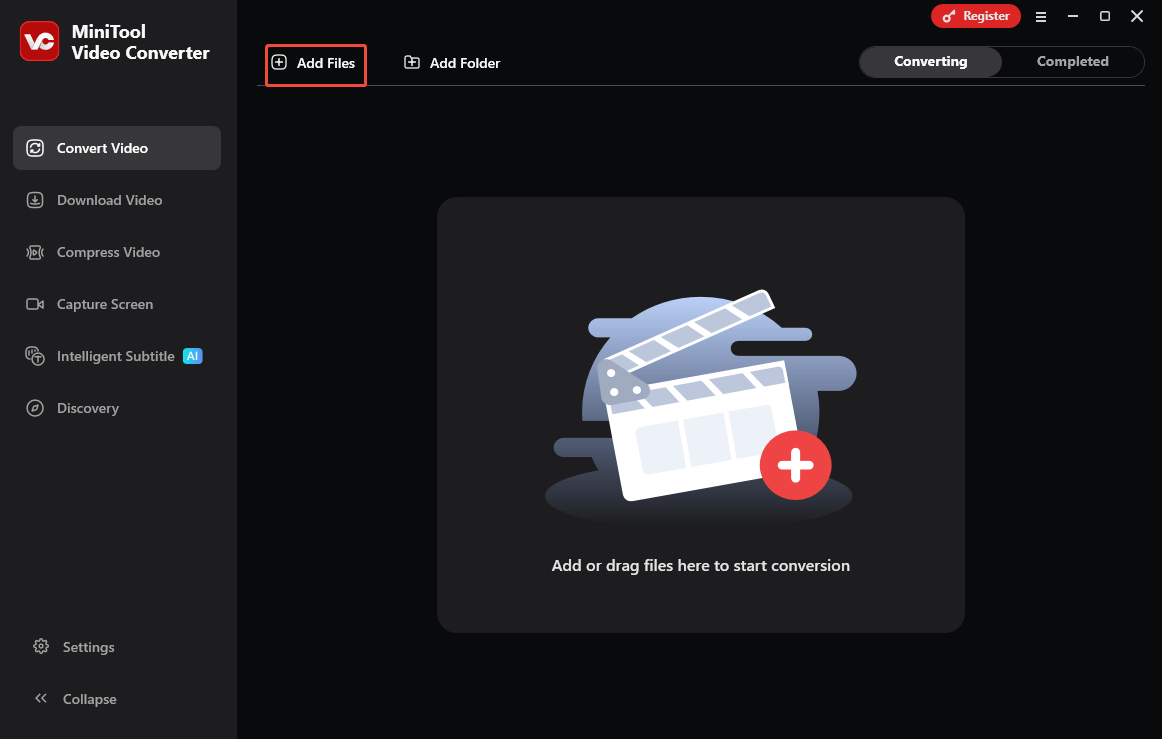
Step 2. Import your recorded videos.
Click on the upper-left Add Files option to import the recorded files that you want to save in the MP3 format.
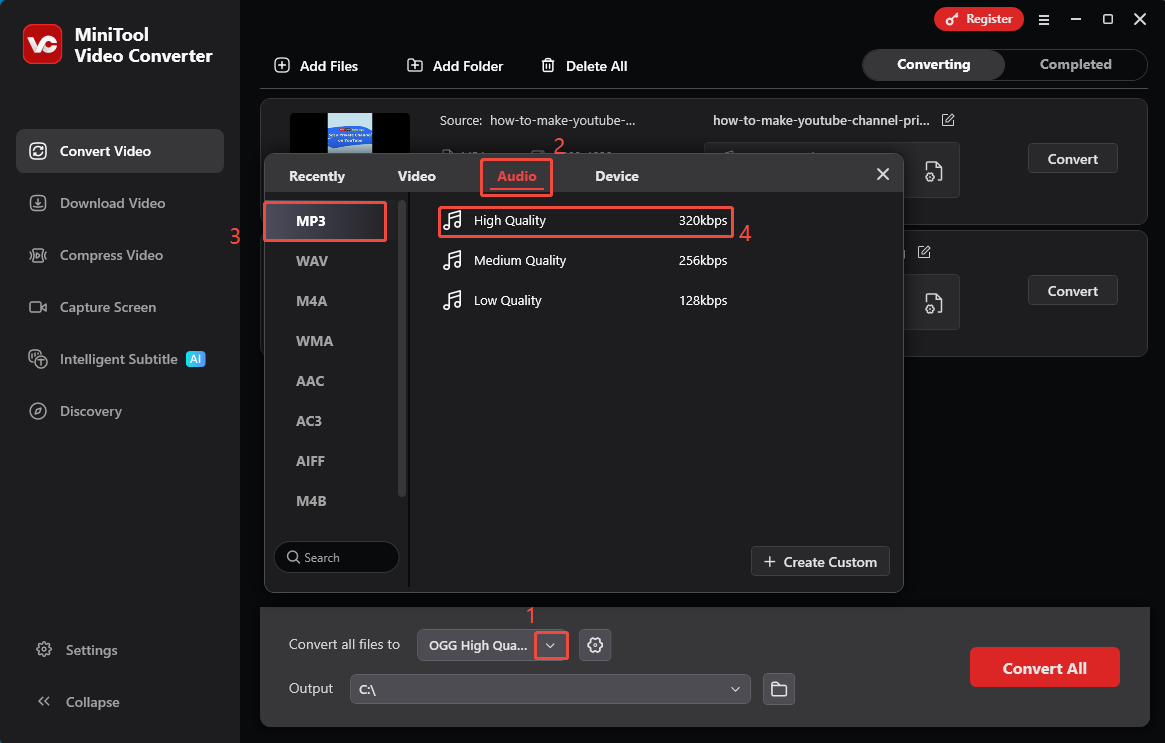
Step 3. Set MP3 as the output format.
Expand the bottom Convert all files to option to access the output format window. There, navigate to the Audio tab. There, click on MP3 and select the audio quality you want. Here, I will select High Quality as an example.
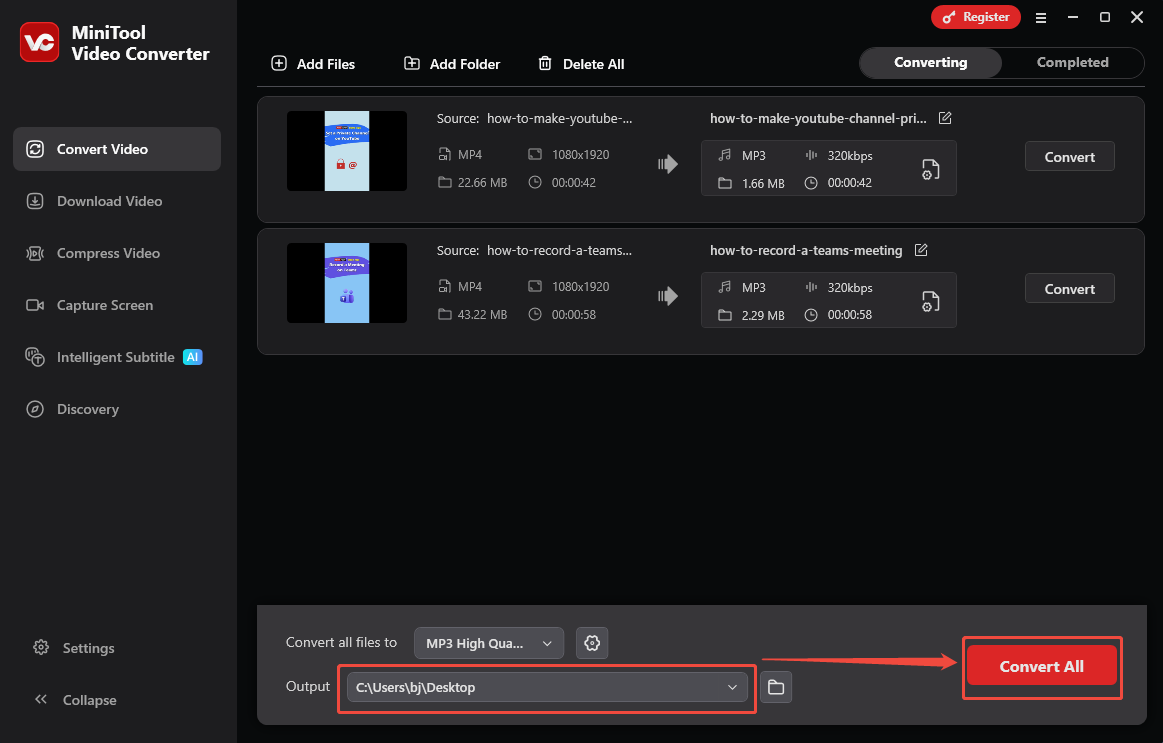
Step 4. Set an output folder and begin conversion.
Expand the bottom Output option and choose a destination folder for the output files. Next, start the conversion process by clicking on the bottom Convert All button.
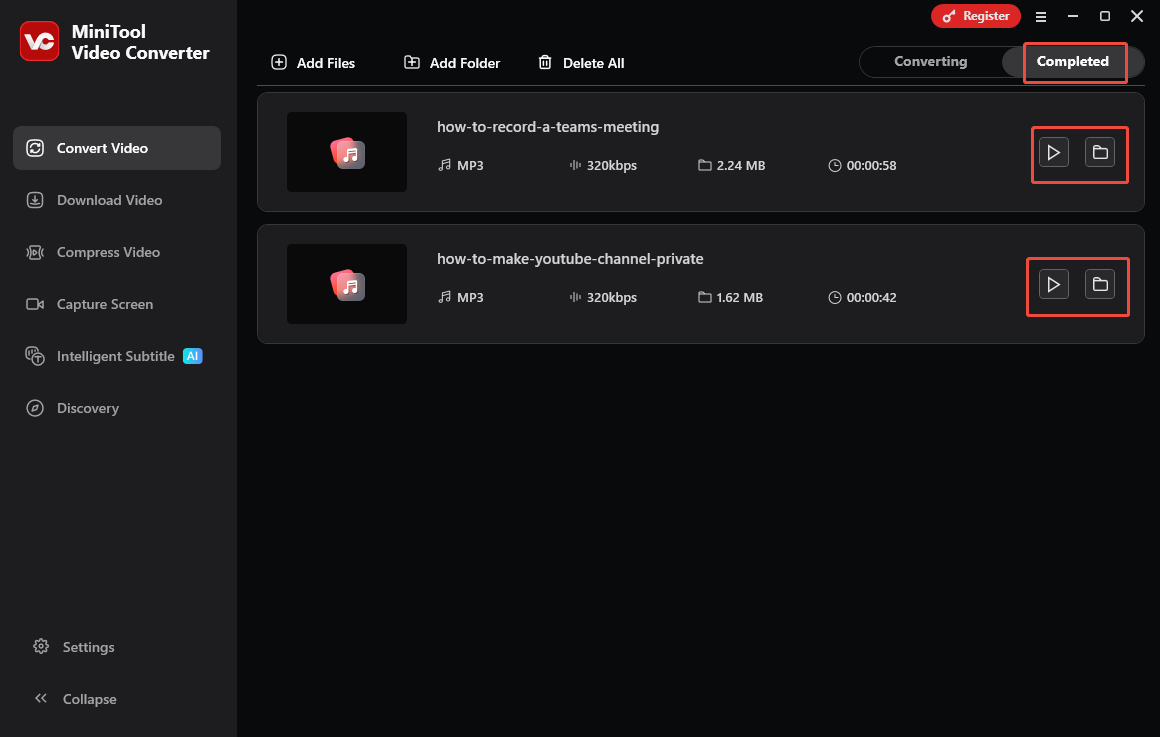
Step 5. Check the converted files.
When the file conversion process completes, MiniTool Video Converter will automatically switch to the Completed section. There, click on the Play icons to listen to the MP3 files. If you want to locate the MP3 audio, click on the Folder icons.
How do you record an MP3 file without hassle? Never miss MiniTool Screen Recorder and MiniTool Video Converter.
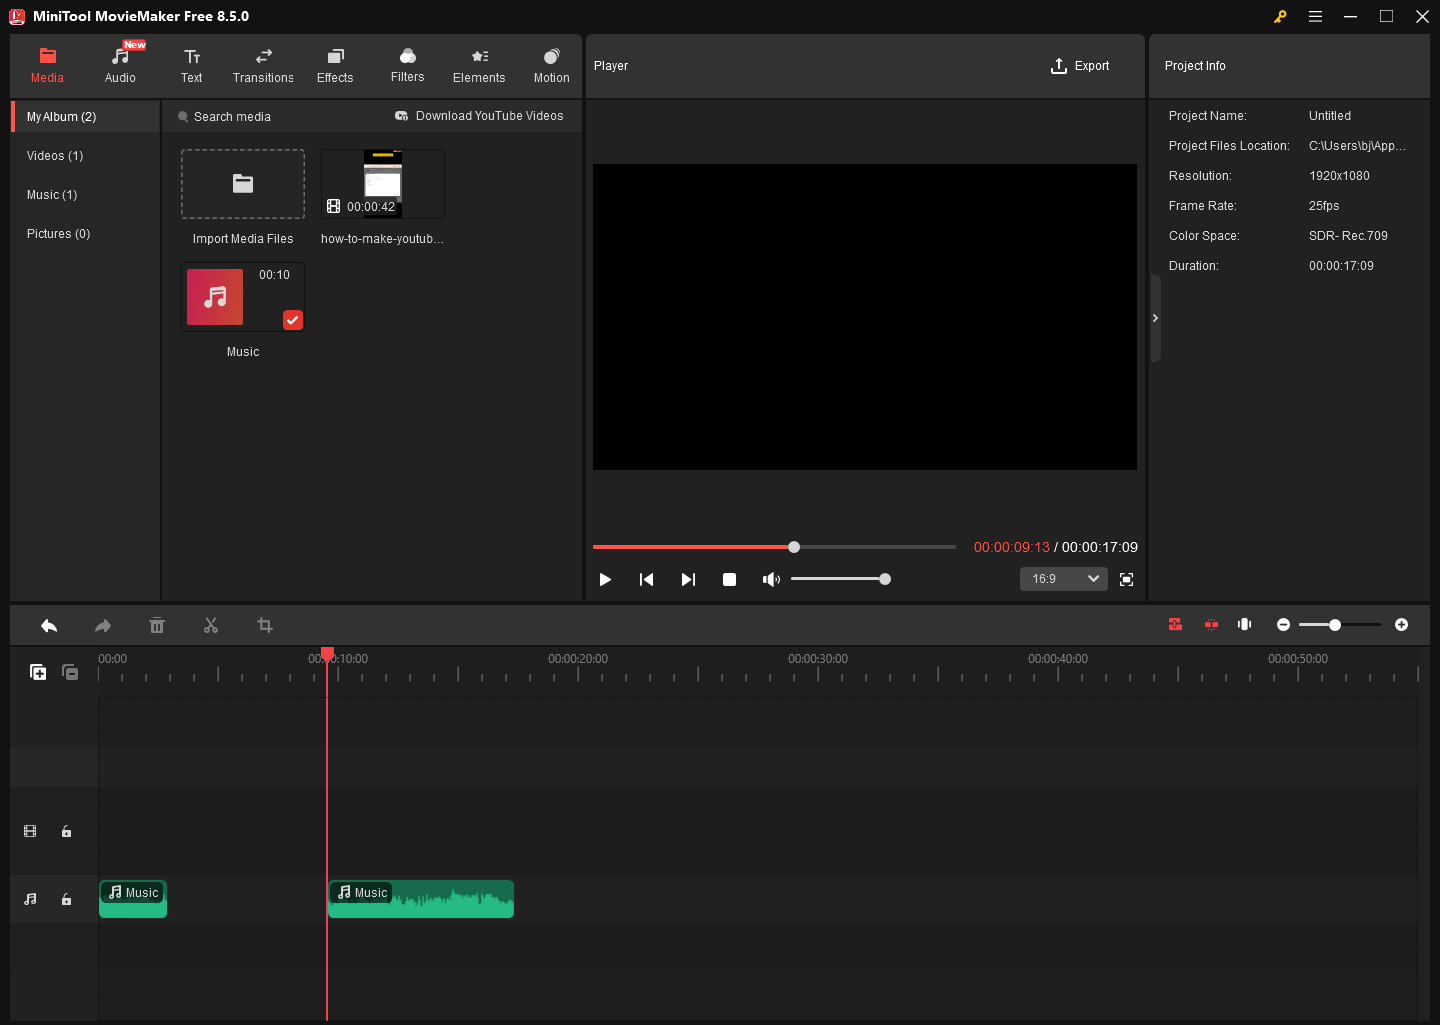
Bonus: How to Edit the MP3 File
Do you want to edit your MP3 files? If yes, MiniTool MovieMaker is a reliable tool you can try. It enables you to trim, merge, or reverse the MP3 audio with simple clicks. Meanwhile, it enables you to change the audio speed/volume easily. In addition, it enables you to save an MP3 file in multiple formats, such as MP4, AVI, MKV, MOV, WMV, and more.
MiniTool MovieMakerClick to Download100%Clean & Safe
To Wrap Things Up
How do you record an MP3 file with ease? The Sound Recorder app can be a great option for those who don’t want to download any software. If you want to record an MP3 file while customizing other parameters like the audio bitrate, MiniTool Screen Recorder and MiniTool Video Converter can help.
If you have been bothered by any problems when using MiniTool Products, please ask for help by sending an email to support@minitool.com. You can also directly share your problems with me on X. I will help you solve them as quickly as possible.