

It is very simple to record browser video by choosing a reliable screen recorder, such as Clipchamp or MiniTool Screen Recorder. This article provides detailed steps to accomplish the task with them.
Nowadays, an increasing number of tasks, such as watching videos, hosting online meetings, delivering presentations, etc., can be performed directly within a web browser. I have found that simply bookmarking frequently visited pages is not the ideal approach, as access remains dependent on an internet connection.
The most convenient solution is to record video in browser, allowing for offline viewing anytime, anywhere. After trying out various tools, I selected two reliable screen recording tools:
- Clipchamp
- MiniTool Screen Recorder
How to Record Browser Video
Although the recording experiences offered by these two tools I have selected differ, their recording workflows share similarities.
Fast Track Steps:
- Launch the recording tool.
- Choose the window recording mode.
- Select the target video in the browser.
- Manage the audio recording feature.
- Start the recording process and play the target video.
- End and check the recorded browser video.
Method 1: Use Clipchamp
My primary reason for choosing Clipchamp is that it comes pre-installed on Windows; additionally, it offers a web-based version that runs directly in the browser, boosting productivity. More importantly, the tool integrates recording and video editing workflows, allowing me to quickly complete video post-production tasks without switching between different applications.
More importantly, Clipchamp offers a variety of recording options, including a window recording feature that allows for quick capture of browser content. Overall, it is an excellent choice for creators looking to boost their productivity. Here are the detailed steps on how to record browser video with Clipchamp.
1. Press Windows + S keys, then type Clipchamp to launch it on the PC.
2. Choose the Try it option within the Record yourself section in the main interface.
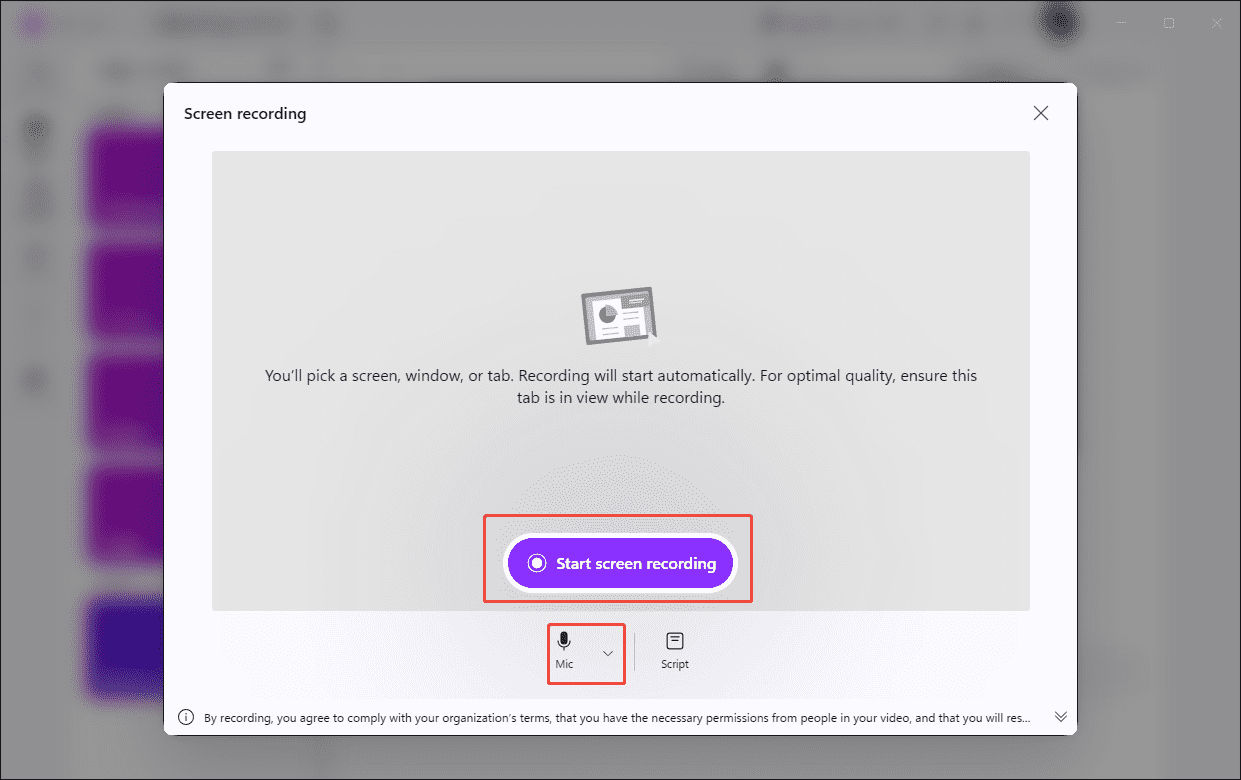
3. In the new interface, select the Screen option in the left-hand menu bar. Then, click the Start screen recording option in the new pop-up window and control the microphone recording feature.
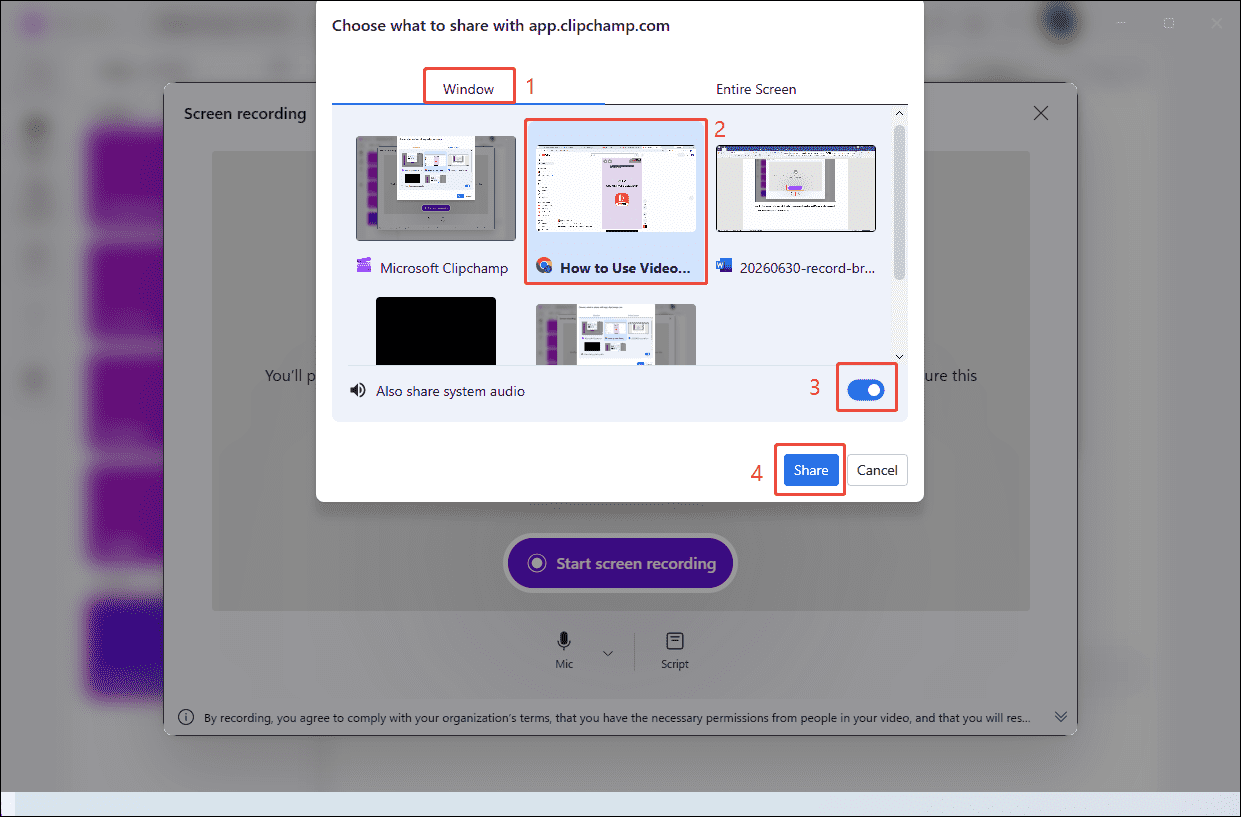
4. Choose the target browser under the Window section. Check the Also share system audio option to enable the computer audio recording feature. Then, click the Share option to begin recording.
5. Play the target video.
6. To end the recording process, click the Stop sharing option on the floating bar. Then, in the new interface, click the Export option in the top-right corner to save the recorded browser video.
Additionally, Clipchamp can capture system audio or microphone audio only, making it an ideal choice for recording podcasts, video chat audio, and more.
Method 2: Use MiniTool Screen Recorder
MiniTool Screen Recorder is a completely free screen recording tool. It offers flexible options, allowing me to capture the full screen, a specific area, a window, or even multiple displays. I can also choose to capture webcam footage while recording to create engaging picture-in-picture videos.
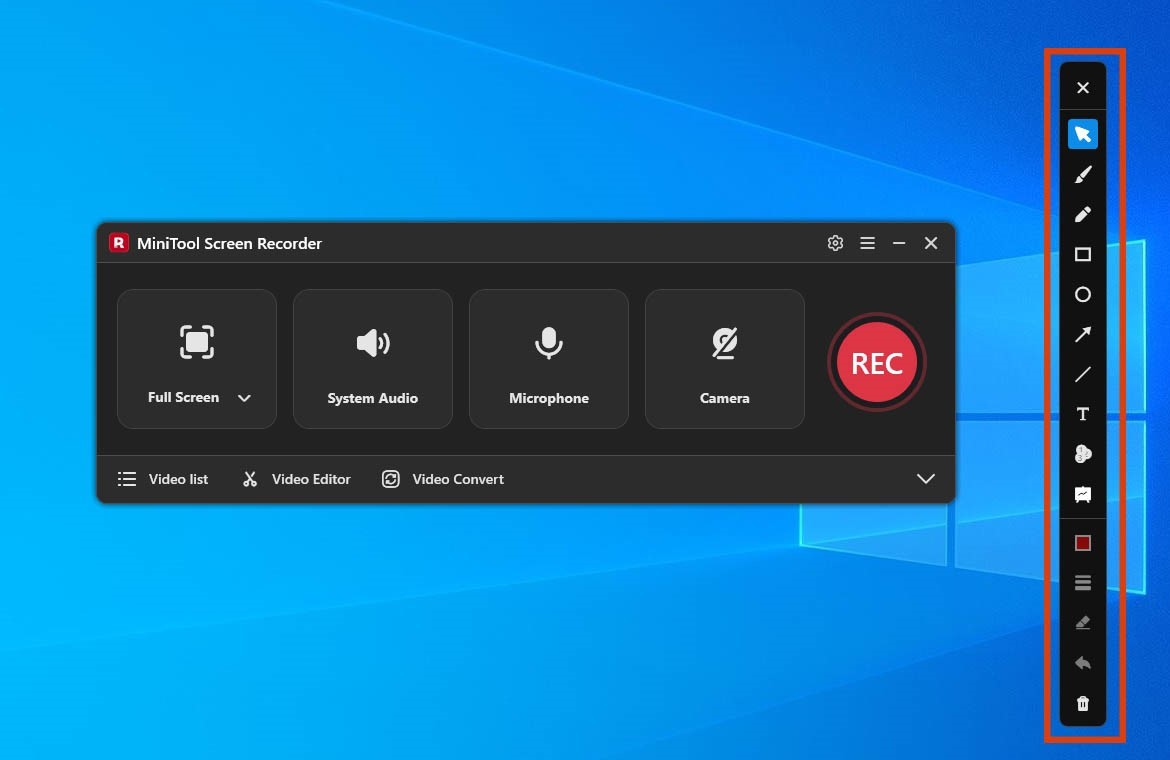
Additionally, the program lets me use the annotation toolbar to mark important information during the recording. Moreover, this tool offers users a high degree of flexibility, allowing them to adjust video quality, frame rates, and recording hotkeys, as well as set recording durations and configure webcam settings according to their needs.
1. Click the button below to download MiniTool Screen Recorder. Then, install and launch it on the PC.
MiniTool Screen RecorderClick to Download100%Clean & Safe
2. Click the Full Screen option. Then, choose the Window option in the drop-down menu.
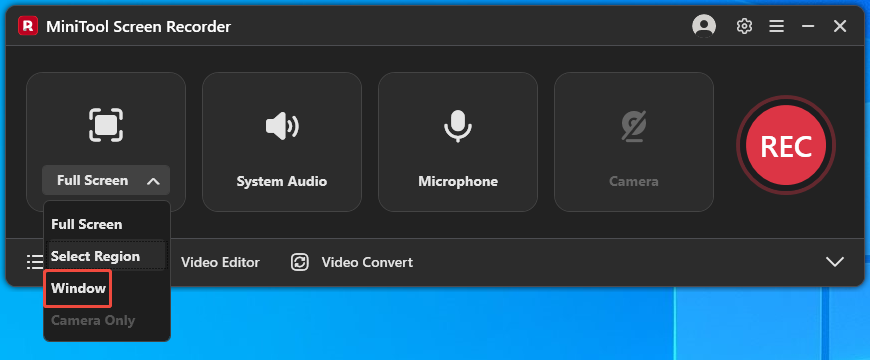
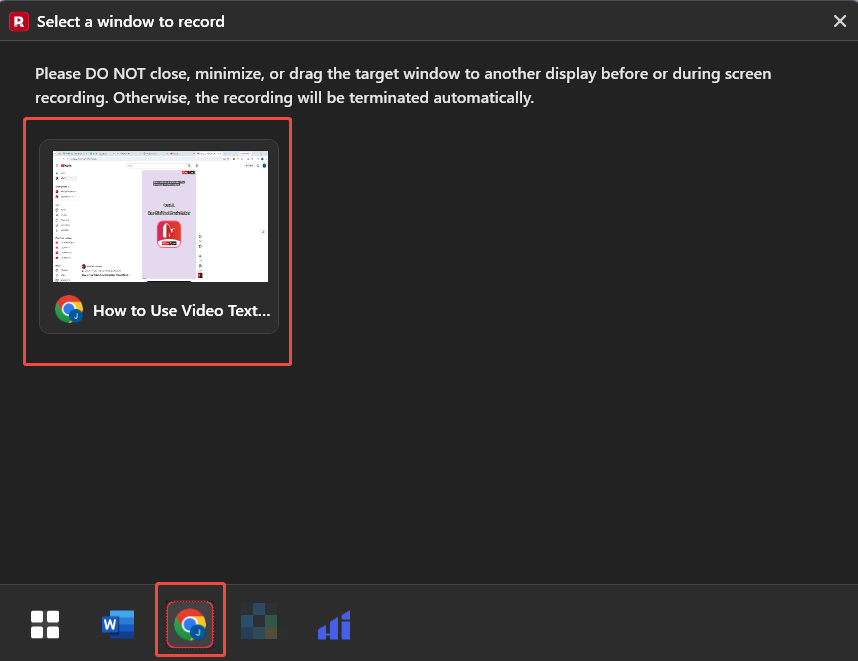
3. Select the target window in the new pop-up window. Or, select the corresponding application icon from the bottom menu and then select the specific window.
4. Then, manage the audio recording features on the floating bar.
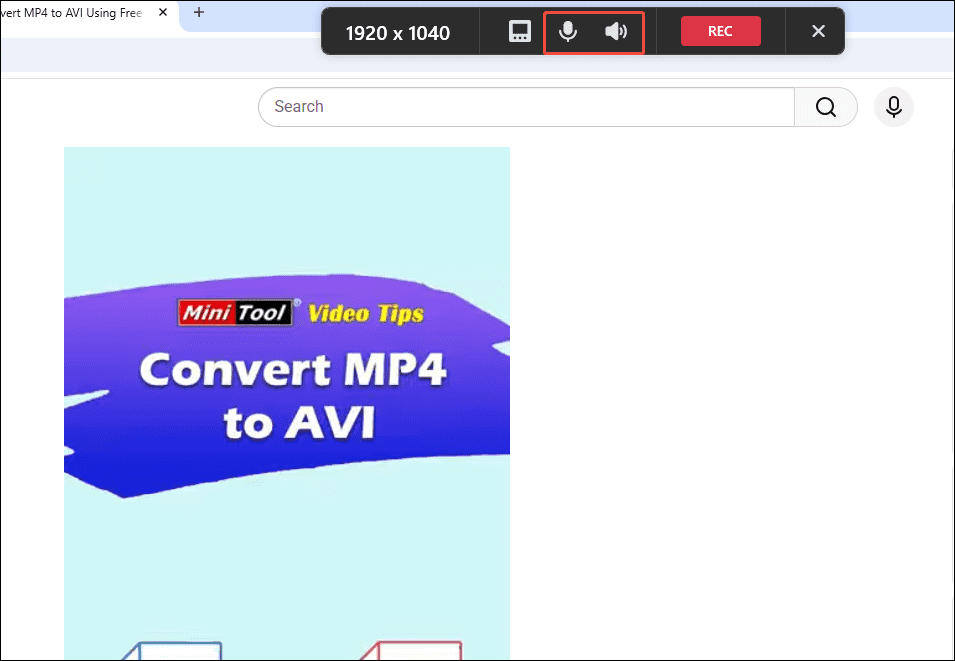
5. To record video from browser, click the REC button on the floating bar or press the F6 key. After a 3-second countdown, play the target video.
6. During the recording process, if there is a need to mark the screen, select the tools from the annotation toolbar on the right of the screen.
7. To end the recording process, press the F6 key again. Then, the tool will automatically switch to the Video list section. Finally, click the Play icon to view the recorded browser video and click the Folder icon to locate it on the PC.
Additionally, I found that this software imposes no limits on recording duration. I experienced no lag or crashes when attempting long recordings. Therefore, MiniTool Screen Recorder is also well-suited for recording long videos.
The best way to record video from browser ultimately depends on the specific needs. Both of the aforementioned tools can handle both basic and advanced recording requirements, so try them out and make a choice based on your personal experience.
How to Edit Recorded Browser Video Recordings
After recording a browser video with Clipchamp, I usually edit it right away, but the free version offers limited export format options. In such cases, I typically use MiniTool MovieMaker, a companion tool to MiniTool Screen Recorder.
It handles basic tasks like video trimming and also supports features such as adding subtitles, filters, music, and transitions. Once editing is complete, I can export the video in various formats, including MP4, MOV, AVI, WMV, or GIF. Click the button below to get the software.
MiniTool MovieMakerClick to Download100%Clean & Safe
Bottom Line
Learning how to record browser video makes it much easier to save online courses, streaming videos, and other web-based content. The two tools introduced in this article, Clipchamp and MiniTool Screen Recorder, both offer an excellent recording experience.
If there are any problems when using MiniTool Screen Recorder or MiniTool MovieMaker, please contact the support team at support@minitool.com.