

How to record a window on Windows? Windows' built-in recording tool, the Snipping Tool, and professional third-party video capture tools, like MiniTool Screen Recorder, can easily handle this task. Additionally, this article provides a troubleshooting guide for the Snipping Tool.
I’ve recently been re-evaluating my screen recording habits to improve my workflow efficiency. Previously, I would always record in full-screen mode, which often resulted in capturing irrelevant content and forced me to spend time editing it out later. I later discovered that window recording perfectly streamlines the entire process.
How Do I Record My Screen Windows
After determining the recording workflow, I began looking for screen recording tools that allows to record a window, and ultimately selected the two that best met my needs:
- Snipping Tool
- MiniTool Screen Recorder
Fast Track Steps:
- Prepare the window that needs to be recorded.
- Launch the screen recording tool.
- Choose the recording mode.
- Select the target window.
- Start and end recording.
- Check the recorded window video.
I have outlined the functions and operating procedures for both tools below.
#1 Use the Snipping Tool
I chose the Snipping Tool because it comes pre-installed on Windows 11, which further streamlines my screen recording workflow. Additionally, the recording function can be quickly launched using the Windows + Shift + R keyboard shortcut. It supports recording a specific window or the full screen and can capture microphone input and system audio simultaneously.
However, the Snipping Tool's capabilities are relatively limited, making it better suited for lightweight screen recording tasks. Below are the detailed steps on how to record a window on Windows using the Snipping Tool.
1. Press the Windows + S keys, then type Snipping Tool in the search box to launch it.
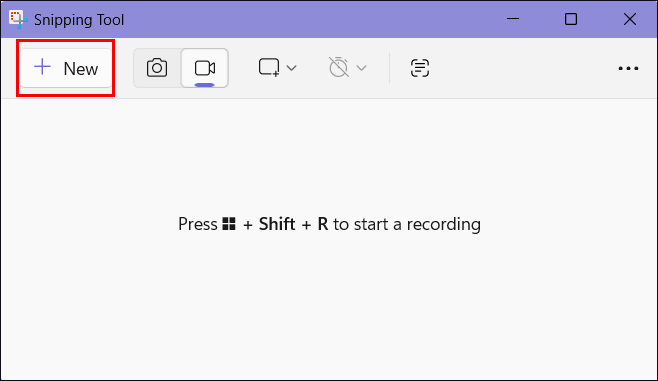
2. Click the New option in the main interface.
3. Choose the Window option, then select the target window.
4. Then, click the Microphone icon to enable the audio recording feature.
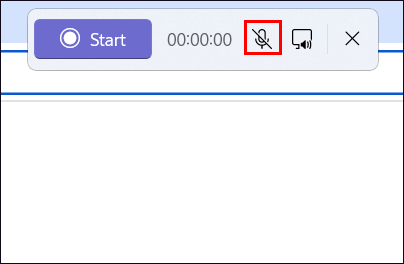
5. To begin the recording process, click the Start option or press the Windows + Shift + R keys.
6. To end recording, click the Stop recording icon.
Since the Snipping Tool lacks advanced features, I have selected an alternative tool, MiniTool Screen Recorder, to handle more complex recording tasks in my daily life.
#2 Use MiniTool Screen Recorder
MiniTool Screen Recorder is a professional Windows screen recorder. In addition to standard window recording options, it supports full-screen, specific-region, and multi-monitor recording. Unlike the Snipping Tool, this program allows for independent control over system audio and microphone audio recording.
A standout feature is its webcam recording capability, which enables the creation of picture-in-picture videos. Furthermore, the built-in annotation tools are highly practical for creating tutorial videos. Now follow the detailed guide to record a window on PC with MiniTool Screen Recorder.
1. Download and install MiniTool Screen Recorder. Then launch it on PC.
MiniTool Screen RecorderClick to Download100%Clean & Safe
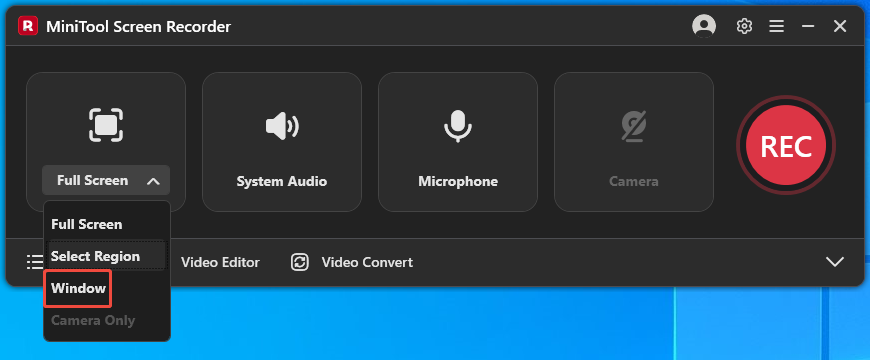
2. Expand the Full Screen option, then choose the Window option.
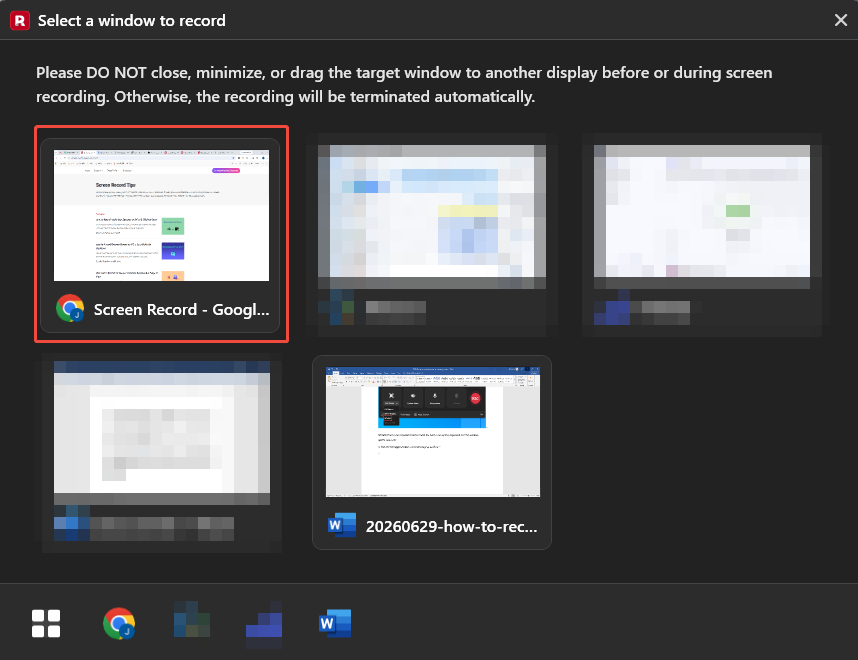
3. Choose the target window in the new pop-up window.
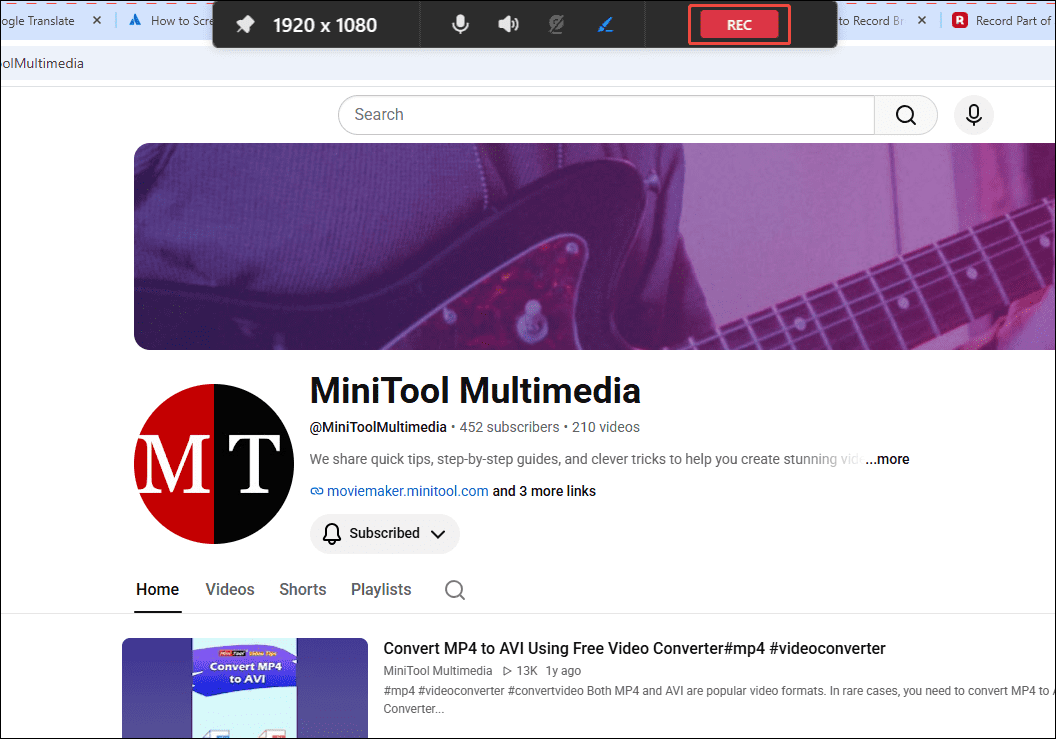
4. Then, control the audio recording and webcam recording features on the floating bar.
5. To start capturing the content of the window, click the REC button on the floating bar or press the F6 key.
6. To annotate the screen while recording, choose the tools from the toolbar on the right of the screen.
7. To end the recording process, press the F6 key again. Then, when the tool automatically switches to the Video list section, play and check the recorded video by clicking the Play and Folder icons.
Both tools are capable of recording windows on Windows; however, the former is better suited for lightweight recording tasks, while the latter, thanks to its advanced recording features, is more appropriate for professional-grade recording.
Troubleshooting: Snipping Tool Not Working
I encountered situations a few times during recording where the Snipping Tool failed to work, but I quickly resolved them using the following methods.
- System not updated to Windows 11: The Snipping Tool originally only supported screenshots; the screen recording feature was added in the Windows 11 update. Please upgrade the system and try using the tool again.
- Restart Snipping Tool: If the Snipping Tool fails to launch, try restarting the application.
- Reset Snipping Tool: If restarting does not work, reset the app via the Apps section in Windows Settings to remove any corrupted cache files.
Conclusion
How to record a window on Windows? This task can be completed efficiently using the built-in Snipping Tool or the professional third-party recorder MiniTool Screen Recorder introduced in this article. Whether recording software tutorials, online courses, or workflow demonstrations, both tools can help produce clearer and more professional recordings.
If there are any problems when using MiniTool Screen Recorder, please contact the support team at support@minitool.com.