Want to record your favorite shows so you can watch them anytime? You’ve come to the right place! This post gives a detailed guide on how to record on Hisense TV using its PVR feature and a professional screen recorder – MiniTool Screen Recorder.
Recording on Hisense TV lets you watch your favorite shows anytime, anywhere. However, without the right equipment, the recording process can be tricky. How to record on Hisense TV? This guide will walk you through two easy methods to record a program on Hisense TV: using a PVR recorder and a computer screen recorder. Read on for more.
Introduction to Hisense TV
Hisense TV is manufactured by Hisense Group, a major Chinese electronics company. It is renowned for offering feature-rich, affordable models as well as high-end devices. It boasts an extensive product lineup, encompassing sleek and minimalist smart TVs as well as premium 4K and even 8K ultra-high-definition televisions.
In addition, Hisense TV incorporates advanced display technologies, including Quantum Dot, Mini-LED, and ultra-bright laser TVs, combined with AI image processing technology to deliver premium features that are highly favored by discerning consumers. Beyond its outstanding visuals, Hisense TV delivers equally exceptional audio quality, immersing you in a lifelike sound experience that makes you feel like you're right in the show.
As a leading global television brand, Hisense TV consistently ranks among the top sellers in shipments, with products available in over 130 countries and regions worldwide. It also holds the top spot in sales for 100-inch large-screen televisions.
Why Record on Hisense TV
In this section, I’ve listed some benefits of recording on Hisense TV. Check them out now!
- Enhance convenience: Recording on Hisense TV lets you watch shows anytime, anywhere—pause live broadcasts, replay segments, and take control of your viewing experience.
- Never miss a favorite show: Schedule recordings of your favorite shows in advance to ensure you never miss any exciting content.
- Create a personal collection of programs: Record TV channel content directly to a USB drive or external hard drive to create a personal library of your favorite shows. This way, you can keep watching even if the content is removed from streaming services.
- Skip annoying ads: Recorded TV content can be watched offline, potentially without ads. Even if ads appear, you can fast-forward through them to quickly jump to the program, avoiding any ad interruptions.
How to Record on a Hisense TV
Hisense TVs have a built-in PVR (Personal Video Recorder) feature, which allows you to record TV programs and save them to a USB flash or external hard drive. However, not all Hisense TVs have this built-in tool. So, check the user manual or go to Hisense’s website first to see if your TV has the PVR. If not, a third-party recorder can help you.
Option 1. Record Hisense TV with PVR
How to record on Hisense TV with a built-in PVR? Follow the step-by-step guide below.
1. Plug a USB into the TV
You need a USB drive formatted as FAT32 or NTFS. Insert it into the TV's USB port. Ensure the USB drive has sufficient storage space; at least 16GB is recommended.
2. Find PVR Recording on Your TV
Open the TV settings, go to Channel Setup or Signal Source, find PVR Recording, and activate it.
3. Start Recording
To record the TV program you're currently watching, press the Record button on your remote control. When finished recording, press the Stop button.
To schedule a recording, go to the program guide in the PVR menu. Select the program you wish to record, choose the Schedule Recording option, and set the start and end times.
4. Watch the Recorded Show
Go to the Media Center to play your recording.
Option 2. Record Hisense TV on a Computer
Does your Hisense TV lack built-in PVR functionality? No worries—you can accomplish this using your computer and a screen recording application.
Step 1. Choose a Reliable Screen Recorder
A great screen recorder makes the recording process easier and smoother. The first step is to select a reliable and professional screen recording tool. I’ve tried a lot of ones and picked up the best two:
- MiniTool Screen Recorder
- Bandicam
MiniTool Screen Recorder
MiniTool Screen Recorder is a free and advanced desktop screen recorder designed for Windows users. It features a straightforward interface, allowing both beginners and experienced users to easily navigate. It can record your computer screen without lag and export as high-quality videos, making it perfect for recording Hisense TV shows and movies, online webinars, online lessons, etc.
Also, MiniTool Screen Recorder supports simultaneous or separate recording of system audio and microphone audio, making it ideal for capturing audio from your computer and voiceovers to create engaging tutorials and game commentary.
Additionally, this application allows for customizing the recording area and capturing webcam footage. It offers multiple recording settings, like webcam footage resolutions, webcam’s size and shape adjustment, video formats, frame rates, and more, helping you perfectly capture 4K screen content.
Moreover, MiniTool Screen Recorder features an annotation tool. You can draw, write, and add arrow shapes on the screen. It also empowers you to set the recording duration. When the time is out, the recording will stop automatically.
Bandicam
Bandicam is also a robust screen recorder that can screen record the Hisense TV smoothly. It supports multiple recording modes, including device recording, audio-only, webcam recording, and game recording. Its intuitive user interface allows for easy navigation.
In addition, Bandicam can capture your on-screen activities and create a high-quality video. You can choose to record the full screen or a specific area based on your needs. The program also captures system audio, microphone sound, and even webcam footage.
Moreover, this application offers multiple output settings, such as format, frame rate, codec, bitrate, and more. You can customize them according to your requirements. Furthermore, Bandicam does not collect any recording data. Recorded files are stored solely on the user's computer and are not uploaded to its servers. Therefore, you needn’t worry about data leaks.
Step 2. Connect the Hisense TV to Your Computer
Use an HDMI Cable Connection
Most computers and televisions come equipped with HDMI ports. Use an HDMI cable to connect your devices if they have such ports. Here’s how:
#1. Ensure both your Hisense TV and computer are equipped with HDMI ports.
#2. One end of the HDMI cable should be plugged into your computer's HDMI input port, and the other end should be plugged into your Hisense TV.
#3. Choose the HDMI output source that corresponds to the port on your cable using the remote control on your Hisense TV.
Use a VGA Cable Connection
Some televisions and computers lack HDMI ports but feature VGA ports. In such cases, you can still connect using a VGA cable. However, VGA ports only transmit video signals, so you will need an audio cable to transmit the audio signal to the computer. Follow the instructions below.
#1. Plug one end of the VGA cable into the computer's VGA input port and the other end into the Hisense TV's VGA output port.
#2. Prepare the audio cable and connect it from the computer's audio input port to the TV's audio output port.
#3. On your Hisense TV, select the VGA output source to connect to your computer.
After connecting your TV and computer, locate the program you want to record on the TV and prepare to record it.
Step 3. Record Hisense TV on a PC
In this part, I’d like to take MiniTool Screen Recorder as an example and show you how to record on Hisense TV. Follow the step-by-step guide below to record your favorite show on a computer.
#1. Download and Install MiniTool Screen Recorder
Click the download button to download this program. Then, follow the setup instructions to install it on your computer.
MiniTool Screen RecorderClick to Download100%Clean & Safe
#2. Configure the Recording Settings
Launch the program: Double-click its shortcut on the desktop to open it.
Configure sound settings: Click the System Audio option and the Microphone option to turn them off or on separately or simultaneously.

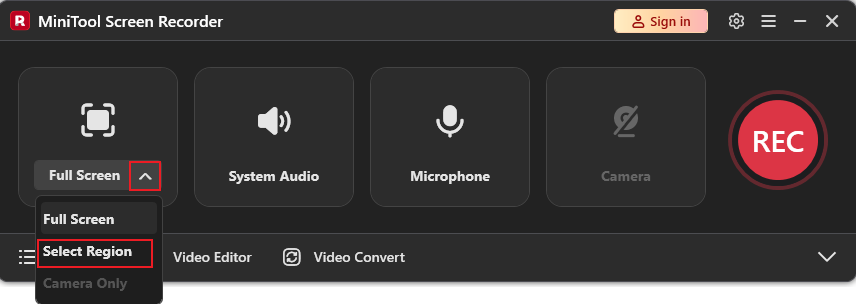
Select the recording area: By default, MiniTool Screen Recorder selects the entire screen for recording. To select the desired recording area, expand the Full Screen option, click the Select Region option, and drag the mouse to specify.
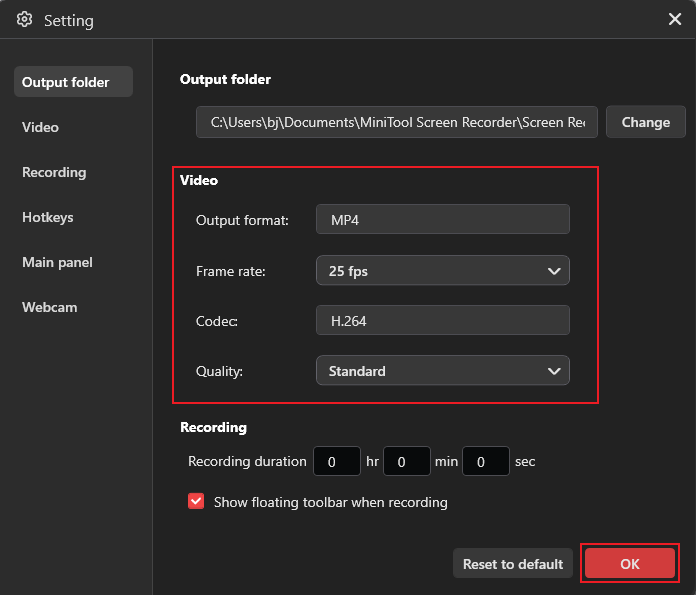
Complete more settings: Click the Settings icon at the top right to open the Settings window. There, you can adjust the output format, frame rate, quality, hotkeys, etc. Click the OK button to save the changes.
#3. Activate Advanced Features (Optional)
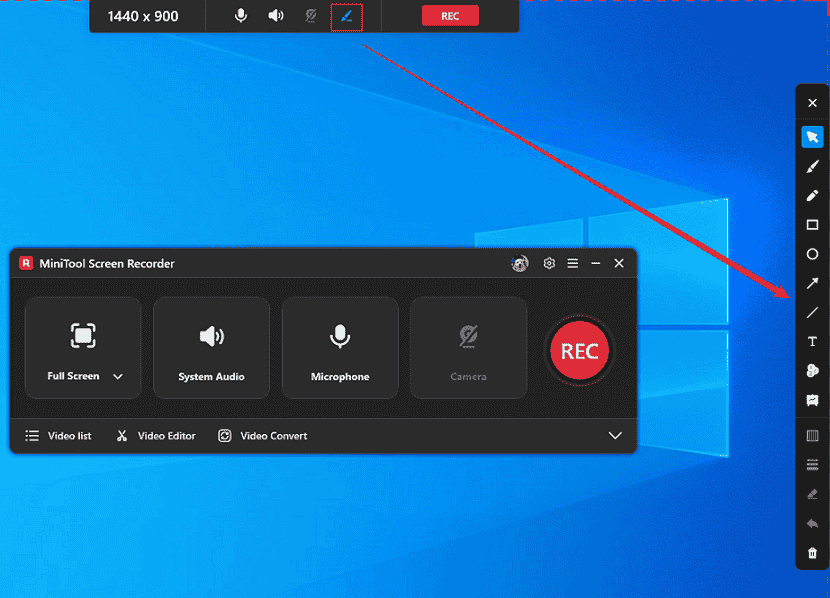
Sign in to the program by clicking the Sign in option at the top right of MiniTool Screen Recorder’s main page. Move the mouse to the middle top of the screen, and then you will see a floating toolbar. Click the Brush icon to activate the screen annotation column on the right side of the screen. Then, you can choose the desired tool to add annotations.
#4. Start Recording the Hisense TV
Click the REC button in the floating toolbar. After a three-second delay, the recording will start. During the recording, you can press the F9 key to pause/resume the recording.
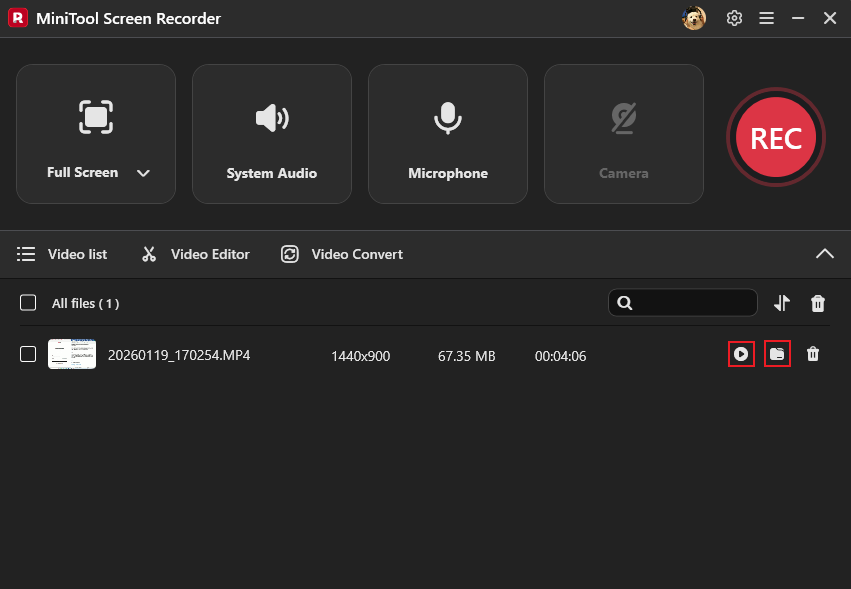
#5. Stop the Recording
Press F6 to end the recording. The recorded video will be listed in the Video list section. There, click the Play icon to watch the recording or click the Folder icon to locate it.
That’s all! Now, you can enjoy shows on Hisense TV at anytime, anywhere.
Bonus: Edit Your Recording
After recording TV shows, do you want to compile them into video compilations? MiniTool MovieMaker can help you!
MiniTool MovieMaker is a free video editor that offers a wide range of editing features. For basic editing, you can trim, split, flip, reverse, and rotate video, control video speed, and merge video clips. Additionally, you can add music to your videos, insert transition effects between clips, and apply fun stickers to perfectly enhance the visual appeal of your videos.
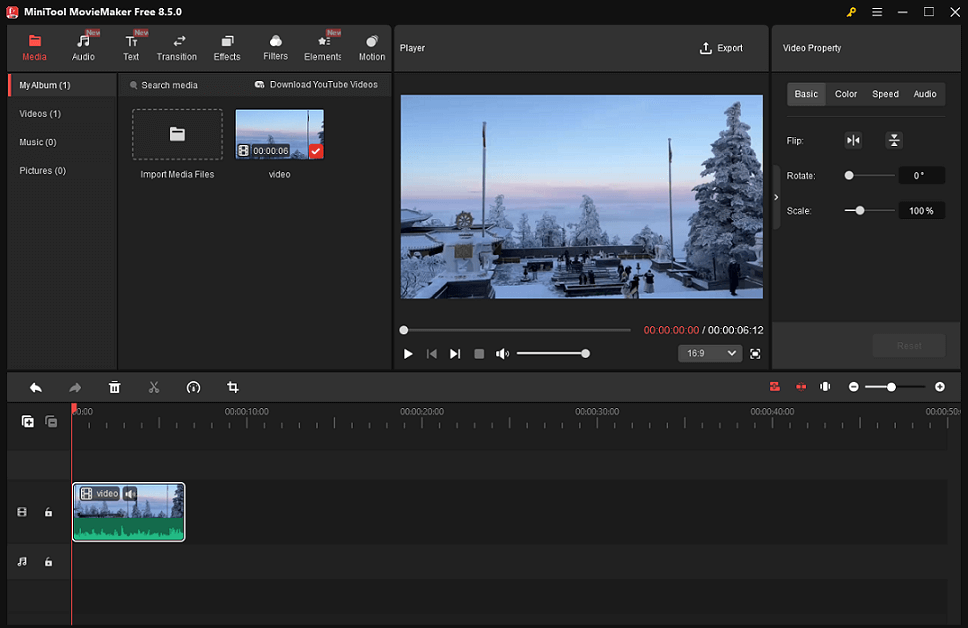
Moreover, for advanced editing, MiniTool MovieMaker allows for copy and paste on the timeline, photo collage, high-resolution editing, video text overlay, multi-track editing, audio overlap, and more. Furthermore, this application supports a wide range of digital formats, such as MP4, MOV, MKV, AVI, FLV, MPG, MP3, M4A, M4R, WAV, FLAC, PNG, JPG, and more. It can even edit a GIF.
After editing, you can customize various parameters for the video output, such as format, frame rate, image quality, bitrate, and more, to generate a video that best meets your needs.
MiniTool MovieMaker has no ads, bundles, or watermarks, offering an enjoyable and hassle-free user experience. Click the download button below to give it a try!
MiniTool MovieMakerClick to Download100%Clean & Safe
Summary
Hisense TV is commonly used in people’s lives. By recording on Hisense TV, you may save programs that might vanish from streaming services, prevent missing shows because of schedule conflicts, build a personal library of your favorite series for convenient rewatching, and more.
How to record on Hisense TV? Hisense TVs' built-in PVR feature records TV programs to a USB drive. If your TV lacks this function, you can connect it to a computer and use a screen recording tool like MiniTool Screen Recorder to capture your favorite shows. After recording, you can optimize the footage using MiniTool MovieMaker. Hope you find this article helpful!
You can contact us via support@minitool.com if you have any questions about using MiniTool Screen Recorder or MiniTool MovieMaker. Alternatively, you can send me messages directly on X, and I will help you as soon as I can.