How to record live streams on Windows? This post introduces three effective methods, including MiniTool Screen Recorder, Xbox Game Bar, and Screencastify. You will also learn why to record live streams and how to edit recorded live stream videos.
Livestreaming is a popular way to share video or audio content in real time. It covers a wide range of topics, including social media events, video games, and professional sports, on platforms such as Facebook Live, TikTok, and YouTube.
However, not all livestreams are available for replay after they end due to creators' settings, platform limitations, or content rights. For this reason, many people choose to record live streams so they can watch the content later, whether they are viewers or streamers.
To help with this, the article shows you how to record live streams using three reliable and effective methods. Before diving into the detailed steps, let’s first take a look at why recording live streams can be useful.
Why Record Live Streams
This section compiles a list of key reasons to record live stream videos on your computer.
1. Save the Content.
Not all platforms provide a replay option after a live stream ends. Recording ensures you don’t lose access to the content, even if it is removed or expires.
2. Edit livestream content.
Recording live streams is essential for editing the content. You can trim unnecessary parts, adjust audio volume, and add captions to make the livestream recording more polished. In addition, you also need the livestream recordings to create highlight reels or short-form videos to increase audience engagement and retention.
3. Improve the viewing experience.
Local recordings often provide a more stable viewing experience than streaming platforms. Since livestreams use fixed bitrates and rely on network conditions, playback may suffer from buffering or interruptions. Recording allows you to watch the content smoothly without connection issues.
4. Watch content later.
Livestreams are shared in real time, which means you may miss them due to time zone differences, work schedules, or network problems. Recording livestreams allows you to watch the content later at your convenience and makes it accessible to viewers across different time zones.
Preparations Before Recording Live Streams
Once you decide to record a live stream, making a few preparations in advance can help ensure a smooth recording process.
Before starting, it’s recommended to close unnecessary background programs to maintain stable performance and avoid dropped frames. Make sure your system audio and microphone settings are configured correctly, especially if the live stream includes important sound or commentary.
For longer live streams, choosing a recorder that supports flexible recording durations can help prevent interruptions. In addition, always review the platform’s recording policies in advance to avoid potential copyright or privacy issues.
How to Record Live Streams on Windows
This section recommends three practical live stream recorders, including the MiniTool Screen Recorder, Windows built-in recorder- Xbox Game Bar, and Screencastify, an online browser extension recorder. Read on to learn how to record live streams with each of them.
Method 1: Record Live Streams with MiniTool Screen Recorder
MiniTool Screen Recorder is widely considered one of the most popular screen recorders thanks to its ease of use and versatile features. Its intuitive interface and customizable recording settings allow users to start recording in just a few clicks while producing professional results, making it an ideal option for beginners and experienced users.
When it comes to recording live streams, MiniTool Screen Recorder offers flexible options for both the recording area and audio. You can choose to capture the full screen or a specific live stream window. It also allows you to record your voice, which is useful for adding real-time reactions during live streaming.
MiniTool Screen Recorder enables you to record webcam footage and add annotations while recording. The customizable webcam settings let you adjust the location, shape, and size of the webcam window. It is equipped with a wide range of annotation tools, including arrows, drawings, shapes, text, step numbers, whiteboards, and more, making it easy to highlight key information in live streams.
In addition, MiniTool Screen Recorder records at up to 4K resolution and saves recordings in MP4 format without time limits or watermarks. It also offers adjustable frame rates and recording quality, ensuring clear live stream recordings while keeping file sizes under control.
How to record live streams using MiniTool Screen Recorder? Here is the detailed guide.
Step 1: Install the Application
Click the button below to download MiniTool Screen Recorder. Then, follow the on-screen instructions to finish the installation on your computer.
MiniTool Screen RecorderClick to Download100%Clean & Safe
Step 2: Specify the Recording Area and Audio Input
Open the livestream you want to capture and make sure it is playing properly with system audio enabled. Next, launch MiniTool Screen Recorder and specify the recording area.
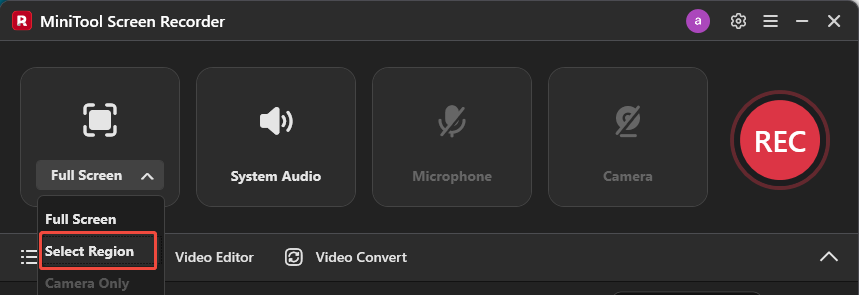
You can keep the default Full Screen option to capture the entire screen. To record only the live stream window without other distractions, click the Full Screen option and choose Select Region. Then, drag the red dashed rectangle to choose the livestream window.
The system audio and microphone recording are turned on by default. If you only want to record the livestream without your voice, just disable the microphone audio by clicking Microphone.
Step 3: Adjust Recording Settings
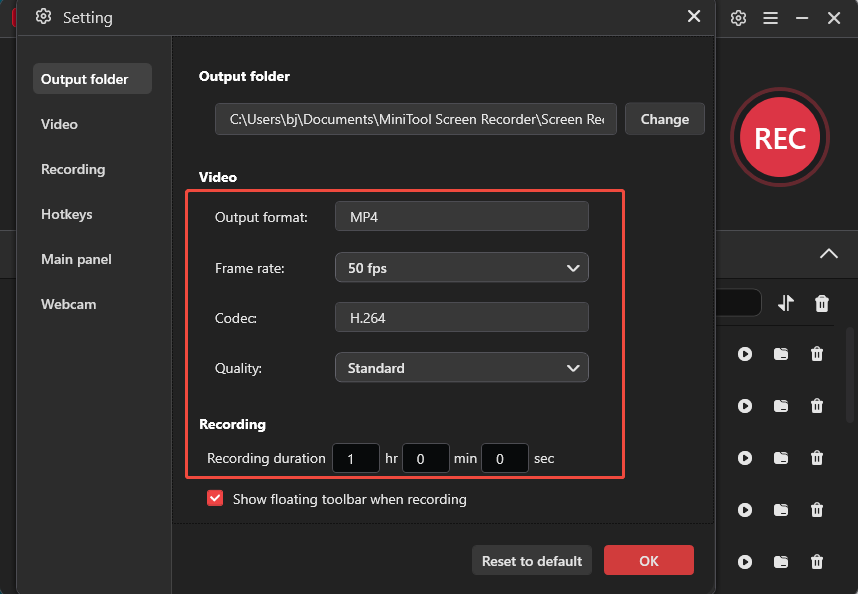
Click the Gear icon in the upper-right corner of the interface. From there, you can change the output folder, pick a suitable frame rate, such as 15, 20, 25, 30, or 50 fps, and select the video quality from standard, original, or high.
You can also set a specific recording duration, after which the program will automatically stop and save the recording. In addition, hotkeys can be customized to make recording faster and more convenient. Once you have finished adjusting the settings, click OK to save the changes.
Step 4: Start and Customize the Recording
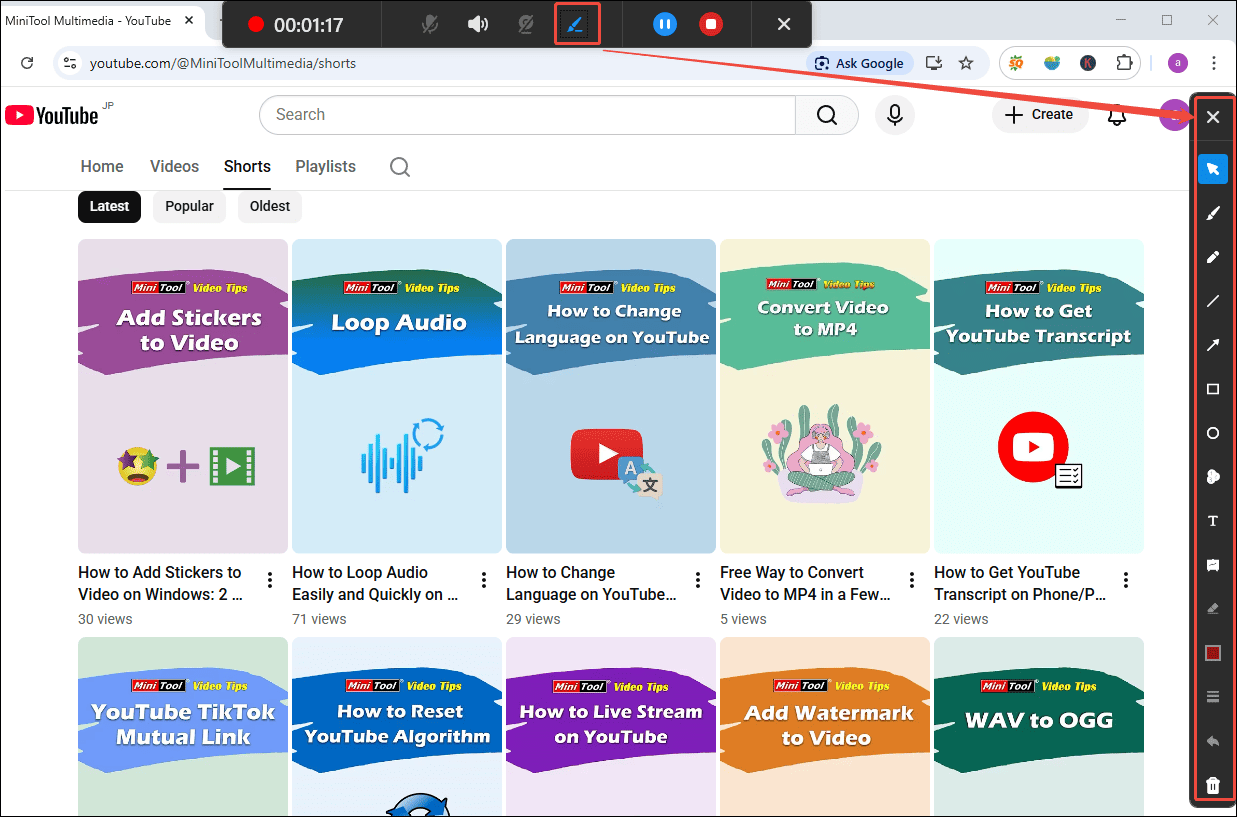
Click the REC button or press the F6 key on your keyboard, and the recording will start after a 3-second countdown. If you want to skip unnecessary parts, click the Pause icon on the floating toolbar at the top of your screen or press F9 to pause the recording. To continue, click the Play icon or press F9 again to resume.
To add some annotations, click the Pen icon at the floating toolbar to open the tool panel on the right side of the screen. Then, you can select the preferred tool and add annotations to the livestream recording in real time.
Step 5: End and Check the Recording
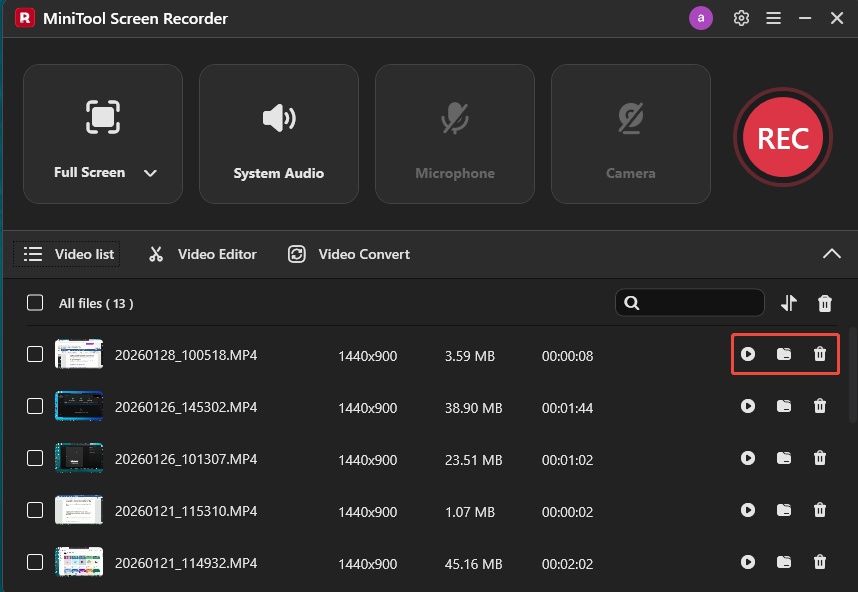
Click the Stop icon or press F6 to end the recording. Then, you can see the recorded video at the top of the video list module in the interface. Click the Play icon to preview the recording. You can also click the Folder icon to open the file location or click the Delete icon to remove the recording from your computer.
All in all, MiniTool Screen Recorder not only enables you to capture live streams with ease but also offers advanced features such as real-time annotation during recording, making it a practical and reliable tool for Windows users.
MiniTool Screen Recorder is a worth-trying screen recorder for Windows users.Click to Tweet
Method 2: Record Live Streams with Xbox Game Bar
Xbox Game Bar is another reliable option for recording live streams on Windows. As a built-in tool, it allows you to record your screen, capture screenshots, and adjust basic recording settings such as video frame rate and quality.
However, Xbox Game Bar does not support selecting a custom recording area, which means the recorded video may need to be cropped afterward. In addition, each recording session is limited to a maximum duration of four hours.
Below are the steps to record live streams using Xbox Game Bar.
Step 1: Enable Xbox Game Bar Recording
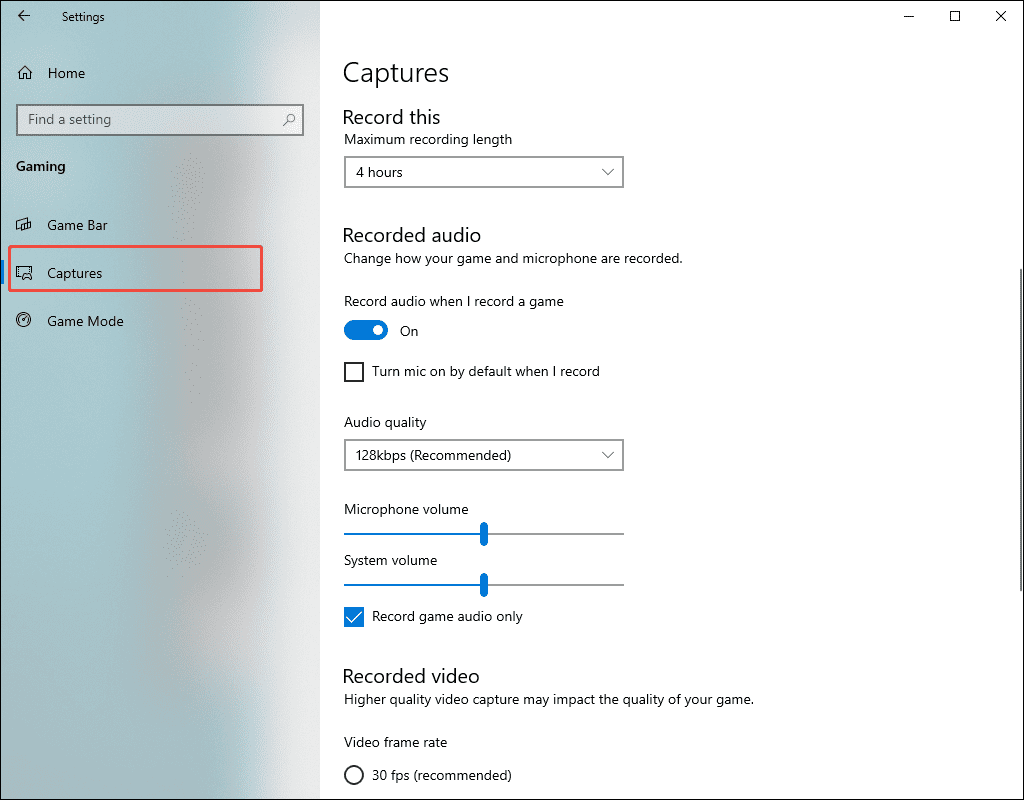
Go to Windows Settings > Gaming > Game Bar and switch on the Enable Game Bar button. You can customize the keyboard shortcuts on this page. Then, click Captures, and you can change the capture location, set the maximum recording length, specify the video frame rate, and quality.
Step 2: Launch Xbox Game Bar
Press the default Windows + G on the keyboard to open the Xbox Game Bar.
Step 3: Start Recording
Open the livestream you want to capture. Press the default Windows + Alt + R to start recording.

Step 4: Stop and Check Recording
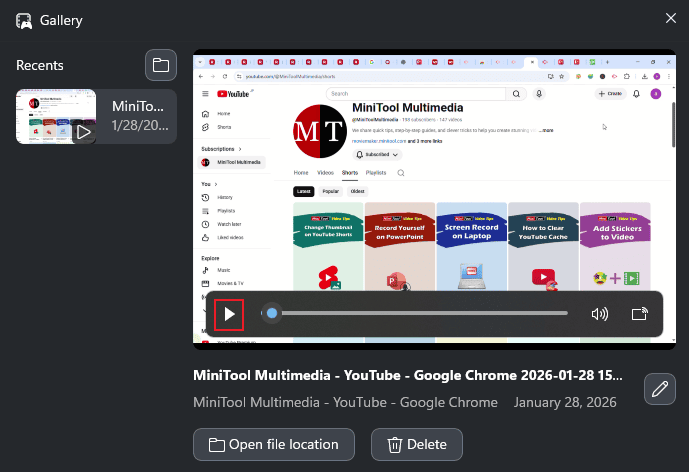
To end recording, click the Stop Recording option in the Capture Status window. Then, a game clip notification will appear on the screen. Click it to open the Gallery window. You can click the Play icon to preview the livestream recording.
Method 3: Record Live Streams Online with Screencastify
Screencastify is a browser-based screen recorder that allows users to capture, edit, and share recordings online. As a Chrome extension, it lets you record browser tabs, desktop screens, or webcam footage without installing additional software. It also offers a built-in teleprompter and drawing tools to assist you during recording.
However, free users can record videos of up to 30 minutes per recording and are limited to 10 recordings in total. In addition, exporting videos in formats such as MP4, GIF, or MP3 is only available up to five times.
Here is how to record live streams online with Screencastify.
Step 1. Access Screencastify
Go to the Chrome Web Store and search for Screencastify. Click Add to Chrome and select Add extension to install the extension.
Step 2: Adjust Recording Settings
Click the Extensions icon at the upper-right corner of your browser and pin Screencastify for quick access. Next, open the livestream tab you want to capture and click the Screencastify icon in your browser’s extension bar. Select THIS TAB to capture the livestream.
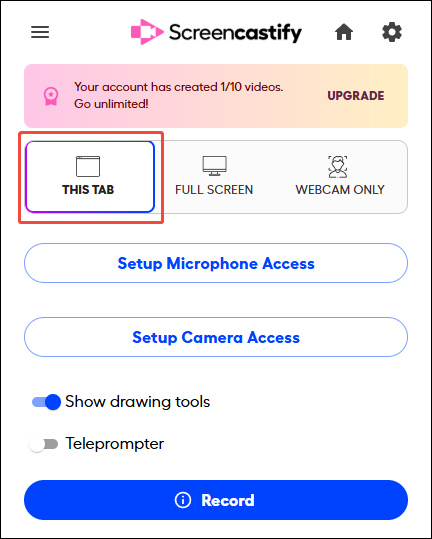
The Show drawing tools option is turned on by default. You can also turn on the Teleprompter if you want to display a script while recording.
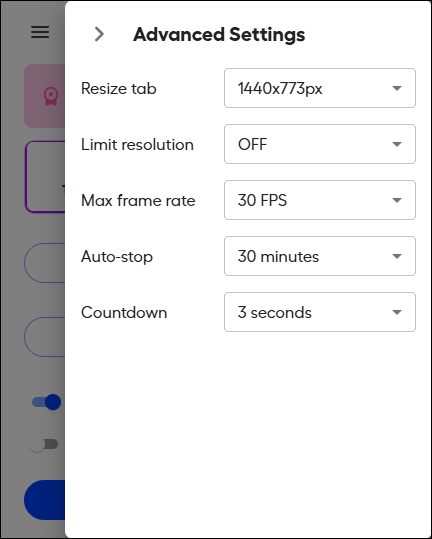
For more advanced settings, click Gear in the upper-right corner of the panel and adjust the recording size, resolution, frame rate, duration, and countdown values.
Step 3: Start and End Recording
Click the Record icon, and the recording will start automatically after a 3-second countdown. To pause the recording, click the Screencastify icon again and select Pause. Click End to stop recording.

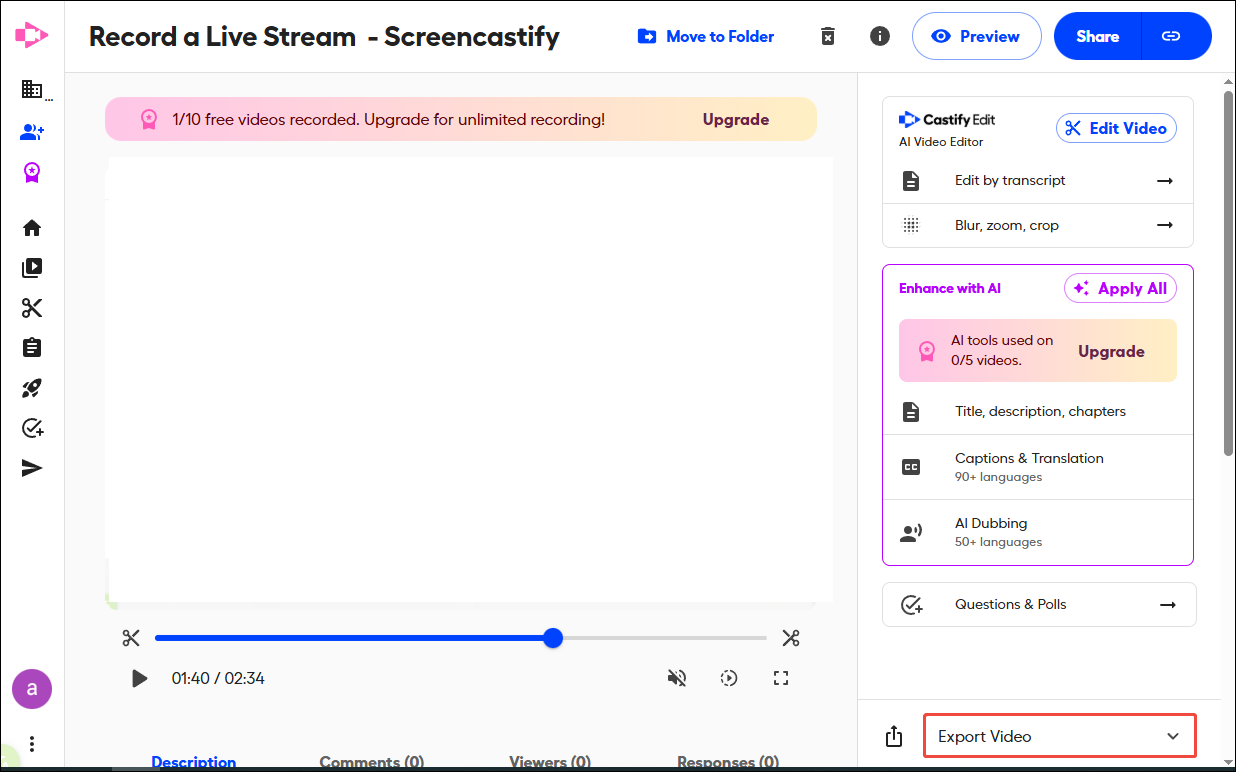
Once finished, the live stream recording will open in a new Screencastify tab, where you can preview, edit, and share the video. You can also click Export Video to download the recording.
Bonus: How to Edit Recorded Live Stream Videos
After recording the live stream, a video editor is indispensable for cropping unwanted sections, trimming unnecessary parts, and creating a polished final video.
MiniTool MovieMaker is a convenient option, as it can be accessed directly from the main interface of MiniTool Screen Recorder. You can click the Video Editor option at the bottom of MiniTool Screen Recorder or click the button below to download it.
MiniTool MovieMakerClick to Download100%Clean & Safe
MiniTool MovieMaker provides essential editing features such as cutting, trimming, and splitting videos. It includes an extensive collection of resources, including text templates, filters, stickers, transitions, and music. It supports up to nine tracks, making it effortless to enhance the content and create overlay effects.
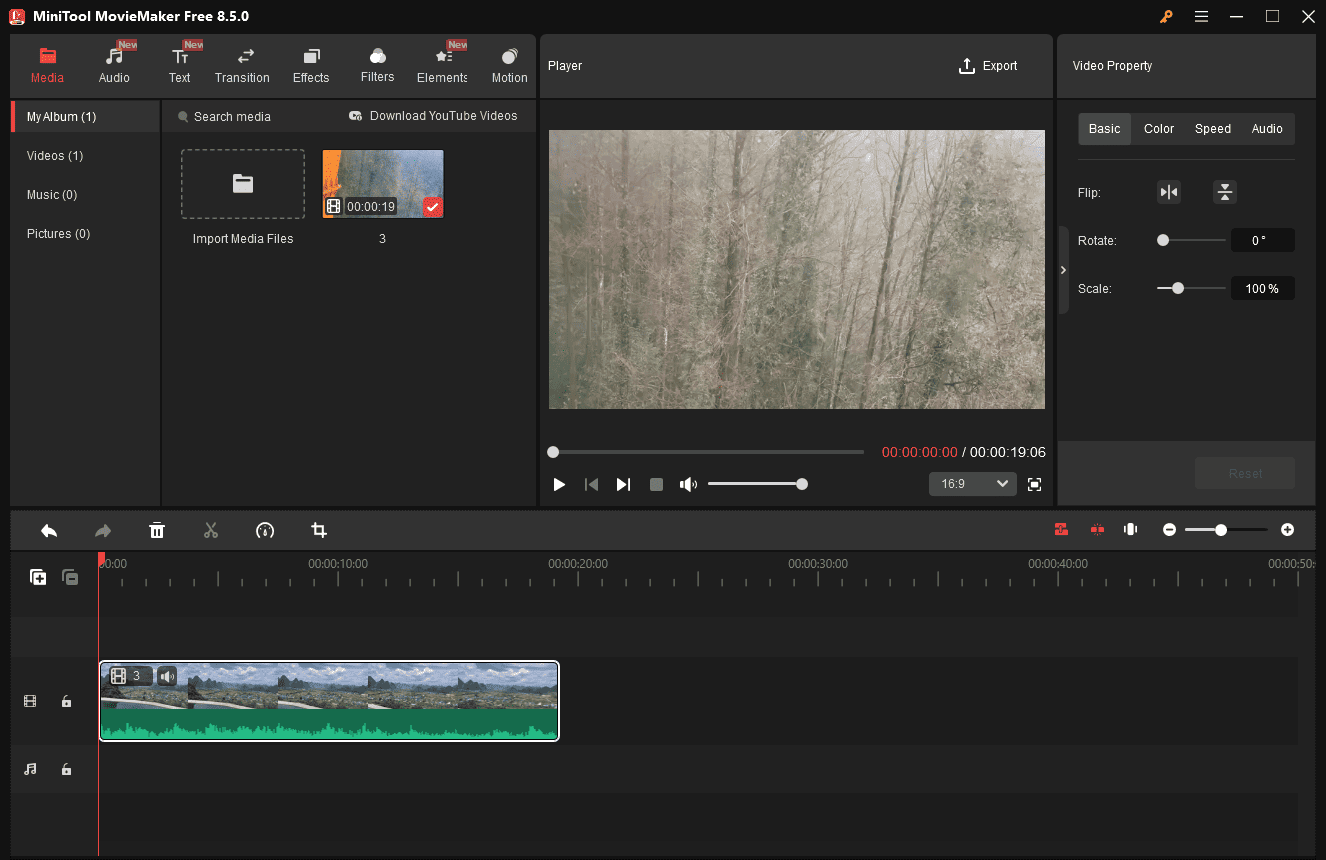
In addition, MiniTool MovieMaker allows you to export videos in up to 4K resolution without watermarks. Its user-friendly interface and robust features make it an ideal choice for beginners without any experience.
Conclusion
This post explains how to record live streams on Windows using MiniTool Screen Recorder, Xbox Game Bar, and Screencastify. Each of them is easy to use and meets your expectations.
MiniTool Screen Recorder is an ideal choice for recording live streams when you need flexible capture options and advanced recording settings. Xbox Game Bar works well for quick live stream recording on Windows without installing extra software. Screencastify is a convenient option for capturing browser-based live streams directly online.
If you have any suggestions or encounter any problems when using MiniTool Screen Recorder and MiniTool MovieMaker, please don’t hesitate to contact us via support@minitool.com.