How to record Amazon Prime Video on Windows? This post introduces two practical tools, MiniTool Screen Recorder and OBS Studio, to capture high-quality video without a black screen.
What Is Amazon Prime Video
Amazon Prime Video, also known as Prime Video, is a popular video-on-demand streaming platform. It offers movies, TV series, live sports, and options to rent or purchase content. The service is available on web browsers, iOS and Android devices, as well as many smart TVs and other platforms.
While enjoying your favorite shows and movies on Prime Video, you might wonder: Is it possible to record Amazon Prime Video for offline viewing or personal use?
Can You Record Amazon Prime Video
Yes, you can. Although Amazon Prime Video does not provide a built-in recording feature, you can record its content using a third-party screen recorder.
In fact, Prime Video also offers a download option for offline viewing. However, this feature has some restrictions. It is mainly available in the official app and is not supported in most web browser environments. In addition, the downloaded titles typically remain available for 30 days. As long as you start watching, you usually have 48 hours to finish watching.
Therefore, if you want to save Amazon Prime Video in a browser or when downloading is unavailable on your desktop, recording Amazon Prime Video can be a practical alternative.
Why Does Amazon Prime Video Show a Black Screen When Recording
When recording Amazon Prime Video, you may find that the recording displays only a black screen instead of the actual video. The following section explains three common reasons why this issue occurs.
DRM Protection
Amazon Prime Video uses DRM (Digital Rights Management), including technologies such as HDCP (High-bandwidth Digital Content Protection), to protect copyrighted content. When a screen recorder attempts to capture the video stream, the protected playback mechanism may block access to the video layer to prevent unauthorized copying, which can result in a black screen.
Hardware Acceleration
In some cases, web browsers use hardware acceleration to decode and render video through the GPU. When DRM-protected content is played, the video may be processed through a secure playback path. As a result, some screen recorders cannot access the protected video layer, which may lead to a black screen.
Browser Restrictions
Some browsers include built-in security mechanisms that limit the capture of protected streaming content. That’s why recording Amazon Prime Video directly in certain browsers may produce a blank or black screen.
To get clear recordings without a black screen, it is important to use a compatible screen recorder and adjust relevant system or browser settings when necessary.
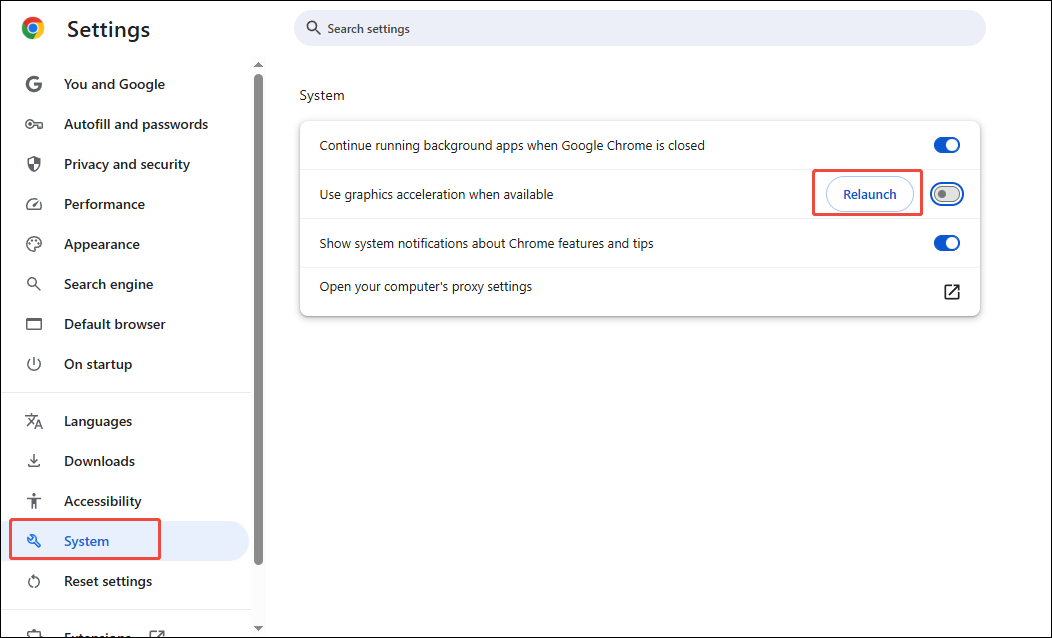
If you plan to record Amazon Prime Video in a web browser, disabling hardware acceleration can sometimes help resolve the black screen issue. The steps below use Google Chrome as an example.
Open Chrome and click Customize and control Google Chrome (the three-dot icon) in the upper-right corner. Select Settings and go to System. Turn off Use graphics acceleration when available. Click the Relaunch option to restart the browser.
How to Record Amazon Prime Video Without Black Screen on Windows
Now that you know why the black screen issue occurs and how to avoid it, it’s time to learn how to record Amazon Prime Video on Windows. The following section presents two reliable Amazon Prime Video recorders, MiniTool Screen Recorder and OBS Studio. Let’s take a look at them one by one.
Method 1: Use MiniTool Screen Recorder
When it comes to free screen recorders, MiniTool Screen Recorder is the first tool that comes to mind. Although it is completely free, it offers a wide range of powerful and easy-to-use features, making it an ideal choice for capturing Amazon Prime Video.
First of all, MiniTool Screen Recorder provides a flexible recording area and audio options. You can choose to record the full screen, a selected region, or the webcam only, allowing you to capture Amazon Prime Video in full-screen mode, within a custom window, or alongside your webcam for reaction videos. It also lets you control system audio and microphone input separately or simultaneously.
What’s more, MiniTool Screen Recorder offers customizable video settings that make it easy to capture high-quality Amazon Prime Video. You can adjust the frame rate and choose the video quality level, such as Original, Standard, or High. It also allows you to preset the recording duration, which is especially useful for long recording sessions.
In addition, MiniTool Screen Recorder comes with real-time screen annotation tools, including drawings, shapes, arrows, step numbers, text, and whiteboards to add notes during recording. It records up to 4K resolution without time limits, watermarks, or noticeable lag. Recordings are saved in MP4 format on your computer, making them easy to edit or share with others.
All in all, MiniTool Screen Recorder is an ideal choice for recording Amazon Prime Video, as well as capturing video from websites, livestreams, desktop applications, gameplay, and more. Its intuitive, user-friendly interface makes it easy for beginners to start recording without hassle.
How to record Amazon Prime Video without black screen using MiniTool Screen Recorder? Follow the steps below.
Step 1: Download and Install
Click the download button below to get MiniTool Screen Recorder. Then, follow the on-screen instructions to complete the installation on your computer.
MiniTool Screen RecorderClick to Download100%Clean & Safe
Step 2: Select the Recording Area
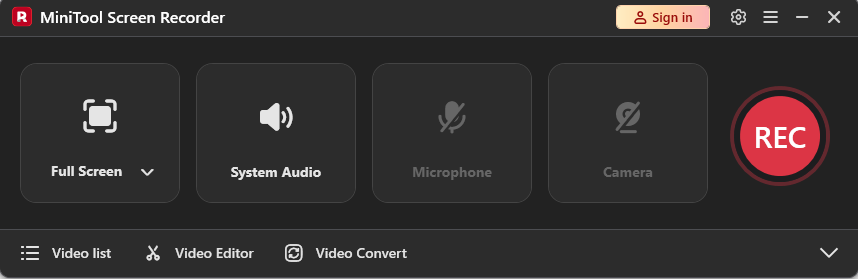
Open Amazon Prime Video in your browser or launch the desktop application and find the video you want to record. Then open MiniTool Screen Recorder.
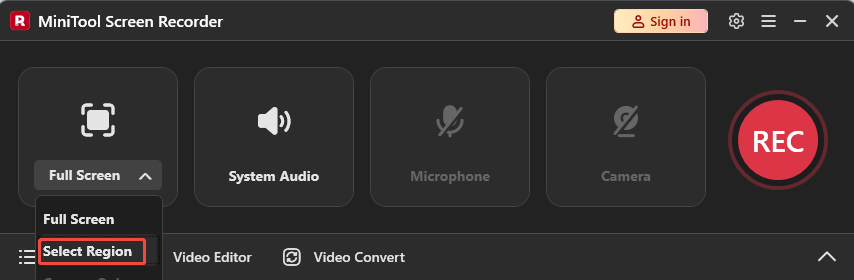
By default, MiniTool Screen Recorder is set to Full Screen mode. If you want to record the video in full screen, keep this setting. To record Amazon Prime Video in a resizable window instead of full-screen mode, expand the Full Screen option and choose Select Region. Then drag your mouse to match the video window precisely.
Step 3: Check the Audio
System audio and microphone input are enabled by default. If you want to add real-time commentary during recording, keep the microphone turned on. To record Amazon Prime Video only, click the Microphone icon to turn it off.
Step 4: Adjust Advanced Settings
Click the Gear icon in the upper-right corner of the interface to enter the settings window. Here, you can customize frame rate, video quality, preset the recording duration, and change hotkeys. The default 25 fps and standard video quality are clear and smooth enough for most recording. You can also adjust these settings by expanding the Frame Rate and Quality options.
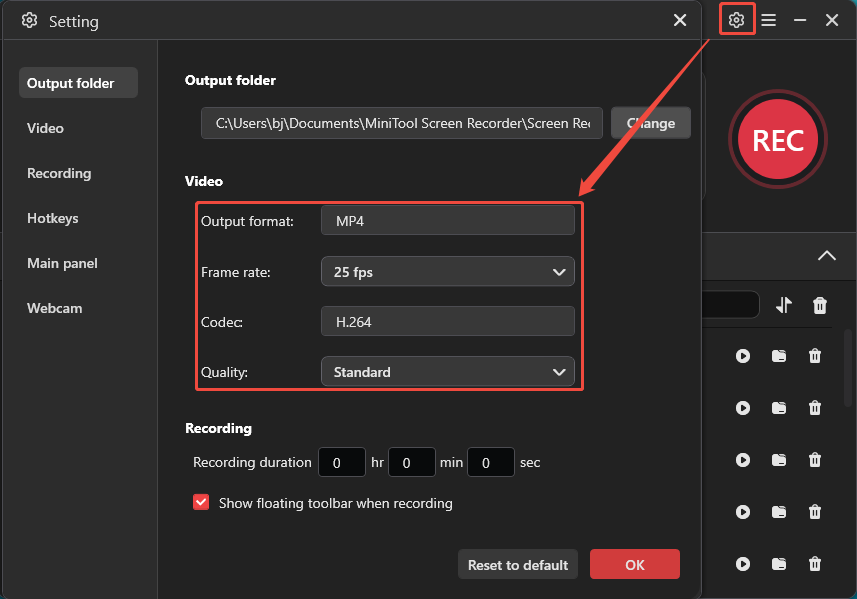
Scroll to the Recording section to set a specific recording duration. The recording will automatically stop and save when it reaches the time limit. After making changes, click OK to save all adjustments.
Step 5: Start and Stop Recording
Click the red REC button in the interface or press the default F6 key on your keyboard. After the 3-second countdown ends, the recording will start automatically. Make sure to play the Amazon Prime Video from the beginning.
To skip ads or other irrelevant parts, you can press F9 to pause and resume recording. Press F6 again to end the recording manually.
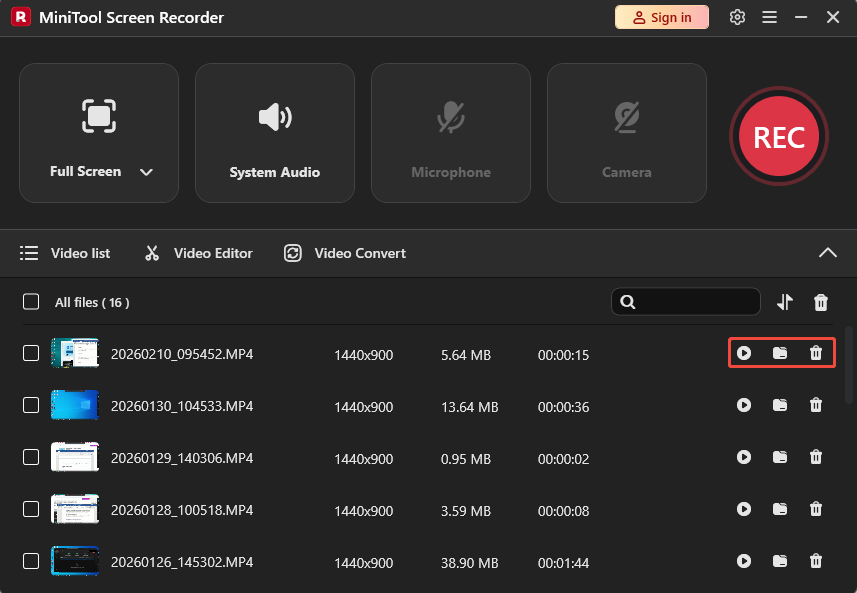
Step 6: Play, Locate, and Delete the Recording
Once the recording is complete, the latest video will appear at the top of the video list module in the interface. Click the Play icon to preview the video. Click the Folder icon to find its location. If you are not satisfied with the recording, click the Delete icon and confirm the Delete the local file as well option to remove it from the computer.
Step 7: Edit Your Recording (Optionally)
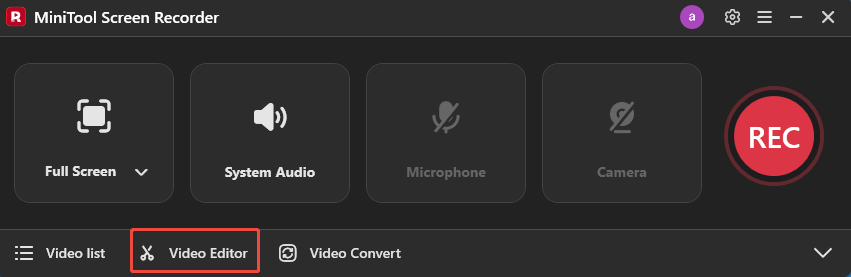
Once you've finished recording your favorite Amazon Prime Video, you may want to make some edits to the video. For example, trimming the beginning and ending to remove unwanted parts or pauses to make the video more polished. In that case, MiniTool MovieMaker is a powerful video editor worth trying.
Click the Video Editor option at the bottom of the MiniTool Screen Recorder main interface to get the professional video editor. Then, you can enhance the recording using its versatile features.
Method 2: Use OBS Studio
OBS Studio is another free yet powerful screen recorder. As an open-source and cross-platform tool, it is available on Windows, macOS, and Linux. Although it has a steeper learning curve for beginners, its powerful features make it a highly popular choice among users.
OBS Studio delivers excellent performance when capturing and mixing video and audio. It allows you to capture your screen, specific application windows, webcams, microphones, system audio, and more, making it suitable for recording Amazon Prime Video.
In addition, OBS Studio provides extensive recording settings, including resolution, frame rate, video and audio encoders, and audio sample rate. It supports multiple output formats such as MP4, MOV, FLV, MKV, and TS. With support for up to 60 FPS and 1080p resolution, you can record high-quality Amazon Prime Video smoothly.
How to record Amazon Prime Video without black screen using OBS Studio? Here is the detailed guide.
Step 1: Download OBS Studio
Go to the official OBS Studio website (https://obsproject.com/)to download this free Amazon Prime Video recorder. Install the program and launch it.
If the Auto-Configuration Wizard appears when you open OBS for the first time, you can close it to enter the main interface.
Step 2: Add a Scene and Recording Source
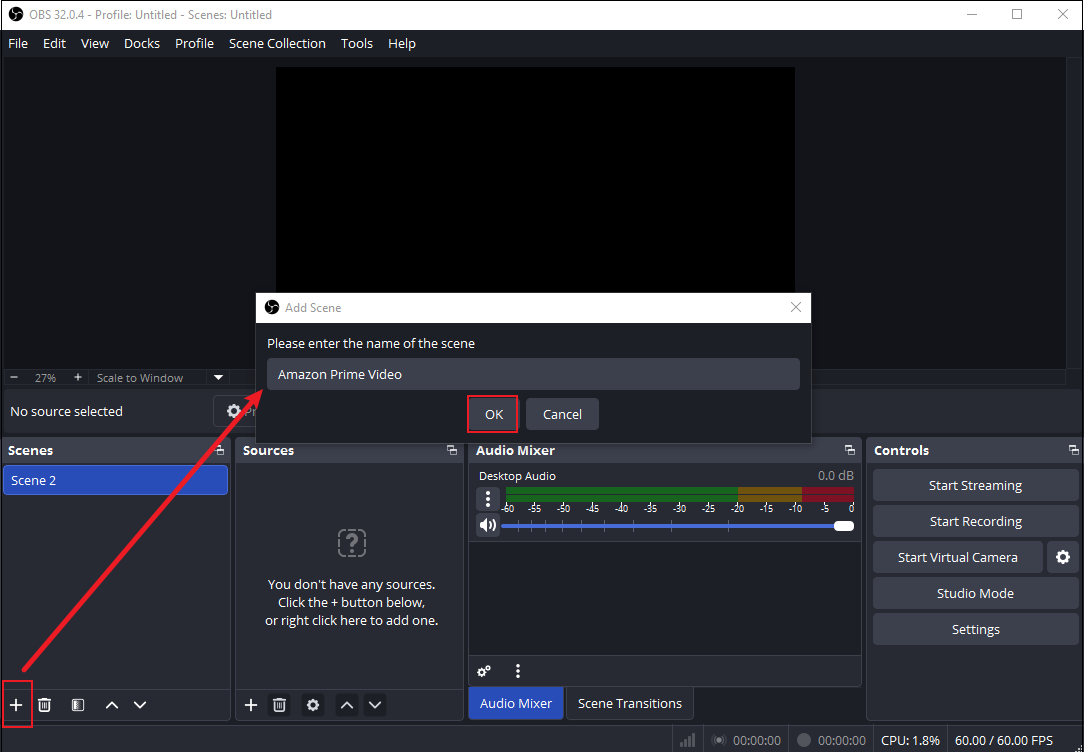
Open Amazon Prime Video in your browser and prepare the video you want to record. Click the Add Scene icon at the bottom of the Scenes box in OBS Studio. Enter the scene name and click OK to create an Amazon Prime Video scene.
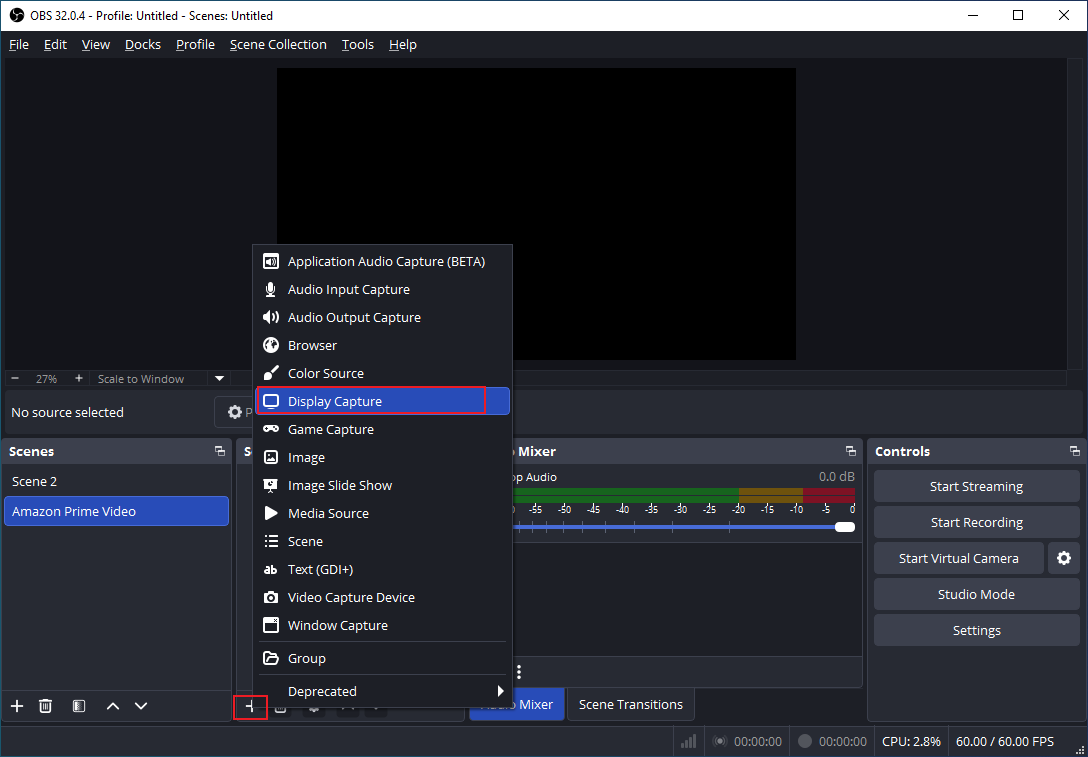
Click the Add Source option in the Sources box and choose Display Capture to record the entire screen. Keep the Create new option and click OK in the pop-up window. If you have multiple monitors, select the correct display. Click OK to confirm.
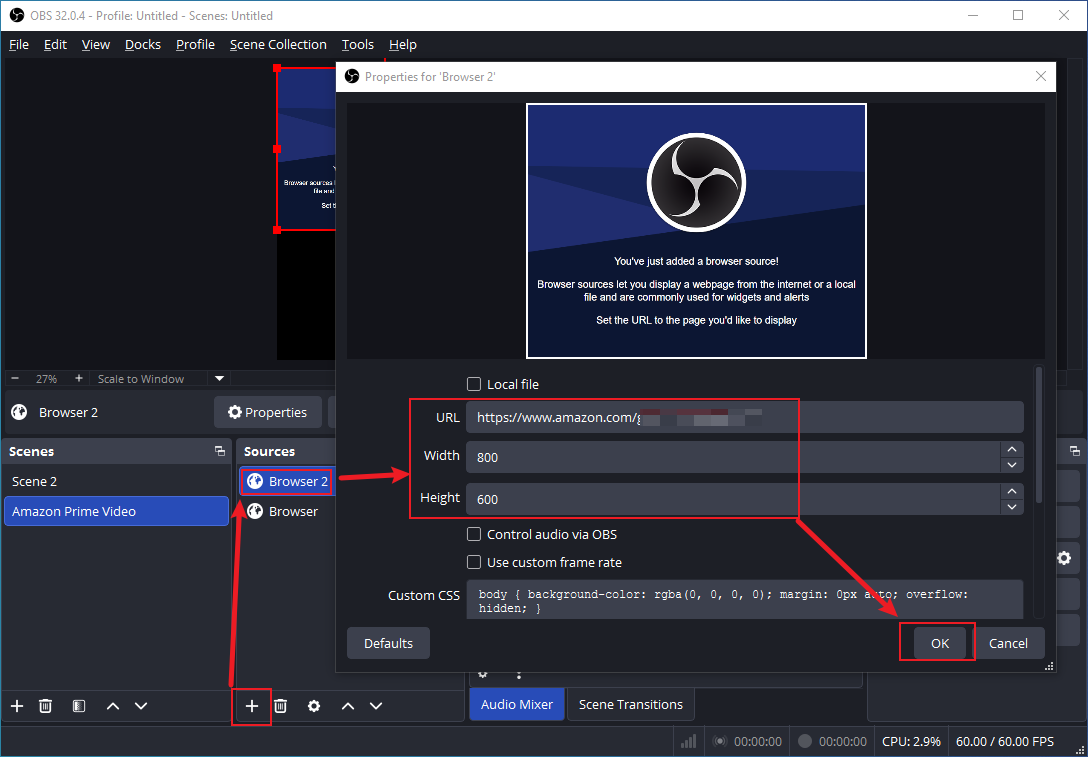
Alternatively, you can also choose Browser in the Sources box. Make sure you have disabled hardware acceleration in your browser settings to avoid black screen issues. Also, click OK on the pop-up window. Then, paste the Prime Video URL in the URL bar. Adjust the width and height based on your needs. Then, click OK to save all settings.
You can see the Amazon Prime Video scene in the OBS player window. If you need to add real-time commentary, you can also add your microphone input to the recording sources.
Step 3: Adjust Additional Settings
Click Settings in the lower-right corner of the interface. Go to the Output tab and choose your preferred recording format. MP4 is recommended as it has better compatibility. Select a desired recording quality option.
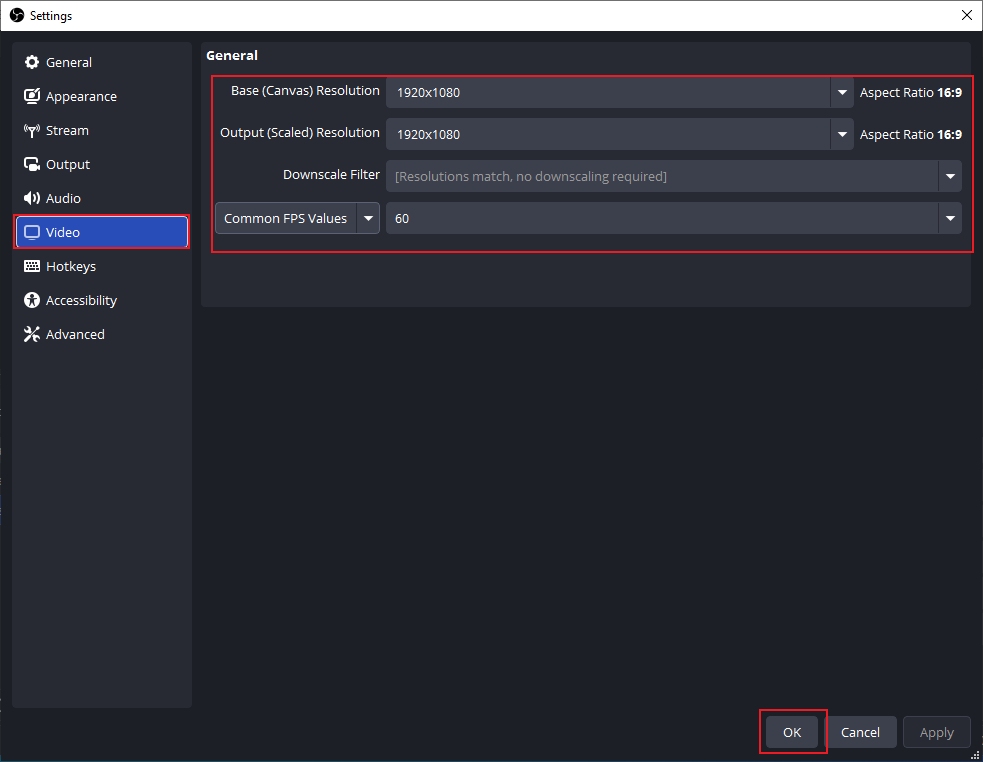
Then, switch to the Video tab and customize the video resolution and frame rate. Set the Base (Canvas) Resolution to match your screen resolution, and the Output (Scaled) Resolution to 1920×1080 for Full HD recording. Choose 60 FPS for smoother video playback. Then, click OK to save your settings.
Step 4: Start, Stop, and Check Recording
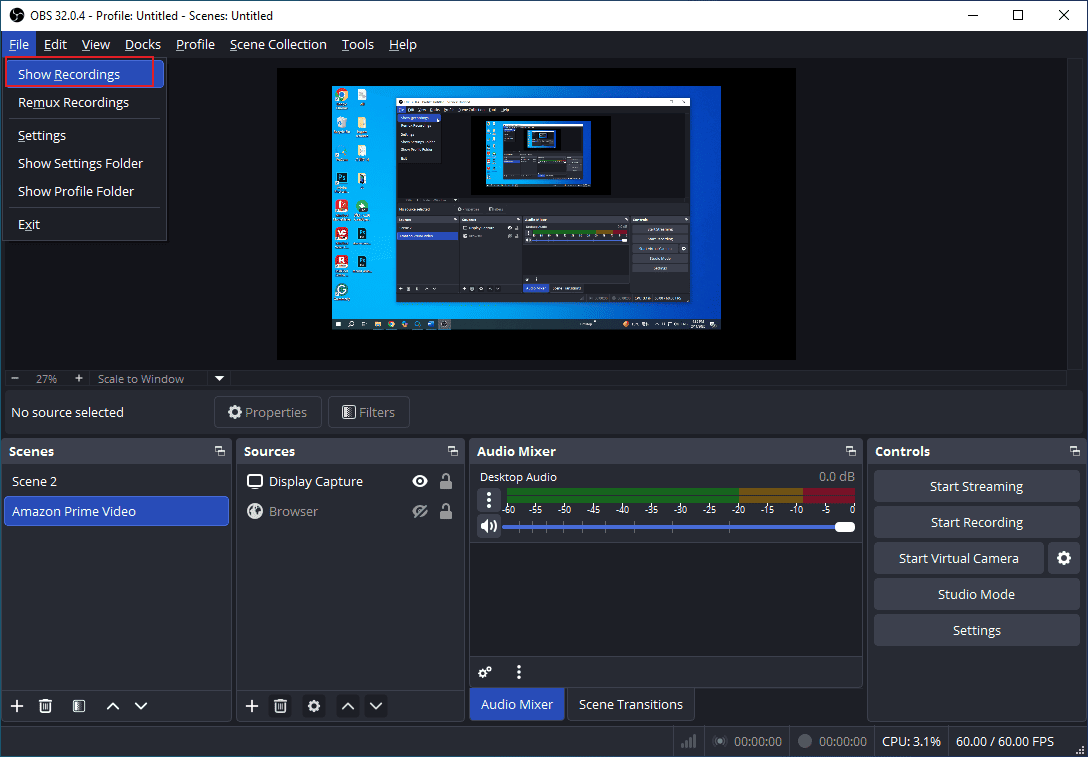
Click Start Recording on the right side of the interface. Play the Amazon Prime Video from the beginning. When finished, click Stop Recording. To find your recording, click File at the top of the menu and click Show Recordings. Then, you can open the recording to preview it.
Since OBS Studio doesn’t offer editing features, you can click the button below to download MiniTool MovieMaker, where you can trim and add other content to make the recording perfect.
MiniTool MovieMakerClick to Download100%Clean & Safe
Conclusion
This post guides you through how to record Amazon Prime Video on Windows using MiniTool Screen Recorder and OBS Studio. If you’re a beginner, MiniTool Screen Recorder is the easier option to start with, while OBS Studio offers more advanced features but is more complex. Select the one that best suits your needs and give it a try!
If you have any suggestions or encounter any problems when using MiniTool Screen Recorder and MiniTool MovieMaker, please don’t hesitate to contact us via support@minitool.com. Also, you can directly share your problems with me on X. I will help you as quickly as possible.