This article explains OBS Studio and the meaning of audio delay. Meanwhile, it explains why there is an audio delay on OBS. More importantly, this post offers you 11 workable OBS audio delay fixes, including updating drivers and hardware, restarting OBS, using an OBS alternative, and more.
Recently, more and more users are complaining that they have encountered audio delay when using OBS. Don’t worry. Read the following content to find out the complete OBS audio delay fixes.
What Is OBS Studio
Also known as Open Broadcaster Software, OBS Studio refers to a free, cross-platform program with an open-source nature. It is widely used for live streaming and video capturing. Furthermore, it allows you to capture, mix, and broadcast videos/audio in real time.
As such, if you want to create gaming tutorials or other content on different platforms like YouTube and Twitch, OBS Studio is an ideal option.
What Is Audio Delay
Audio delay also means the audio latency. Simply put, when you have encountered an audio delay, there is a time gap between the audio you hear and the generation of an audio signal. An audio delay is often measured in milliseconds (ms).
Why Does OBS Audio Delay
Many factors may cause an audio delay on OBS Studio.
Reason 1. Sample Rate Mismatch
Sample rate mismatch sometimes triggers an audio delay on OBS Studio. For example, on condition that you set OBS to 44.1kHz while configuring the microphone/audio interface to 48 kHz, the audio may gradually become out of sync.
Reason 2. USB Device Buffering
Compared with a direct-input audio source, a USB microphone or interface is more likely to generate an inherent, slight latency. Hence, if you want to fix the audio delay on OBS Studio quickly, try unplugging the USB microphone.
Reason 3. Weak CPU/GPU
With a weak CPU/GPU, your computer is unable to process video frames at a speed that matches audio processing. This way, the video will lag behind the audio. In addition, an over-utilized CPU/GPU often leads to encoding/rendering lag. This way, a larger buffer will be created for processing video. Finally, the audio latency will emerge over time.
Reason 4. Outdated Drivers
If the drivers of your PC are outdated, the communication between the operating system and the hardware won’t be managed appropriately. In addition, old drivers need more time to process the audio data. Hence, the audio data may arrive in OBS more slowly than video frames, which finally causes audio delay.
Reason 5. Monitoring Output Conflicts
Monitoring Output conflicts will also cause an audio delay on OBS Studio. Specifically, on condition that your desktop output device is not the monitoring device that you have configured, an audio delay may happen.
Reason 6. Hardware-Accelerated GPU Scheduling (HAGS)
HAGS is a Windows function that will cause an over-utilized GPU. Therefore, if you enabled HAGS, the rendering and encoding of OBS will be slow, which leads to dropping frames. Eventually, you will find that the audio is playing, but the video stalls or lags.
How to fix OBS audio delay? The following content can help.
Fix 1. Restart OBS
Restarting OBS is one of the easiest OBS audio delay fixes that you can try. Such a method helps you to get rid of accumulated buffer errors and reset the audio engine. Therefore, after restarting, it is possible for you to fix the audio delay on OBS.
Fix 2. Update Drivers and Hardware
To ensure that your drivers are not outdated, follow these steps below to update the drivers and hardware.
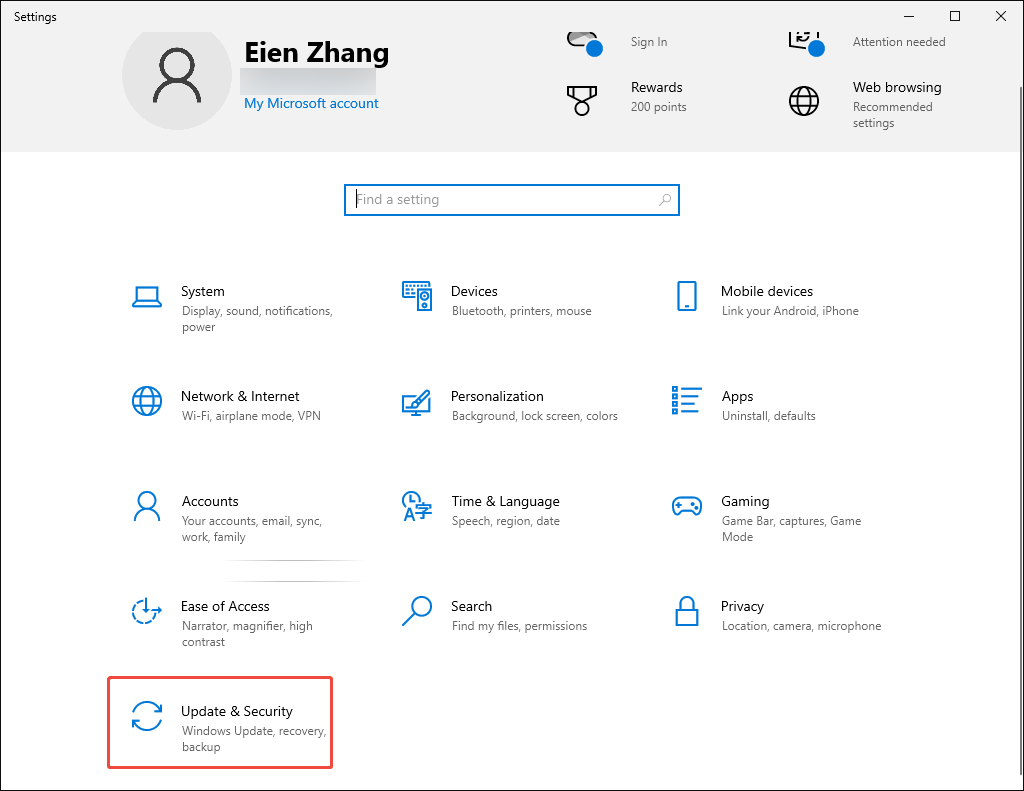
Step 1. Go to the update interface.
Press the Windows + I keys to enter the Settings window. There, click on the Update & Security option to enter the update interface.
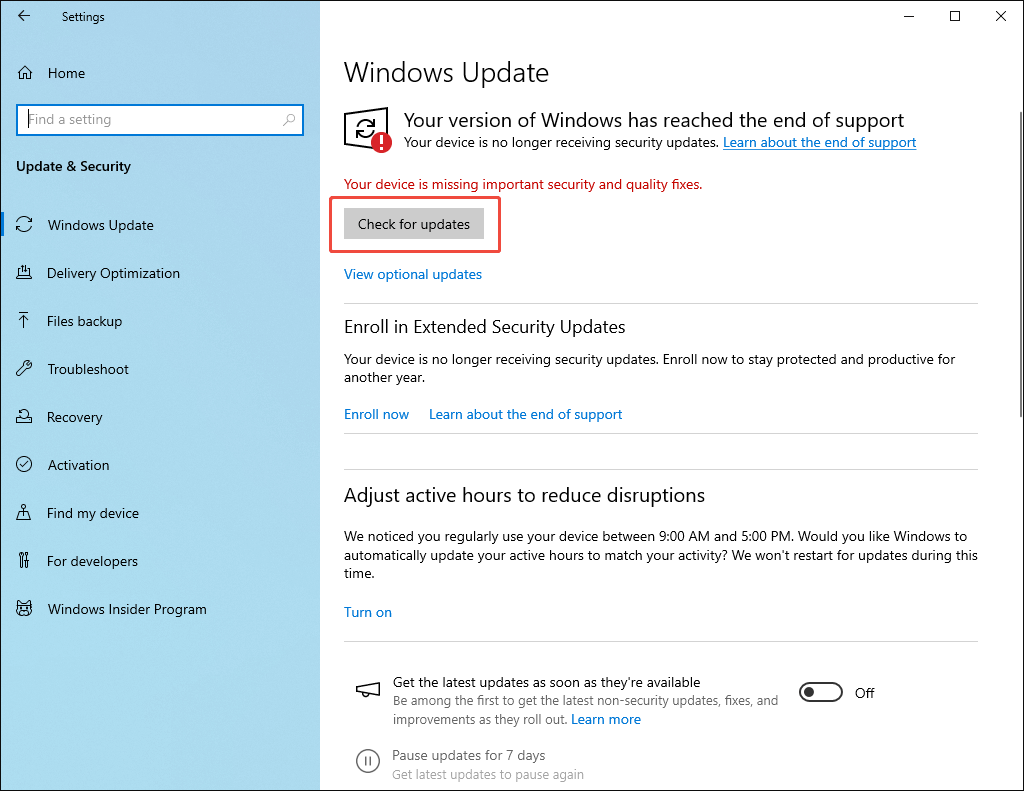
Step 2. Check for the update.
Click on the Check for updates option to check whether the update is available or not. If it is available, follow the on-screen prompts to update the drivers.
With the above-detailed steps, you can update the drivers and hardware to the latest version. Then, check whether this OBS audio delay fix is effective. If this method doesn’t work, try other methods below.
Fix 3. Adjust Audio Offset
OBS Studio features an audio offset function that enables you to manually handle the audio delay. Follow the detailed guidance on how to fix audio delay on OBS.
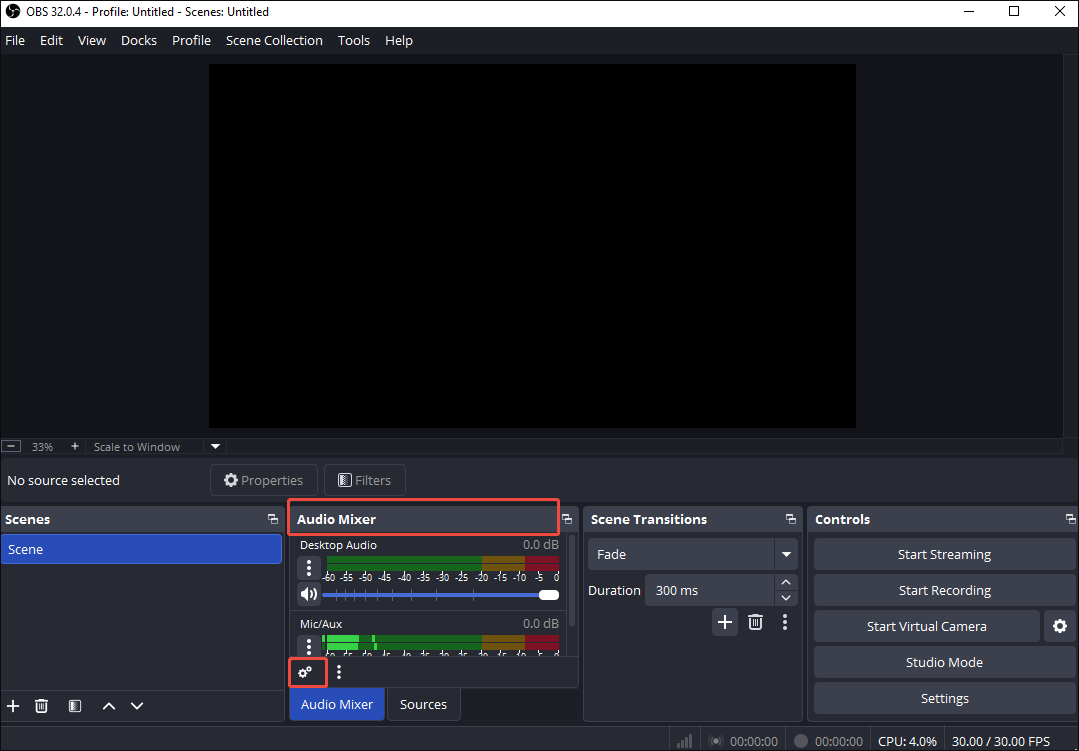
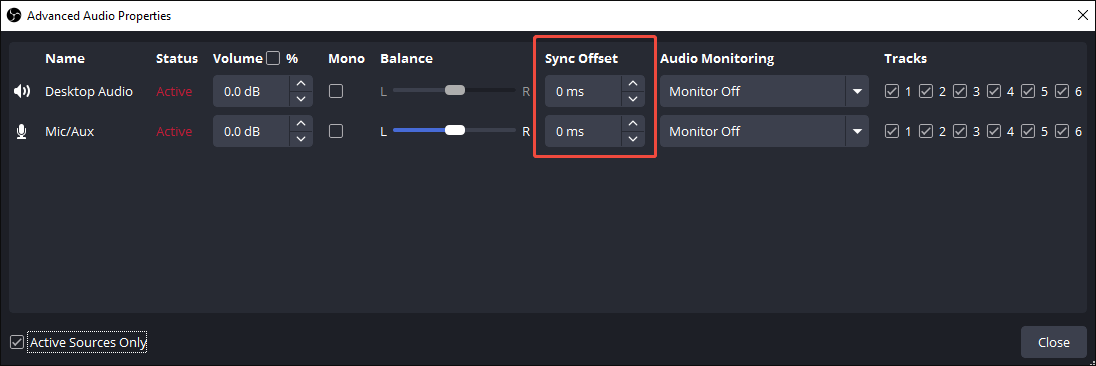
Step 1. Enter the Advanced Audio Properties window.
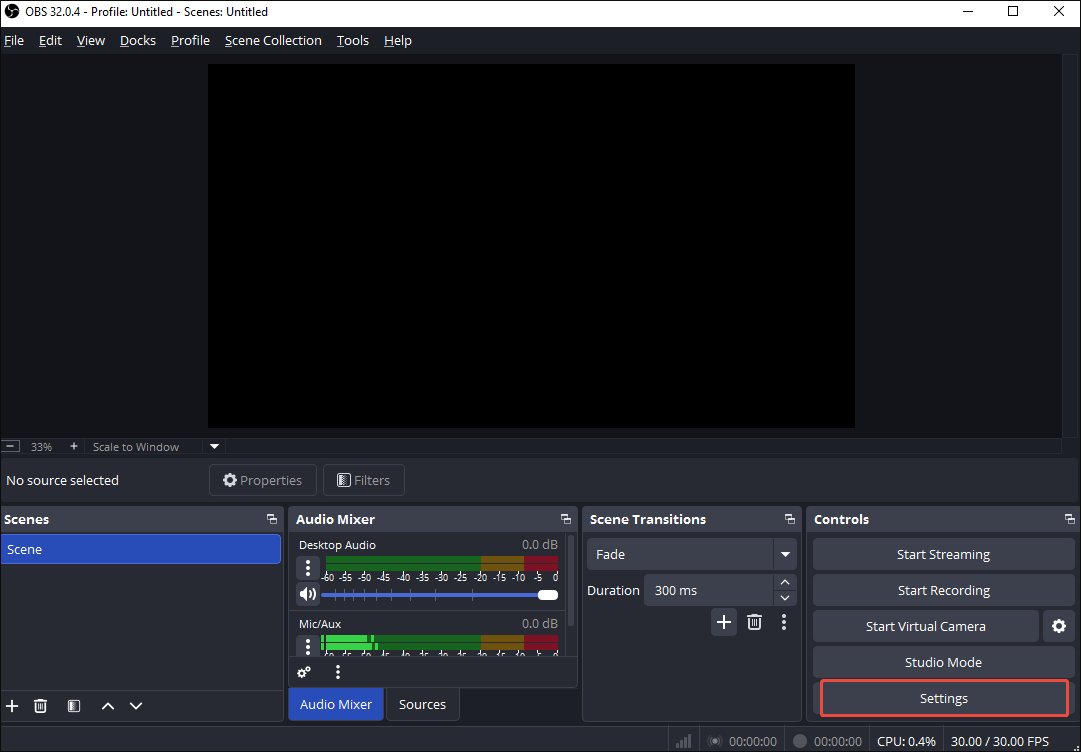
After running the OBS app, navigate to the Audio Mixer section. There, click on the bottom Settings icon to enter the Advanced Audio Properties window.
Step 2. Adjust the audio delay.
Pay attention to the Sync Offset section. Enter a value according to your needs. If the audio is after the video, enter a negative number. On condition that the audio is before the video, enter a positive number.
Step 3. Test the synchronization.
Once you have entered the value, play a recording to check whether the synchronization is accomplished. If not, adjust the value again.
It is believed that adjusting the audio offset can be a workable OBS delay audio fix for you.
Fix 4. Reduce Video Processing Load
The reduction of the video processing load can be a great OBS audio delay fix. Specifically, for a computer whose performance is bad when handling processing and encoding tasks, audio delay is common.
To ensure that your PC can run smoothly, it is necessary for you to shut down the non-essential programs running in the background, lower the video resolution, or change the encoding settings to reduce the workload.
Fix 5. Match Sample Rates
To avoid the sample rate mismatch, follow the instructions below to match the sample rates.
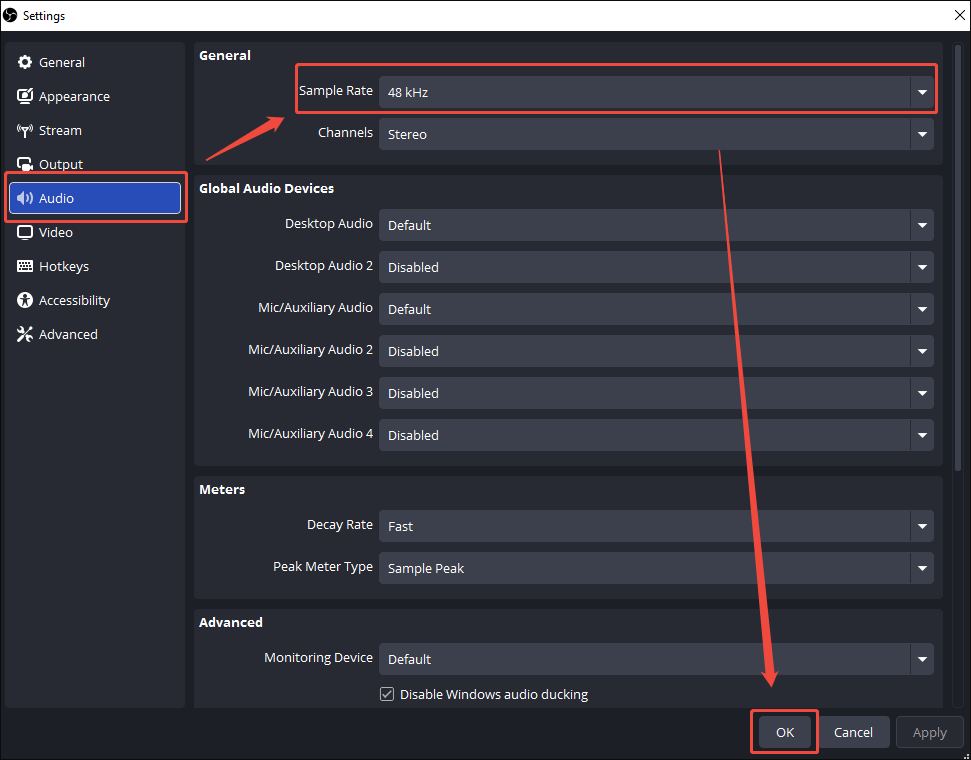
Step 1. Check the OBS sample rates.
After running OBS Studio, click on the bottom-right Settings option to enter the Settings window.
Switch to the Audio tab. There, expand the Sample Rate option and choose 48 kHz.
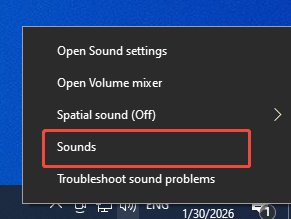
Step 2. Configure the Windows sample rate.
Right-click on the Speaker icon on the bottom taskbar and select the Sounds option.
Under the Playback tab of the Sound window, right-click on the speakers and choose Properties
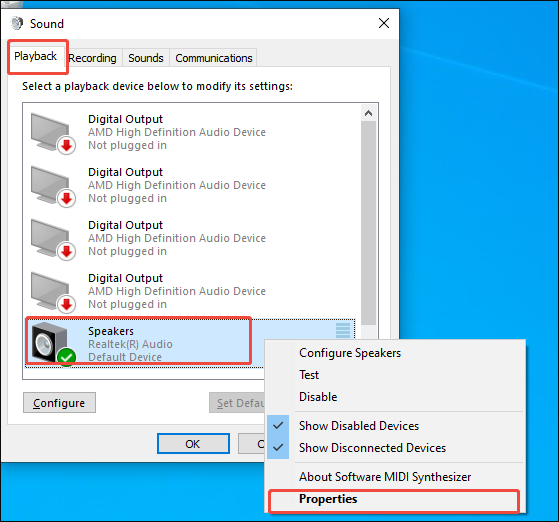
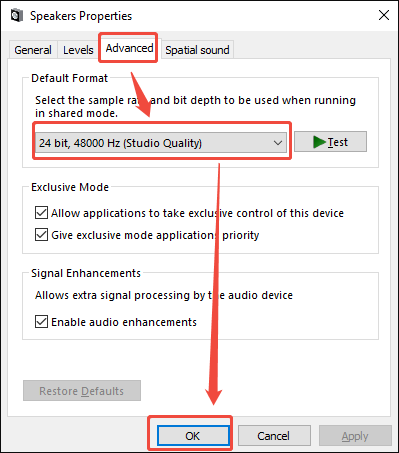
In the Speaker Properties window, navigate to the Advanced section. There, configure the sample rate as 48 kHz and click on the OK button to save the changes.
Currently, you have matched the sample rates. Check whether the audio delay on OBS has been fixed.
Fix 6. Try Audio Sync Tools
Some audio sync tools can automatically analyze and fix the audio delay. These OBS audio delay fixes include SyncOffset, VoiceMeeter Banana, and more. Please select one tool based on your preference.
Fix 7. Run OBS as Administrator
Running OBS as an administrator enables Windows to offer OBS higher priority. This way, sufficient CPU/GPU resources can be applied by OBS for real-time audio/video processing. Below is a step-by-step guide on how to run OBS as an administrator.
Step 1. Enable the option menu
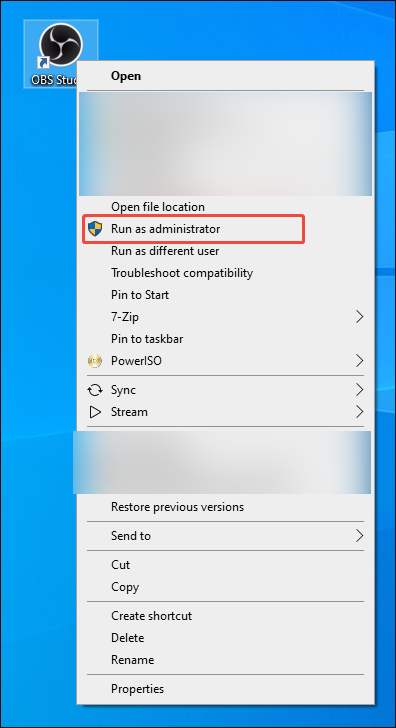
Right-click on the shortcut of OBS on the desktop to access the option menu.
Step 2. Run OBS as an administrator.
In the option list, choose the Run as administrator option.
Once the OBS is opened, play a recording to check whether the audio delay issue has been fixed or not. In addition, if you want to know how to fix game audio delay on OBS, this method is also helpful.
Fix 8. Disable HAGS
To avoid the negative influence of HAGS, follow the tutorial below to disable it.
Step 1. Enter the Settings window.
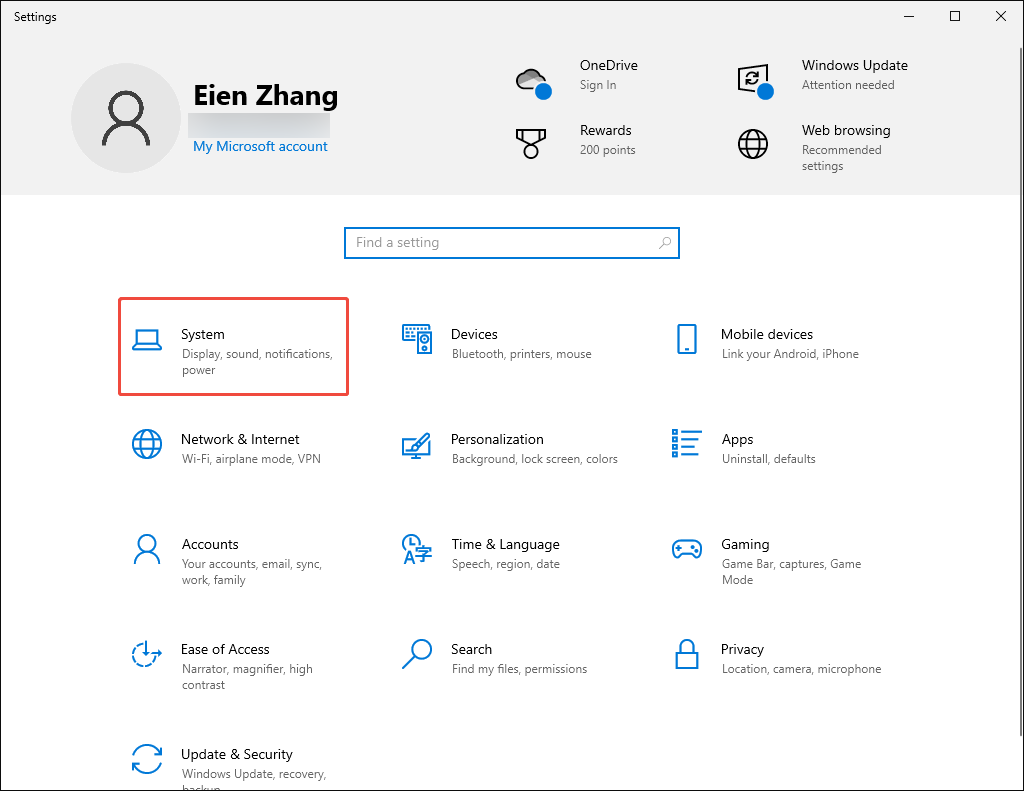
Press the Windows + I keys to enter the Settings interface. There, click on the System option.
Step 2. Access the Graphics settings interface.
Under the Display section, click on the Graphics settings option to enter the next page.
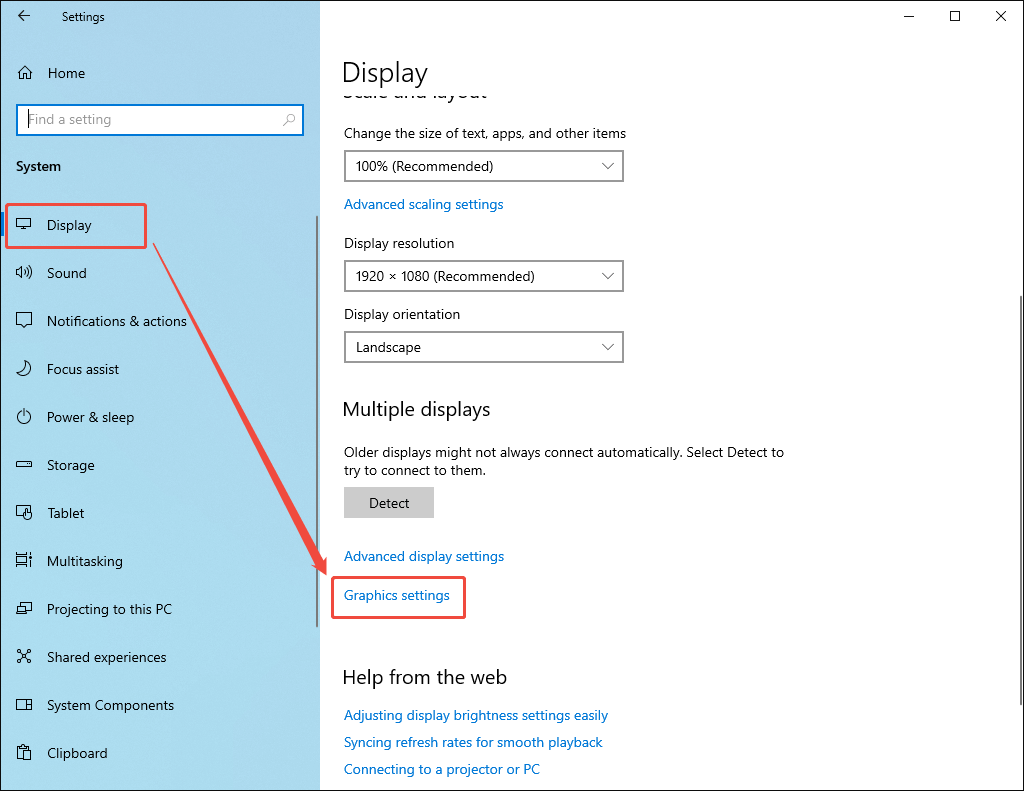
Step 3. Disable HAGS.
Turn off the Hardware-accelerated GPU scheduling option.
Check whether this OBS audio delay fix is workable.
Fix 9. Change the Monitoring Device
Follow the guidance below to handle the monitoring output conflicts.
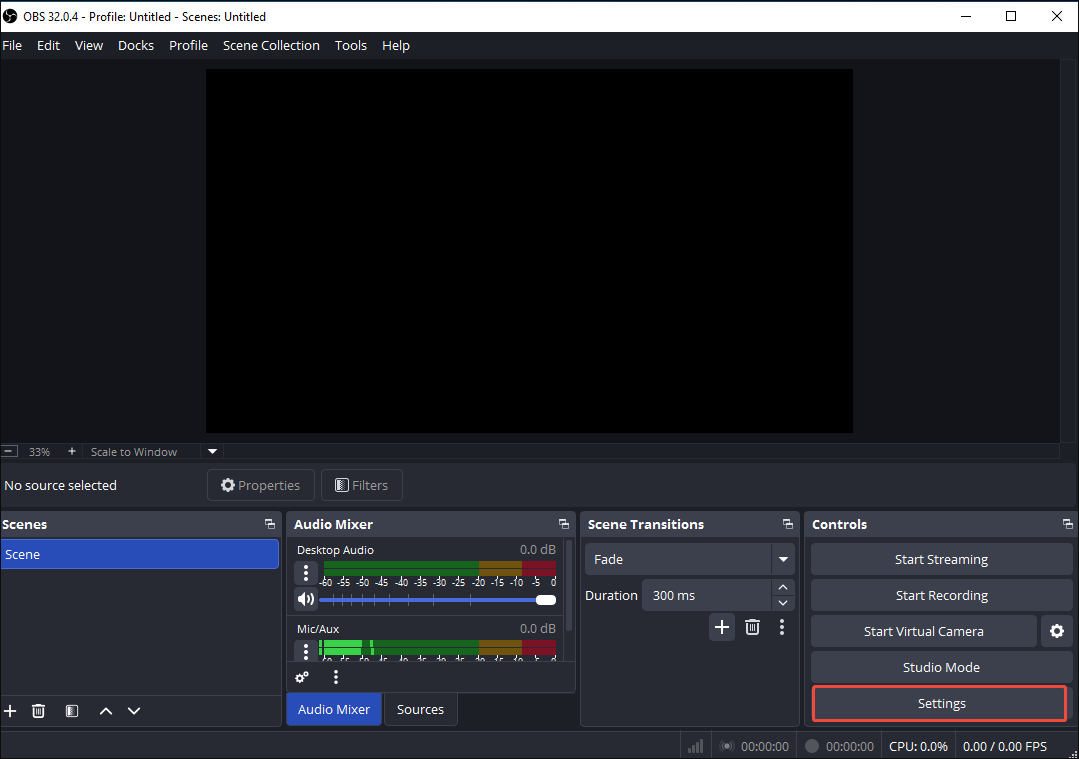
Step 1. Go to the Settings interface of OBS.
After launching OBS, click on the bottom-right Settings option to enter the Settings window.
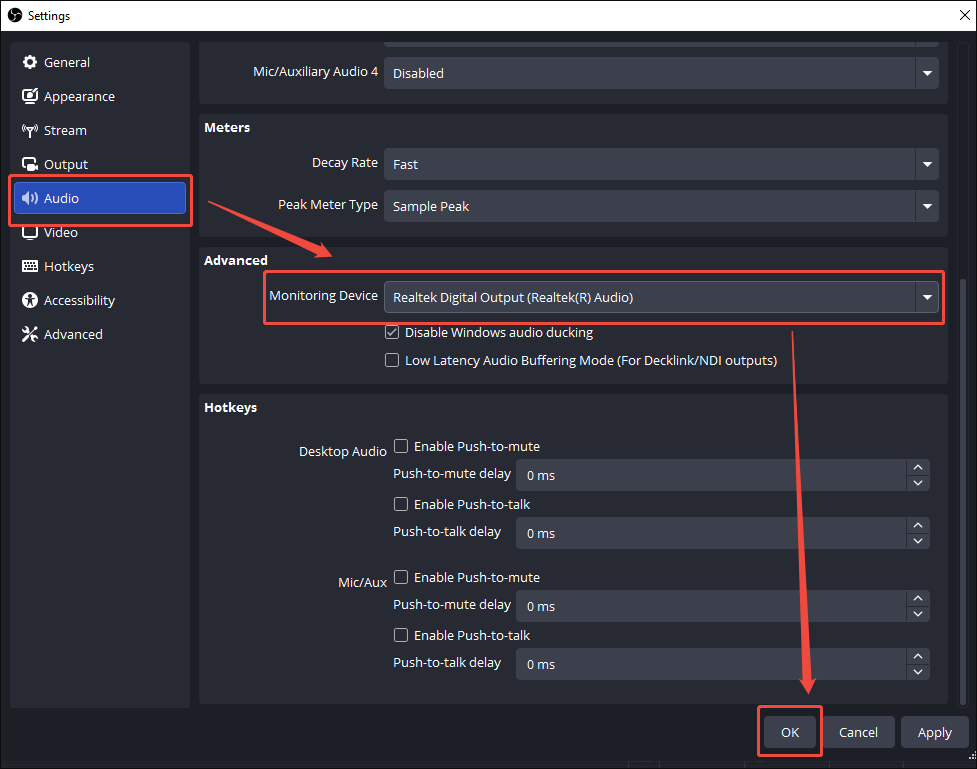
Step 2. Change the monitoring device.
Switch to the Audio tab. There, scroll down to the Advanced section. Then, expand the Monitoring Device option. Change the monitoring device from Default to the specific audio interface or headphones you are using. Finally, click on OK to save the changes.
With the above-detailed steps, you can handle the conflicts effortlessly.
Fix 10. Use an OBS Alternative for Screen Recording
If the methods above are all ineffective and you want to record your screen with simple clicks, try using an OBS alternative. Here, I highly recommend MiniTool Screen Recorder.
What Is MiniTool Screen Recorder
MiniTool Screen Recorder is a watermark-free, feature-rich application that enables you to capture a wide range of computer activities, including gameplay videos, video calls, online courses, and more. More importantly, it allows you to record the PC audio without hassle. In addition, MiniTool Screen Recorder supports webcam recording.
More importantly, MiniTool Screen Recorder empowers you to annotate your screen with various elements, helping you to grasp the key points effortlessly. Plus, it doesn’t require any payment for the screen recording function. Moreover, MiniTool Screen Recorder is a screen recorder without time limits.
How to Record the Screen with MiniTool Screen Recorder
Below are the detailed instructions on how to record your screen using MiniTool Screen Recorder.
Step 1. Download and install MiniTool Screen Recorder.
MiniTool Screen RecorderClick to Download100%Clean & Safe
Download MiniTool Screen Recorder by clicking on the download button above. Then, follow the on-screen instructions to install this OBS alternative on your PC.
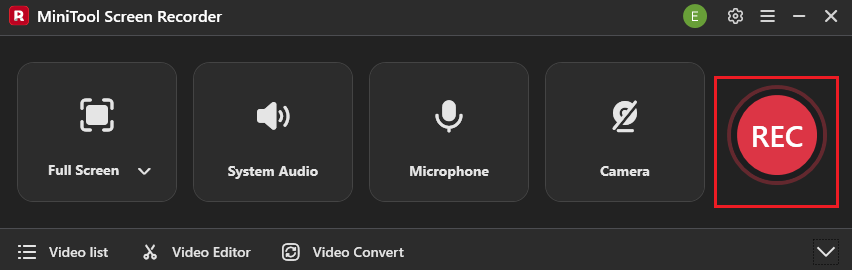
Step 2. Select the recording area and manage the audio recording.
MiniTool Screen Recorder will capture the whole screen by default. If you want to customize the recording region, press the Alt + R keys and make a choice. Then, click on the System Audio icon and the Microphone icon to turn on/off the recording of system and microphone sounds.

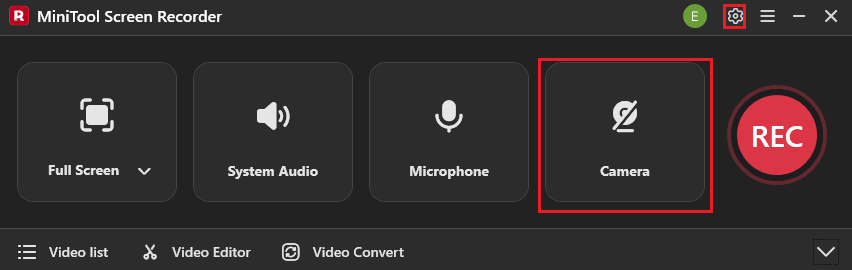
Step 3. Enable webcam recording and configure other recording settings.
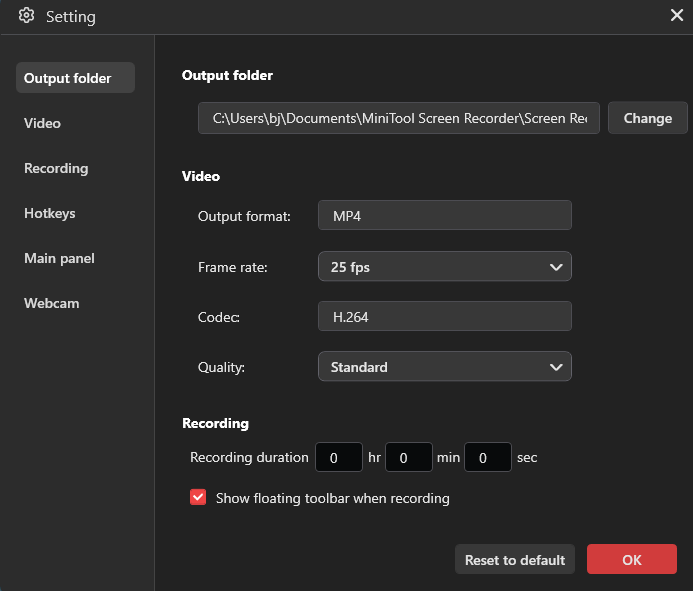
Click on the Camera icon to enable the webcam recording function. Then, click on the upper-right Settings icon to enter the Settings window.
In the Settings window, you can select a destination folder for the recorded videos. Meanwhile, you can specify the frame rate for recording as 15fps, 20fps, 25fps, 30fps, or 50fps. In addition, you are free to set the recording quality as Standard, High, or Original. Finally, click on the bottom-right OK button to save the changes.
Step 4. Start/end recording and check the recorded file.
Begin the recording process by clicking on the REC button. After a 3-second countdown, play the computer activity that you want to record. When the recording process finishes, end it by pressing the F6 key.
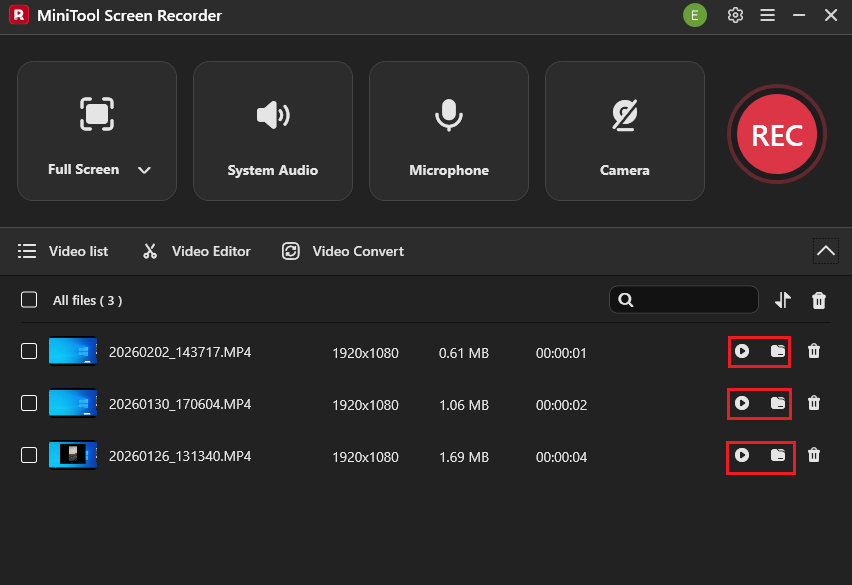
In the expanded file list, click on the Play icon to view the recorded videos. If you want to locate them, click on the Folder icon.
MiniTool Screen Recorder is a fabulous OBS alternative for screen recording.Click to Tweet
With the above-detailed steps, you can capture the screen easily and quickly. Meanwhile, MiniTool Screen Recorder will automatically save the recordings in the MP4 format, which facilitates your video sharing, editing, or playback. Even if you want to record a webinar, this application can satisfy your needs.
Bonus: How to Edit the OBS Recordings
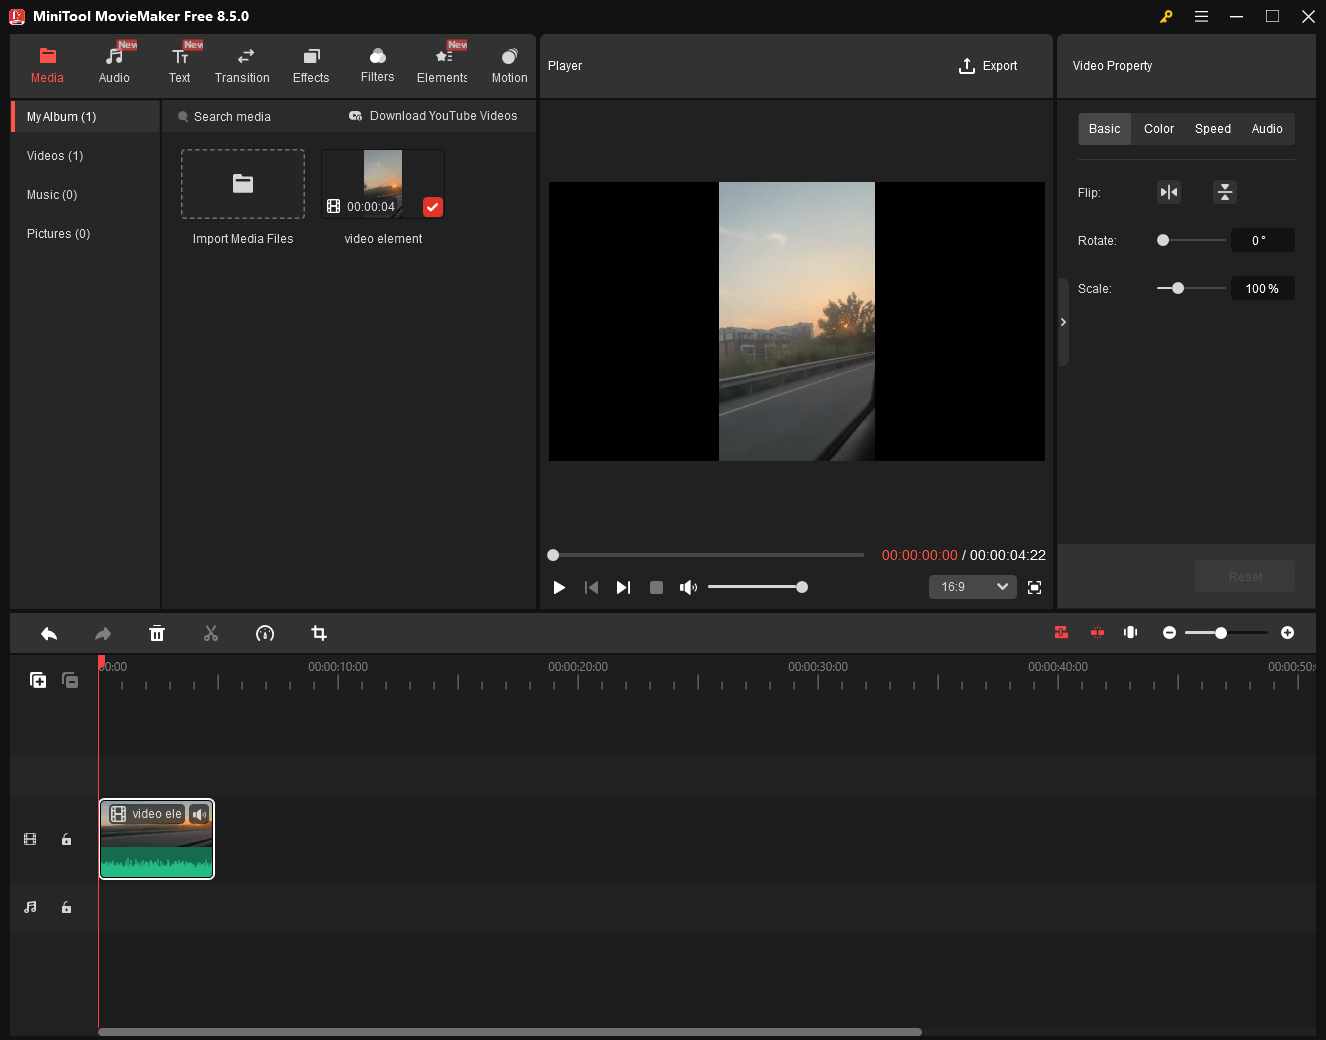
If you want to edit the OBS recordings, MiniTool MovieMaker can help. It is a remarkable video editor that enables you to trim, merge, flip, rotate, reverse, crop, or speed up your screen recording.
In addition, MiniTool MovieMaker empowers you to change the volume and aspect ratio effortlessly. What’s more, it enables you to add various elements, including motions, transitions, filters, effects, captions, and more. Besides, MiniTool MovieMaker can save your recordings in multiple formats, such as MP4, MKV, WMV, GIF, MP3, and more.
MiniTool MovieMakerClick to Download100%Clean & Safe
To Wrap Things Up
Many factors, including sample rate mismatch, USB device buffering, and more, will cause an audio delay. This article has summarized 10 OBS audio delay fixes for you, such as restarting OBS, updating the drivers and hardware, using an OBS alternative: MiniTool Screen Recorder, and more.
If you have encountered any problems when using MiniTool Screen Recorder or MiniTool MovieMaker, you can send an email to support@minitool.com to ask for help. Also, you can directly share your problems with me on X. I will help you as quickly as possible.