

As a gamer, I frequently search for walkthroughs and guides on various social media platforms, a habit that led me to discover several creators I really enjoy.
I eventually realized that I, too, could earn an income by posting exciting gameplay clips or tutorial videos. Consequently, I began looking for the best way to record gameplay on PC and discovered that using a high-quality screen recorder makes the entire process easy.
How Do You Record Gameplay on PC
After some searching and testing, I ultimately chose the PC game recorder MiniTool Screen Recorder and the built-in Xbox Game Bar for game recording.
Quick Comparison:
| Feature | MiniTool Screen Recorder | Xbox Game Bar |
| Ease of Use | Yes | Yes |
| Recording Area | Full screen, specific area, window, game, other monitors | Game and app window |
| System Audio | Yes | Yes |
| Microphone | Yes | Yes |
| Webcam Overlay | Yes | No |
| Screen Annotation | Yes | No |
| Recording Time | No recording time limit | No more than 4 hours |
Fast Track Steps:
- Configure the recording settings.
- Launch the recording tool.
- Open the game.
- Manage the audio and webcam recording features.
- Start recording.
- Play the game.
- End the recording process and check the recorded game video.
Option 1: Use MiniTool Screen Recorder
MiniTool Screen Recorder is a free game screen recorder for PC. It offers various recording area options, including full screen, specific regions, windows, and games; notably, the game recording mode can automatically detect game windows.
Additionally, the application features a built-in webcam function that allows users to add a webcam overlay while recording. Furthermore, the tool provides annotation features for highlighting key information within the recording. Moreover, MiniTool Screen Recorder allows you to change the frame rate before recording, up to a maximum of 60 fps.
1. Click the button below to download and install MiniTool Screen Recorder. Then, launch it on the PC.
MiniTool Screen RecorderClick to Download100%Clean & Safe
2. Open the game that needs to be recorded on the PC.
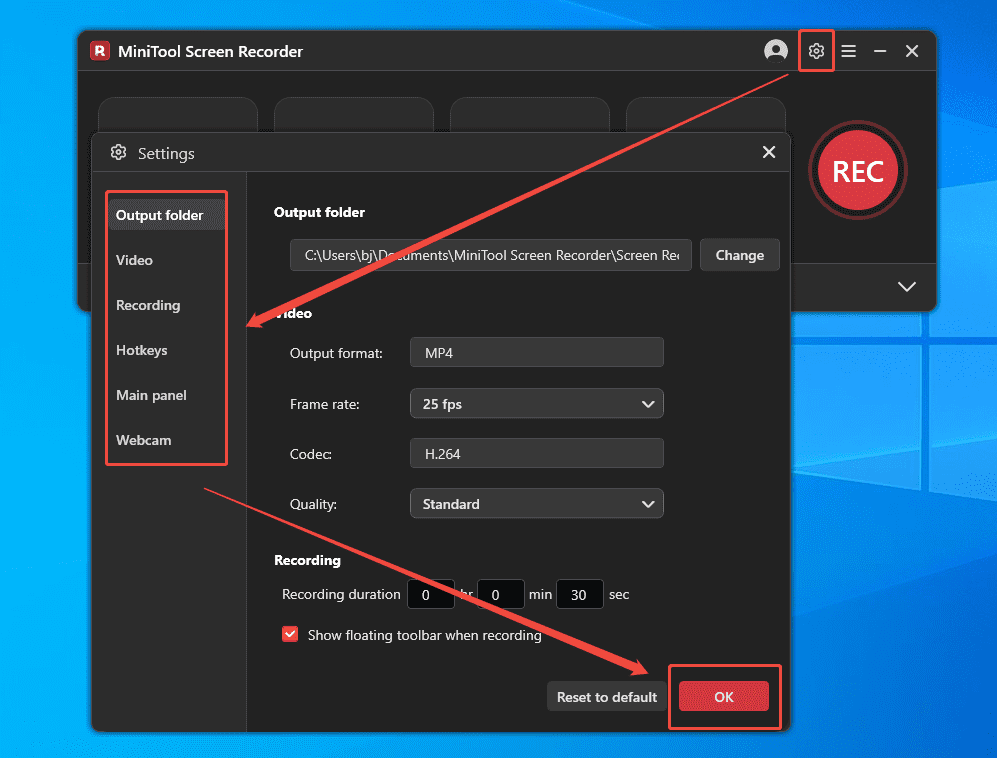
3. In the MiniTool Screen Recorder main interface, click the Settings icon. Then, in the new interface, configure the recording settings in the relevant sections, such as frame rate, quality, hotkeys, webcam parameters, and so on. To save the changes, click the OK button.
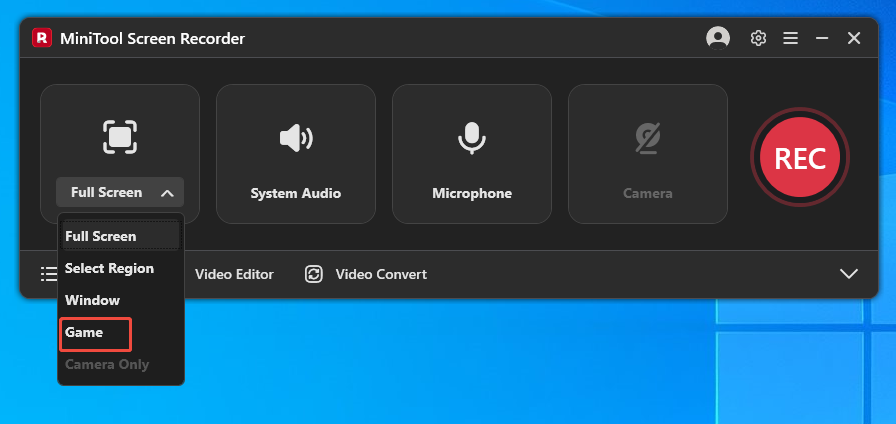
4. This tool will automatically select the entire screen as the recording mode. To easily capture the game, expand the Full Screen option, then choose the Game option.
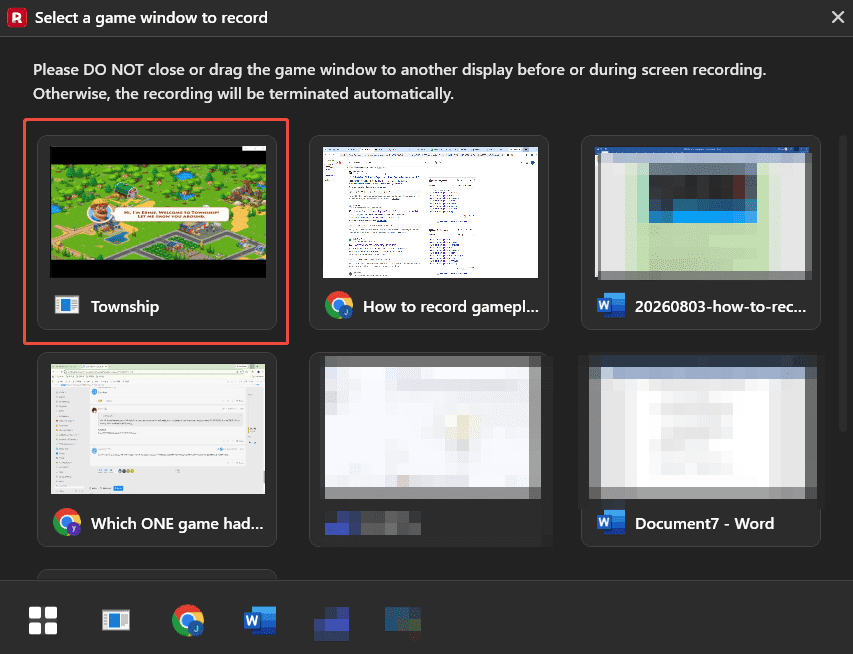
5. In the pop-up window, choose the target game window.
6. To capture both system audio and microphone input, please ensure the audio recording function is enabled. If there is a need to add a webcam overlay while recording gameplay, simply click the Camera icon on the floating bar.
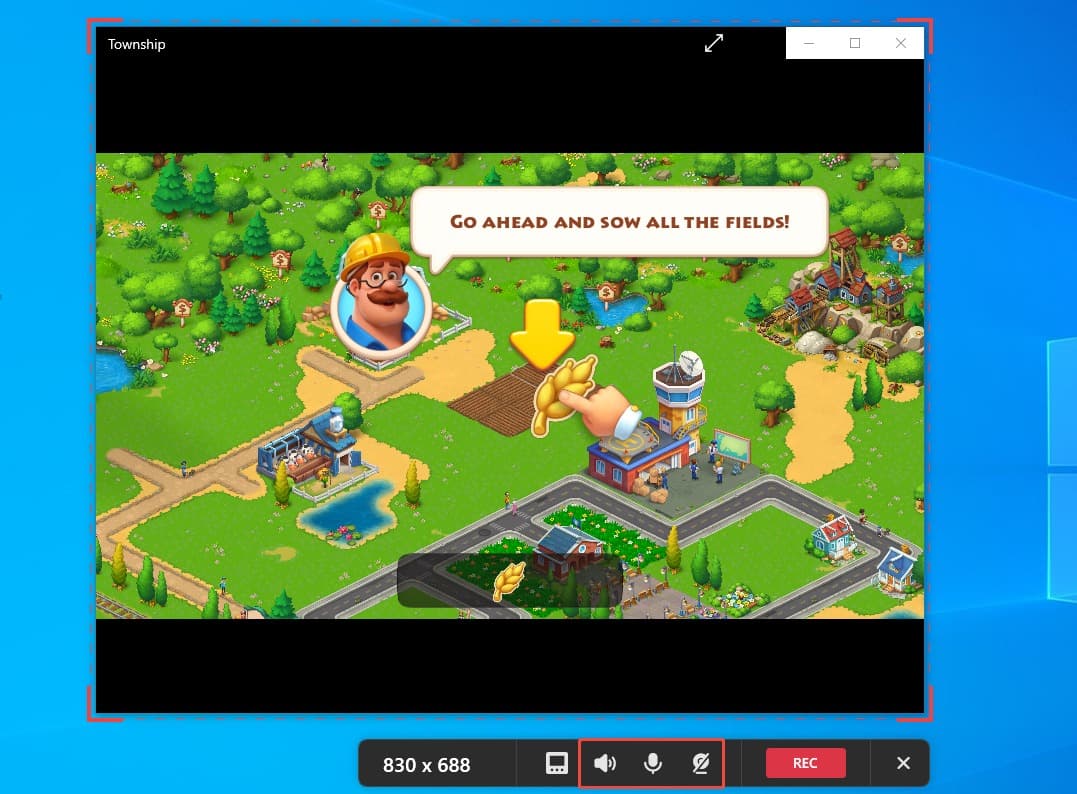
7. To start recording the gameplay, click the REC button on the floating bar. After a 3-second countdown, play the target game.
8. During gameplay, I usually use the annotation tools on the right side of the screen to mark key operational steps.
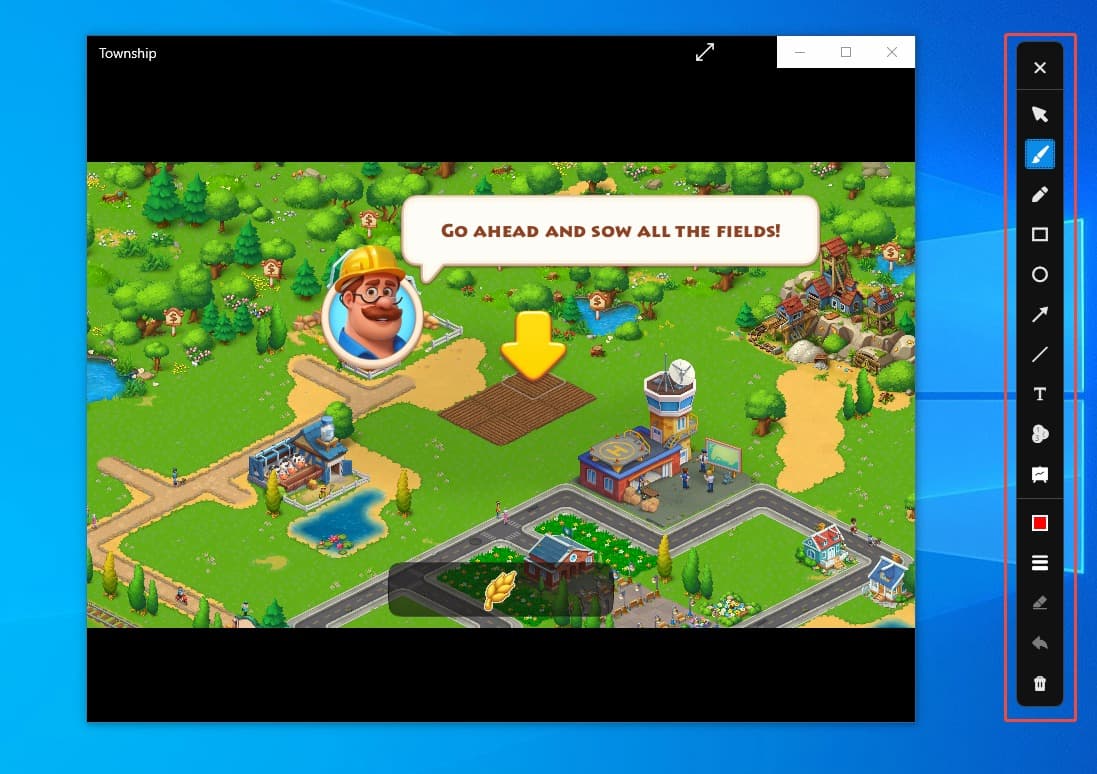
9. To end the recording process, press the F6 key. Then, the tool will switch to the Video list section. Click the Play icon to view the recorded game video and click the Folder icon to locate the recording file on the PC.
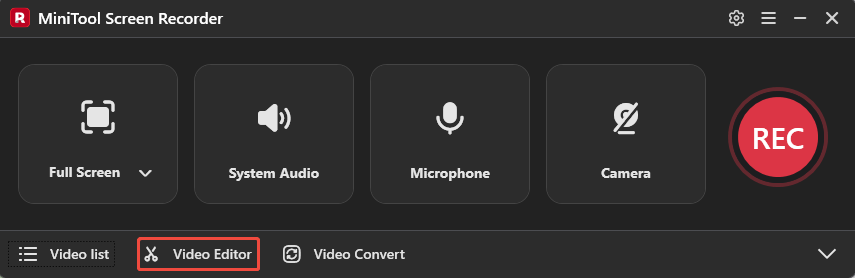
10. Finally, I always click the Video Editor option to use the bundled tool, MiniTool MovieMaker, to edit the recorded gameplay videos.
MiniTool MovieMakerClick to Download100%Clean & Safe
MiniTool Screen Recorder is ideal for users with demanding game recording needs. However, to meet my occasional need for quick game recordings, I also opted for the Xbox Game Bar.
Option 2: Use the Xbox Game Bar
Xbox Game Bar is a built-in recording tool for Windows that allows users to quickly access recording functions by pressing Windows + G. It supports both automatic and manual recording: the former automatically captures the last 30 seconds of gameplay in the background, while the latter enables manual recording of longer videos.
Moreover, the Xbox Game Bar allows users to display frame rate performance while gaming, enabling them to monitor the game's smoothness. Here are the steps on how to record gameplay on PC with the Xbox Game Bar.
1. Press Windows + I to open Windows Settings. Move to the Gaming module. Under the Captures section, adjust the maximum recording time within the Maximum recording length section.
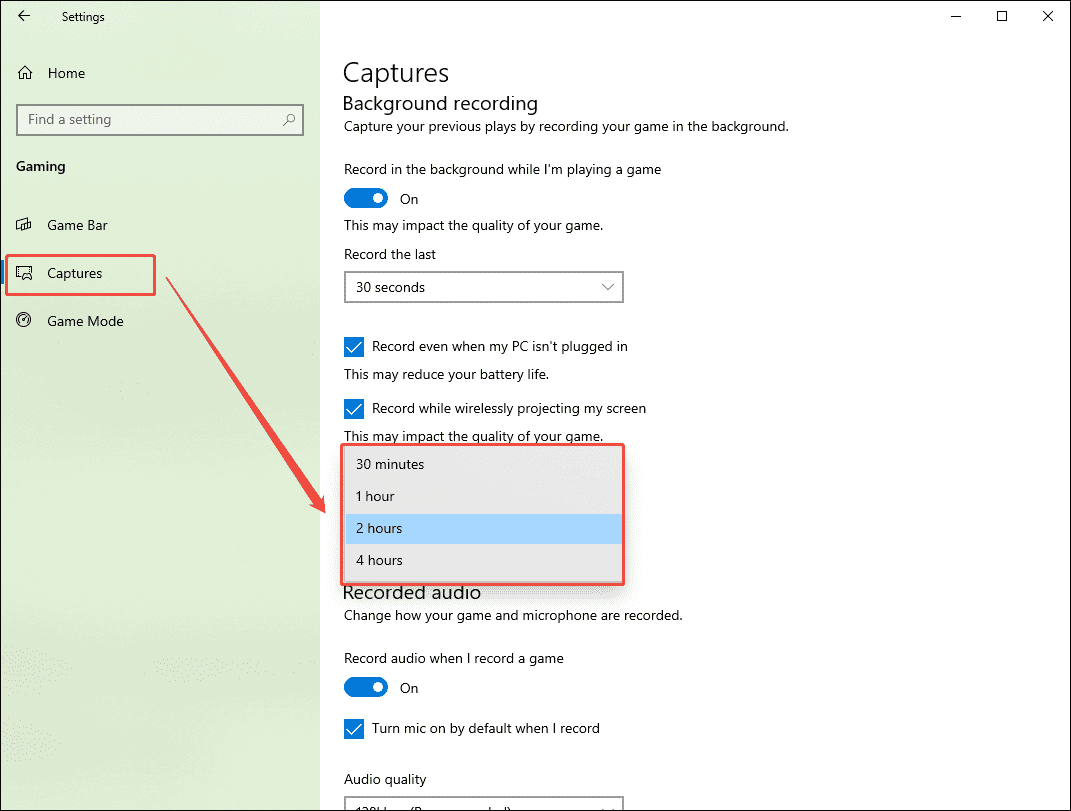
2. Open the game.
3. Press Windows + G to launch the Xbox Game Bar.
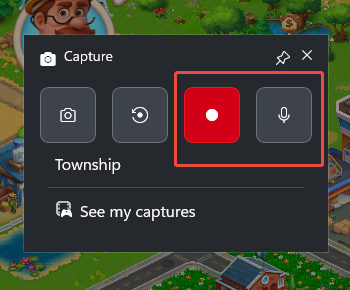
4. In the Capture panel, make sure the Microphone recording feature is enabled by default. Then, click the Start recording icon or press Windows + Alt + R to begin recording.
5. Play the target game.
6. To end the recording process, press Windows + Alt + R again. Finally, check the recorded game video under the See my captures section.
In short, both tools are excellent for capturing PC gameplay. The former is geared towards users seeking advanced features, while the latter is better suited for those who need to record quickly.
Bottom Line
This article explains how to record gameplay on PC using MiniTool Screen Recorder and Xbox Game Bar. The former offers greater flexibility in game recording to meet diverse content creation needs, while the latter provides a built-in solution for quick recording.
If you encounter any questions when using MiniTool Screen Recorder or MiniTool MovieMaker, send an email to support@minitool.com.