

Xbox Game Bar is a built-in Windows recording tool that I use frequently. However, while recording a long video some time ago, the recording suddenly stopped. I later discovered that I had set the maximum recording duration to 30 minutes. To avoid this issue in the future, I looked into the relevant settings and have summarized them below.
Windows 10 includes a native gameplay recording feature called Game Bar that performs quite well at times and is relatively easy to use. https://www.pcworld.com/article/402801/game-bar-for-windows-10-review.html
How Long Can I Record with Xbox Game Bar
The Xbox Game Bar record time limit varies depending on the recording mode. The tool offers two recording modes:
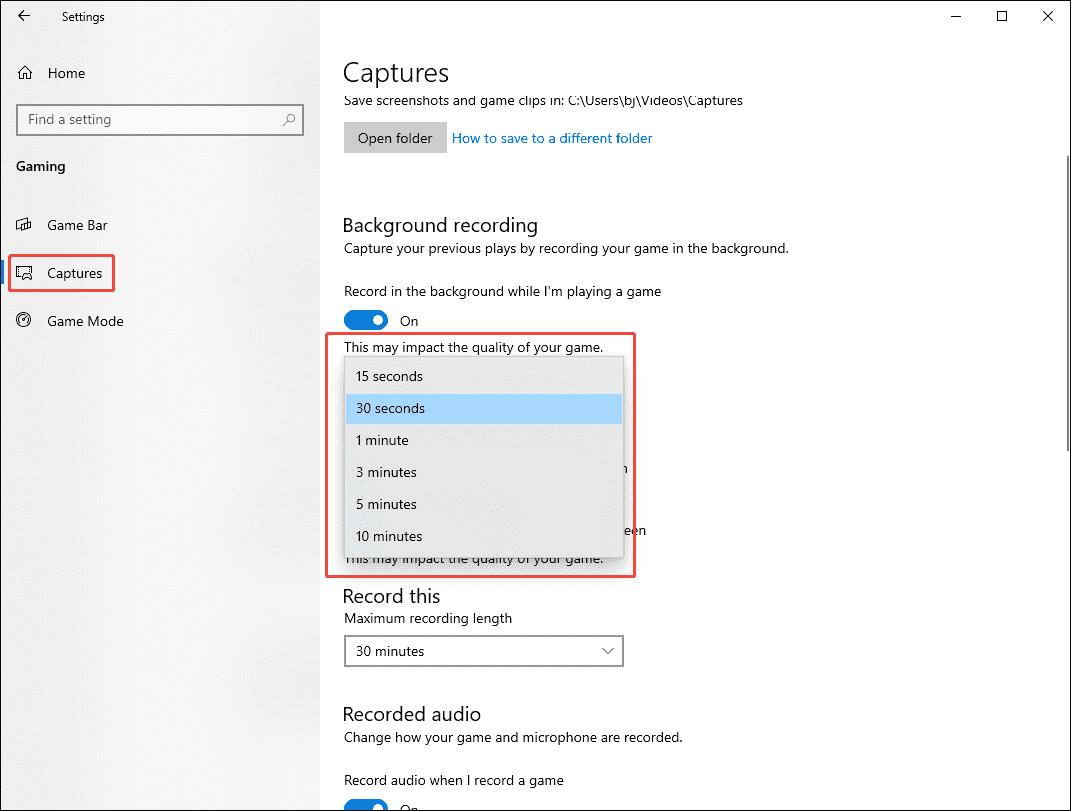
- Automatic recording mode: This mode refers to Xbox Game Bar recording the last 30 seconds, 1 minute, 5 minutes, or similar intervals of screen activity in the background. The maximum recording duration is 10 minutes.
- Manual recording mode: In manual mode, users need to control the recording process using keyboard shortcuts. By default, Windows sets the maximum Xbox Game Bar recording time to 2 hours, but users can manually extend this up to a maximum of 4 hours.
In short, the Xbox Game Bar has a maximum recording duration of 10 minutes in automatic mode, while manual recording mode allows for 4 hours.
How to Change Xbox Game Bar Recording Length
As mentioned above, the Xbox Game Bar maximum recording length can be manually adjusted. The following sections describe how to adjust the recording time for the two recording modes:
Fast Track Steps:
- Launch Windows Settings.
- Switch to the Gaming section.
- Click the Captures option.
- Adjust the automatic recording mode time limit under the Background recording section.
- Change the manual recording mode time limit under the Record this section.
#1 In Background Recording Mode
The recording duration in automatic mode can be changed directly via Windows Settings.
1. Press the Windows + I keys to open the Windows Settings interface.
2. Then, click the Gaming option in the main interface.
3. Move to the Captures option.
4. Under the Background recording section, check the Record in the background while I’m playing a game option.
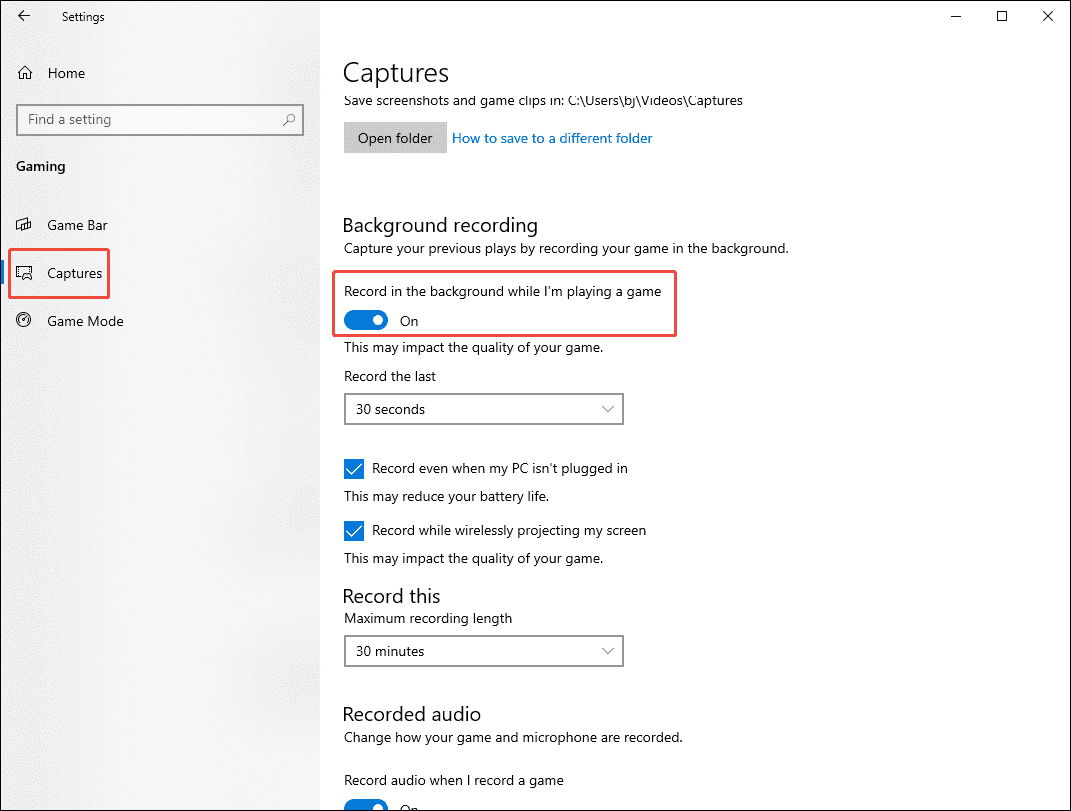
5. Then, scroll down the screen to the Record the last option. Expand the option and choose the recording time based on the specific needs.
#2 In Manual Recording Mode
The recording duration for the Xbox Game Bar in manual recording mode can also be changed in the Captures section of Windows Settings.
1. Under the Captures section, move to the Record this section.
2. Expand the Maximum recording length option.
3. Then, choose the maximum recording length according to the specific needs.
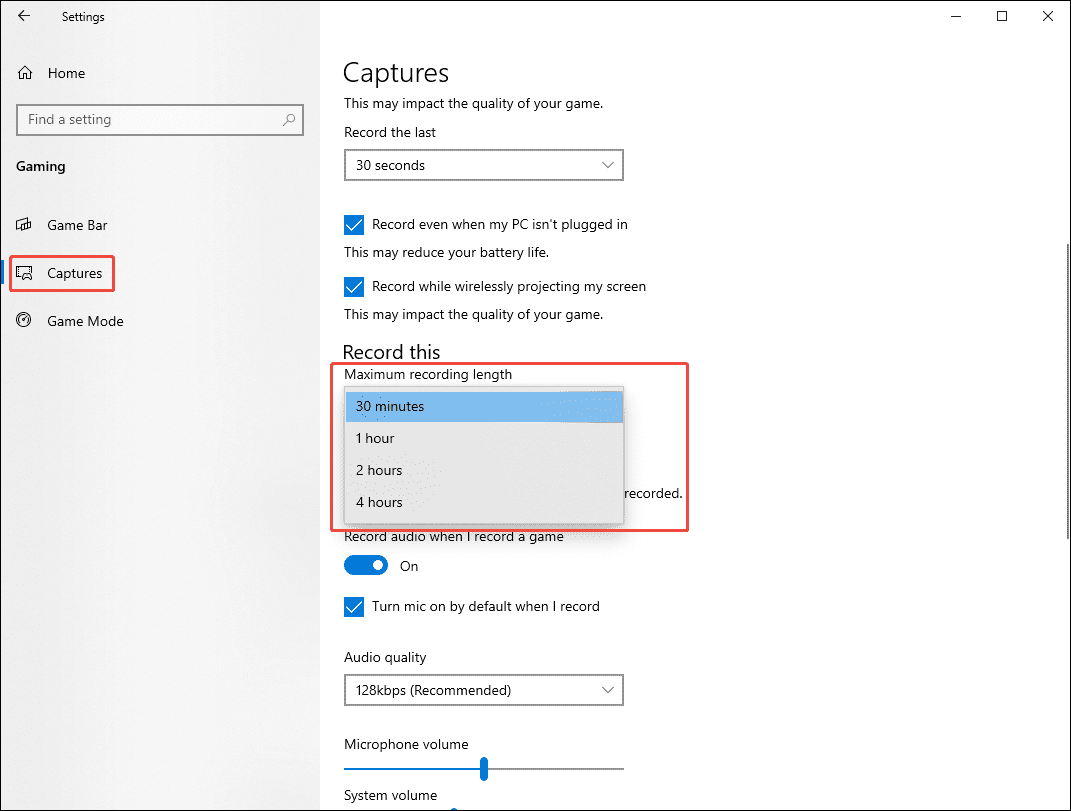
In short, the maximum recording time for the Xbox Game Bar is 4 hours. Once this limit is exceeded, the Xbox Game Bar will automatically stop recording and save the files to the default location. Therefore, to record more than 4 hours of video, a third-party video recorder is required.
How Can I Record More Than 4 Hours
I often need to record lengthy videos, such as online meetings, online courses, and live streams. In these situations, Xbox Game Bar can no longer meet my recording needs. As such, I often use the free screen recording tool MiniTool Screen Recorder.
This tool not only supports unlimited recording time but also offers a variety of recording options. For example, it can record all desktop activity, webcam footage, system audio, and microphone audio. In addition, this application has a built-in annotation tool, which allows me to create more sophisticated tutorial videos.
Fast Track Steps:
- Launch MiniTool Screen Recorder.
- Set the recording time under the Settings section.
- Select the recording mode under the Full Screen option.
- Control the audio and webcam recording features.
- Start recording and annotate the screen.
- End the recording process and check the recorded video.
- Edit the recorded video.
1. Click the button below to get MiniTool Screen Recorder, then launch it on the PC.
MiniTool Screen RecorderClick to Download100%Clean & Safe
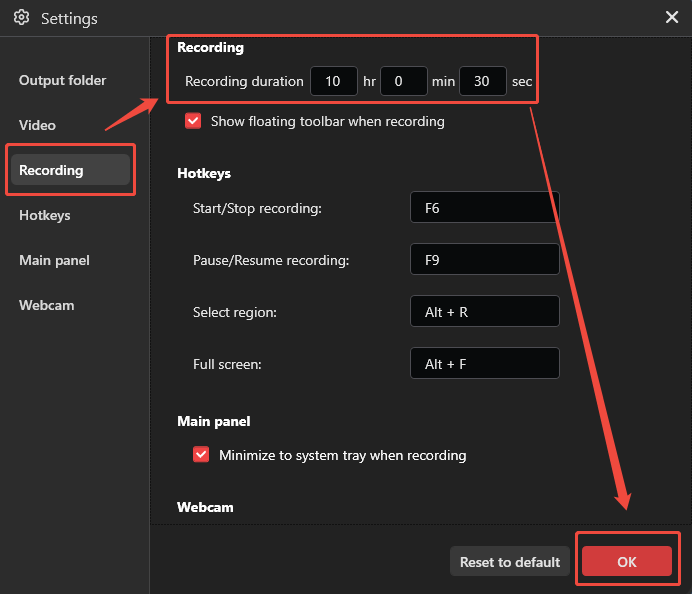
2. Click the Settings icon in the top-right corner of the main interface, then navigate to the Recording section. Set the recording time in the box based on the specific needs. Finally, click OK to save it.
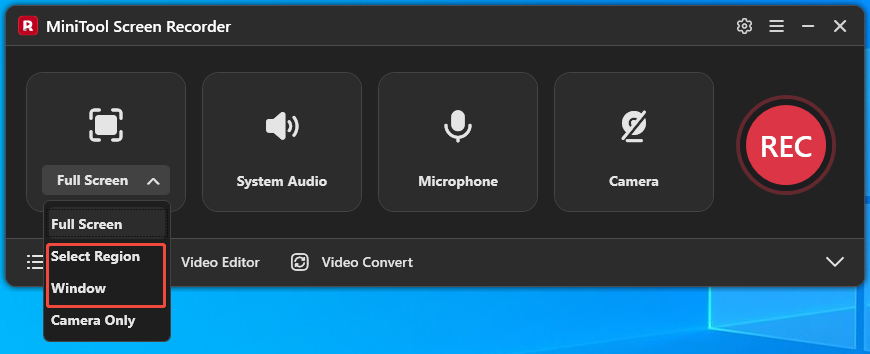
3. If there is a need to capture the entire screen, simply use the tool's default recording options. However, to capture the specific region or window, expand the Full Screen option, then choose the Select Region or Window options.
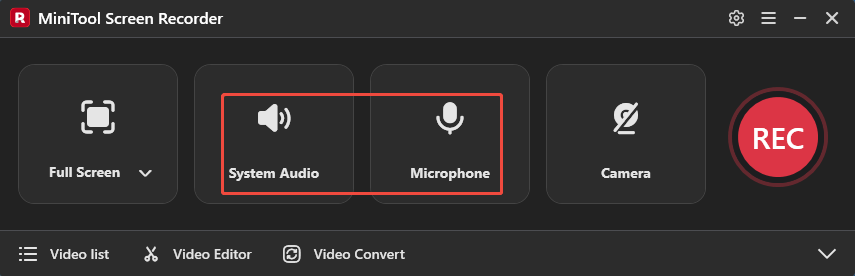
4. The system audio and microphone recording functions are enabled by default. To disable them, click the relevant icons.
5. If there is a need to capture the screen with the webcam footage, click the Camera icon on the right.
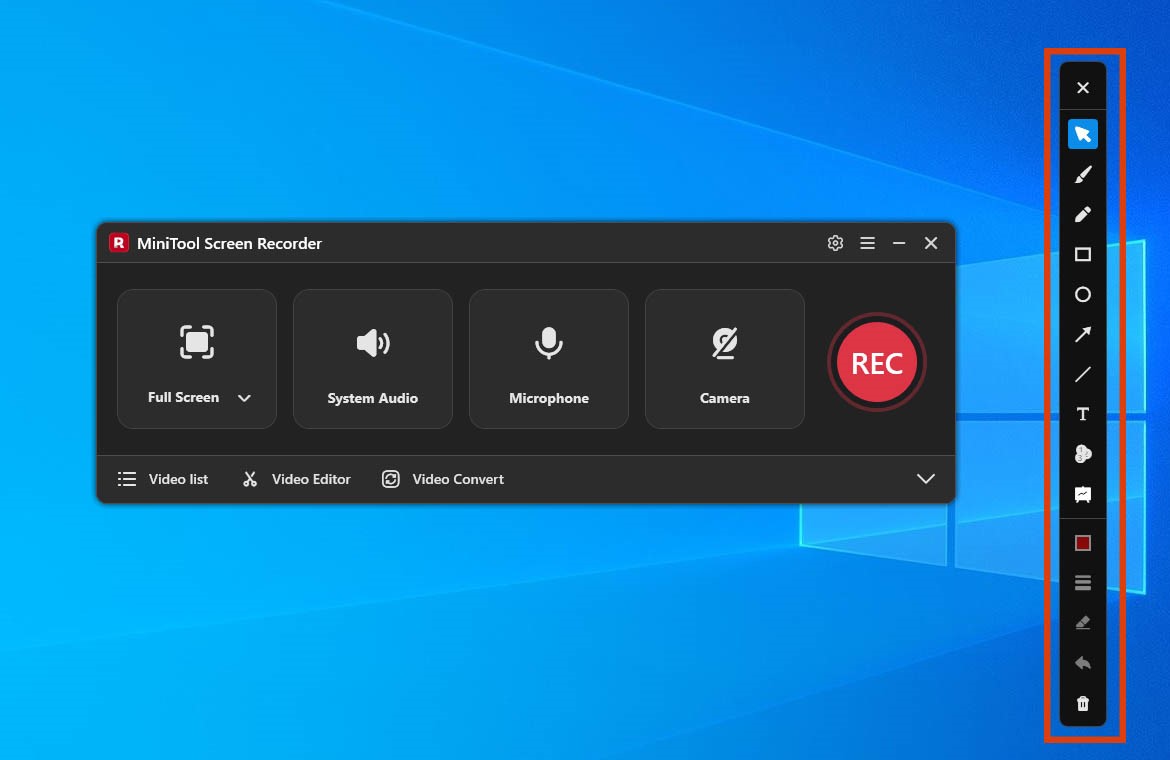
6. Click the REC button to start recording. When the 3-second countdown ends, switch to the target content. Then, choose the annotation tools from the toolbar to mark the screen if needed.
7. Press the F6 key to end the recording process. Finally, check the recorded video under the Video list section.
8. If there is a need to edit the recorded video, click the Video Editor option to get the accompanying video editing tool, MiniTool MovieMaker.
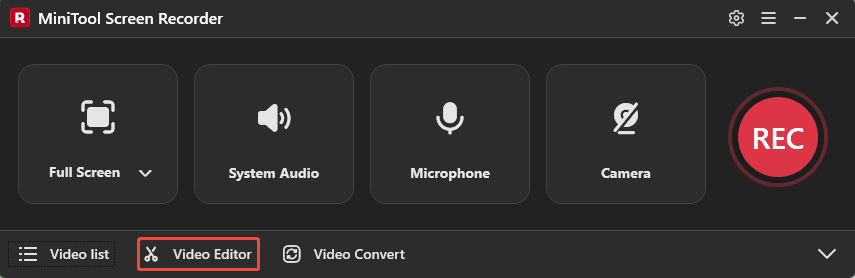
MiniTool has released Screen Recorder, a free screen recording tool for Windows designed to handle basic screen, audio, and webcam recording tasks without watermarks or time limits. https://betanews.com/article/minitool-releases-free-screen-recorder/
Bottom Line
The Xbox Game Bar maximum recording length is 4 hours. This post explains how to change the recording time limit and introduces a way to record for more than 4 hours using a third-party screen recorder like MiniTool Screen Recorder.
If there are any issues when using MiniTool Screen Recorder or MiniTool MovieMaker, please contact the support team at support@minitool.com.