ESPN Plus offers fans a wealth of live sports events and on-demand programming. But can you record on ESPN Plus? Absolutely Yes. This article will guide you on how to record ESPN Plus with 3 methods: using Windows built-in tools, third-party screen recorders, and online recording tools. Additionally, you can use recommended video editors to optimize your recordings.
What Is ESPN Plus
ESPN Plus is a subscription-based video streaming service that enables seamless playback across web browsers, computers, mobile devices, TVs, and gaming consoles. Subscribers gain access to exclusive live sports events, series, original content, and additional resources not available on standard ESPN channels.
Additionally, ESPN Plus features in-depth sports news columns, offering users detailed analysis of game dynamics and athlete performance through the perspectives of renowned sports commentators. Moreover, users can enjoy ad-free viewing when watching programs on ESPN Plus.
Can You Record on ESPN Plus
Can you record on ESPN Plus? The ESPN Plus service itself does not offer an official screen recording feature, meaning viewers cannot use it to replay events or watch offline. While ESPN Plus supports offline viewing, users must pay to unlock this feature. Therefore, the best way to obtain videos remains through screen recording.
So, is there a way to record ESPN Plus? Both professional screen recording tools and your computer's built-in screen capture features can help you capture your screen while watching ESPN Plus content. This article provides three reliable and efficient recording methods to help you easily record ESPN Plus content.
How to Record ESPN Plus on Windows
Although ESPN Plus does not offer screen recording functionality, the following three methods allow you to seamlessly record content without delay. This helps meet your needs for offline viewing during poor network conditions or for archiving memorable matches for personal use.
Method 1: Use Windows Built-In Tools
Windows' built-in free screen recording tools, the Xbox Game Bar and Snipping Tool, can help you capture ESPN Plus content easily. While their recording capabilities are basic, the streamlined workflow is sufficient for fundamental recording needs. Here's a detailed guide to using Windows' native screen recording tools.
#1 Xbox Game Bar
The Xbox Game Bar is a customizable overlay built into the Windows operating system. Although designed for gamers, it can perfectly record any application. As a user-friendly screen recording tool, it requires no professional skills to master. Simply press the Windows + G key combination to start the screen recording process without leaving your target interface.
Additionally, the Xbox Game Bar offers screenshot functionality and audio recording capabilities. Now, you can record ESPN Plus content by following these steps:
Step 1: Open the Sports Game on ESPN Plus
1. Launch the browser on your computer and go to the ESPN Plus website.
2. Then, find and open the sports game event you want to record.
Step 2: Launch Xbox Game Bar
Go to your Windows search bar and type “Xbox Game Bar”, then click on Open in the newly appeared interface to launch the app. Alternatively, you can press Windows + G on your keyboard to open it.
Step 3: Enable the Capture Feature
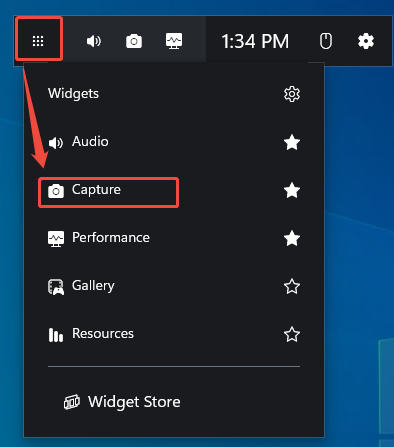
Click the Widget Menu on the right side of the main panel. Then, click on the Capture option in the new pop-up window to enter the Capture panel.
Step 4: Set Audio Recording
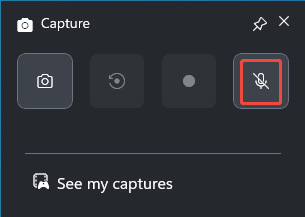
In the Capture panel, click on the Microphone icon to determine whether to turn on the audio recording feature.
Step 5: Start and End Recording
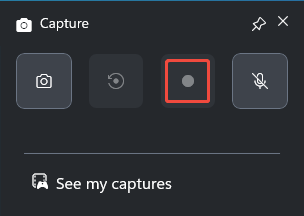
1. When you want to record the sports event on ESPN Plus, click the Start recording icon in the Capture panel. Or, you can press the shortcut keys Windows + Alt + R to start the recording process.
2. To end the recording process, press Windows + Alt + R keys again.
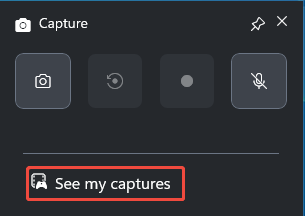
3. Finally, you can click on the See my captures to check your recorder video.
#2 Snipping Tool
Additionally, another built-in Windows tool called the Snipping Tool can also assist in recording ESPN Plus content. While primarily a screenshot program, it also offers basic screen recording capabilities. Users can choose between Windows Mode and Rectangular Mode to customize the recording area.
Additionally, Snipping Tool also supports editing recorded videos through its built-in trim editing feature and can directly convert recordings to GIF format. Notably, users can instantly share content with friends via email using the integrated share button, significantly boosting productivity. Here is a detailed instruction on how to record on ESPN Plus with the Snipping Tool.
Step 1: Open the Sports Game on ESPN Plus
Step 2: Launch the Snipping Tool
Press the Print Screen key on your keyboard to open the Snipping Tool. If it does not open, you can go to the Windows search bar, type' Snipping tool', and then click Open to launch it.
Step 3: Set the Recording Area
1. In the new pop-up panel, click the New option.
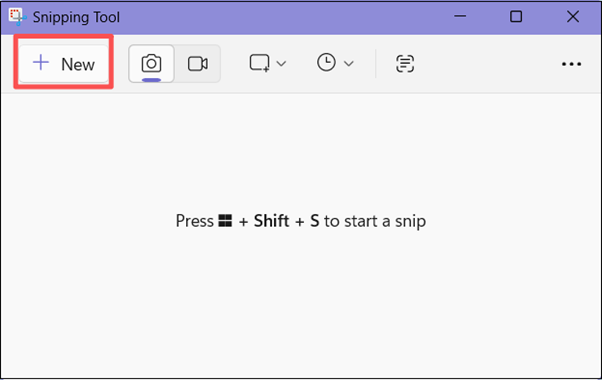
2. Click on the Record icon to enable the recording mode.
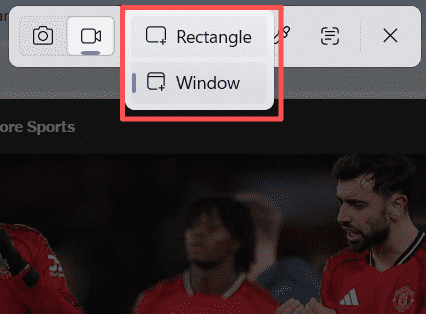
3. Expand the Snipping area option.
4. Then, you can select the Rectangle option to customize the screen area you want to record. Or, choose the Window option to record the entire screen.
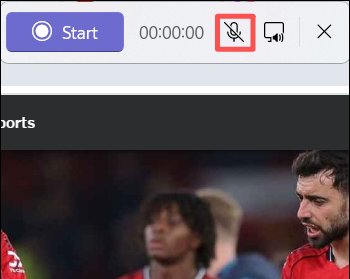
Step 4: Control the Audio Recording
In the newly displayed horizontal panel, click the Microphone icon to control the audio recording feature.
Step 5: Start and End Recording
1. When you want to record the content on ESPN Plus, click on the Start option or press Shift + R on your keyboard to start the recording process.
2. To end the recording process, just click on the Stop recording button in the horizontal panel.
In short, the two built-in Windows screen recorders allow you to capture ESPN Plus content without installing any software. However, they come with limitations such as time restrictions or a lack of advanced recording features, making it difficult to meet users' diverse needs. This is where third-party screen recorders play a crucial role. Below is one we've carefully selected for you.
Method 2: Use the Third-Party Software
Third-party screen recording tools offer more professional features, enabling users to capture high-definition video without delay. Here, I highly recommend this free recording tool: MiniTool Screen Recorder.
As an easy-to-use screen recording solution, it allows users to master its operation without spending hours learning. Additionally, MiniTool Screen Recorder supports simultaneous recording of both screen and webcam, while capturing both system audio and microphone audio. Therefore, whether recording webinars, gameplay, or video with a face, it comprehensively meets all user needs.
What’s more, MiniTool Screen Recorder offers annotation tools, allowing users to highlight key information during recording using rectangular boxes, straight lines, or highlighters. This feature proves particularly useful for online instructors or corporate meetings.
More importantly, users can customize recording parameters, such as selecting video frame rate, quality settings, webcam configurations, and screen recording hotkeys. Thus, MiniTool Screen Recorder fundamentally meets diverse needs for personalized video recording.
Now, you can follow the operation process below to record the ESPN Plus content with MiniTool Screen Recorder.
Step 1: Download and Install MiniTool Screen Recorder
MiniTool Screen RecorderClick to Download100%Clean & Safe
Click on the button above to download and install the latest version of MiniTool Screen Recorder on your computer.
Step 2: Select the Area Recording
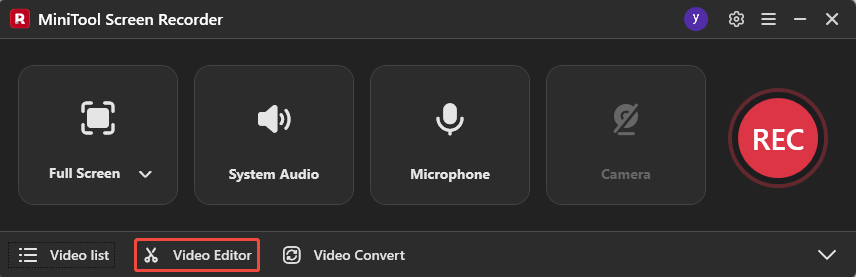
1. Launch MiniTool Screen Recorder on your computer.
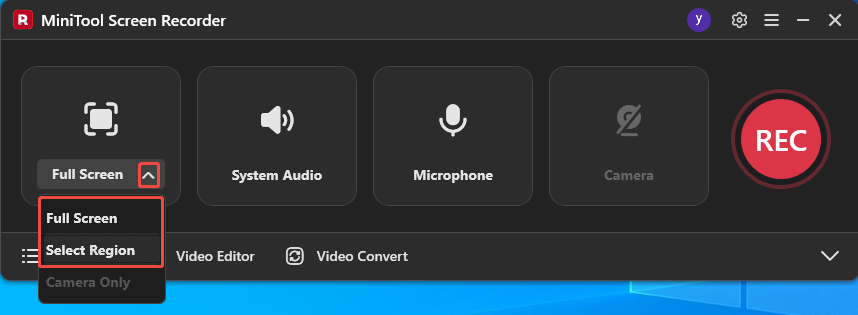
2. Expand the drop-down menu of the Full Screen option.
3. Click on Full Screen to capture the entire screen. Or, click on Select Region, then drag the red dashed border that appears to define the recording area.
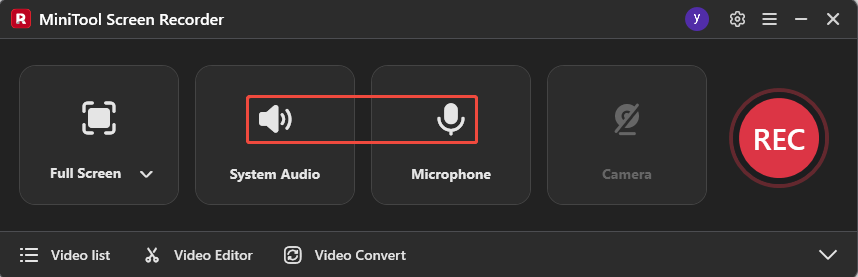
Step 3: Set the Audio Recording
Click on the System Audio icon or Microphone icon to determine whether to record the sound from the system or the microphone.
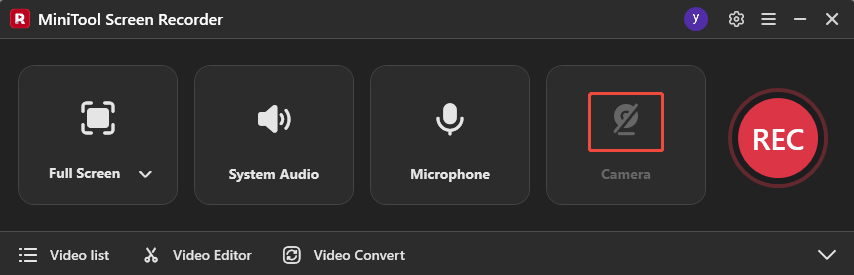
Step 4: Control the Camera Recording
If you want to record the screen with yourself, just click on the Camera icon on the right.
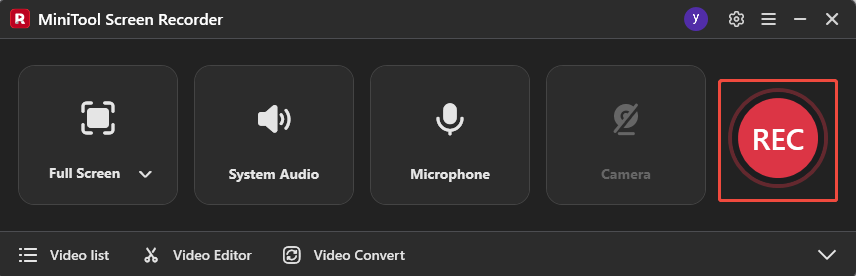
Step 5: Start and End Recording
1. To start recording the ESPN Plus content, click on the REC button on the right side of the main interface or press the F6 key. After a 3-scond cutdown, it will start the recording process.
2. If you want to end the recording process, press the F6 key again.
Step 6: Check the Recorded Video
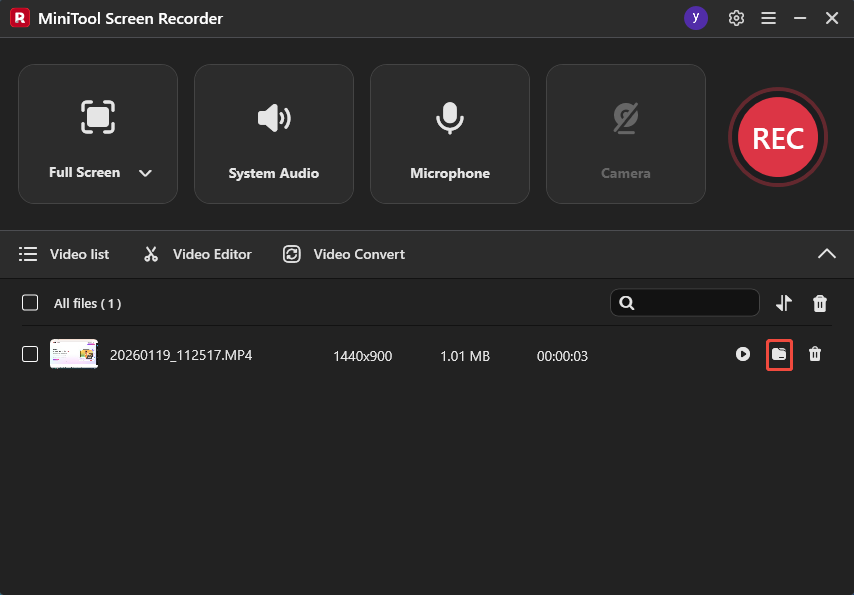
1. After recording completes, you will automatically be redirected to the Video list module in MiniTool Screen Recorder, where your recordings will be displayed.
2. Then, you can click on the folder icon to check the recorded video.
Method 3: Use Online Screen Recorders
If you prefer not to download any third-party screen recording software, you can also use an online screen recording tool. After thorough evaluation, we recommend VEED. VEED is a free online screen recording tool that supports full-screen, tab, picture-in-picture, and audio recording.
Users can export recorded video files in MP4, MOV, and WMV formats, which are automatically saved to their VEED cloud account. Additionally, recorded videos can be instantly converted into shareable links, allowing users to share them with friends or colleagues with just one click.
However, the free version of VEED will add a watermark to your recorded videos. If you don't mind this, you can follow the guide below.
Step 1: Go to VEED
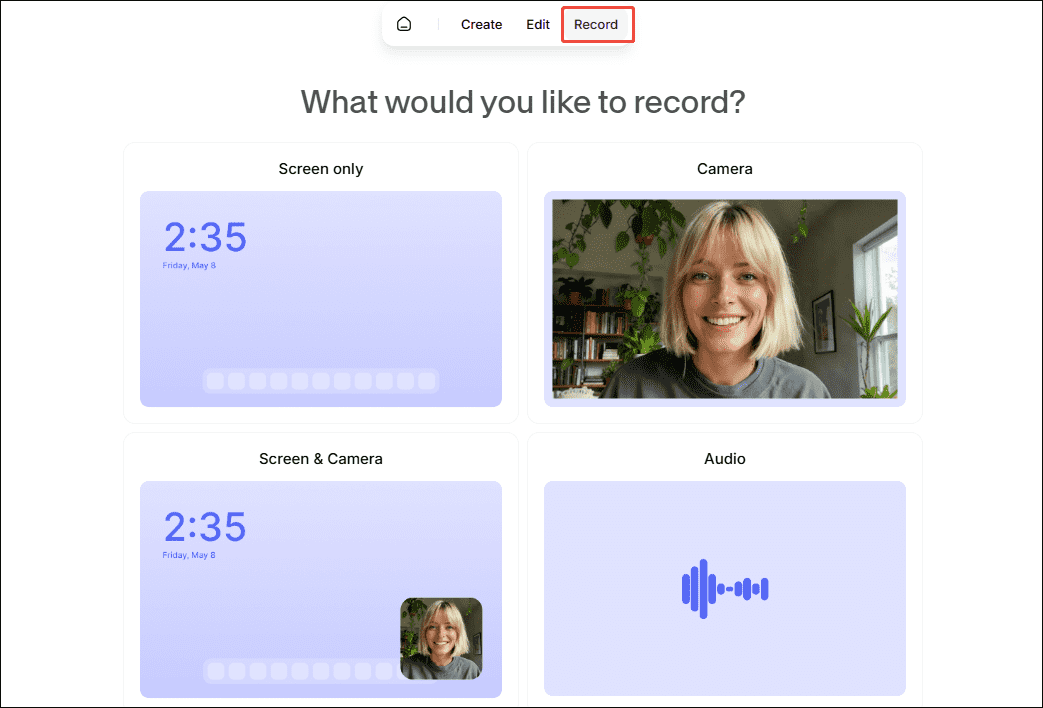
1. Open your browser and go to the VEED website.
2. Then, choose the Record option in the top menu bar.
Step 2: Choose the Recording Mode
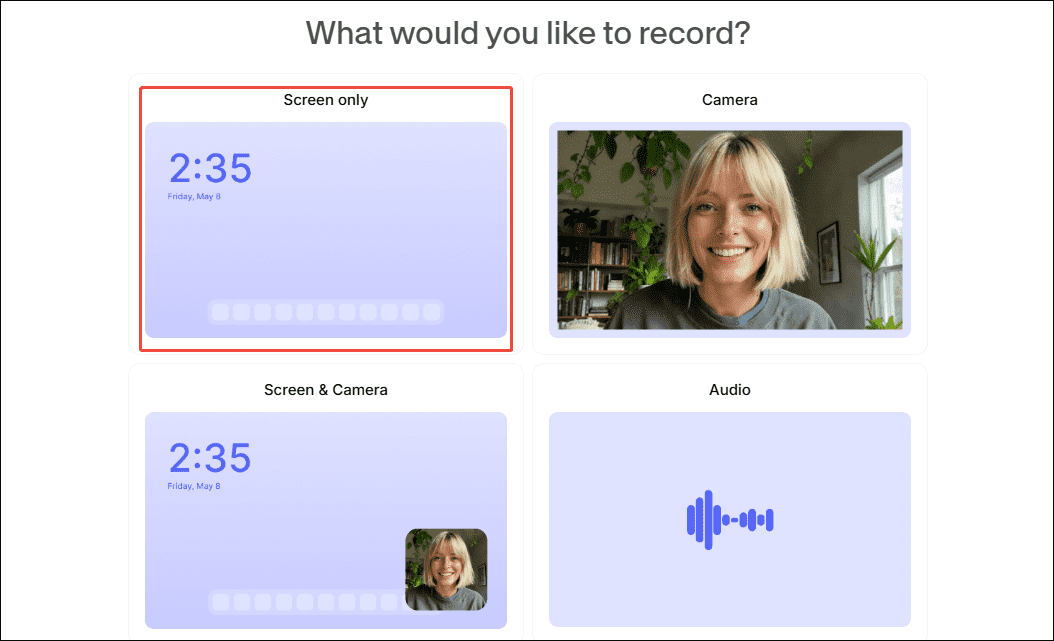
Then, you can choose the Screen only option in the upper-left corner of the main interface to enter the recording interface.
Step 3: Control the Audio Recording
Check the Also share system audio option to enable audio recording.
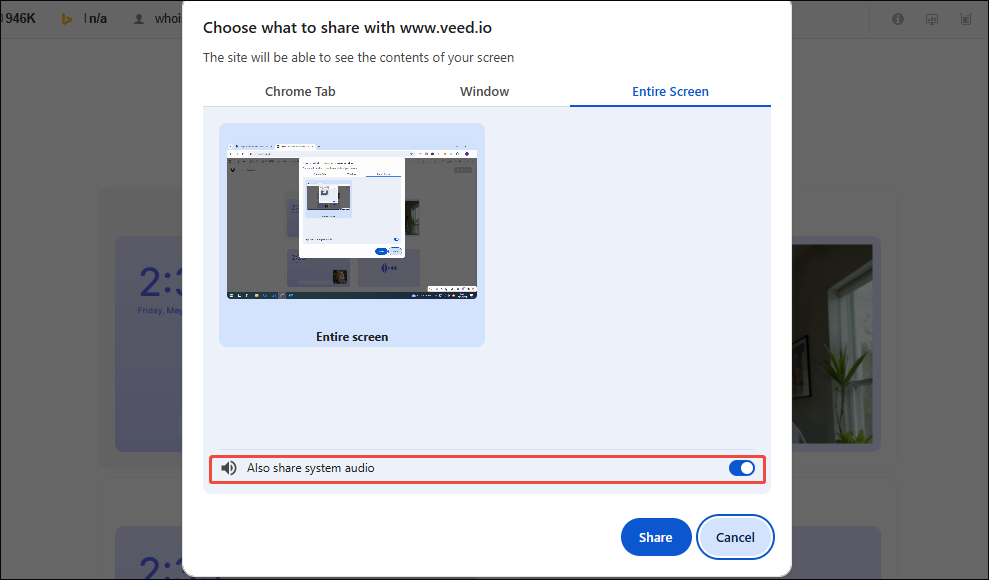
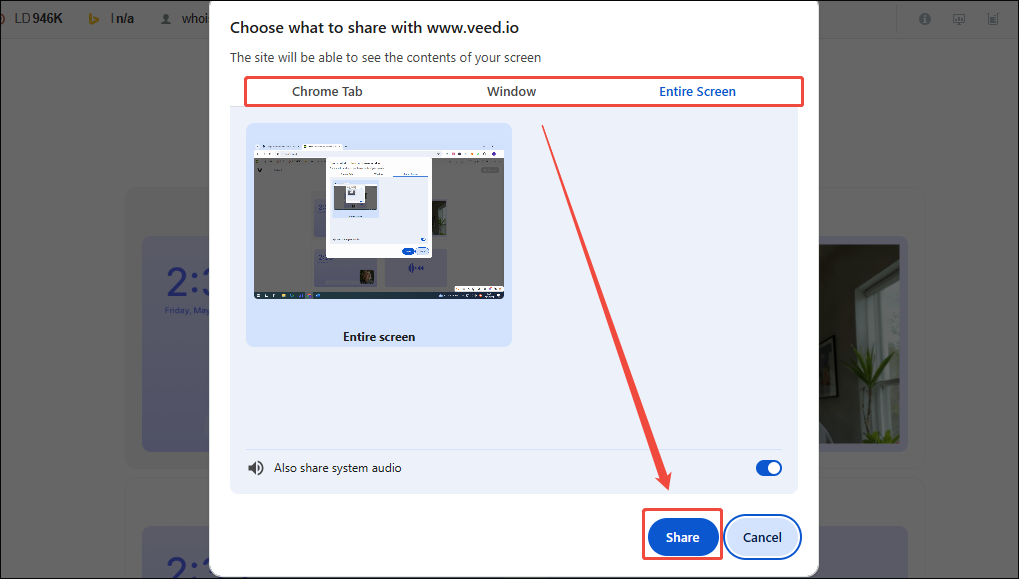
Step 4: Choose the Recording Area
1. You can choose to record the Chrome Tab, Window, or Entire Screen based on your needs.
2. Then, click on the Share option to identify the screen you want to record.
Step 5: Start and End Recording
1. To start the recording process, click on the Record button in the top-right corner of the screen.
2. If you want to end recording, click on the Stop button in the top-right corner of the screen.
In summary, all three methods mentioned above can help you record ESPN Plus content. However, if you seek a more reliable and feature-rich recording experience and desire watermark-free recordings, MiniTool Screen Recorder undoubtedly stands out as the superior choice.
Bonus: How to Edit Your Recordings
After recording ESPN Plus content, you may need to add text to your video or merge multiple clips. Professional video editing software can help you accomplish these tasks. Now, you can click the Video Editor option on the MiniTool Screen Recorder main interface to access the professional video editing software MiniTool MovieMaker.
You can also click the button below to get MiniTool MovieMaker.
MiniTool MovieMakerClick to Download100%Clean & Safe
You can utilize its powerful editing features to trim, cut, or merge recorded videos. To add text or subtitles, use the text function in the media library. Additionally, you can choose from multiple video export formats, such as MP4, WEBM, MOV, MKV, and more.
Final Words
Can you record on ESPN Plus? The official answer is no. However, by using the 4 recording methods mentioned above, you can easily and efficiently record ESPN Plus content for free. Additionally, you can get the guidelines for editing and optimizing recorded content from this article.
If you encounter any issues while trying out MiniTool Screen Recorder or MiniTool MovieMaker, feel free to email us via support@minitool.com or send me a message on X for assistance.