

A high-quality 1080p screen recorder allows users to record full HD video in various situations. In this article, we reviewed 6 excellent recording tools, including Clipchamp, Xbox Game Bar, MiniTool Screen Recorder, ScreenPal, Camtasia, and Loom.
Capturing video in 1080p sounds simple, but the quality of 1080p recording tools on the market varies. Especially when running on a low-performance computer, some software may even freeze. Therefore, to choose the right tool, I spent a few days testing a variety of recording software.
How We Test and Select 1080p Screen Recorder for PC
To identify the best 1080p screen recording tools, we tested whether each program could capture lag-free 1080p video and evaluated visual smoothness and potential stuttering across various frame rates. We also monitored CPU and GPU usage for each application.
Ease of use was another key factor in our testing, ensuring users could quickly master the software's features. Naturally, we also evaluated the functionality of each tool, specifically considering the level of customization available in the settings. Ultimately, we selected the following 6 1080p recording software programs that achieved the highest overall scores:
- Clipchamp
- Xbox Game Bar
- MiniTool Screen Recorder
- ScreenPal
- Camtasia
- Loom
Quick Comparison:
| Tool | Video Quality | Recording Time | Price |
| Clipchamp | 1080p | 30 minutes | Free/Paid |
| Xbox Game Bar | 1080p | Up to 4 hours | Free |
| MiniTool Screen Recorder | 1080p | No time limit | Free |
| ScreenPal | 1080p | 15 minutes (free) | Free/Paid |
| Camtasia | 1080p | No time limit | Paid |
| Loom | 1080p (Paid version) | 5 minutes (free) | Free/Paid |
Option 1: Clipchamp
I mostly use Clipchamp 4.5 when I need to record a quick screen walkthrough or trim a short video before sharing it with teammates. The interface is simple enough that I don't have to spend time figuring things out. https://www.g2.com/products/clipchamp/reviews
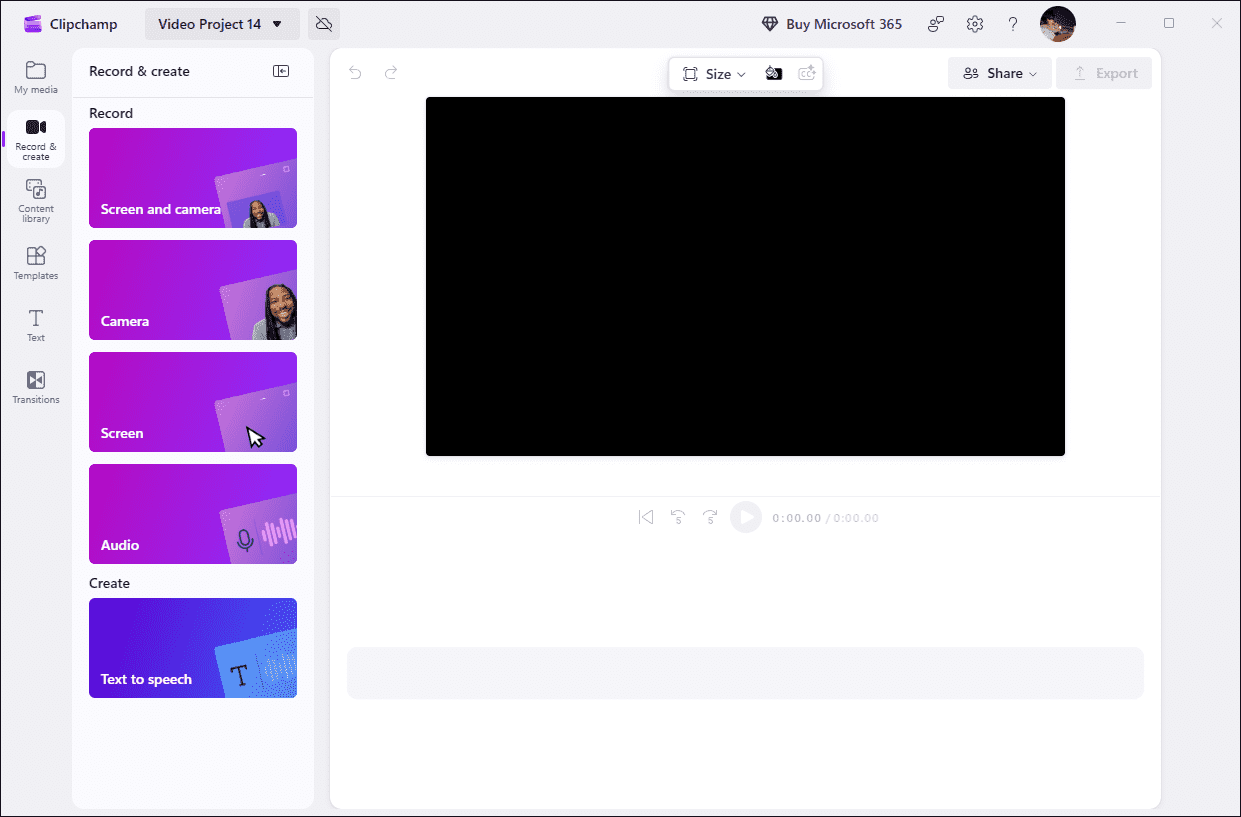
Clipchamp is a recording tool owned by Microsoft that offers a comprehensive video creation experience. Our testing revealed that its standout feature is not merely its diverse recording capabilities, but rather the integration of recording and video editing into a single workflow; in other words, users can proceed directly from recording to the editing interface to refine their videos.
Clipchamp delivers excellent 1080p video recording quality. We experienced no stutter or lag when adding elements to the screen during recording. However, occasional stuttering may occur when capturing high-frame-rate gameplay on low-performance computers. Additionally, the tool has a 30-minute recording limit, and some advanced features require a subscription.
Option 2: Xbox Game Bar
Windows 10 includes a native gameplay recording feature called Game Bar that performs quite well at times and is relatively easy to use.https://raydenreviews.home.blog/2019/02/01/game-bar-for-windows-10-review-a-top-gameplay-capture-performer-when-you-can-see-it/
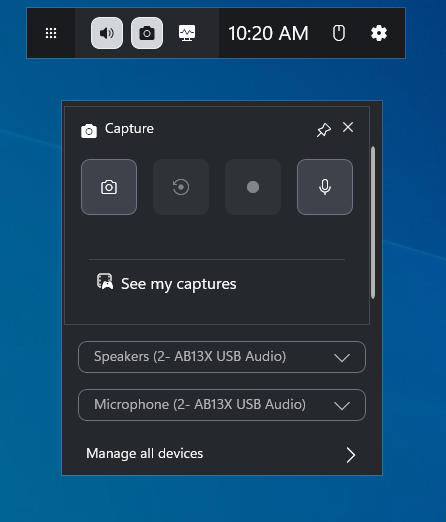
Xbox Game Bar 7.326.6011.0 is a free 1080p screen recorder built into Windows. It relies heavily on system integration, allowing it to launch quickly when the user presses the Windows + G keys. Meanwhile, it consumes minimal RAM and CPU resources during operation, making it ideal for recording high-frame-rate footage, particularly high-definition gameplay.
Xbox Game Bar can capture 1080p video at 60 FPS. But the deal is, its recording capabilities are relatively limited; it is designed primarily for games and general recording tasks, and cannot capture the desktop or File Explorer. Moreover, the app has a four-hour recording limit, making it unsuitable for long-duration recordings.
Option 3: MiniTool Screen Recorder
MiniTool Screen Recorder supports high-definition screen recordings of up to 4K resolution, making your video look super clear. It's ideal for presentations requiring extreme detail, such as recording gameplay and video editing. https://finance.yahoo.com/news/discover-minitools-screen-recorder-perfect-174500158.html
In our testing, we found MiniTool Screen Recorder 1.4 to be a tool that strikes an excellent balance between functionality and ease of use. It captures video smoothly at 1080p resolution and even supports 4K resolution. The tool showed no signs of stutter or lag during extended recording sessions.
Furthermore, there are no time limits when recording gameplay, tutorials, online meetings, or other types of videos. More importantly, we tested MiniTool Screen Recorder’s window, region, multi-monitor recording, and webcam recording capabilities, and it performed exceptionally well in terms of recording flexibility.
What’s more, the app’s annotation tools are well worth using for recording tasks that require overlays. However, the tool is currently available only for Windows.
Option 4: ScreenPal
ScreenPal (Formerly knows as: Screencast-O-Matic) is a software that records the screen and your webcam, and you do not need any technical knowledge to start using it. https://awesometutorialsandreviews.com/a-record-screen-software-review/
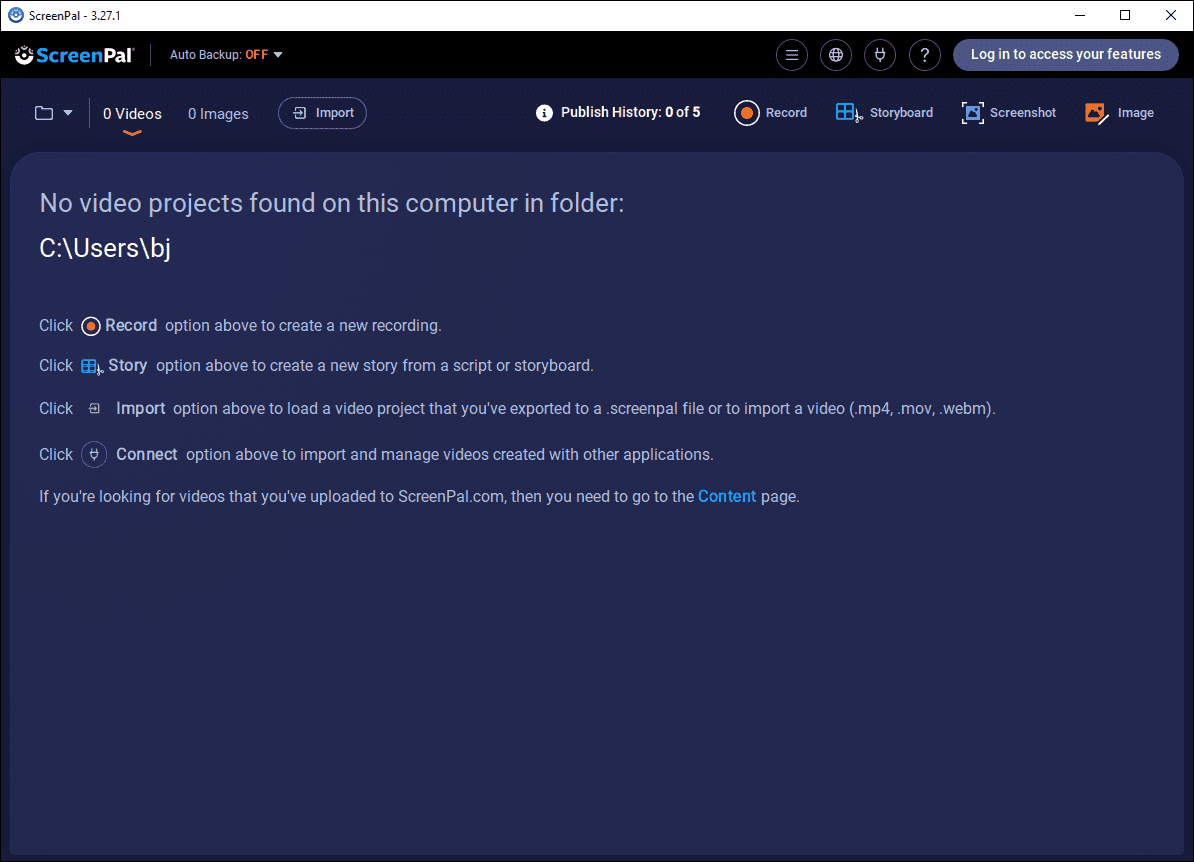
ScreenPal 3.27.1 is a lightweight tool, similar to Clipchamp, that integrates screen recording and video editing capabilities. We found it particularly well-suited for educational settings. During testing, we configured it to record at 1080p and could choose between three modes: screen recording, webcam recording, and picture-in-picture.
Meanwhile, ScreenPal offers real-time annotation features, allowing us to draw arrows and circles on the screen or even zoom in on specific areas. What’s more, once video editing is complete, ScreenPal allows us to generate a direct sharing link, a highly convenient feature for teachers or corporate users who need to quickly share training content.
But the deal is, the free version of this tool imposes significant limitations; for instance, recordings are capped at 15 minutes, and the system audio recording function is unavailable.
Option 5: Camtasia
TechSmith’s Camtasia is one of the best screen recorders we’ve ever reviewed. Setup is easy, recording is flawless, and the editing capabilities are both simple and incredibly powerful, setting it apart from the competition. https://www.techradar.com/reviews/techsmith-camtasia-2022
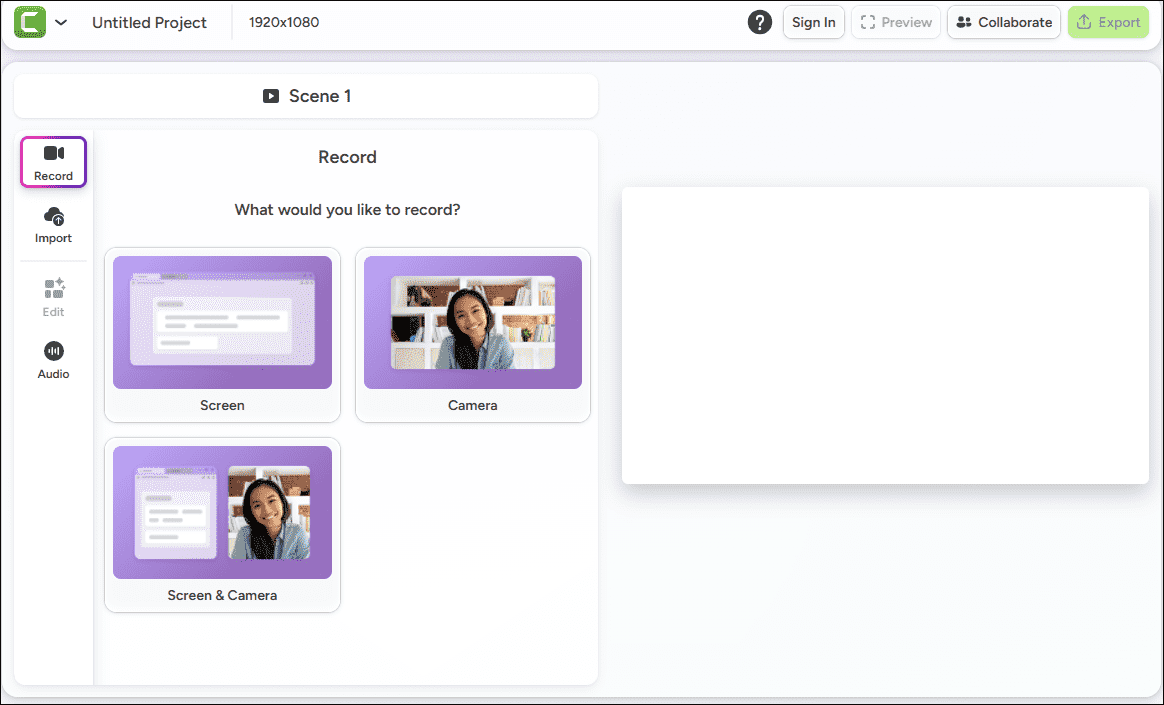
Camtasia 2026.1.0 is another tool that integrates recording and video editing into a seamless workflow. Based on our testing, we find it highly suitable for creating 1080p instructional videos. While the tool consumes relatively little memory and CPU during recording, resource usage increases significantly during the editing phase.
Unlike standard software, Camtasia stands out by separating recorded screen activity, audio, and webcam footage into distinct tracks for post-production editing. It offers a comprehensive suite of editing features, including trimming, annotations, and transitions.
Furthermore, it allows for the customization of cursor effects and the inclusion of interactive elements, such as quizzes, during the editing process. However, as a paid tool with a relatively steep learning curve, it is best suited for use by businesses or educators.
Option 6: Loom
Loom is a video recording and screen sharing solution that allows teams to communicate with ease, without wasting hours of productivity from non-productive meetings. https://www.softwareadvice.com/video-making/loom-profile/
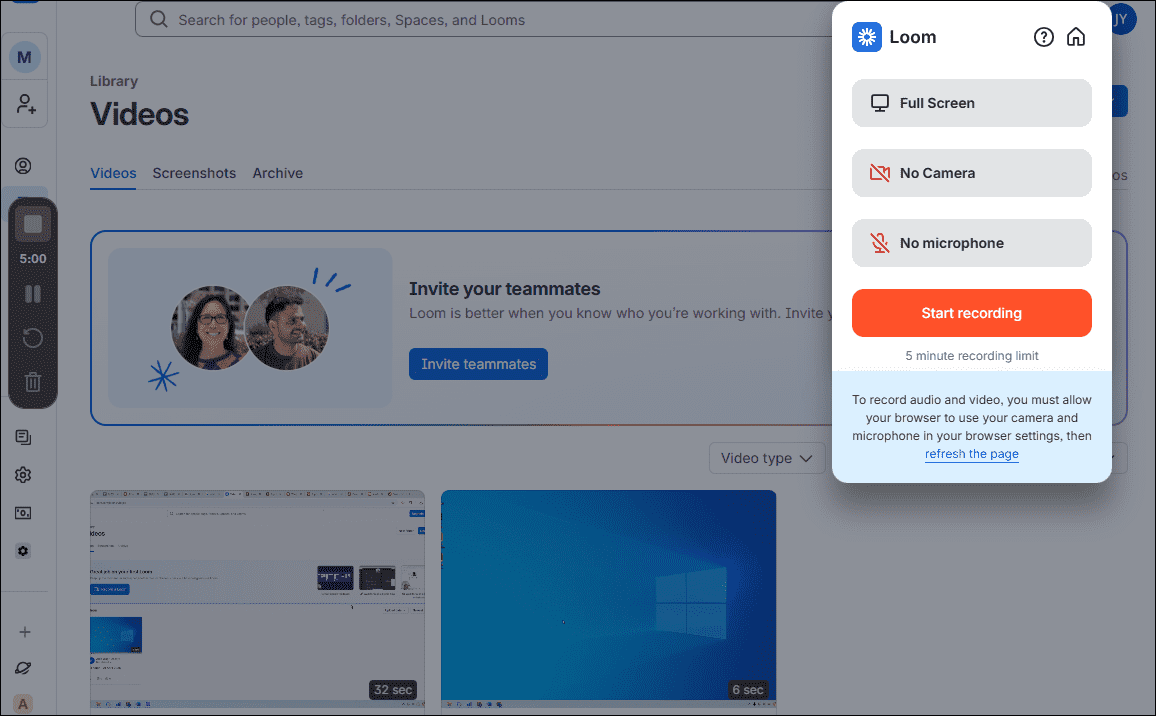
In addition to the 5 desktop tools mentioned above, we have also selected an online 1080p screen recorder: Loom 5.5.206. It offers standard recording capabilities, including full-screen, window, and webcam recording. Meanwhile, this tool is ideal for remote teams, as users can simply share the generated link with colleagues for viewing immediately after recording.
Moreover, our testing revealed that Loom offers robust interactive features; for instance, viewers watching via a link can add comments or leave "likes" at any point in the video. It also incorporates powerful AI capabilities that automatically generate titles or chapters for recorded videos.
However, it is worth noting that the free version of Loom limits recordings to 5 minutes; capturing longer videos requires a paid subscription.
After testing all the tools, we found that each one targets a specific type of user. Among the 6 recording tools, some are suited for quick recording, others for creating instructional videos, and some for team collaboration; ultimately, however, the choice depends on the user's personal experience.
How to Record with 1080p Screen Recorders
Recording 1080p video is very simple; in addition to choosing the right recording tool, it is also necessary to adjust the recording resolution before starting the recording process. Using MiniTool Screen Recorder as an example, this article outlines how to record screen 1080p.
Fast Track Steps:
- Install and open the recording tool.
- Set the video recording resolution.
- Choose the recording area.
- Manage the audio recording features.
- Control the webcam recording feature
- Start the recording process.
- Annotate the screen if necessary.
- End the recording process.
- Check the recorded 1080p video.
- Edit the recorded 1080p video if necessary.
1. Get and Open the Recording Tool
MiniTool Screen RecorderClick to Download100%Clean & Safe
Click the button above to download and install MiniTool Screen Recorder. Then, launch it on the PC.
2. Set Video Recording Quality
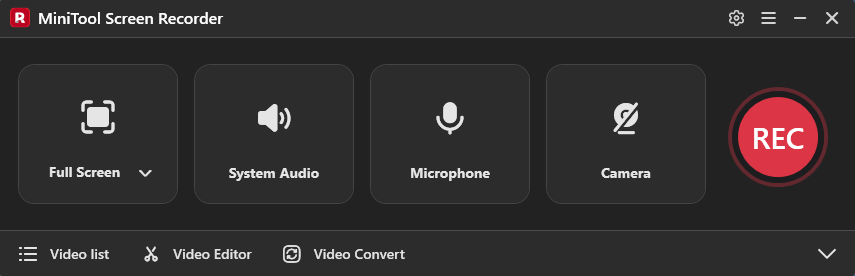
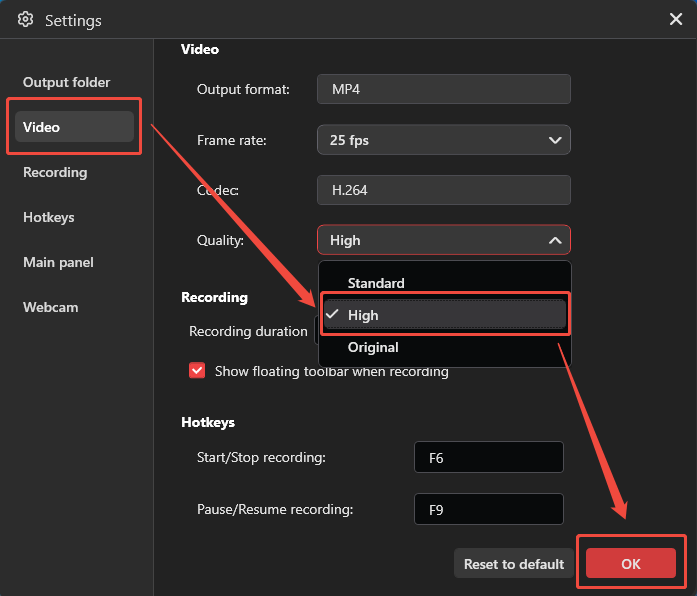
To screen record in 1080p, click the Settings icon. Then, navigate to the Video section. Within the Quality option, choose the High option. Finally, click the OK option to save the changes.
3. Determine the Recording Area
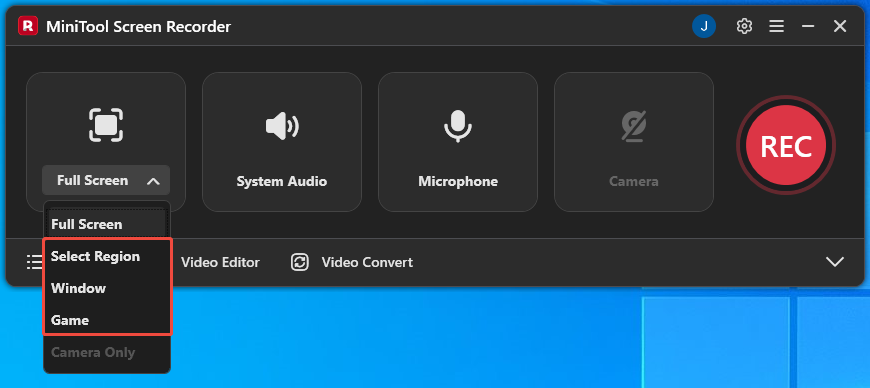
This tool captures the full screen by default. To record a specific area, window, or a game, expand the Full Screen option, then choose the Select Region, Window, or Game option.
4. Manage Audio Recording
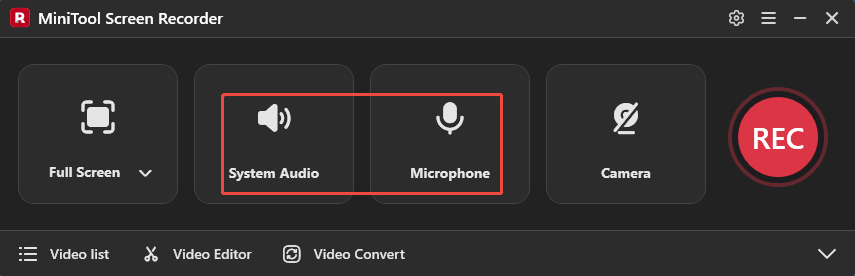
Before recording, system audio and the microphone are enabled by default, allowing for the simultaneous recording of computer sound and voice. Users can adjust audio settings by clicking the relevant icons.
5. Control Camera Recording
To record the screen with webcam footage, click the Camera icon on the right of the screen.
6. Start Recording
Next, click the REC button or press the F6 key to begin the recording process. When the 3-second countdown ends, move to the target content that needs to be recorded.
7. Annotate the Screen
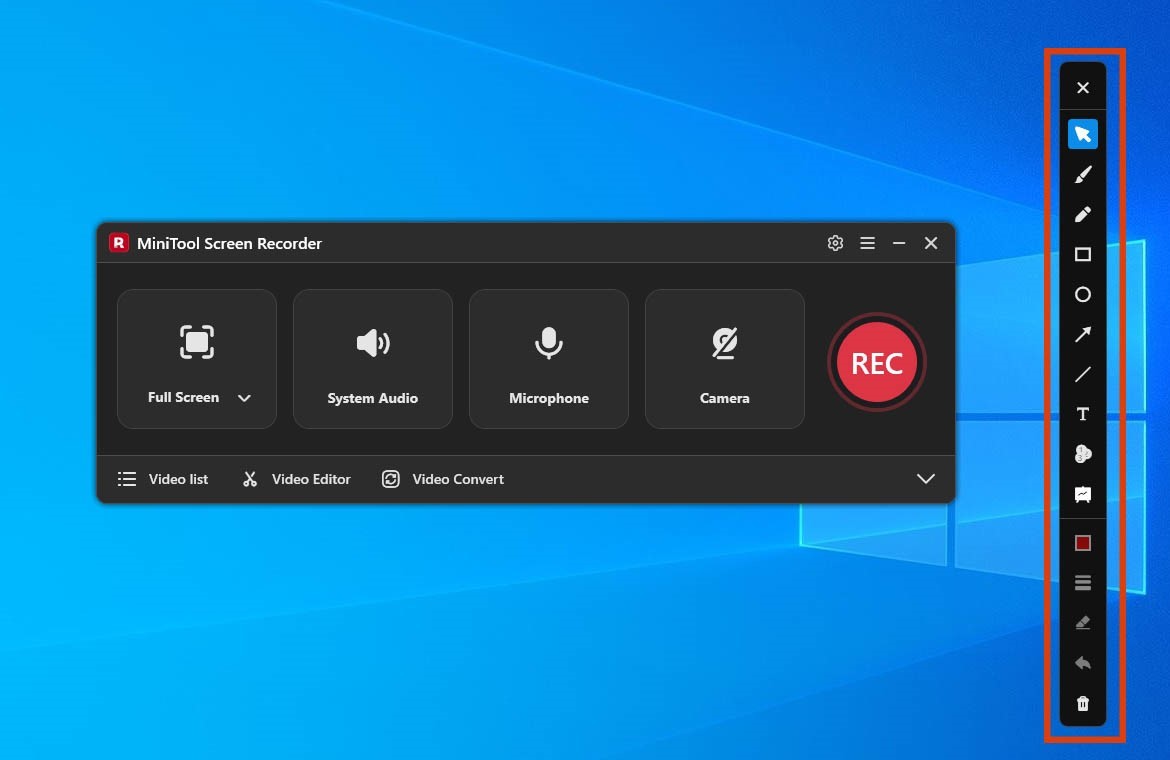
If there is a need to highlight important details while recording, use the built-in annotation tools to add drawings, arrows, text, or shapes. These tools help viewers better understand the content in the 1080p video.
8. End Recording and Check the Recorded 1080p Video
To end the recording process, press the F6 key again. Then, check the recorded 1080p video under the Video list section.
9. Edit the Recorded Video
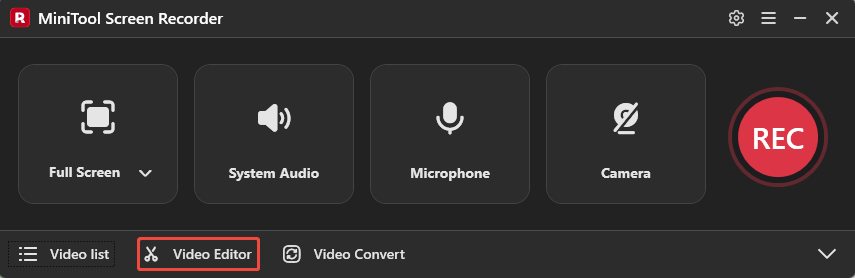
To optimize the recorded 1080p video, click the Video Editor option to get the video editing tool, MiniTool MovieMaker.
MiniTool MovieMakerClick to Download100%Clean & Safe
Why 1080p Matters
Why is a 1080p screen recording tool worth trying? Although 4K resolution has become the mainstream standard, 1080p offers distinct advantages for everyday use.
Compared to 720p, 1080p resolution displays video details much more clearly. While 1080p may not match the sharpness of 4K, it strikes a perfect balance between image clarity and file size. Furthermore, recording in 4K places a heavier load on computer hardware, making 1080p a more suitable choice for recording across a wider range of devices.
Moreover, although many social media platforms now support 4K video uploads, 1080p content often benefits from better algorithmic recommendations and offers viewers a smoother playback experience.
Final Words
This article tests the performance of 6 1080p screen recorders, Clipchamp, Xbox Game Bar, MiniTool Screen Recorder, ScreenPal, Camtasia, and Loom, in real-world scenarios. Additionally, it explains how to use these tools to record high-quality 1080p videos.
If you encounter any questions when using MiniTool Screen Recorder or MiniTool MovieMaker, send an email to support@minitool.com.