I frequently use Teams for online meetings, utilizing its built-in recording feature to capture important information for future reference. However, I have occasionally encountered issues with the Teams record button missing.
Upon investigation, I discovered that the problem could stem from insufficient permissions, corrupted cache files, outdated software versions, etc. Consequently, I researched Teams user permissions, common causes of recording failures, and the corresponding solutions.
Who Can Record a Meeting in Teams
Before addressing this issue, I would like to clarify the recording permissions for Teams meetings. Often, the inability to capture is simply due to the user lacking the necessary permissions. Below is the breakdown of recording permissions assigned to different roles participating in Teams meetings:
- Organizer: By default, the organizer can capture the Teams meeting and manage recording permissions for other participants.
- Co-organizer: Can start and pause recording during the meeting, but cannot assign permissions.
- Presenters: Presenters also have the recording permissions.
- Guest: Does not have meeting recording permissions by default, but can obtain them by requesting them from the organizer.
Other Causes of Why Can’t I Record on Teams
However, after consulting relevant information on forums and elsewhere, I discovered that recording permissions are not the only factor behind Teams recording not working; the following common issues can also affect recording.
- Unsupported account type
- Insufficient storage space
- Outdated Microsoft Teams version
- Corrupted cache files

How Can I Fix Teams Recording Not Working
To avoid being caught off guard by a recurrence of the issue where Teams won’t let me record, I have identified effective solutions based on the aforementioned causes, including:
- Check the recording permissions
- Utilize an alternative recording tool
- Upgrade Teams account
- Clear up cloud storage space
- Update Teams version
- Delete Teams cache files
I have listed the detailed implementation steps for each solution below.
#1. Check and Request Recording Permissions
As I mentioned earlier, Teams assigns recording permissions based on participant roles. If I am unable to capture a Teams meeting, it is usually because I joined as a guest or the meeting organizer has not granted recording permissions to participants. In such cases, I can check with the organizer to see if the recording feature is enabled and then request permission to record.
#2 Use an Alternative Tool
When faced with recording limitations in Teams and seeking more advanced features, I often turn to the Teams alternative tools. MiniTool Screen Recorder is a tool I frequently use to capture other screen activities in my daily life.
The software offers flexible recording area options, allowing users to choose between full-screen, specific regions, individual windows, or multi-monitor setups. It also includes a webcam recording feature, making it ideal for creating reaction videos, while its annotation tools are perfect for producing tutorials.
Here are the general steps for recording a Teams meeting with MiniTool Screen Recorder.
- Launch MiniTool Screen Recorder.
- Determine recording area.
- Control the audio and camera recording features based on needs.
- Click the REC button to start recording.
- Annotate the screen while capturing a Teams meeting.
- End recording by pressing the F6 key.
- Check the recorded Teams meeting under the Video list section.
The steps below describe in greater detail how to use this tool to record Microsoft Teams sessions.
1. Download and install MiniTool Screen Recorder on the PC.
MiniTool Screen RecorderClick to Download100%Clean & Safe
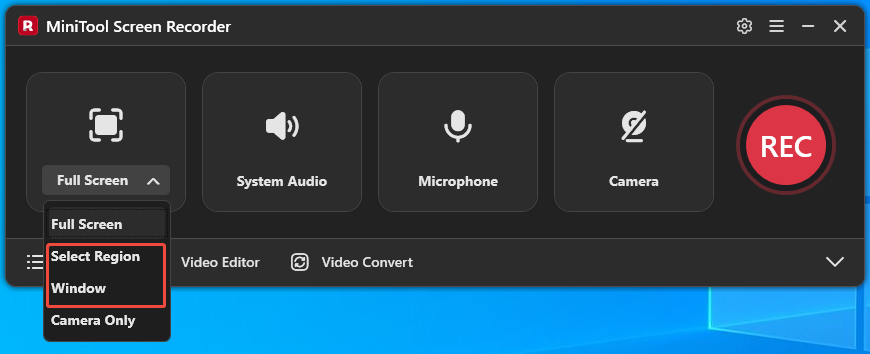
2. By default, this tool captures the entire screen. If there is a need to record a specific region or window, click the Full Screen option, then choose the Select Region option or the Window option.
3. Please ensure that computer audio is enabled and the microphone is correctly connected to ensure the audio recording function works properly.
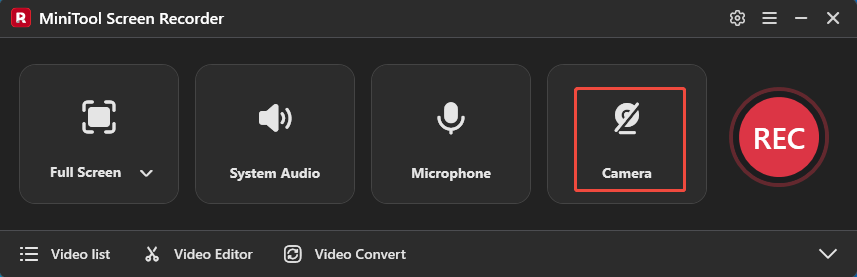
4. To capture the screen with webcam footage, click the Camera icon.
5. Click the REC button to start recording. After the countdown, switch to Teams and create or join a new meeting.
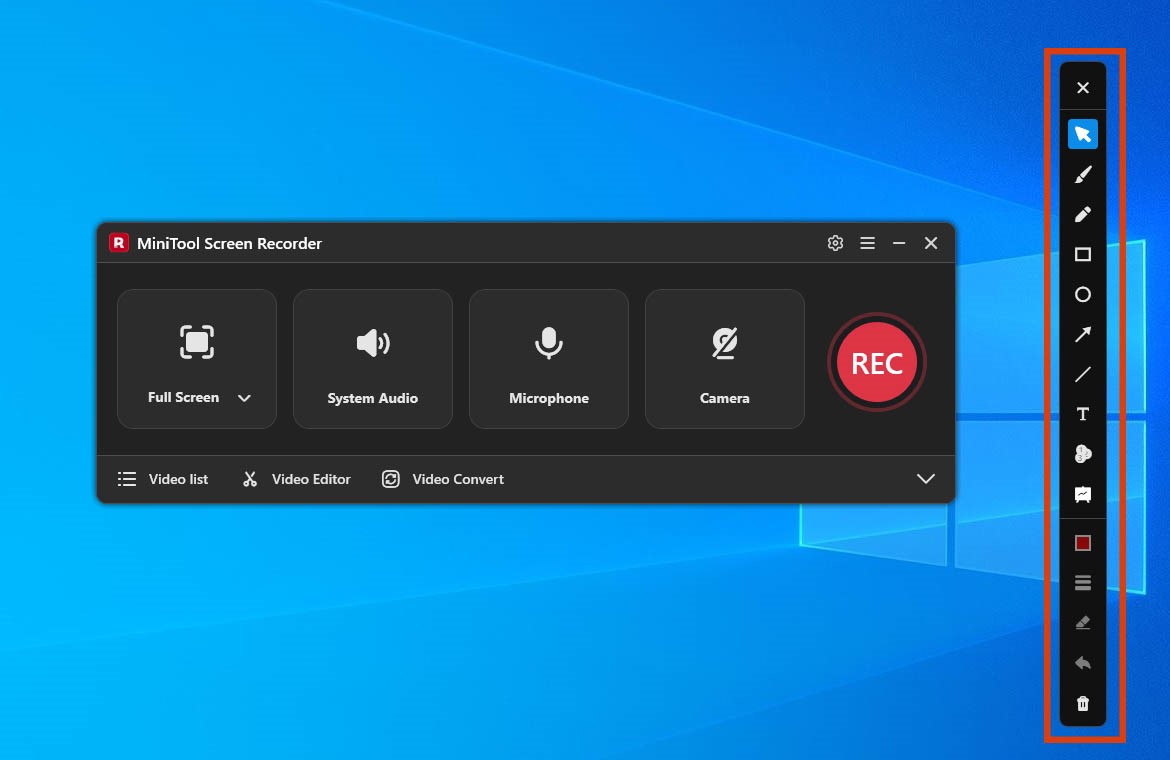
6. To annotate the screen while recording, select tools from the toolbar on the right of the screen.
7. Press the F6 key to end recording. Then, when the tool automatically switches to the Video list section, click the Play icon to check the recorded Teams meeting or click the Folder icon to find it on the local file.

#3 Upgrade Account
I have found that many users frequently encounter the issue of the Teams recording button disappearing, a problem directly linked to the specific version of Teams being used.
Generally, access to the recording feature requires a commercial version of Teams; the free, personal, and family versions do not support built-in recording. In my view, upgrading to a commercial version is one of the most effective solutions.
#4 Free up Storage Space
I once encountered a situation where I was unable to record a Teams meeting despite having the necessary permissions. After some troubleshooting, I discovered the issue was insufficient storage space. Teams recordings are saved to OneDrive or SharePoint, both of which have storage limits.
In such cases, clearing out unnecessary files or purchasing additional storage restores the recording functionality.
#5 Update Teams
Sometimes, older versions of Teams lack the meeting recording feature, leading users to mistakenly believe there is a problem with the recording function itself. The best solution is to update Teams to the latest version; this not only restores the recording capability but also ensures compatibility with Windows and helps avoid other operational issues. Here is how to check for version updates.
1. Launch Teams on the computer.
2. Click the More options in the upper-right corner of the main interface. Then, click the Settings option.

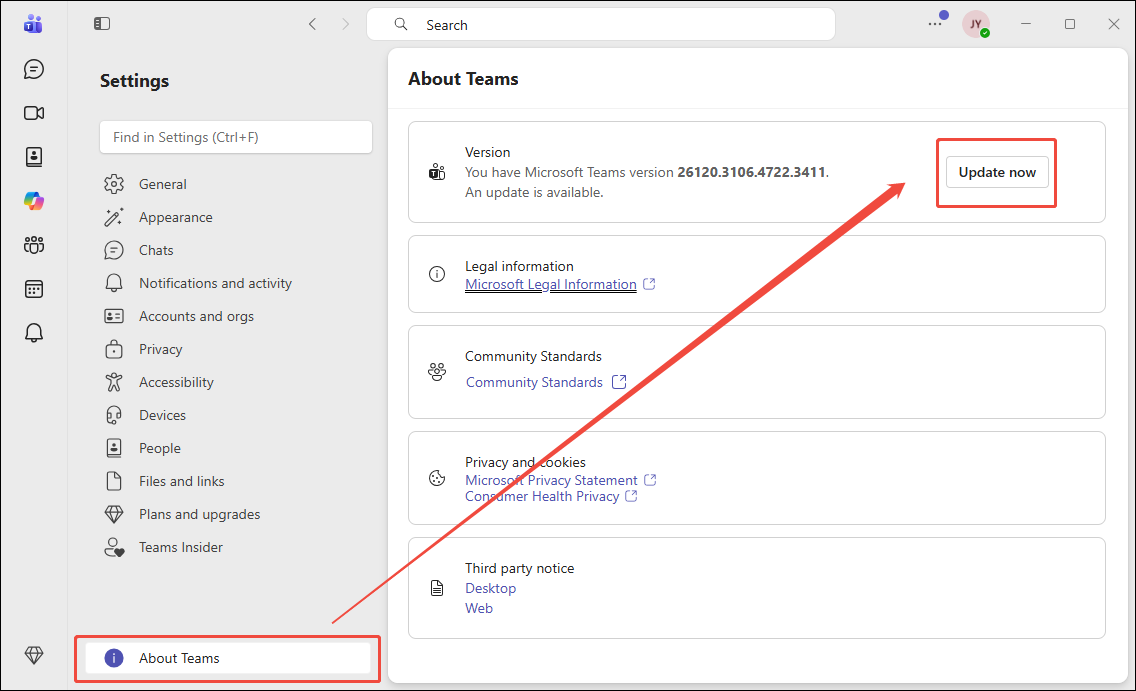
3. In the Settings interface, click the About Teams option.
4. Finally, check the version within the Version option. If there is a new version, click the Update now option on the right.
#6 Delete Teams Cache
Corrupted cache files are an often-overlooked cause of Teams recording issues because they prevent the application from functioning properly. Deleting these corrupted files is usually sufficient to resolve the problem.
1. Exit the Teams application.
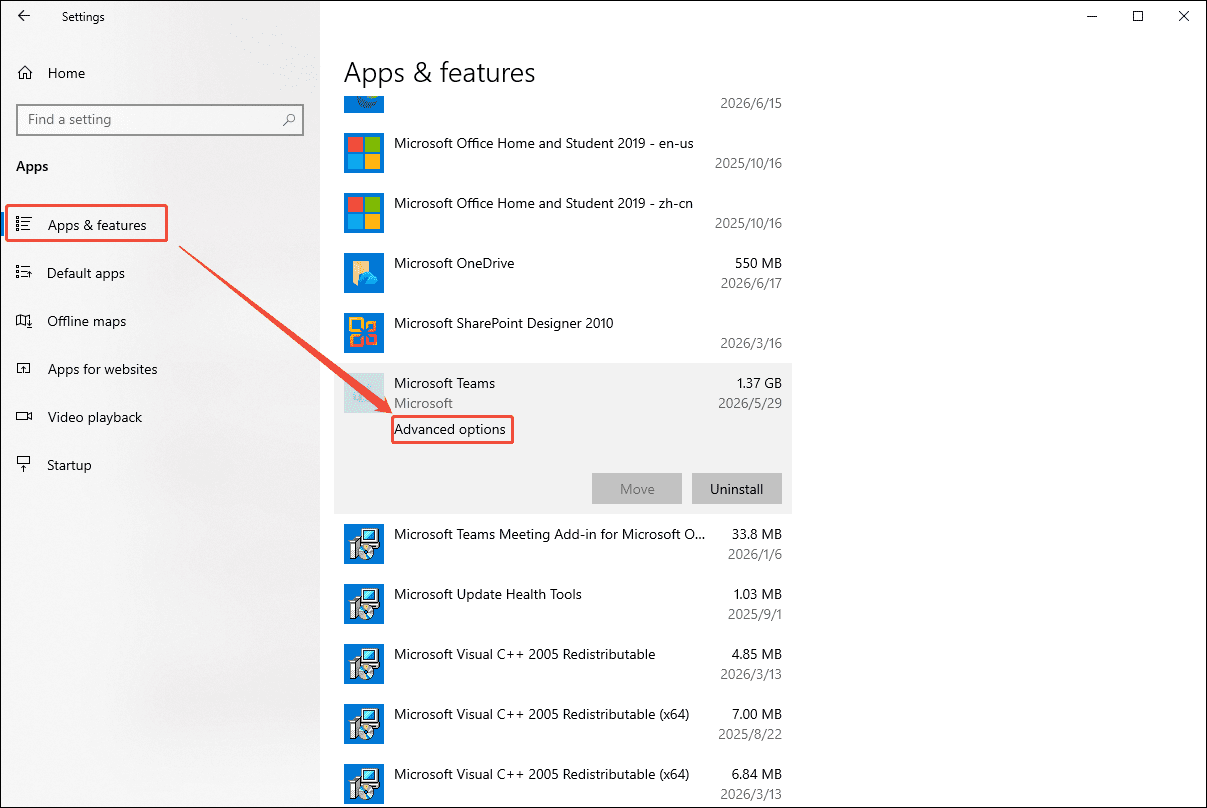
2. Press the Windows + I keys to launch the Windows Settings window.
3. Switch to the Apps module. Then, click Teams under the Apps & features section. Then, click the Advanced options.
4. Then, click the Reset option in the new interface.
Based on my testing, the above methods can largely resolve Teams recording issues. If none of the above methods work, then there is a need to seek help from the Teams technical support team.
Final Words
Why can't I record on Teams? The problem is often caused by issues such as insufficient recording permissions, limited storage, corrupted cache files, etc. This post provides 6 solutions, including requesting recording permissions, using alternative software (such as MiniTool Screen Recorder), clearing storage space, deleting cache files, etc., to quickly resolve this problem.
If there are any questions about MiniTool Screen Recorder, please contact the support team at support@minitool.com.