Using filters during video recording can enhance visual appeal, thereby attracting more viewers. This article provides a step-by-step guide to help you learn how to record video with filters, including using MiniTool Screen Recorder and Veed.io.
Why Record Video with Filter
In today's internet era, adding filters during recording is crucial for making videos stand out.
#1 Enhance Visual Appeal
Filters not only soften skin tones and adjust lighting, but also add artistic effects to videos, creating a unique atmosphere. This elevates the visual appeal of recorded footage, making it more engaging to watch.
#2 Capture Audience's Attention
Video recording with filters not only helps your work stand out in a sea of content but also instantly grabs viewers' attention, drawing more people to watch your content.
#3 Enhance Brand Identity
Whether you're an online educator or video creator, using a video recording filter creates a cohesive visual aesthetic. This further strengthens your brand identity and deepens audience recall of your brand.
How to Record Video with Filter
If you want to add filter effects while recording videos, this guide is exactly what you need. Below, we'll provide two efficient methods that require no technical background, and you can just follow the steps to quickly master them.
#1 Use MiniTool Screen Recorder
The first method is to use MiniTool Screen Recorder, a free and easy-to-use screen recording application that we've thoroughly tested. It allows users to quickly add filters to recorded content after completing the recording.
Additionally, its robust recording capabilities are worth mentioning. MiniTool Screen Recorder allows users to capture any activity on the screen, with the option to record the entire screen or a specific area as needed.
Furthermore, it supports recording system audio, microphone audio, and webcam footage. Should users require screen annotation during recording, they can utilize its built-in convenient annotation tools. It is worth noting that recorded videos will not have watermarks added and can all be exported in MP4 format.
Now, you can check the comprehensive guide on how to record a video with a filter using MiniTool Screen Recorder.
Step 1: Download and Install MiniTool Screen Recorder
MiniTool Screen RecorderClick to Download100%Clean & Safe
Click on the button above to download and install the latest version of MiniTool Screen Recorder on your computer.
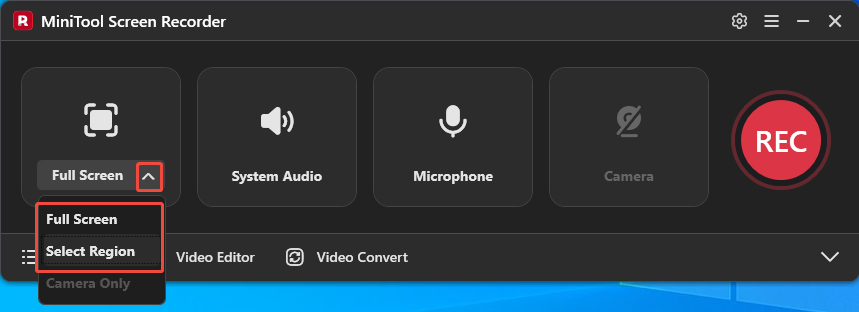
Step 2: Select the Recording Area
1. Launch MiniTool Screen Recorder on your computer.
2. Expand the drop-down menu of the Full Screen option.
3. Then, you can choose whether to record the entire screen or a specific area.
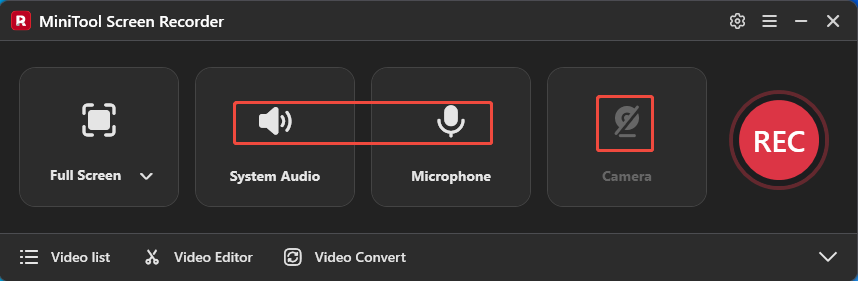
Step 3: Control the Audio and Camera Recording
1. Click on the System Audio icon or the Microphone icon to turn on or off system audio or the voiceover recording feature.
2. If you want to record with your face, you can click on the Camera icon on the right to enable the webcam recording feature.
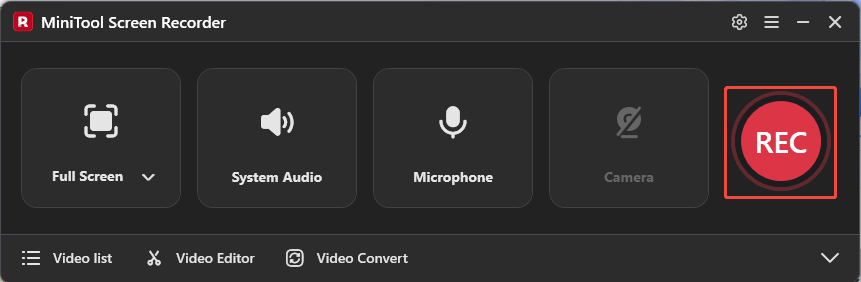
Step 4: Start and End Recording
1. To start the recording process, click on the REC button on the right side of the main interface or press the F6 key. After a 3-second countdown, it will automatically start recording.
2. When you want to end recording, press the F6 key again.
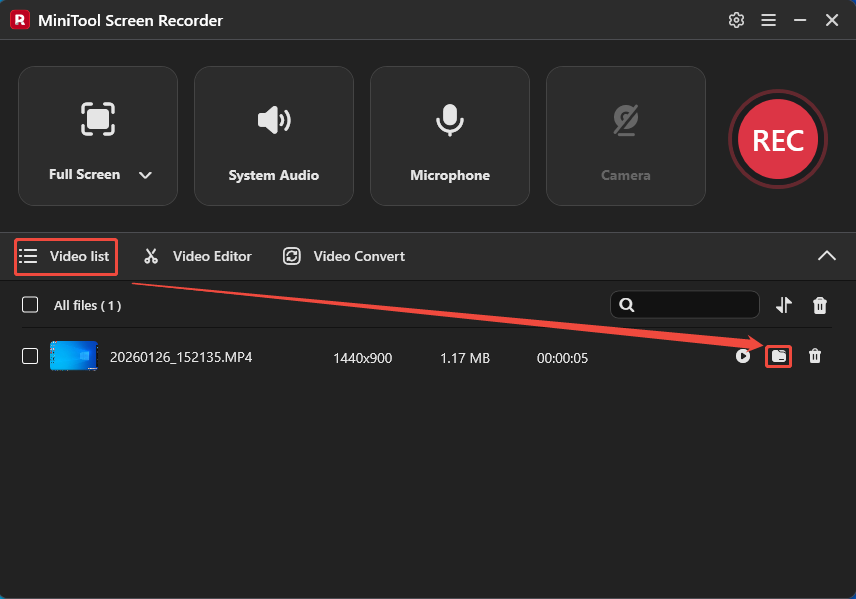
Step 5: Check the Recorded Video
After the recording is complete, you will be automatically redirected to the Video list section. Then you can click the folder icon on the right side of the video to view the recorded footage.
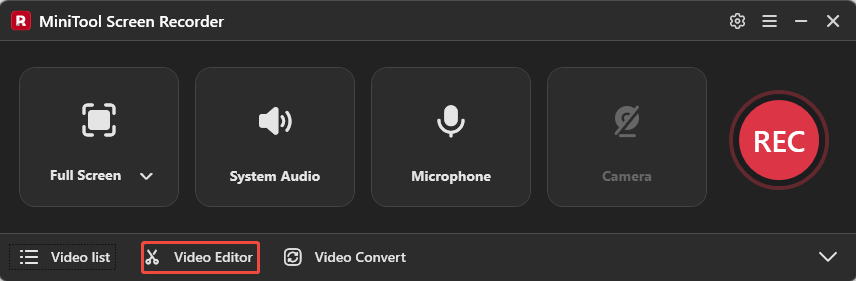
Step 6: Enable the Video Editor Feature
Click on the Video Editor option in the main interface to get MiniTool MovieMaker.
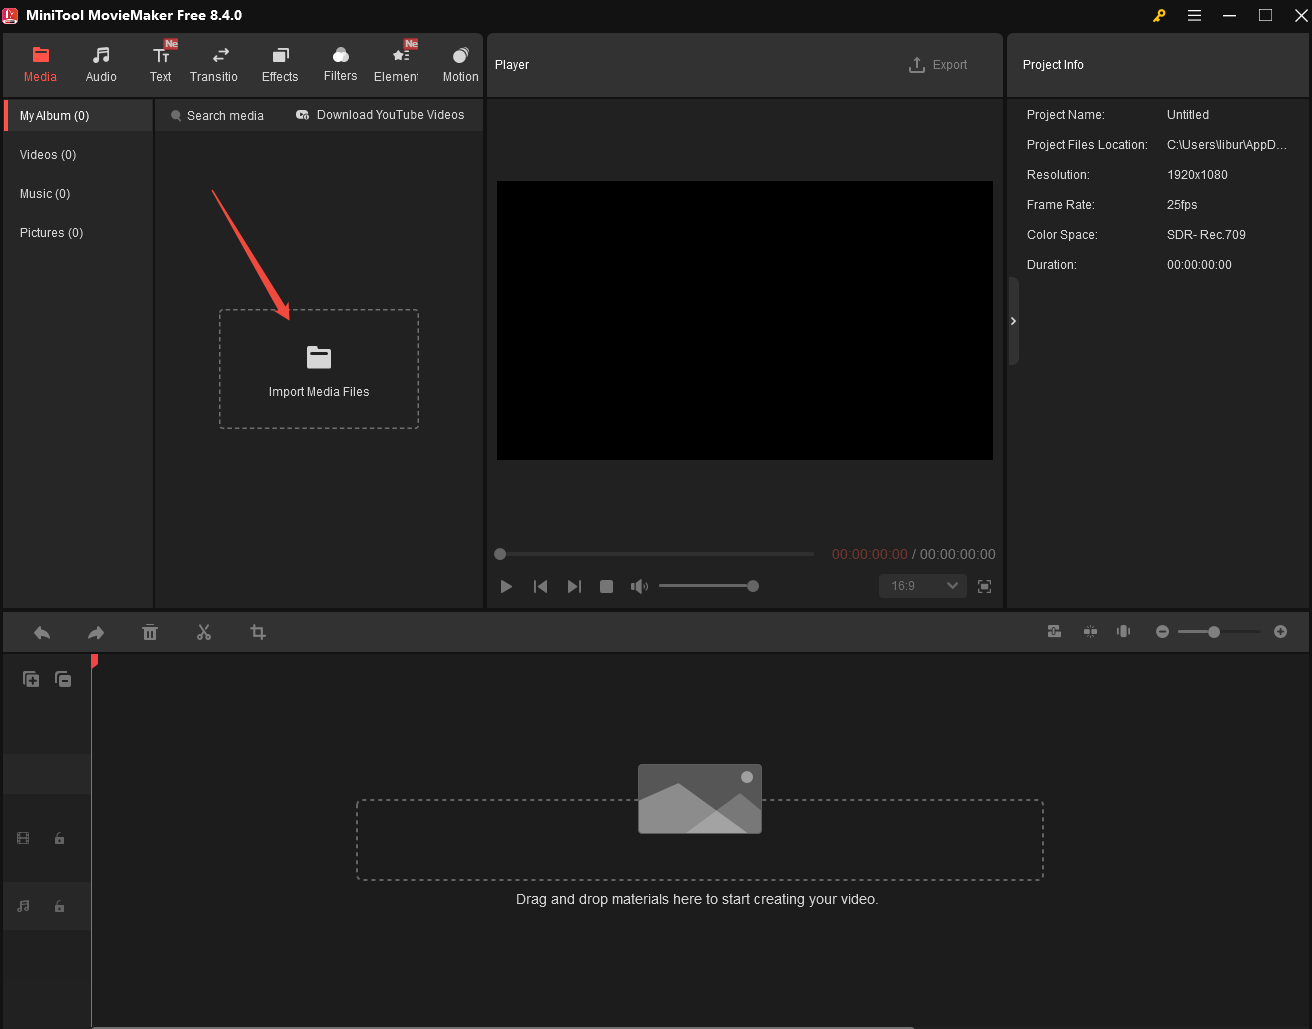
Step 7: Upload the Recorded Video
1. Launch MiniTool MovieMaker on your PC.
2. Click the Import Media Files area to upload the recorded video.
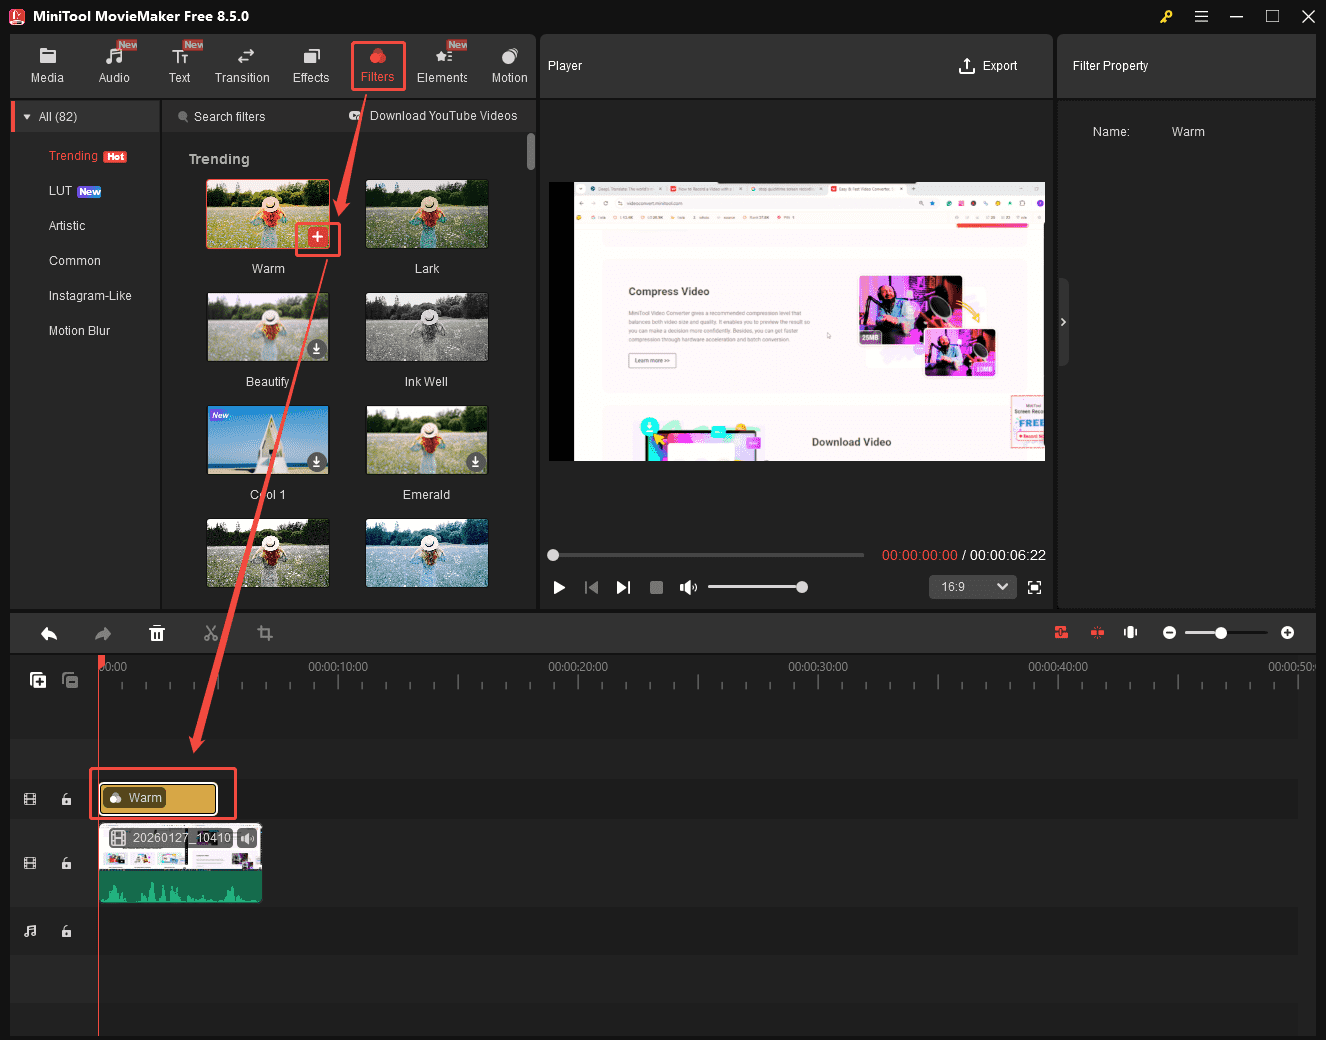
Step 8: Add Filters to the Recorded Video
1. Drag the recorded video into the timeline.
2. Move to the Filters section and choose an appropriate filter based on your needs.
3. Then click the download icon in the bottom-right corner of the filter to save it locally. Once downloaded, click the + icon to add it to your timeline.
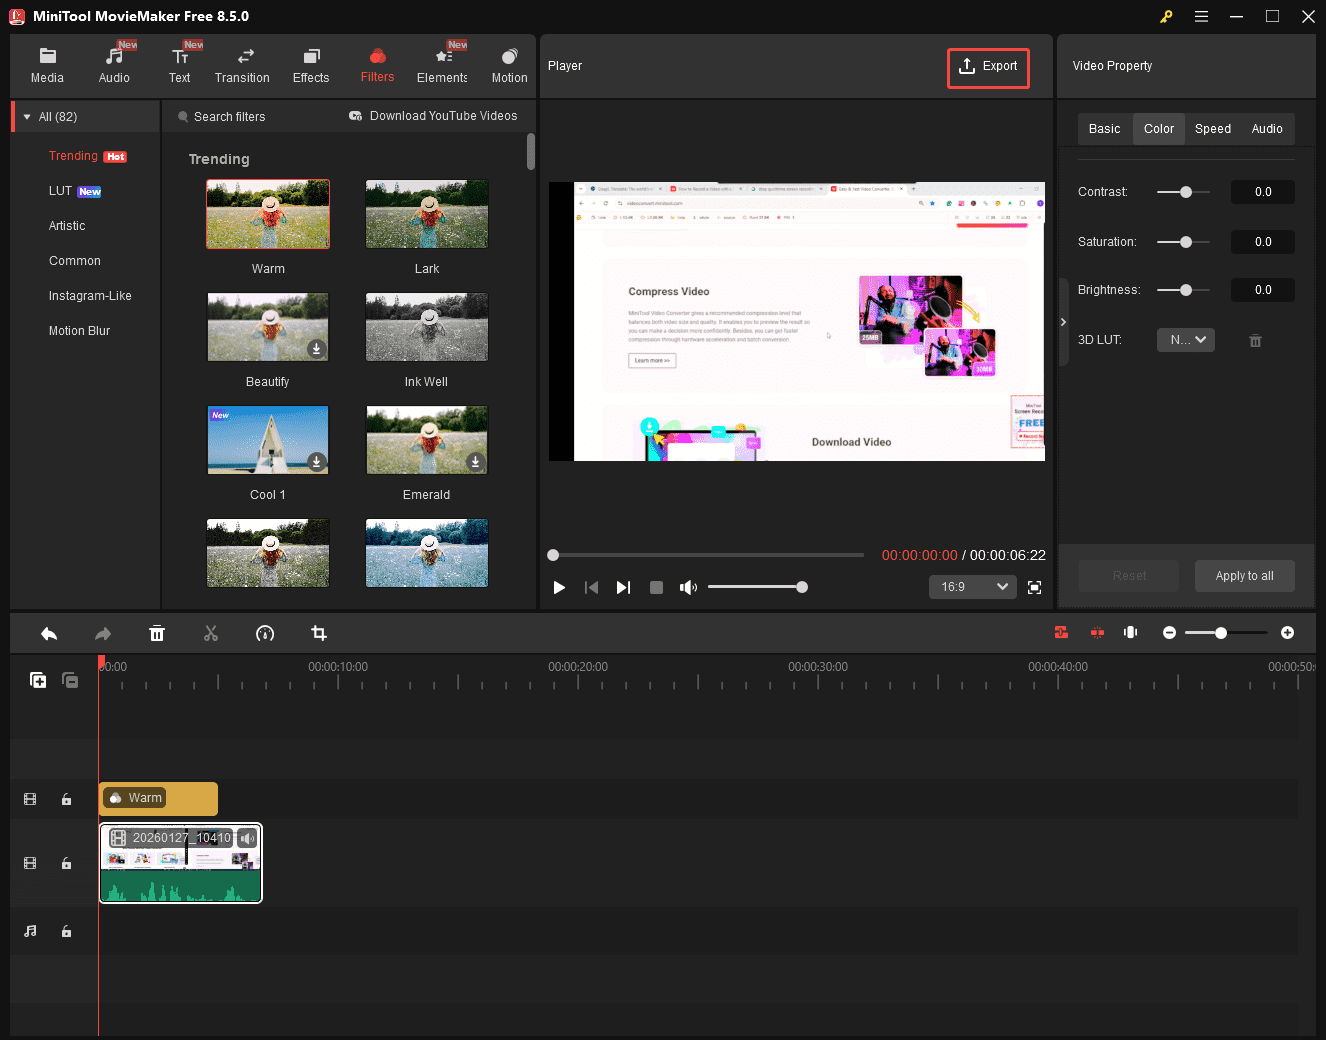
4. To make the filter better match your expectations, select the target video on the timeline, then adjust the video's contrast, saturation, and brightness in the Color section of the Video Property.

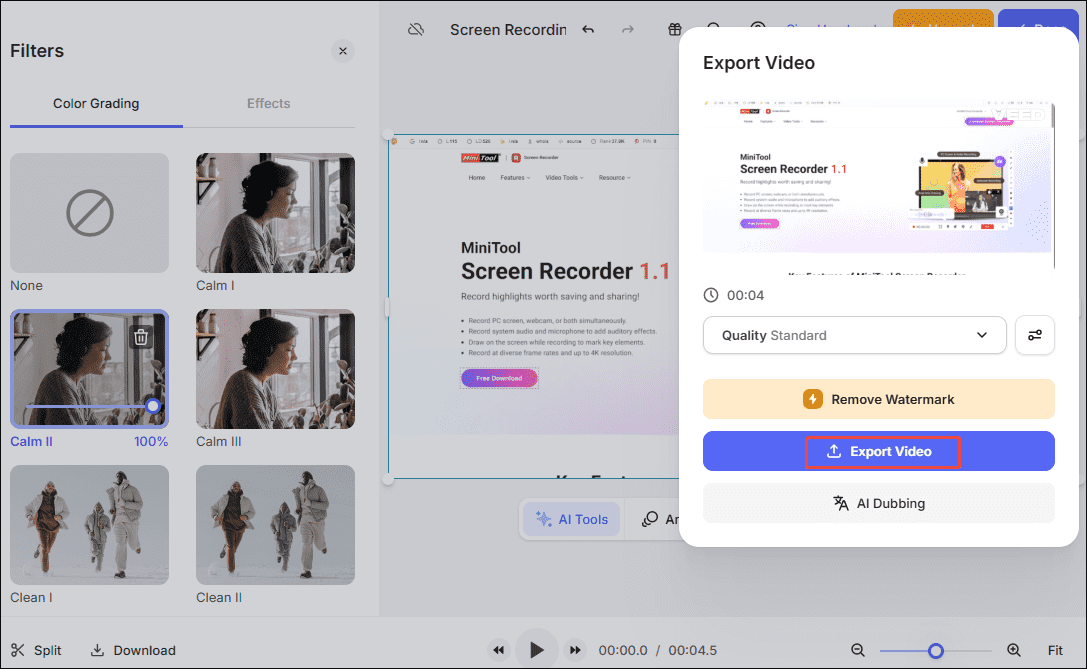
Step 9: Export the Video
After adding the filter to your recorded video, you can click the Export button at the top of the interface to save it on your PC.
#2 Use an Online Recorder
If you prefer using websites and don't want to install any software, you can opt for this online screen recording tool, Veed.io. The platform supports recording the entire screen, specific tabs, picture-in-picture, and audio content. It also allows users to add filter effects to videos after recording.
However, its free version will add a watermark. You can refer to the following specific steps before deciding whether to use it:
Step 1: Visit Veed.io
Visit the Veed.io official website and click on Start Recording.
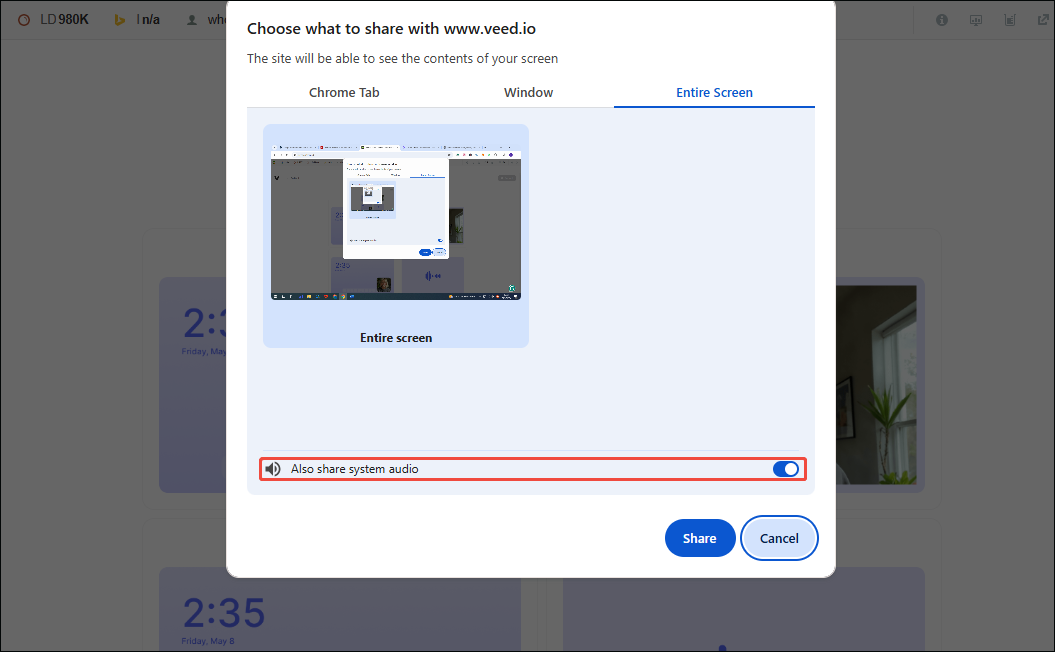
Step 2: Set the Audio Recording
Check the Also share system audio option to enable the audio recording feature.
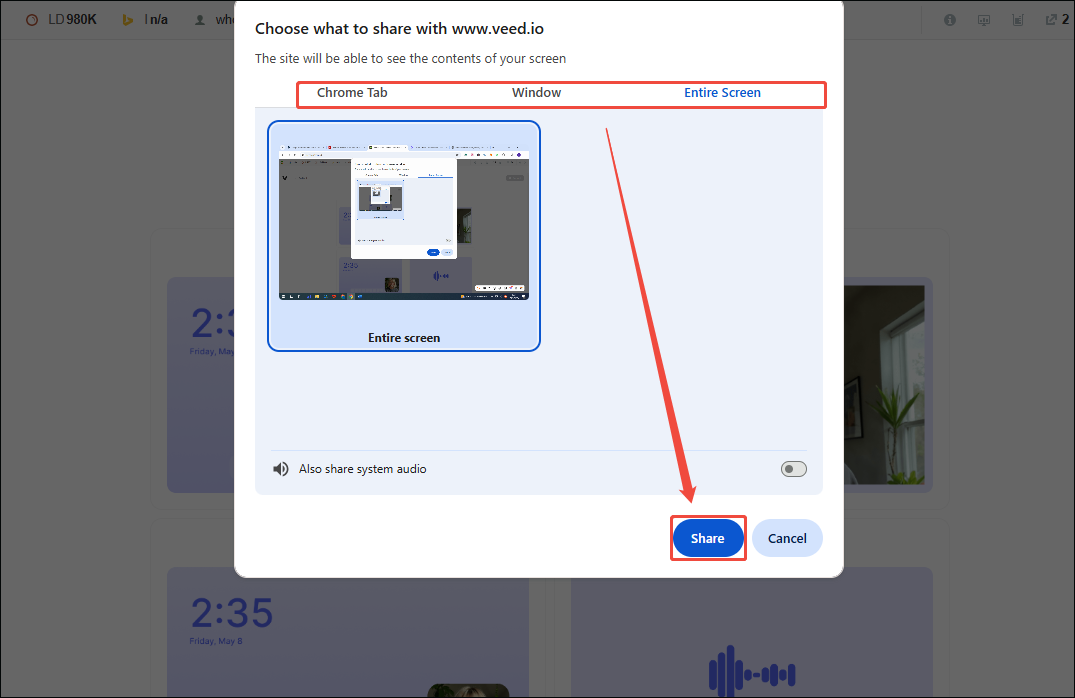
Step 3: Select the Recoding Content
1. You can choose record the Chrome tab, window, and entire screen according to your needs.
2. Click on the Share option to share the screen with Veed.io.
Step 4: Start and End Recording
1. When you want to start recording, click the Record button in the top-right corner of the screen.

2. To end the recording process, click the Stop button in the top-right corner of the screen.
Step 5: Add a Filter to the Recorded Video
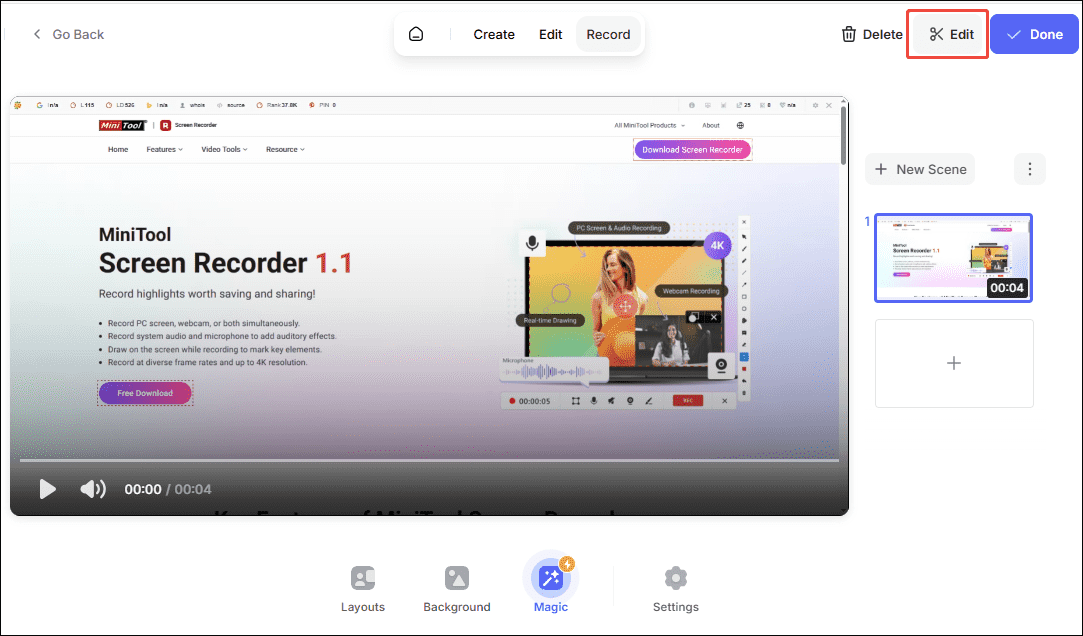
1. After the recording is complete, click the Edit option in the upper-right corner to enter the video editing interface.
2. You can tap the More options in the bottom toolbar and select the Filters option.
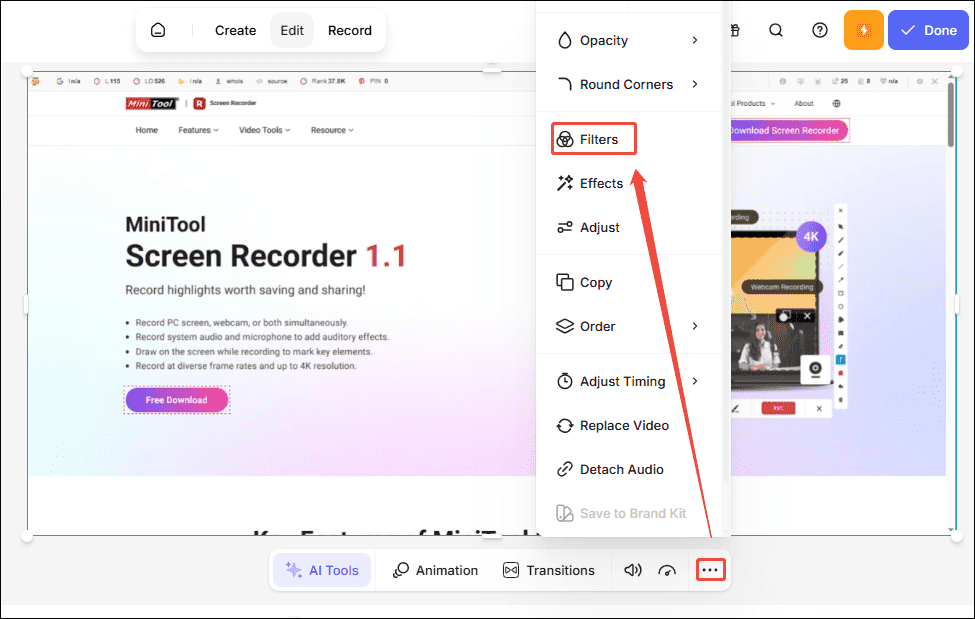
3. Then choose your favorite filter from the library on the left and tap Done to save the operation.
4. Finally, click the Export Video option to save it to your device.
In short, both methods allow you to record video with beauty filters easily. However, if you prefer not to have a watermark on your videos, MiniTool Screen Recorder is the better choice.
Final Words
All in all, it is simple to record video with filters. Whether you choose the powerful MiniTool Screen Recorder or the convenient online platform Veed.io, both can make your recordings more engaging. Start using them now to capture your amazing moments!
Additionally, if you encounter any issues or have suggestions while using MiniTool Screen Recorder, you can reach out for assistance by emailing us via support@minitool.com or sending a message on X.