

In recent years, video podcasts have gained increasing popularity. A multitude of video podcasters have emerged on platforms like YouTube; for instance, The Joe Rogan Experience and The Diary of A CEO, both of which I frequently watch, consistently rank at the top. Unlike traditional podcasts, this format seamlessly blends audio content with visual elements.
I eventually began experimenting with creating my own video podcasts, and I soon realized that producing high-quality content requires the right tools. Consequently, I have selected the 6 best podcast recording software tailored to various needs to capture podcasts:
- Clipchamp
- MiniTool Screen Recorder
- Riverside
- StreamYard
- OBS Studio
- Descript
How We Evaluate Each Podcast Recorder
To help readers quickly identify the product best suited to their needs, we have evaluated each tool based on several key dimensions: price, performance, ease of use, and intended use cases. Below is a simple comparison table I’ve put together:
| Price | Ease of use | Best for | |
| Clipchamp | Free/Paid | Easy | Beginners |
| MiniTool Screen Recorder | Free | Easy | Solo podcast makers |
| Riverside | Free/Paid | Easy | Remote video podcasts makers |
| StreamYard | Free/Paid | Easy | Live video podcasts makers |
| OBS Studio | Free | Moderate to difficult | Professionals |
| Descript | Free/Paid | Easy | AI-powered video podcast editing |
6 Best Podcast Recording Software
To help readers better understand each product, we have conducted detailed testing of their features; the relevant information is provided below.
#1 Clipchamp
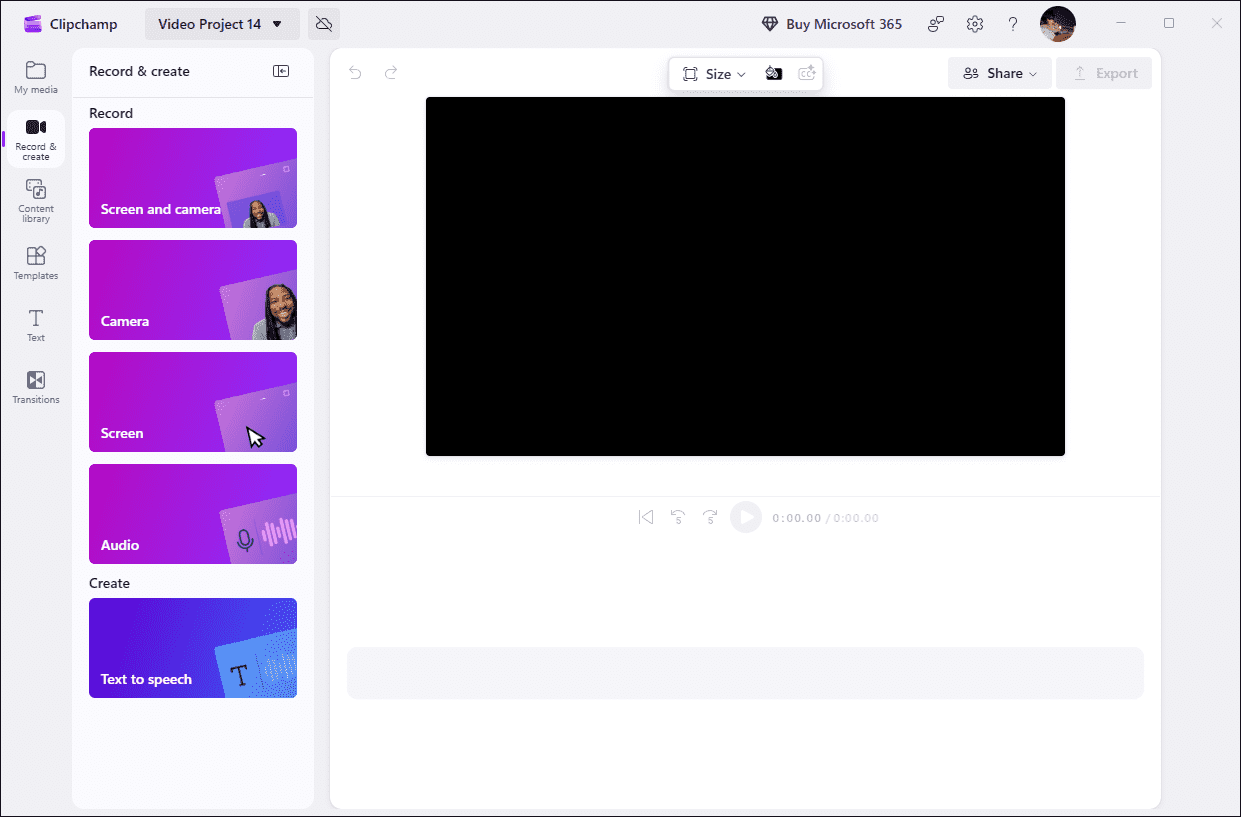
Clipchamp is a screen-recording tool built into the Windows operating system, available in both desktop and web-based versions. It offers an all-in-one workflow, allowing users to record video podcasts and perform post-production audio editing without needing to switch between multiple applications.
For those just starting to create video podcasts, Clipchamp provides an exceptionally convenient solution.
Price: Free tier (Limited); advanced features included in paid plans
Platform: Windows
Advantage: Built into the Windows system, it integrates screen recording, camera recording, audio recording, and audio editing capabilities.
Limitation: Each recording session is limited to 30 minutes; certain advanced editing features, as well as specific output format and quality options, require a subscription.
Our Take:
In our view, Clipchamp is well-suited for beginners looking to record podcasts, primarily due to its all-in-one workflow. Its interface is intuitive and easy to grasp, allowing us to get started quickly. Furthermore, the tool offers a robust set of editing features that fully cover our needs, from post-production audio editing and captioning to adding transitions.
That said, users who require more advanced editing capabilities might need to turn to other software.
Super easy to use. I'm a 55 year old woman with only moderate computer experience. I was able to figure this out in less than 30 minutes. Have come up with 3 great videos.https://www.trustpilot.com/review/www.clipchamp.com
#2 MiniTool Screen Recorder
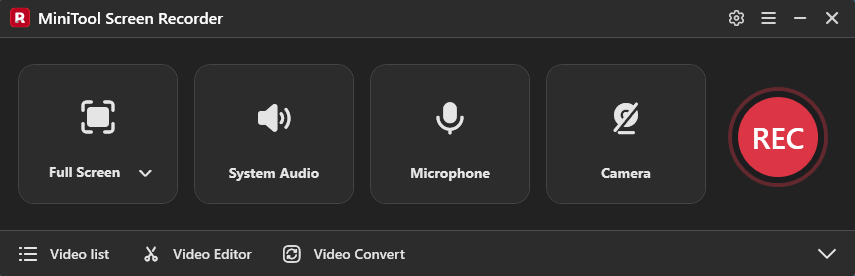
MiniTool Screen Recorder is a Windows-based free podcast recording software that allows users to capture both their screen and webcam feed simultaneously. The software offers various capture modes, enabling users to record a specific area, a particular window, a game, or an extended display.
What’s more, it provides flexible audio recording options, allowing users to record audio from a microphone, system sound, or both at the same time. Better yet, the application includes built-in annotation features, making it an excellent choice for creating instructional or tutorial videos.
Price: Completely free
Platform: Windows
Advantage: No recording duration limits; includes built-in annotation tools and the ability to simultaneously capture the screen, webcam, and audio.
Limitation: Currently, only a Windows version is available, and it lacks built-in editing features for post-production audio editing.
Our Take:
To be honest, MiniTool Screen Recorder is also very well-suited for beginners. Upon opening the interface, I simply select the recording area, enable audio and camera recording, and I’m ready to start recording podcast content.
Moreover, its greatest strength lies in the fact that it is completely free while still offering a remarkably rich set of features, making it an excellent choice for users on a limited budget. That said, I don’t believe this tool fully meets the needs of users who require remote interview capabilities or advanced post-production audio editing.
MiniTool Screen Recorder supports recording your computer screen. You can choose whether to record system audio or microphone audio. Furthermore, this screen recorder supports webcam recording.https://finance.yahoo.com/news/discover-minitools-screen-recorder-perfect-174500158.html
#3 Riverside
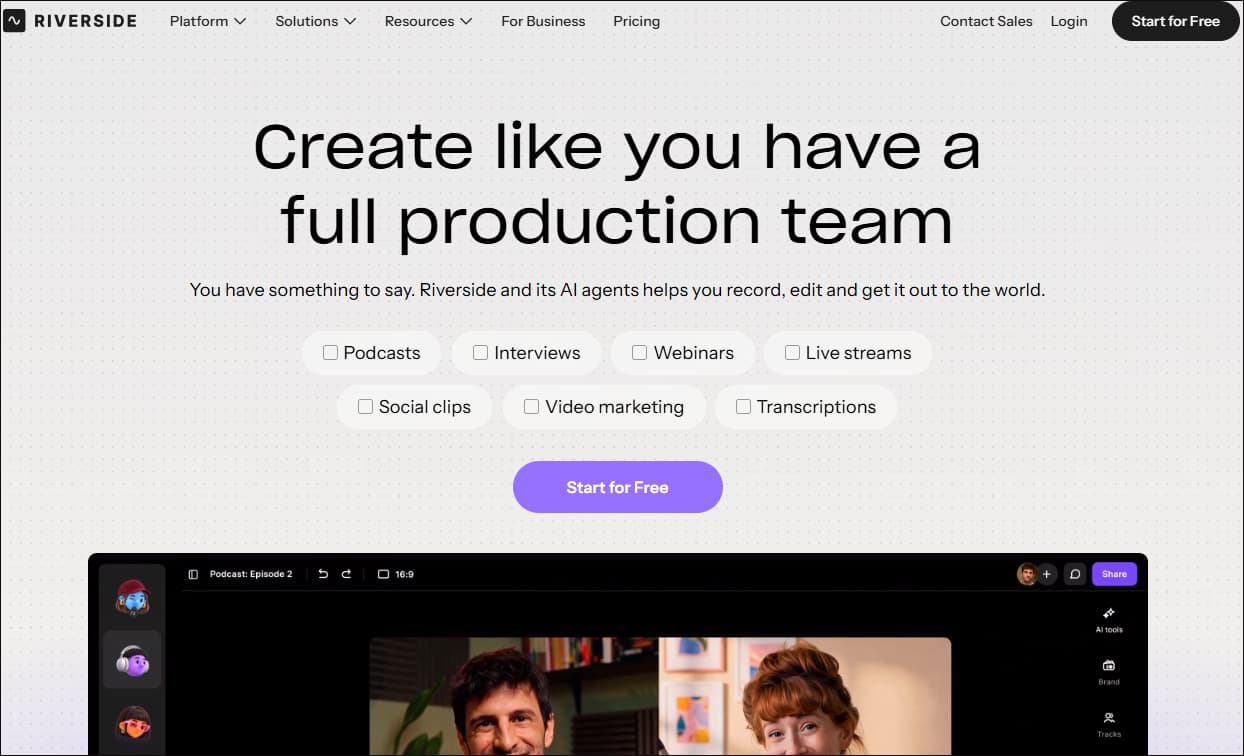
Unlike the previous two tools, Riverside is a recording platform designed specifically for podcasters. Its standout feature is the ability to conduct remote podcast recordings, allowing users to record sessions with others over a connection.
During this process, Riverside automatically captures audio locally from each participant's computer, with all recorded content saved to the cloud in real time. What’s more, the application includes editing features, enabling users to edit audio and video tracks independently.
Price: Free version: 2-hour recording limit, with watermarks on exported files; Paid versions: Available in different tiers priced at $29, $39, and $99 per month.
Platform: Windows, macOS, Linux
Advantage: Supports local recording of remote audio, with the option to separate audio and video tracks for post-production editing.
Limitation: The free version has a limit on recording duration, restricts access to certain advanced features, and its overall smoothness is dependent on the internet speed.
Our Take:
Simply put, I tend to choose Riverside when I need to boost my workflow efficiency. I’ve found that its remote recording solution significantly lightens the workload during the initial recording phase. For instance, the software automatically separates audio and video tracks, which saves a great deal of time during post-production.
Besides, I can edit the audio of an individual guest without affecting the tracks of other participants. It would be even better if the free version were less restrictive regarding advanced features; nonetheless, for those planning to record podcasts on a long-term basis, Riverside is an excellent choice.
What I like best about Riverside is how easy it makes it to create professional-quality podcast and video content without a complicated production setup. I use it for podcast interviews, virtual conversations, and content creation, and I especially value the high-quality local recording, separate audio and video tracks, transcription, and AI-powered editing tools.https://www.g2.com/products/riverside/reviews
#4 StreamYard
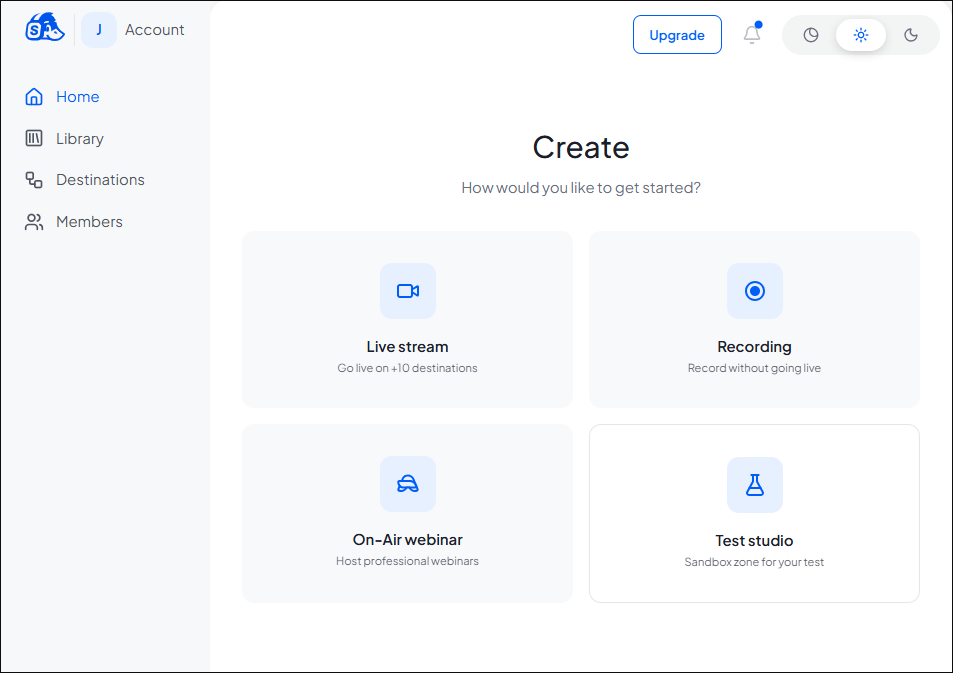
StreamYard is an online tool that combines recording and live-streaming capabilities, allowing users to create podcasts either through local recording or live broadcasts. For interview-style podcasts, users can simply share a link to invite guests to join the session quickly.
Moreover, StreamYard offers a variety of visual elements to help users build their brand identity, such as adding watermarks, dynamic effects, logos, and banners to their recorded podcasts.
Price: The free version includes a watermark on exported files; paid versions are available at $18.99, $25, and $49, depending on the specific version.
Platform: Windows, macOS, Linux, iOS, Android
Advantage: Supports recording podcasts via local recording or live streaming, with customizable layouts for the recording view.
Limitation: Advanced features are subject to limitations based on the subscription plan.
Our Take:
First, I believe that StreamYard’s browser-based operating model significantly boosts my podcast recording efficiency. Second, the tool is exceptionally well-suited for interview-style podcasts; beyond the ease of inviting guests, its customizable layout feature is my personal favorite.
It allows me to determine the split-screen format effortlessly, without needing any post-production editing, which greatly reduces the workload for subsequent cutting and polishing. Finally, I’ve found StreamYard’s podcast hosting functionality to be highly practical, enabling me to publish my recordings to various major platforms with just a single click.
StreamYard is extremely user-friendly and intuitive. The quality of streams is great, the user interface is easy to navigate, and it is super easy to connect to other platforms to broadcast live (website, social media, etc.).https://www.g2.com/products/streamyard/reviews
#5 OBS Studio
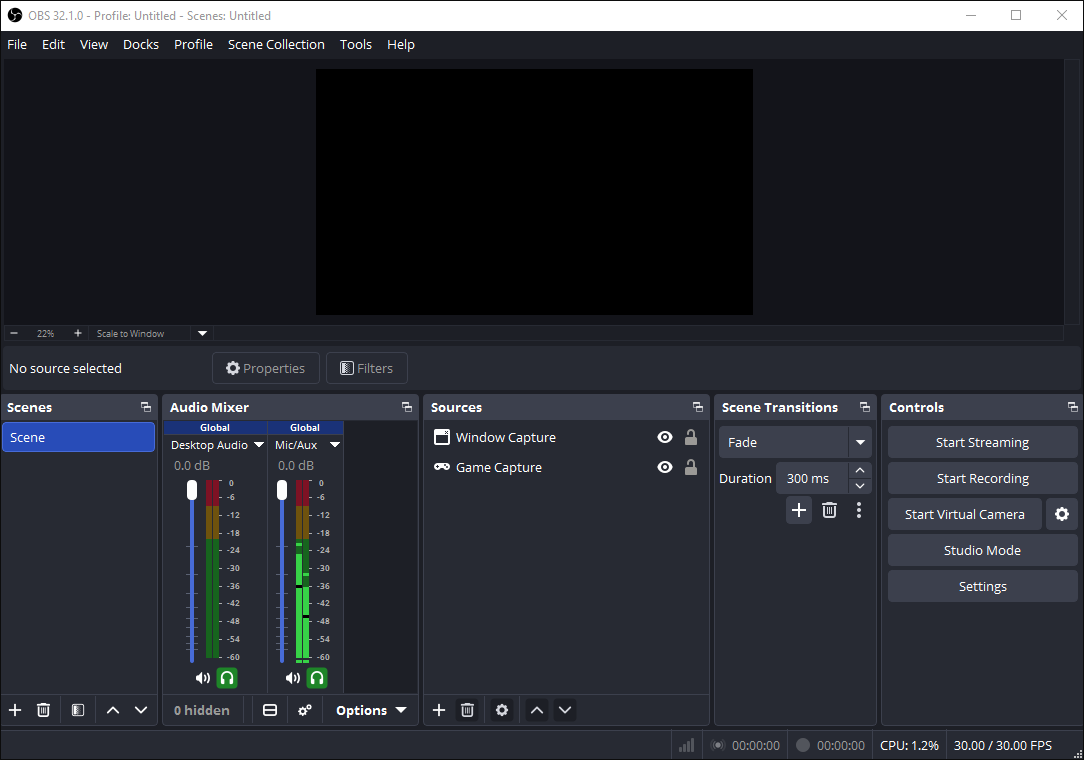
OBS Studio is an open-source software for video recording and live streaming that is completely free to use. Beyond capturing any activity on the screen, the tool also offers highly advanced audio recording capabilities.
First, it supports multi-track recording, allowing users to split audio into six separate tracks simultaneously, tracks that remain independently editable when imported into editing software. Furthermore, this tool includes built-in audio processing features, such as tools to remove breathing sounds and background noise, as well as a compressor to give your audio a fuller, richer sound.
Price: Free
Platform: Windows, macOS, and Linux.
Advantage: Supports multi-track audio recording and provides advanced audio processing functions.
Limitation: The interface design is complex, so the learning curve is steep.
Our Take:
To be honest, as a completely free and feature-rich tool, OBS Studio is well worth trying out. I particularly appreciate its ability to integrate various recording sources, such as screen capture, webcam feeds, multi-track audio, and external devices, which allows me to create highly dynamic podcast content.
However, while the software offers extensive customization options (including settings for recording bitrate, frame rate, etc.), its complex user interface does require a significant time investment to learn and master.
I use OBS Studio for capturing gameplay to publish on YouTube and Instagram. I really like the high-resolution screen capturing it offers. It gives me many customization options, which is really helpful as a gaming YouTuber. I also appreciate that it separates different voice capturing.https://www.g2.com/products/obs-studio/reviews
#6 Descript
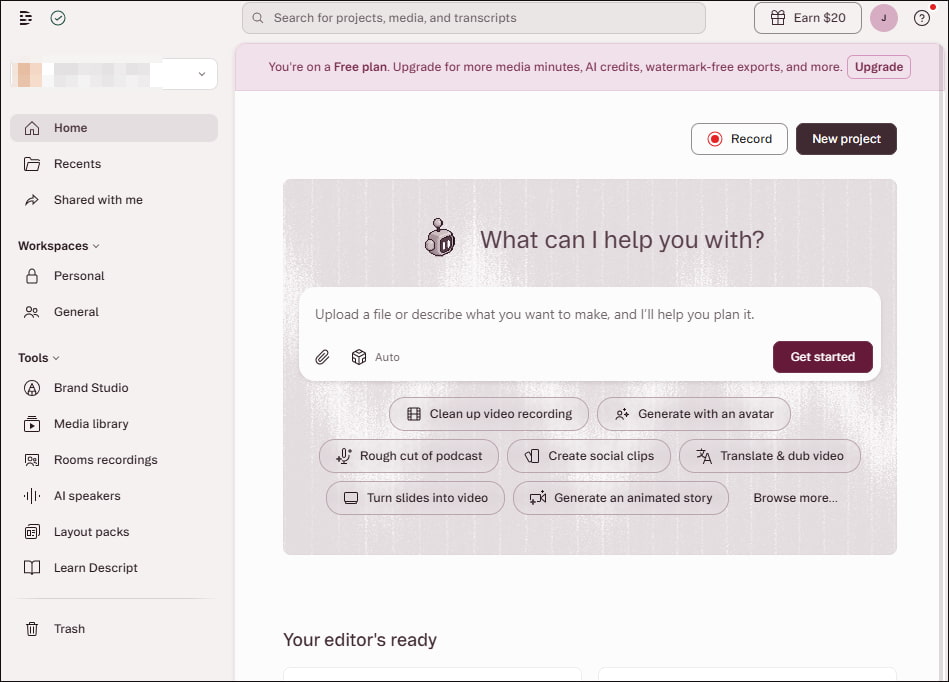
Descript is a podcast recording software that combines audio and video recording with AI-powered editing. Much like Riverside or StreamYard, it supports remote podcast recording and automatically separates audio tracks to facilitate post-production.
Moreover, its standout feature, however, is its ability to use AI to transcribe speech into text in real time, automatically identifying different speakers to generate a structured script. Furthermore, if a user’s gaze wanders, for instance, while reading from a teleprompter, the tool can use AI to perform "eye contact correction."
Price: The free version can be used indefinitely. The paid versions are priced at $24, $35, and $65 per month, depending on the specific tier.
Platform: Windows and macOS
Advantage: Supports remote collaborative podcast recording and features AI-powered tools for post-production editing.
Limitation: The free version includes limits on duration and AI usage, and exported videos will contain a watermark.
Our Take:
Based on our testing, Descript stands out as a more powerful tool for editing recorded podcasts compared to the others. While it offers standard audio and video recording capabilities, its built-in AI-powered tools can automatically process audio right from the start. For this reason, I believe it is an excellent choice for beginners, as well as for users looking to boost their productivity.
As the creators of the Don't Be a Tool podcast, Descript has completely streamlined our workflow. Being able to edit audio like a text document and clean up sound in one click saves us hours every week. If you want to check out the end result of what Descript helps us build, search for Don't Be a Tool on Spotify! Highly recommend to any audio or video creator.https://www.g2.com/products/descript/reviews
As we can see, while all six of these tools are capable of recording video podcasts, they each offer different features. Regardless of which one you choose, however, I believe any of them will help you easily create a podcast that meets your specific needs.
Bonus: How to Record a Video Podcast
Fast Track Steps:
- Open the podcast recording software
- Choose the recording area
- Enable the audio and camera recording features
- Start recording
- End recording and check the recorded video podcast
Finding the best way to do podcast recording, besides understanding and choosing the right tools, it is also necessary to learn how to perform the corresponding recording operations. This section uses MiniTool Screen Recorder as an example to explain how to record a simple video podcast.
Here are the detailed steps on how to record podcasts with MiniTool Screen Recorder.
MiniTool Screen RecorderClick to Download100%Clean & Safe
1. Download and install MiniTool Screen Recorder
Click the button above to download MiniTool Screen Recorder. Then follow the on-screen instructions to install it on the PC.
2. Select the recording area
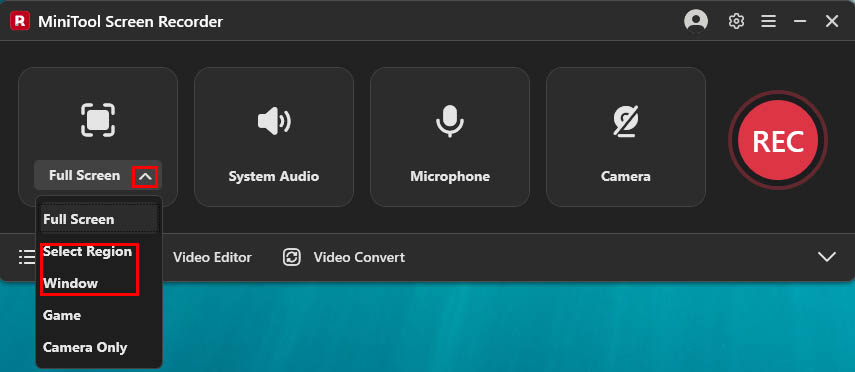
Open the program to access its main interface. The tool captures the entire screen by default. To record a specific window or application, expand the drop-down menu next to the Full Screen option, then choose the Select Region option or the Window option.
3. Configure audio recording settings
System audio and microphone recording features are enabled by default. To capture both the podcast host's voice and system audio, keep both options enabled. If only the host's sound needs to be recorded, click the System Audio icon to disable it.
4. Manage the webcam recording setting
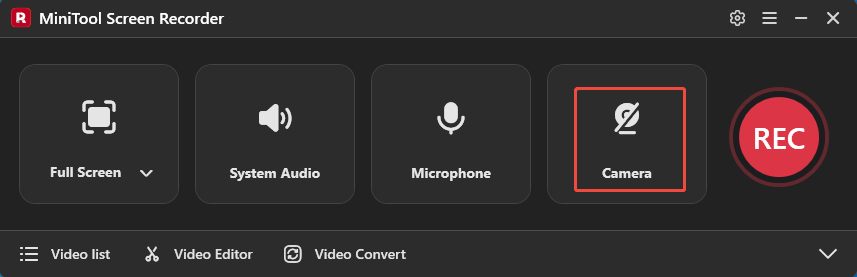
Video podcasts usually include footage of the host. To capture these visuals, click the Camera icon to enable webcam recording.
5. Start recording
To begin the recording process, click the REC button on the right of the main interface or press the F6 key. After a 3-second countdown, I can speak. During the process, press the F9 key to pause or resume the recording,
6. Stop recording
To end the recording process, press the F6 key again.
7. Check the recorded video podcast
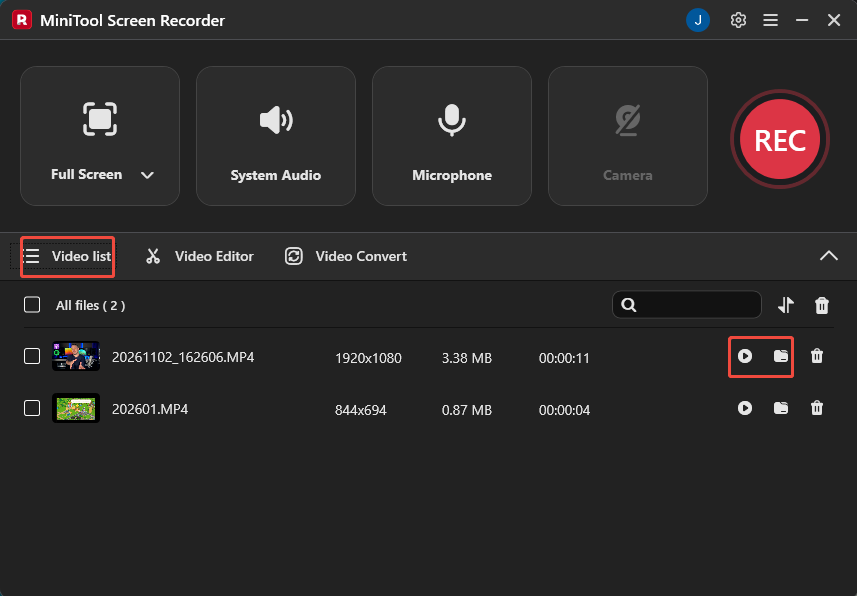
When the recording ends, the tool will automatically redirect to the Video list section. Then, I can click the Play icon to view the recorded video podcast or click the Folder icon to locate it on the computer.
Final Words
This article presents 6 distinctive podcast recording software options, capable of meeting a variety of needs, whether you are recording a solo podcast, collaborating remotely, or recording in real time. Additionally, the steps for recording a video podcast outlined in this article can help you begin your podcasting journey.
If you have any questions when using MiniTool Screen Recorder, send an email to support@minitool.com.