This article shows how to record audio on PowerPoint step by step, including using the built-in feature and a third-party PowerPoint audio recorder: MiniTool Screen Recorder. Additionally, it also shares the benefits of PowerPoint audio capture.
2 Types to Record Audio in a PowerPoint Presentation
Before learning how to record audio on PowerPoint, understanding the recording types will help you choose the most suitable audio recording method for your PowerPoint presentation.
1. Record Narration for All Slides
Recording narration for all slides is highly efficient. There’s no need to record each slide individually. It will start recording as you speak. PowerPoint also automatically aligns your voice with the slides. During recording, the recording pop-up floating toolbar is placed in a corner, so it doesn’t interfere with your presentation.
Once the recording is completed, the recorded audio is immediately displayed on the slide. The advantage of recording narration for all slides is that it’s more engaging for the audience when presented alongside the explanation. This type is ideal for online courses, training videos, and promotional presentations.
2. Record Narration for a Specific Slide
If you only have a few slides with particularly complex content that can’t be clearly explained through text alone, you may need to record audio to accompany them. You can record audio for individual slides instead of recording for all slides.
Furthermore, recording slides one by one offers greater flexibility and makes editing easier. If you need to update or modify the recording later, simply re-record the affected slides. Many presenters add extra audio to their specific slides when creating detailed tutorials.
Why Record Audio on PowerPoint
What's the reason for recording audio on PowerPoint? You can learn from the following three points.
1. Enhance Presentation’s Professionalism and Flexibility
Recording narration in PowerPoint for backup enhances the professionalism of the presenter. Recordings support asynchronous viewing, allowing for flexible remote access. It also improves accessibility and ensures the accuracy of information delivery.
2. Reuse the Recorded Audio Later
When you record audio on PowerPoint, the recording is saved along with the text and images in the presentation. You can reuse and share the audio recordings at any time. This is especially helpful for training courses, promotional presentations, and repeated instruction.
3. Assist Visually Impaired People
Recording the key audio content in your PowerPoint presentations can greatly help visually impaired people understand the main points. At the same time, recording narration broadens the audience and expands your influence.

Preparations Before Recording Audio on PowerPoint
To record audio efficiently in PowerPoint, doing some preparations in advance is essential. Read the following 4 tips previously.
- Check System Audio and Microphone: Ensure your microphone is working properly and set to the correct recording device.
- Mute Notification Sounds: Turn off system notification sounds and application message notifications to avoid interruptions during recording.
- Maintain a Quiet Environment: Choose a quiet room for audio recording to reduce background noise affecting audio quality.
- Prepare Your Lines in Advance: Prepare notes or a script handy to help you speak clearly and confidently.
How to Record Audio on PowerPoint with the Built-in Feature
PowerPoint’s built-in recording function allows users to record microphone audio and system audio slide by slide directly. However, here are some limitations of PowerPoint audio recording. Sometimes, PowerPoint screen recording may not work due to freezing or crashing. Furthermore, it may be difficult for first-time users to locate the audio recording option.
Below are 2 guides on how to record a PowerPoint slide with audio using the built-in recorder.
Method 1. Record Audio for the Specific Slides:
Recording audio for specific slides helps explain complex content to your audience.
Step 1. Open the PowerPoint Presentation
Launch the PowerPoint on your screen and go to the presentation you want to record.
Step 2. Begin/end the Audio Recording Process
Switch to the Record tab. Here, expand the Audio option and choose the Record Sound option to trigger the Record Sound window.
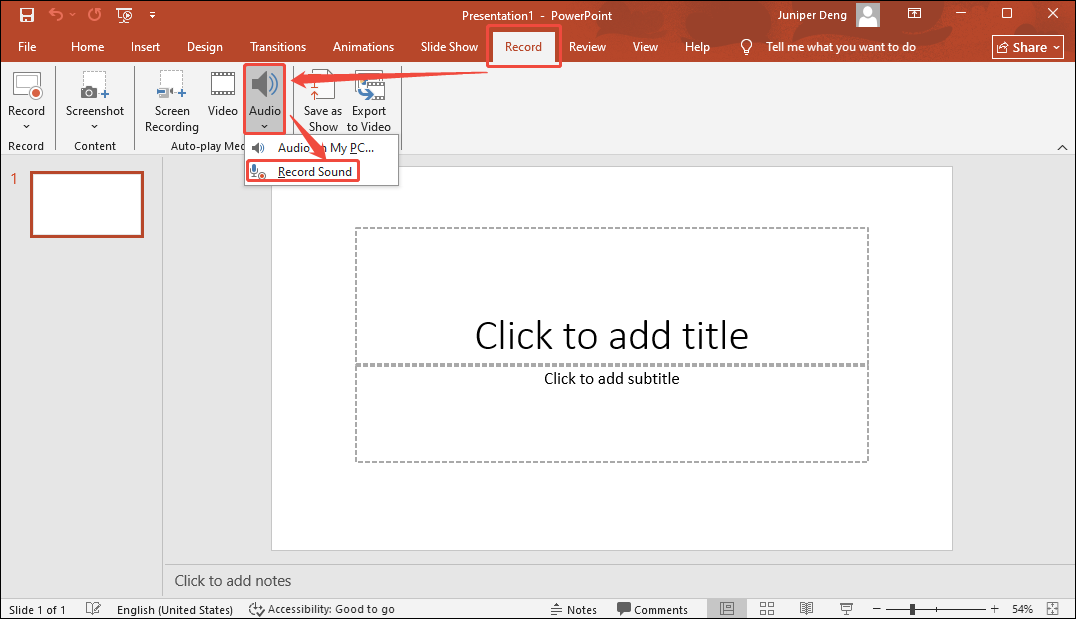
In the Record Sound window, click on the Record option to begin the audio recording.

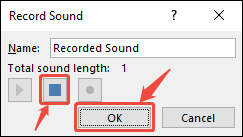
After starting recording, you can start speaking into the microphone or making other sounds that need to be recorded. If you decide to complete this audio recording, click on the Stop button to end this recording. Then, click the OK button to add the recording to the slideshow.
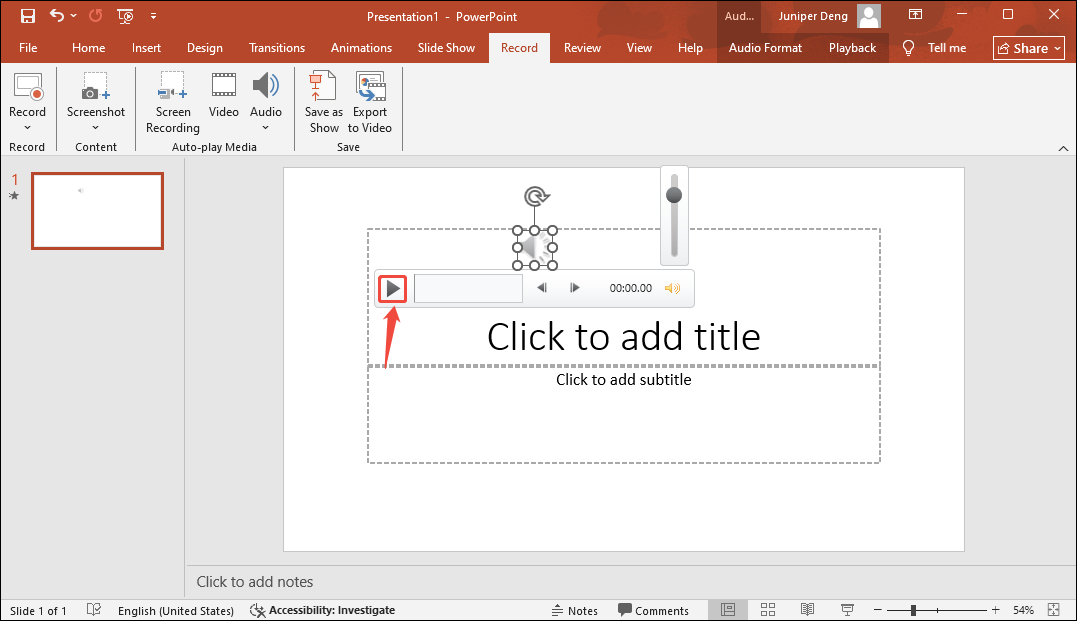
Step 3. Check the Recorded Audio
When this audio recording finishes, it will automatically appear in the PowerPoint presentation. Then, you can click on the Play icon to check it.
Method 2. Record Audio for All the Slides:
Recording audio for all your slides allows you to add narrations for all your presentations, making the presentation richer and more engaging. There are the steps to record a PowerPoint presentation with audio for all slides.
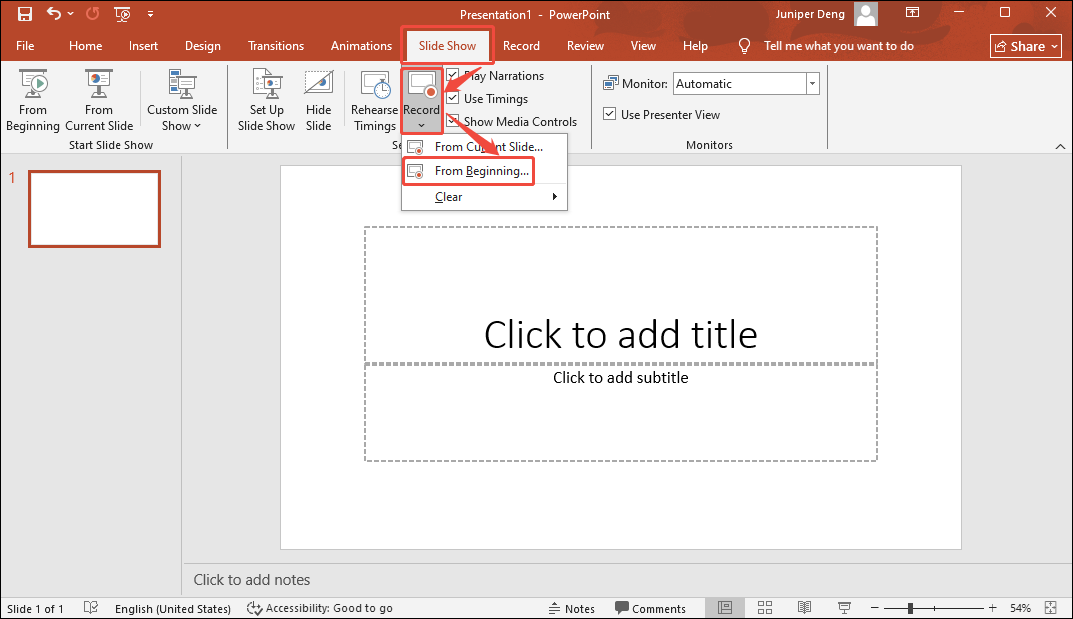
Step 1. Navigate to the Recording Section
Open the PowerPoint presentation you need. Then, switch to the Slide Show tab. Here, expand the Record option to select the From Beginning… option to open the Record Slide Show window.
Step 2. Begin the Audio Recording
In the Record Slide Show window, check the Slide and animation timings option and the Narrations, ink, and laser pointer option. Then, click on the Start Recording button to begin the audio recording for all slides. During recording, you need to click or scroll down with your mouse to turn the slides.

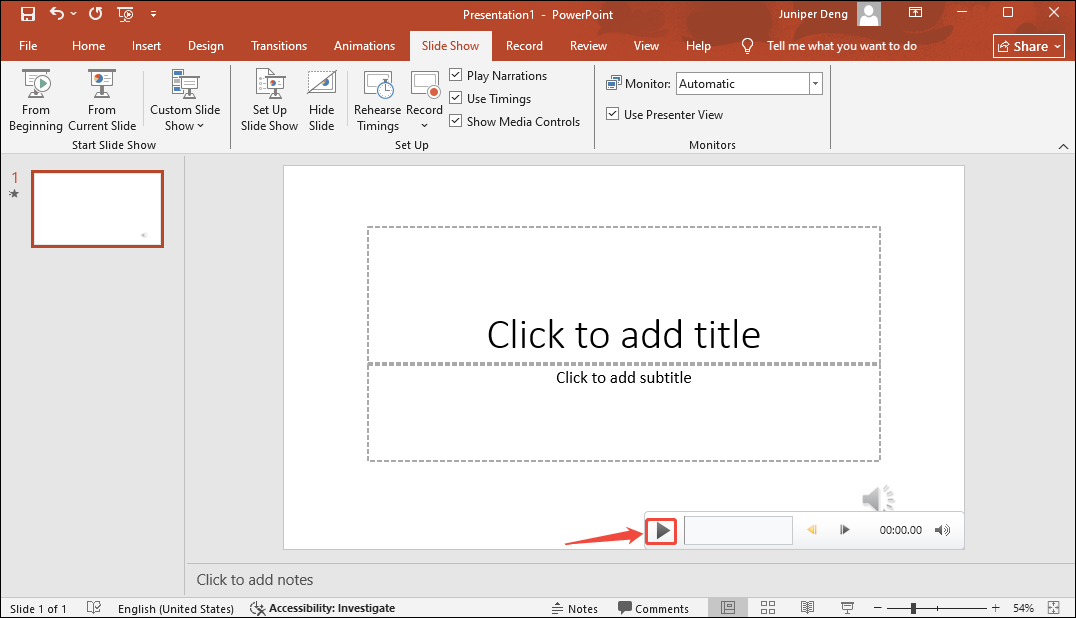
Step 3. Check the Recorded Audio
After completing the recording, the recorded audio will land on the present slide. There, you can click on the Play icon to check it.
Using PowerPoint’s built-in audio recording tool is efficient. It also supports easy editing of the recorded audio.
How to Record Audio with MiniTool Screen Recorder
MiniTool Screen Recorder is a lightweight and professional screen recording tool suitable for both experienced users and beginners. Its stable performance and clean interface allow users to record their screen, voiceover, and system sounds.
MiniTool Screen Recorder is fully compatible with Microsoft PowerPoint, enabling it to record audio during PowerPoint presentations. Besides, it supports high-quality audio recording, providing users with clear audio output. MiniTool Screen Recorder allows users to choose to record only the microphone sound, only system audio, or both simultaneously.
Furthermore, MiniTool Screen Recorder has no time limit. It also supports recording webcam, which helps make a PiP (Picture-in-Picture) effect. What’s more, it allows you to record real-time annotations, enriching your PowerPoint content.
Next, let’s try to record audio on PowerPoint using MiniTool Screen Recorder.
Step 1. Download and Install MiniTool Screen Recorder
Click on the download button below to download and set up MiniTool Screen Recorder. Then, launch and log in to it.
MiniTool Screen RecorderClick to Download100%Clean & Safe
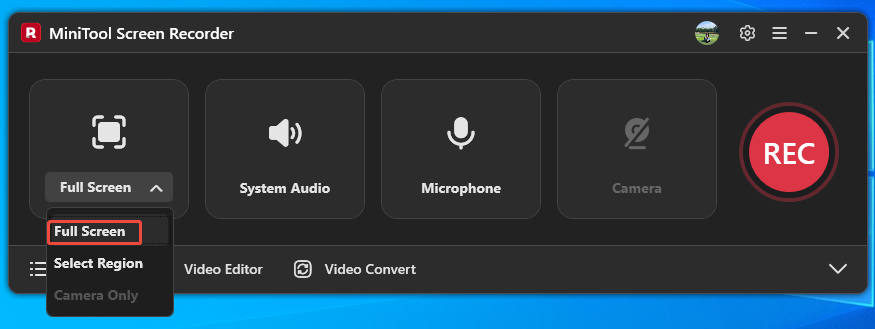
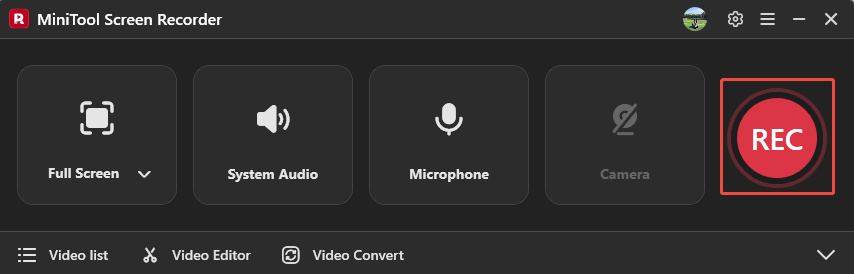
Step 2. Set a Screen Recording Type
Expand the screen recording option and choose a mode. Here, I use Full Screen.
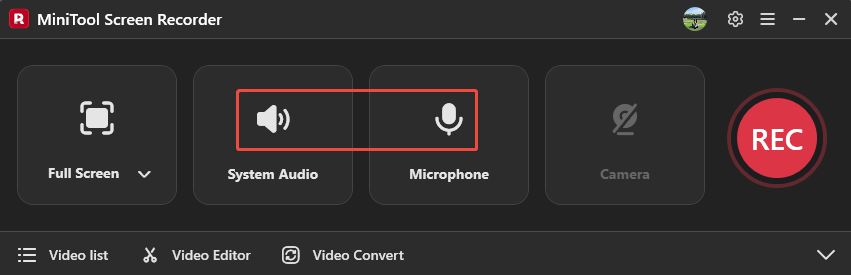
Step 3. Enable the Audio
Click on the System Audio icon and the Microphone icon to decide whether to capture your system audio and microphone.
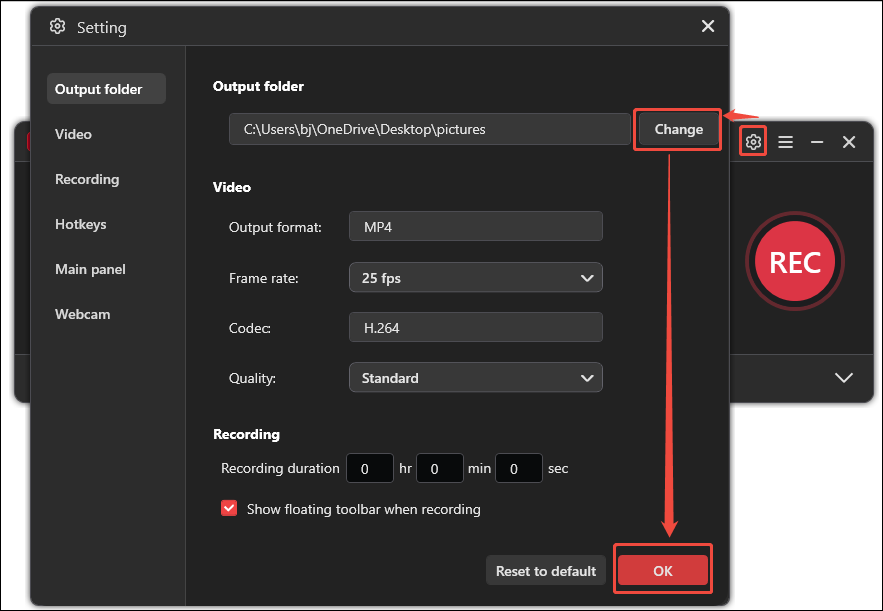
Step 4. Select a Saving Folder for the Recorded Audio
Click on the Settings icon on the upper right of the interface to open the Setting window. There, click on the Change button to choose a storage destination. Then, click on the OK button to apply the change.
Step 5. Start Recording
When you complete those settings, click on the REC button to start recording after a 3-second countdown. Then, open your PowerPoint presentation to play the audio or start speaking.
Step 6. Stop the Recording Process
If you need a halftime break, press the F9 key to pause or resume the recording. To end this recording, press the F6 key.
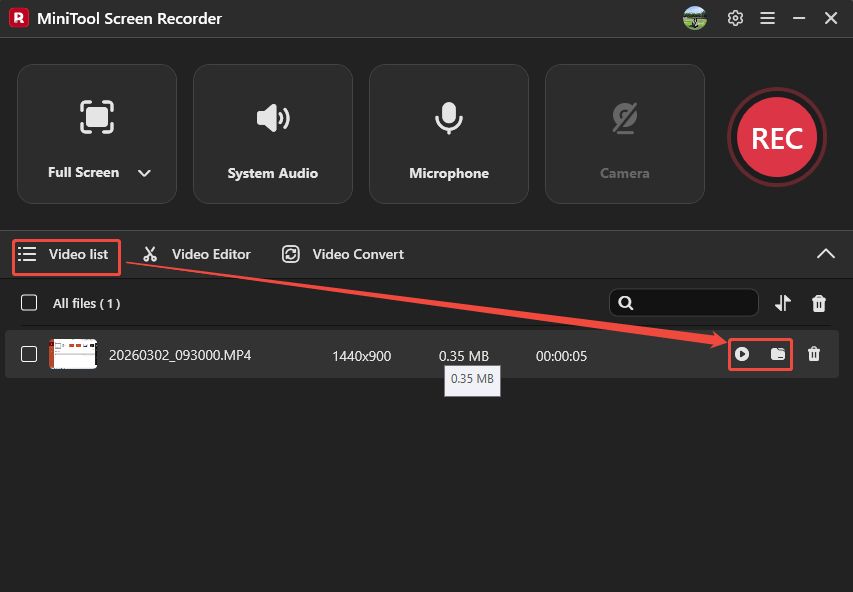
Step 7. Check Recording Result
Once the recording process finishes, the recorded video with audio will be present under the Video list tab. Here, click on the Play icon to check the audio quality and completeness. Or you can click the Folder icon to locate the recorded audio.
MiniTool Screen Recorder is a marvelous audio recording tool. It simplifies your screen recording process.
Benefits of Recording Audio to PowerPoint Presentations
Is recording audio good for presenting PowerPoint slides? Yes, of course! Learn the 3 main merits of recording audio on PowerPoint.
1. Help Understand the Content Better
Recording audio can make your presentations easier to understand. Narration can clearly explain difficult concepts. This is especially useful for complex topics, data charts, or step-by-step instructions. If you record slides with narration, your audience will have a thorough understanding of the core content when they watch the presentation recording again later. Recording narration also helps the audience stay focused and avoid missing key information.
2. Enhance the Professionalism of the Presentation
Clear narration makes a presentation more distinctive and well-prepared. It shows that the speaker has taken the time to carefully explain the content, rather than simply relying on the text on the slides. This output makes the audience feel that you are creating content with care rather than just performing. Great audio quality and fluent delivery also leave a lasting impression.
3. Simplify Workflow
For those who value efficiency, some audio recordings can be used for more than just the current presentation. If someone raises a question related to the presentation later, the audio can be shared to answer that question, avoiding the need for further explanation.
This approach is typically suitable for instructors, corporate trainers, and other professionals who frequently use PowerPoint presentations. Furthermore, the combination of audiovisual content makes it more appealing to share and transmit, which can also improve work efficiency. In addition, recorded presentations can be reused as reference material.
How to Enhance Audio Quality in PowerPoint Recordings
The quality of the recorded audio is crucial. Following 3 steps can significantly improve the clarity and professionalism of your PowerPoint audio recordings.
1. Adjust Microphone Position and Distance
Microphone position and distance greatly affect sound clarity. Recording too close can cause popping sounds, affecting audio clarity. If the microphone is too far from your mouth, it may not capture enough sound information, resulting in weak and unclear audio. When recording PowerPoint narrations, place the microphone slightly to the side rather than directly in front of your mouth to reduce airflow interference. Additionally, record a test version beforehand to adjust the microphone position and distance.
2. Control Speaking Volume and Rate
Maintaining a stable mood and volume while recording PowerPoint narrations helps provide the best tone. Also, be sure to output your speech at a consistent pace. Speaking too fast or too slow will affect the quality of the audio recording.
3. Check and Export Clear Audio Settings
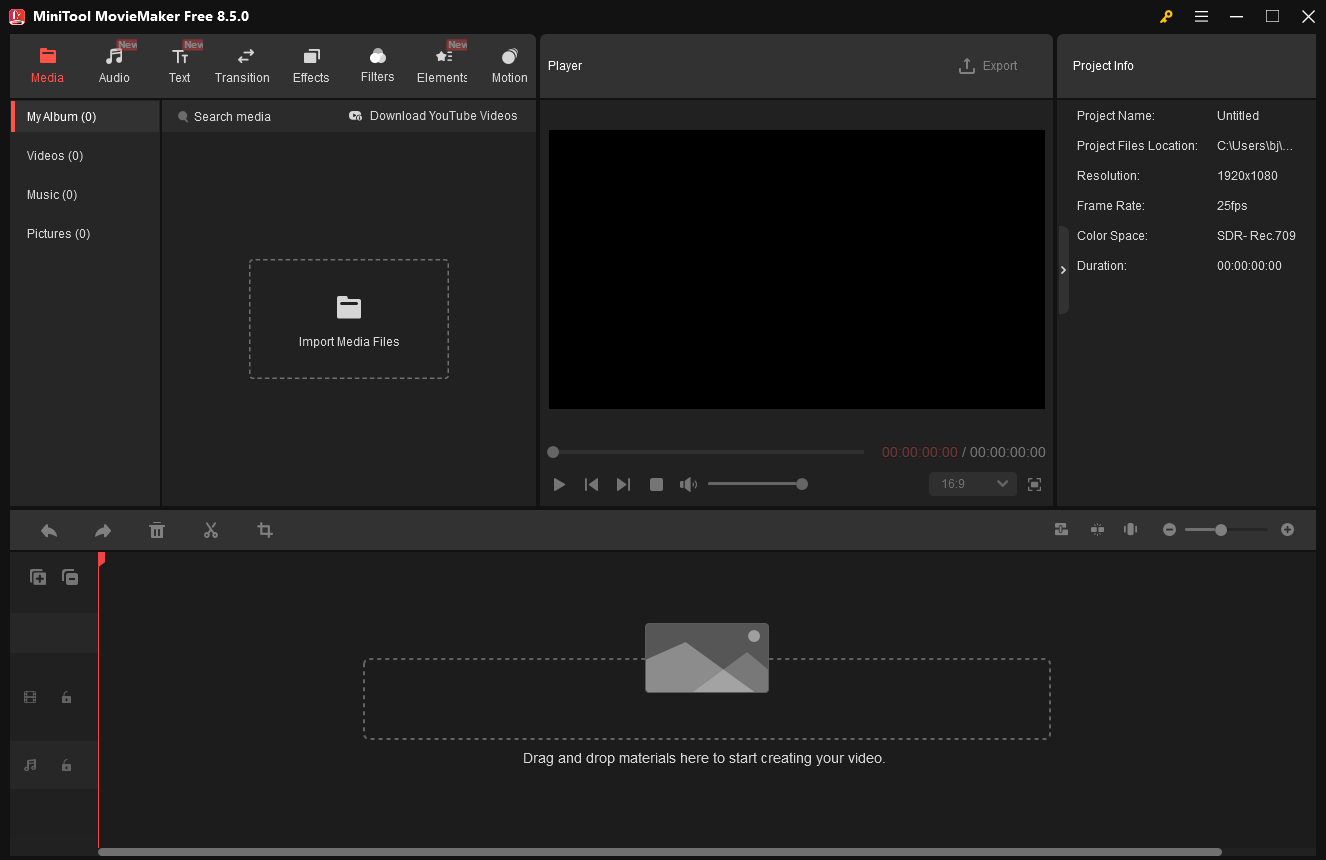
After recording, be sure to play back the audio to check it, ensuring the sound is natural and smooth, and synchronized with the slides. To improve audio quality, you can use PowerPoint’s trim function to remove unclear parts of the exported audio. After exporting the audio, you can also use other devices to check the clarity of the exported audio.
MiniTool MovieMakerClick to Download100%Clean & Safe
Final Words
Learning how to record audio on PowerPoint is important for creating excellent presentations. This article shows you 2 fabulous recording methods, including using PowerPoint’s built-in recording feature and an external recorder: MiniTool Screen Recorder. If you would like to learn more about MiniTool Screen Recorder, you can send an email to support@minitool.com. Or you can directly message me on X to contact me. I will reply to you as soon as possible.