How to capture a screen recording to MP4? This article recommends 2 excellent screen recorders: Xbox Game Bar and MiniTool Screen Recorder, with their detailed recording guides. It also provides solutions to common MP4 recording problems.
MP4 (MPEG-4 Part 14) is a digital multimedia container format that is primarily used to save video and audio. It utilizes lossy compression technology. Besides, compared to MKV and WebM, MP4 is still a great format due to its strong compatibility and compression efficiency. MP4 usually has the file name extension of .mp4. It has a wide range of popularity, which can be recognized by most computer systems, web browsers, players, and mobile devices.
Given these advantages, MP4 is often the first choice for screen recording, facilitating subsequent playback, sharing, or editing.
How to Record MP4 on Windows
I’ve tried many methods to save screen recordings to MP4. Among them, I think 2 are highly recommended.
1. Use Xbox Game Bar (Windows Native Recorder)
Xbox Game is built into the Windows system. It allows me to screen record to MP4 smoothly. I only need to enable Xbox Game Bar on my computer before I use it. What’s more, I can also use it to chat with friends and access the widget without leaving the content I’m recording.
Let me show you how to record an MP4 on Windows with Xbox Game Bar.
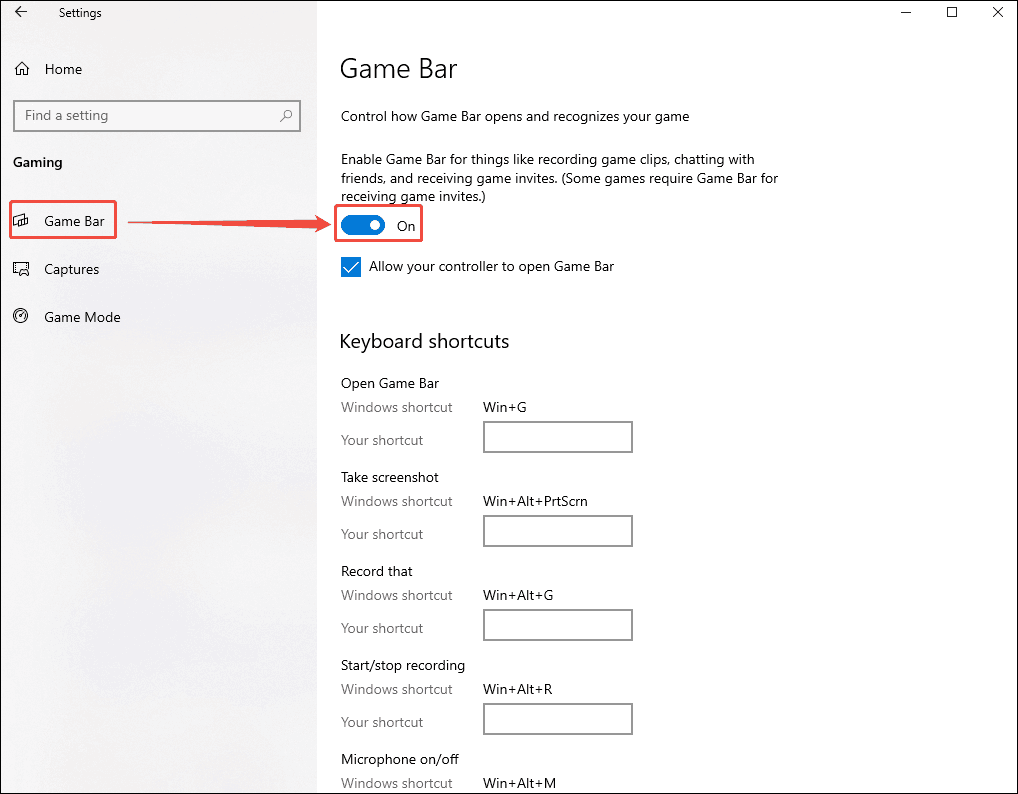
Step 1. Enable Xbox Game Bar
To enable the Xbox Game Bar, I press Win + I to open the system Settings window. Click on the Gaming option to enter the Game Bar page. Here, I click the Xbox Game Bar launch button in the Game Bar tab to activate this widget.
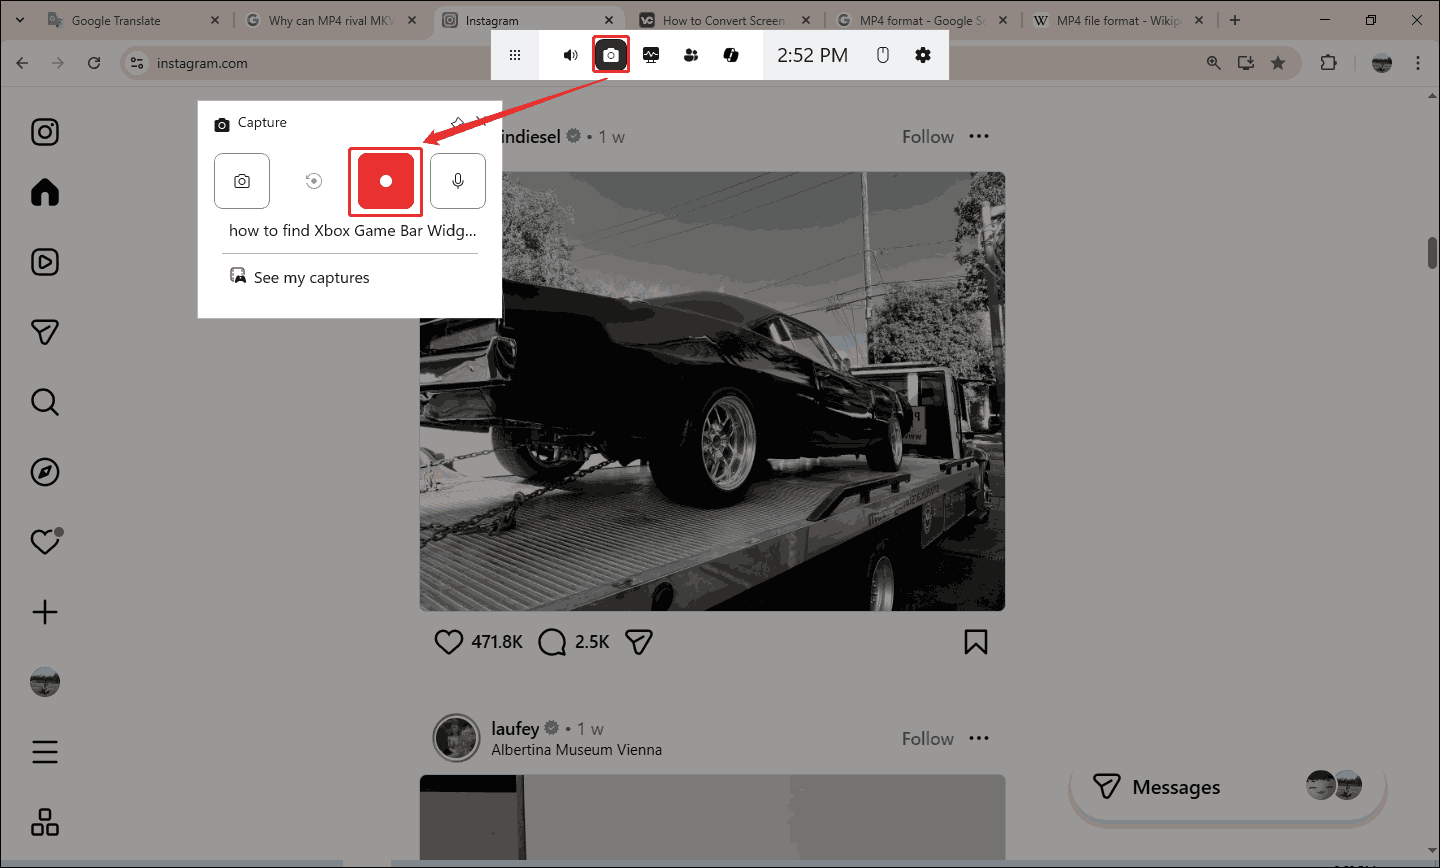
Step 2. Begin/Stop Recording
After enabling Xbox Game Bar, I press Win + G to run Xbox Game Bar’s movable toolbar. There, I click the Camera option to trigger the Capture window. In this window, click the Record button to begin recording. Then, I open the content that I want to record. To stop this recording, I click the Stop button.
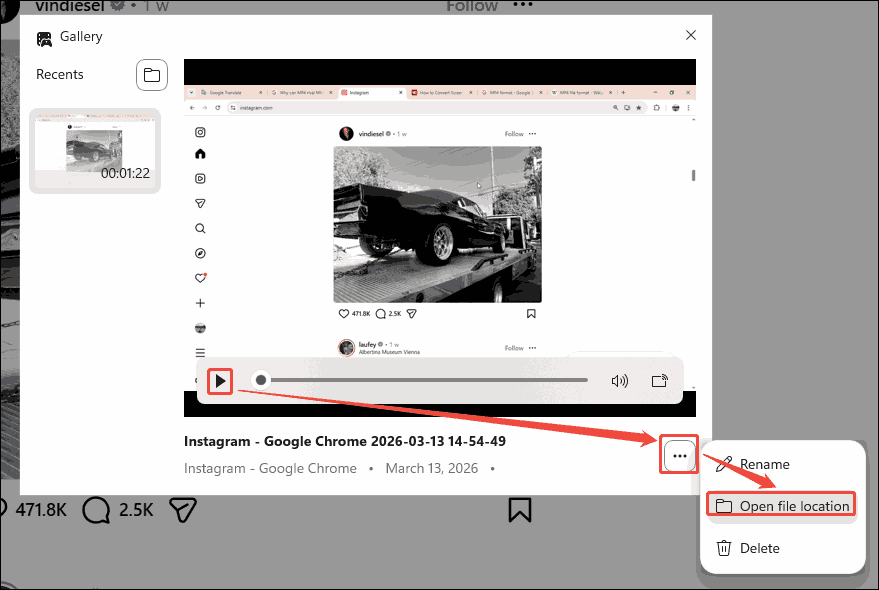
Step 3. Preview and Locate the Recorded Video
Once the recording finishes, a shear board will appear on the screen. Click it to enter the Gallery pop-up window. Here, click the Play icon to preview the recorded video. Then, I expand the More option and click on the Open file location option to locate the recorded video on my computer.
Using the Xbox Game Bar makes me experience the convenience of screen recording on Windows. However, it only allows me to record for a maximum of 4 hours.
2. MiniTool Screen Recorder (Third-party Recorder)
The second screen recorder I highly recommend is MiniTool Screen Recorder. It helps me screen record to MP4 effectively. MiniTool Screen Recorder allows me to record the full screen, selected area, and window. Moreover, it supports webcam recording, allowing you to overlay the webcam feed onto the main recording content.
MiniTool Screen Recorder has no recording duration limitations. Therefore, I can use it to capture long screen recordings. I have also tried its screen annotation feature, which allows me to use brushes, shapes, and highlighters to illustrate my ideas in real time.
Here are the specific steps about how I record an MP4 using MiniTool Screen Recorder.
Step 1. Download and Install MiniTool Screen Recorder
I put a download button below for MiniTool Screen Recorder. Click on this button to download and install it. Then, run MiniTool Screen Recorder.
MiniTool Screen RecorderClick to Download100%Clean & Safe
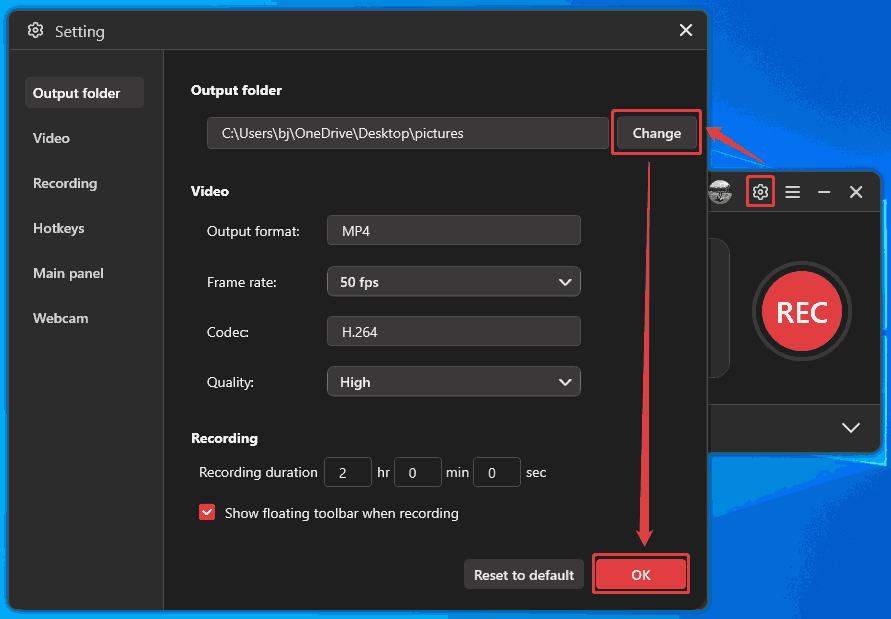
Step 2. Configure a Saving Path for the Recorded Video
After launching MiniTool Screen Recorder, log in to it. I usually set the storage location first. Click on the Gear icon to enter the Setting window. There, click on the Change button to specify a storage location. Then, I click on the OK button to save these changes.
Step 3. Control the Recording Audio
After the series of settings finishes, this recorder will take me back to the main interface. Here, I click on the System Audio icon and the Microphone icon to decide whether to record the computer sound and voiceover. Here, I will enable all of them.

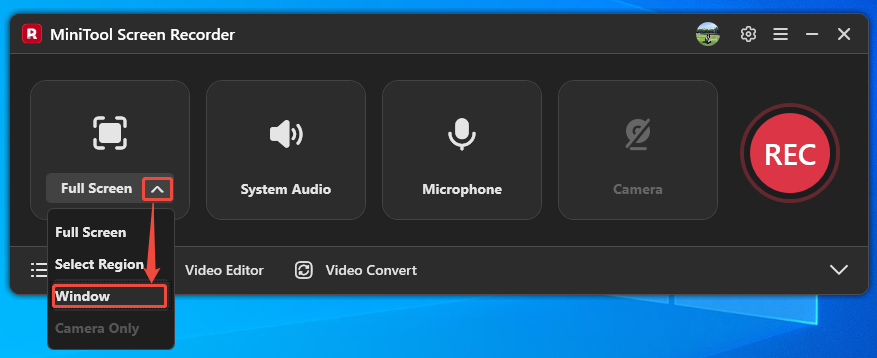
Step 4. Choose the Screen Recording Type
Before starting the recording, open the website or window I will record. Expand the screen recording type option and choose the Window option to enter the Select a window to record window.
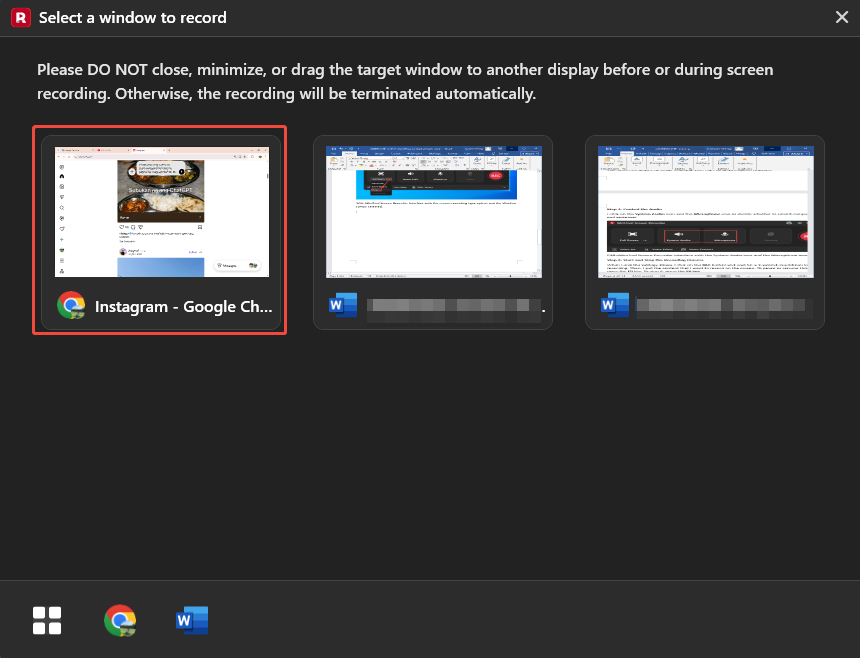
I want to record on Instagram, so I choose the Instagram - Google Chrome option to enter the Instagram page.
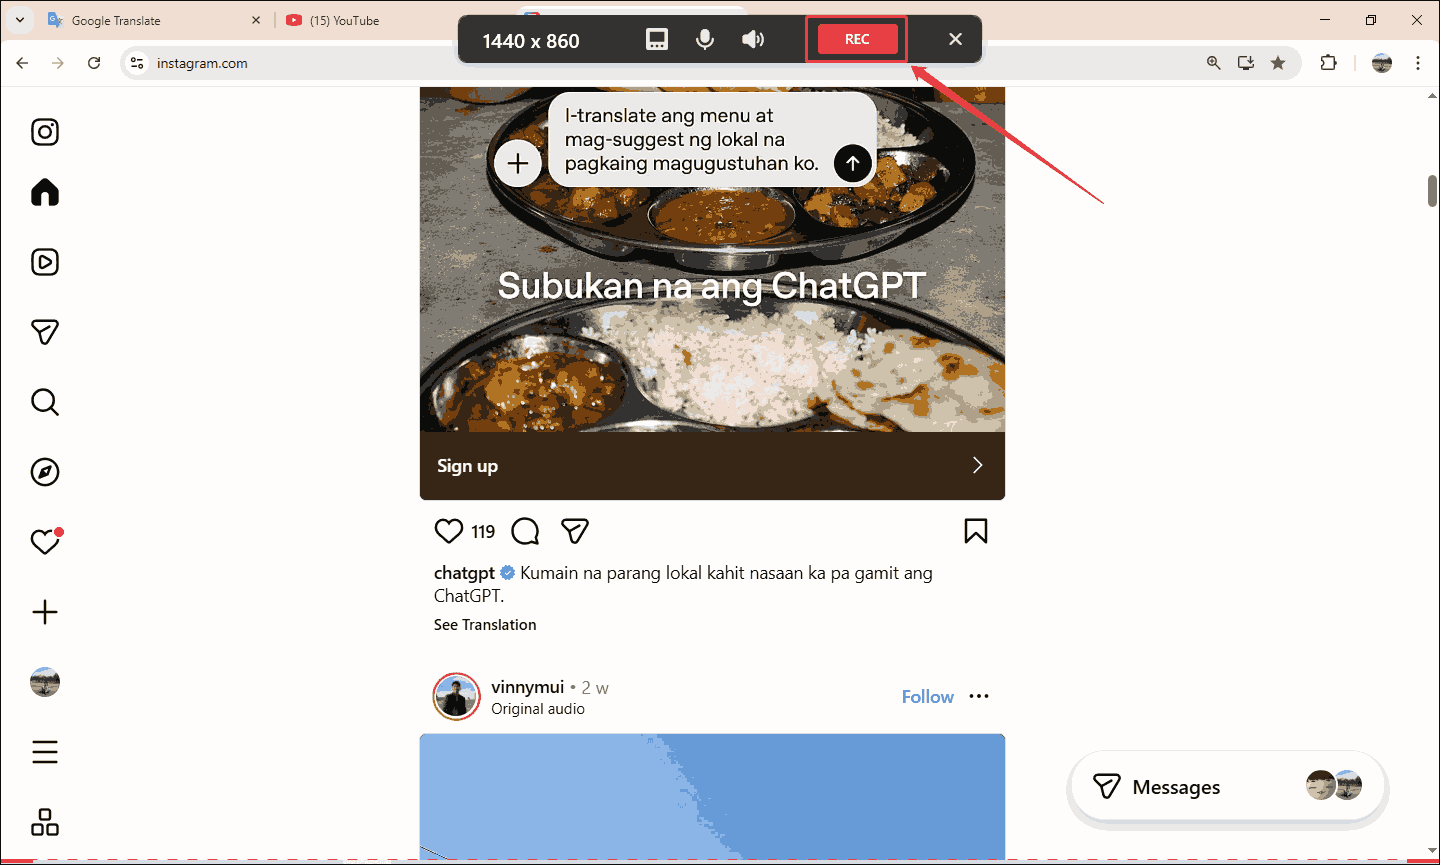
Step 5. Start the Recording
After entering the Instagram page, I click on the REC button on the floating toolbar to start the recording process. To pause or resume the recording, press the F9 key. Once I’ve finished recording what I want, I press F6 to end this recording.
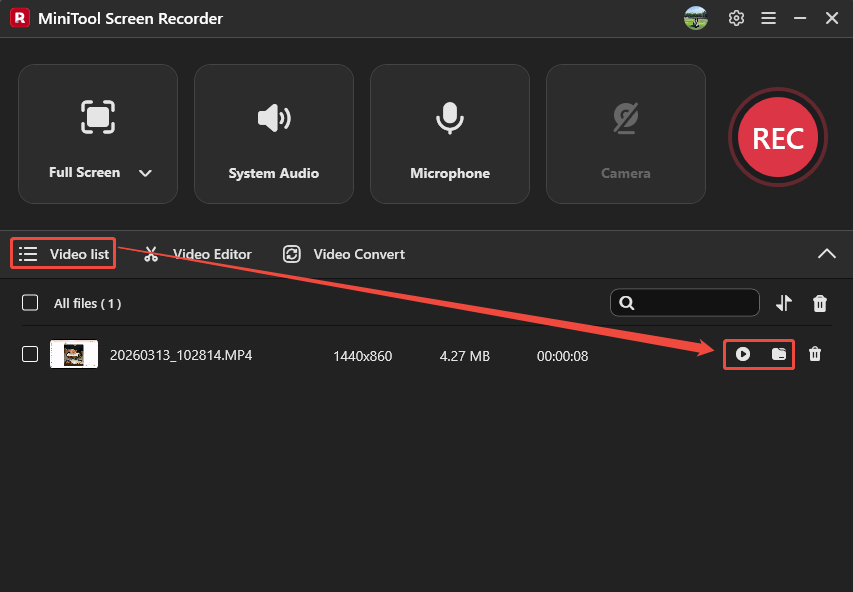
Step 6. Check and Locate the Recorded Video
When the recording ends, the recorded video will land on the Video list tab. Here, I can click on the Play icon to check the result. Or click on the Folder icon to locate the recorded video on my computer.
MiniTool Screen Recorder makes screen recording to MP4 quickly and easily. Also, it doesn’t have the vexing ads or bundles.
Comparison of 2 MP4 Recorders
Through using the 2 recorders above, I found they each have their own advantages and disadvantages.
1. Flexibility of Recording Region
MiniTool Screen Recorder outperforms Xbox Game Bar in terms of screen recording area. It supports the 4 main screen recording modes, allowing me to record the entire screen, selected region, webcam, and specific window. However, the Xbox Game Bar only provides whole-screen recording. Besides, it can’t record the Windows desktop and File Explorer.
2. Advanced Output Settings
In terms of advanced settings, the Xbox Game Bar and MiniTool Screen Recorder each have their advantages. Xbox Game Bar allows me to record the last 30 seconds of the target content, which is suitable for my gameplay capturing. I used to use this feature to save my best game moments without having to record the entire game.
As a desktop recording tool, MiniTool Screen Recorder allows me to set a recording duration previously, which saves me the step of stopping recording, so I don’t have to wait in front of the screen all the time. Besides, MiniTool Screen Recorder also empowers me to fine-tune the frame rate and the video quality of recorded videos to make my screen recordings of higher quality.
Benefits of Screen Recording to MP4
Why save screen recording to MP4? I conclude the following 4 benefits after I tried to capture videos as MP4.
1. Compatibility
I think videos are easy to open when saved as the MP4 format. I can open it using most of my handy devices, such as phones, computers, and iPads, without installing extra players. In addition, it is portable to upload and transfer online, including social media platforms or video websites. Correspondingly, the receiver I send MP4 videos to can also easily and quickly download and open the content.
2. Compression Efficiency
High compression efficiency is also a benefit of MP4. It adopts H.264 or H.265 video codecs. H.264 is the most commonly used codec for MP4 files. It offers high compression capabilities while maintaining video quality, which can meet my daily viewing needs.
Compared to H.264, H.265 is more advanced. It adheres to the advantages of H.264 and develops a stronger compression efficiency. H.265 keeps a greater video quality than H.264 as well. Because of MP4’s efficient compression technology, I usually save screen recordings as MP4 format.
3. Video Quality
Apart from reducing the file size, the high video quality of MP4 is also an aspect that is widely preferred by people. I believe that frame rate and resolution are the 2 main factors that affect the quality of MP4.
Frame rate refers to the number of images that make up each second of a video. The more images are displayed in one second, the smoother the video will be. MP4 supports various frame rates. Therefore, I can choose from them according to my needs.
Resolution is the number of pixels contained in each frame of a video. The more pixels there are, the more details and information the video contains. Thus, the clearer the video will be. MP4 has a broad range of resolution support, up to 8K resolution.
Troubleshoots and Optimizations
Although MP4 is reliable, I still face some recording issues when using it as output formats. Here are solutions to quickly fix them.
1. Video and Audio Out of Sync
If the recorded MP4 video is at a high frame rate, it has a problem with video and audio synchronization when playing the video. This might be due to the insufficient performance of the player, which can’t support high frame video playback. To solve this problem, I would choose to change a player, such as Windows Media Player or VLC Media Player.
2. Black Screen
The recorded MP4 video going black is also an inevitable situation. A black screen may be caused by incompatible codecs or file corruption. When I encounter this problem, I usually choose to change a codec using MiniTool Video Converter or repair the corrupted video with MiniTool Video Repair.
3. Latency and Stuttering
When playing the recorded MP4 video, there’s latency or stuttering. This might not be due to any problem with the video itself, but because our computer system is overloaded. To maintain the video’s smooth playback, I usually close some applications that I won’t use temporarily to ensure my video plays normally.
Extended: How to Edit the MP4 Recordings
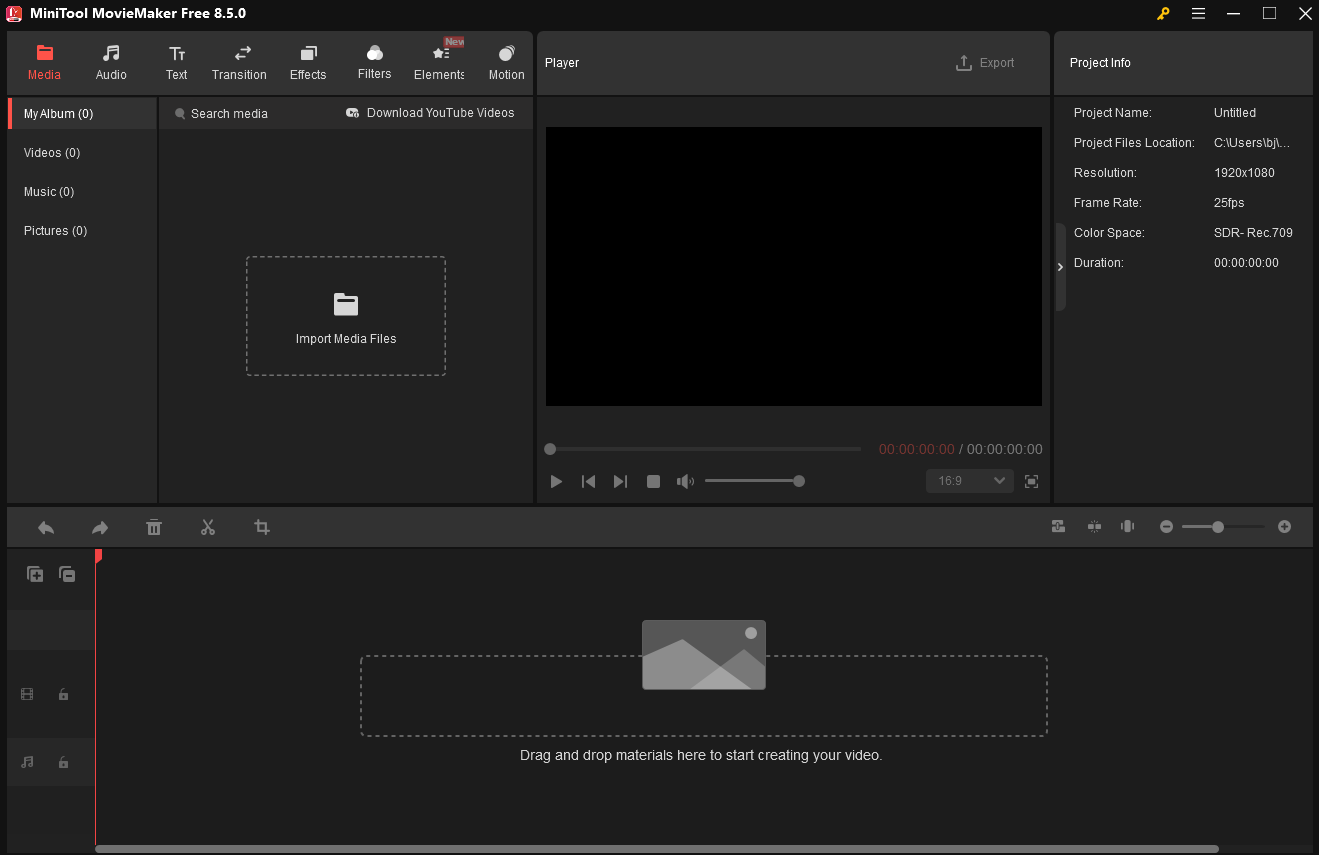
I usually edit my recorded MP4 videos before using or sharing them. Therefore, I would use a reliable video editor to edit my recorded MP4 videos. After years of practice, I discovered an excellent editor: MiniTool MovieMaker. It is an all-in-one multimedia editing tool. MiniTool MovieMaker allows me to add background music or sound effects to my recorded MP4 videos.
Additionally, I can use MiniTool MovieMaker to add some other videos to my recorded videos to make a picture-in-picture effect, presenting a better visual experience. Apart from those, I am also able to add transitions, effects, elements, motions, texts, and filters to the recorded MP4 videos.
What’s more, MiniTool MovieMaker supports trimming, cropping, splitting, merging, flipping, rotating, and reversing my MP4 videos. Besides, it also allows me to adjust the resolution, frame rate, and aspect ratio for the exported videos. Furthermore, MiniTool MovieMaker allows me to adjust properties of MP4 recordings, such as saturation, contrast, brightness, fade-in/out sound, and volume.
MiniTool MovieMakerClick to Download100%Clean & Safe
Bottom Line
This article shows the step-by-step guides on how to screen recording to MP4 using 2 can’t-miss screen recorders: Xbox Game Bar and MiniTool Screen Recorder. To record a video without a time limit, choose MiniTool Screen Recorder. If you don’t want to download any software, try Xbox Game Bar.
If you want to learn more about MiniTool Screen Recorder and MiniTool Moviemaker, please feel free to contact us via email at support@minitool.com. Additionally, you can also send me a message on X. I will reply to you as soon as I see it.