Vertical video refers to video shot in portrait mode. To record vertical videos for social media, you can use MiniTool Screen Recorder. Furthermore, you can use MiniTool MovieMaker to modify the aspect ratio of the recorded video.
What Is Vertical Video?
Vertical video refers to videos in a portrait orientation with a 9:16 aspect ratio. This type of video became popular with the development of mobile phones and social media. Most mobile phones we use today have a 9:16 aspect ratio. Furthermore, smartphone users spend most of their time holding their phones vertically. Therefore, vertical video can fit the way users hold their devices, creating a more intuitive and immersive viewing experience.
Currently, most social media and video-sharing platforms, such as Facebook, X, Instagram, Snapchat, TikTok, and YouTube, have driven the development of vertical video. TikTok, in particular, is known for its vertical videos. Social media platforms like Instagram have dedicated vertical video sections called Reels. YouTube also followed this trend and launched Shorts, a dedicated vertical video section that allows creators to upload short video content for mobile device users.
Why Record Vertical Videos?
Here are some reasons you should record a vertical video:
- Further Editing: After recording a vertical video, you can use post-production techniques to enhance its quality. For example, add transitions, filters, and text to create a professional visual effect.
- Offline Viewing: Record portrait-oriented videos and save them to your device. This way, you can watch videos smoothly even if your network connection is limited or interrupted, without consuming data.
- Permanent Storage: Vertical videos on social media are easily deleted or hidden by creators. Recording your favorite videos promptly protects them from permanent loss.
Can You Record Vertical Videos on PC?
You can record vertical videos. However, you must remember that recording copyrighted, private, or confidential content without permission is illegal. If you want to distribute others’ vertical videos on social media, please make sure you obtain permission from the creators. Generally, it is legal to use screen recording software to record vertical videos for personal, non-commercial use only.

How to Record Vertical Video on PC?
MiniTool Screen Recorder is a desktop screen recording solution designed specifically for Windows users. This software is free and offers extensive customization options to suit your recording needs. It supports capturing specific screen regions, allowing you to precisely define the recording area to match the 9:16 dimensions of vertical video content.
What's more, MiniTool Screen Recorder can record both your computer's system audio and microphone audio. To prevent microphone interference during recording, you can disable microphone recording beforehand. Also, this software won't add watermarks to the recorded videos.
Below is a step-by-step guide on how to record vertical video with MiniTool Screen Recorder:
Step 1: Download and Install MiniTool Screen Recorder
Click the download button below to get the MiniTool Screen Recorder on your computer.
MiniTool Screen RecorderClick to Download100%Clean & Safe
Step 2: Choose Recording Section
To record vertical videos, you can select a recording area to fit the width and height of the vertical video. This prevents other irrelevant parts from being recorded:
1. Click the dropdown arrow next to Full Screen.
2. Choose Select Region.
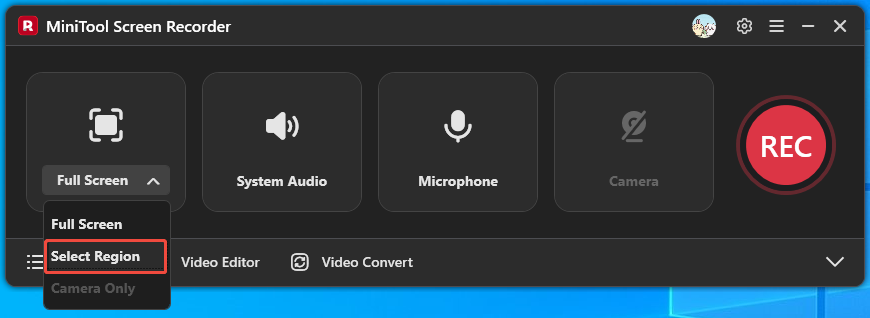
3. Adjust the recording area to match the width and height of the vertical video you want to record.
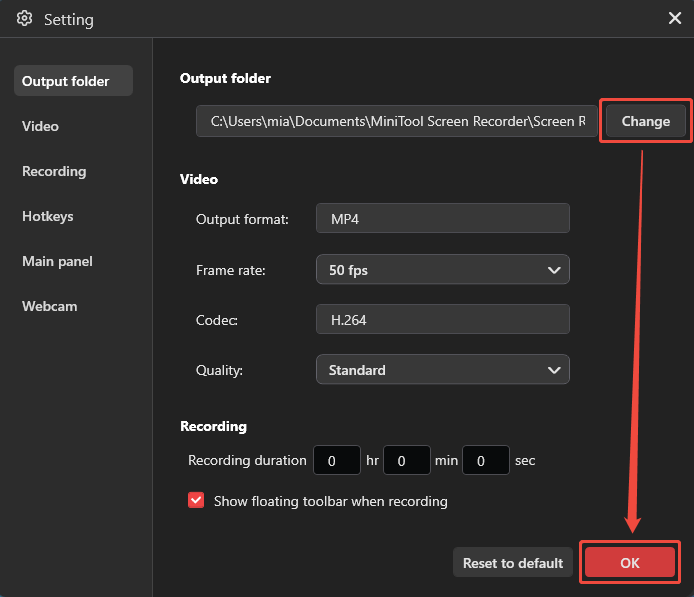
Step 3: Set the Save Location
Back to the main interface of this screen recorder and click the gear icon to open the Setting window. Then, click on Change in the Output folder section to select the save location, and click OK.
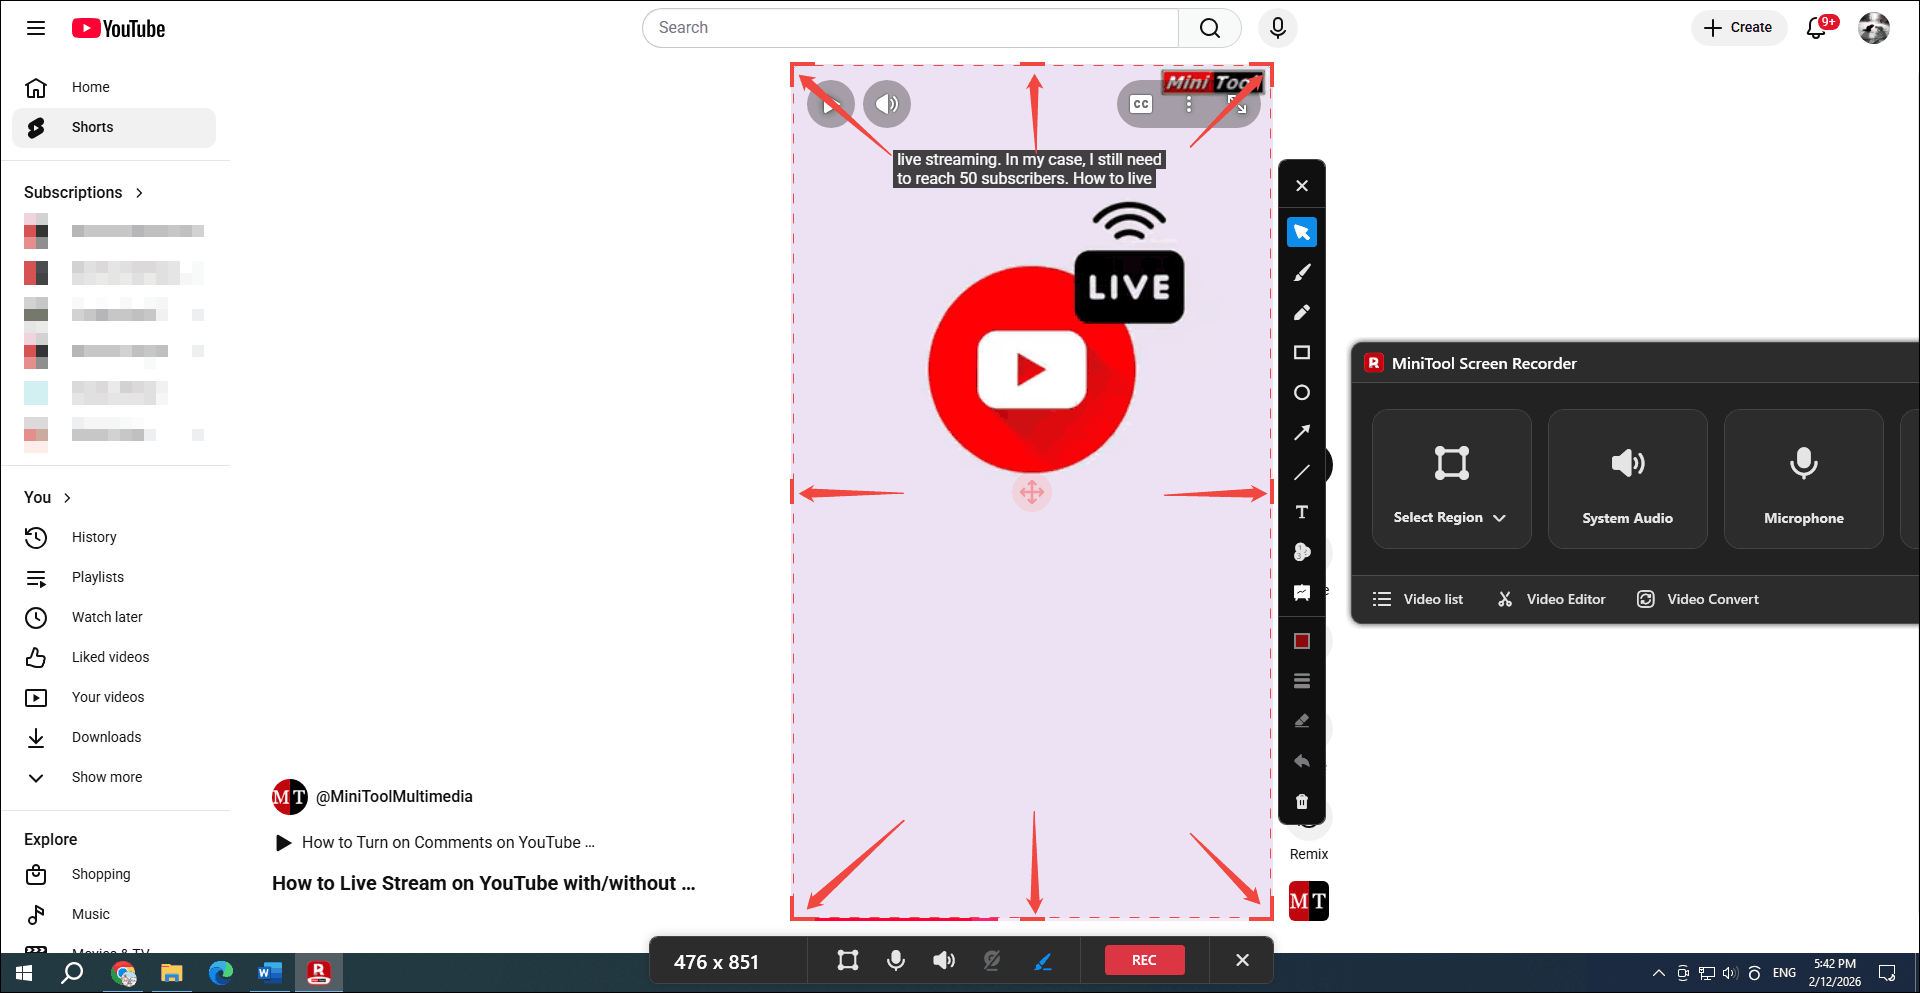
Step 4: Start and End Recording
Simply press the F6 key on your keyboard. You will then see a three-second countdown. After the countdown ends, play the vertical video you want to record. To stop recording, press the F6 key again.
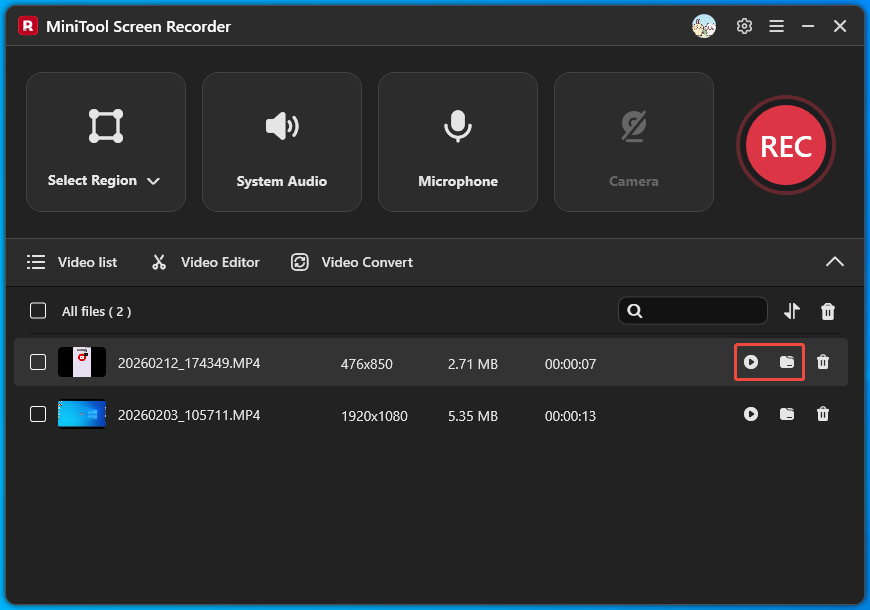
Step 5: Navigate to the Recording
Once the recording stops, the recorded video will be saved to your computer. The MiniTool Screen Recorder main interface will then reappear, and you'll see the newly recorded video in the Video list. Click the play icon to view the video and click the folder icon to locate the recorded video.
MiniTool Screen Recorder allows you to record webcam feed, computer screen, or both simultaneously for picture-in-picture presentations. In addition, the software provides a suite of real-time screen annotation tools, allowing you to add various arrows, text, numbers, and rectangular highlights directly to the screen, enhancing your recordings.
Bonus: How to Change the Aspect Ratio of Vertical Video?
If you want to change the aspect ratio of a recorded vertical video, you can use a video editor like MiniTool MovieMaker. It supports resizing the video canvas and cropping videos. Furthermore, you can use it to add background music, transitions, effects, filters, and more to the video. And, this video editor is free.
How to use MiniTool MovieMaker to change the aspect ratio of a recorded video? Follow these steps:
Step 1: Download and Install MiniTool MovieMaker
Click the download button to install MiniTool MovieMaker on your computer.
MiniTool MovieMakerClick to Download100%Clean & Safe
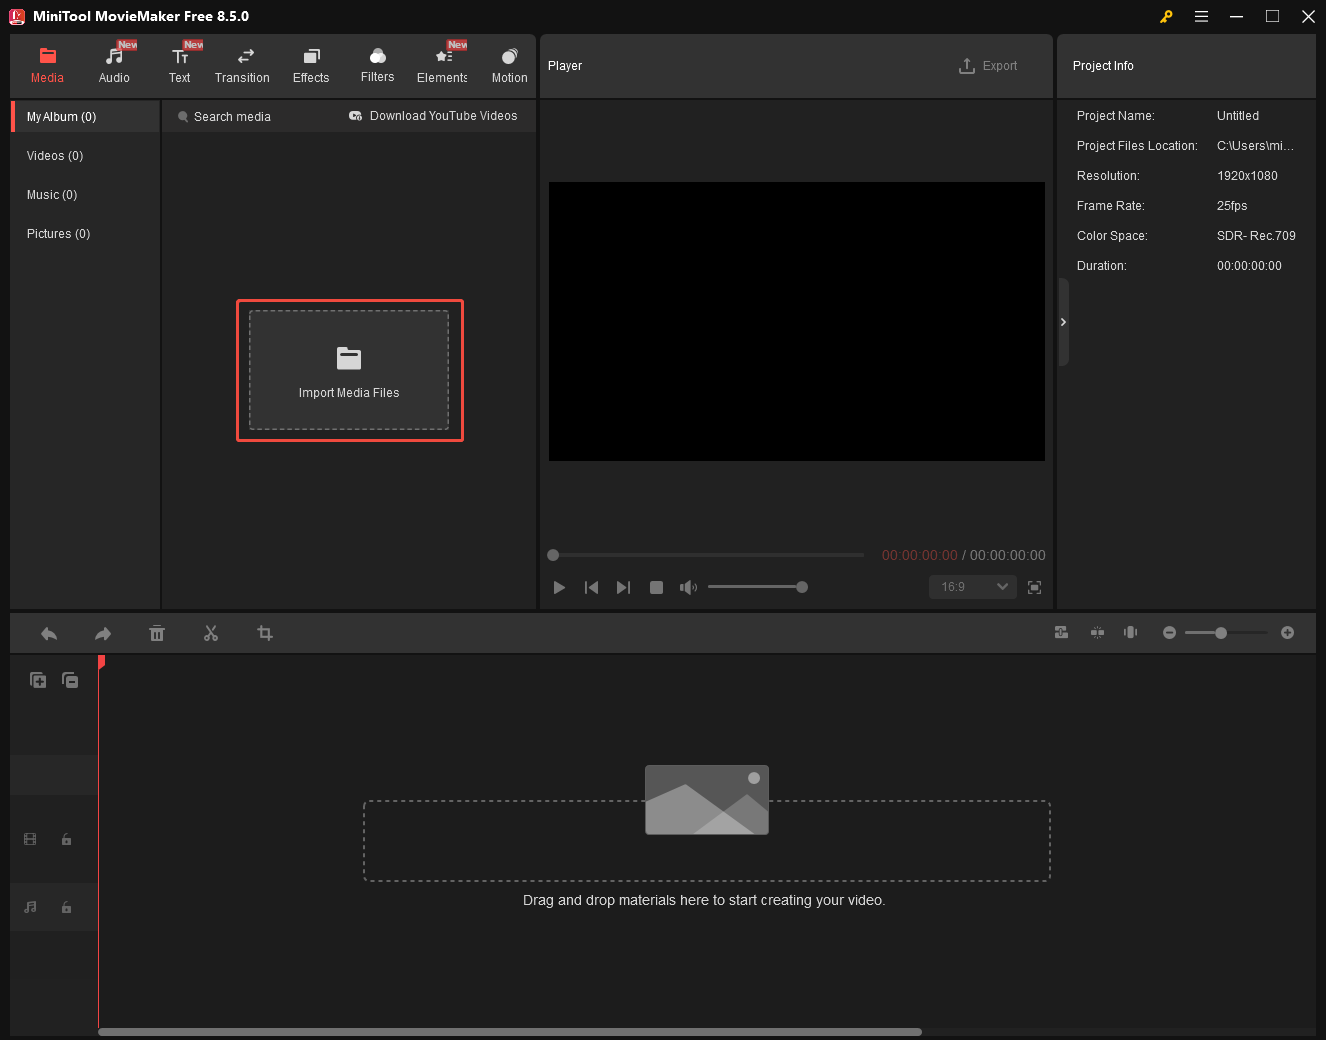
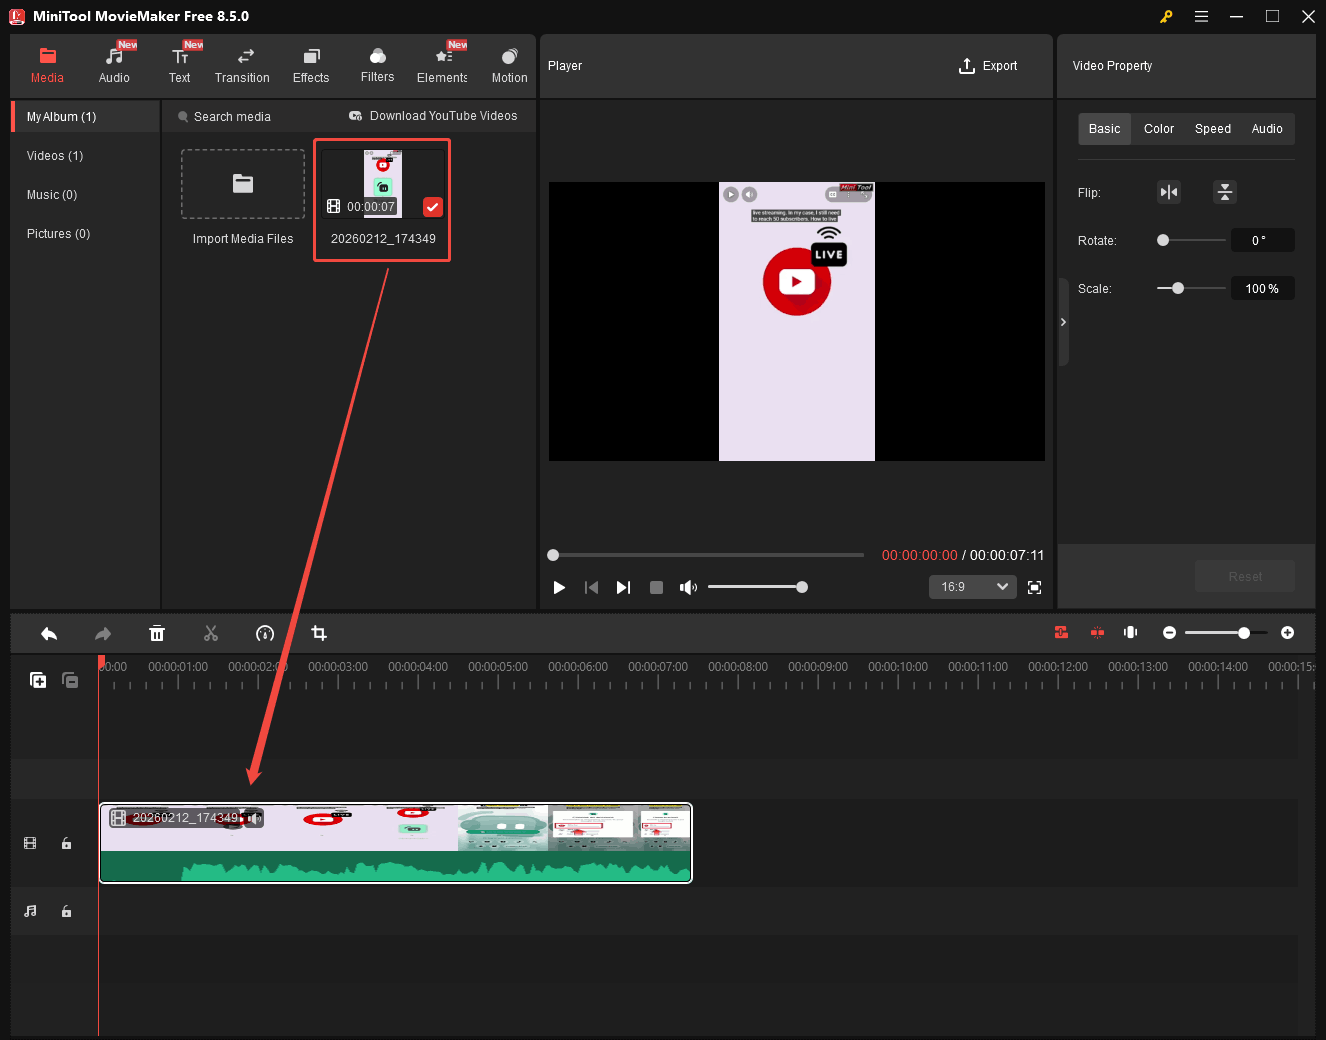
Step 2: Import the Recorded Video
Click the Import Media Files option to import your video.
Then, drag and drop the video into the bottom timeline area.
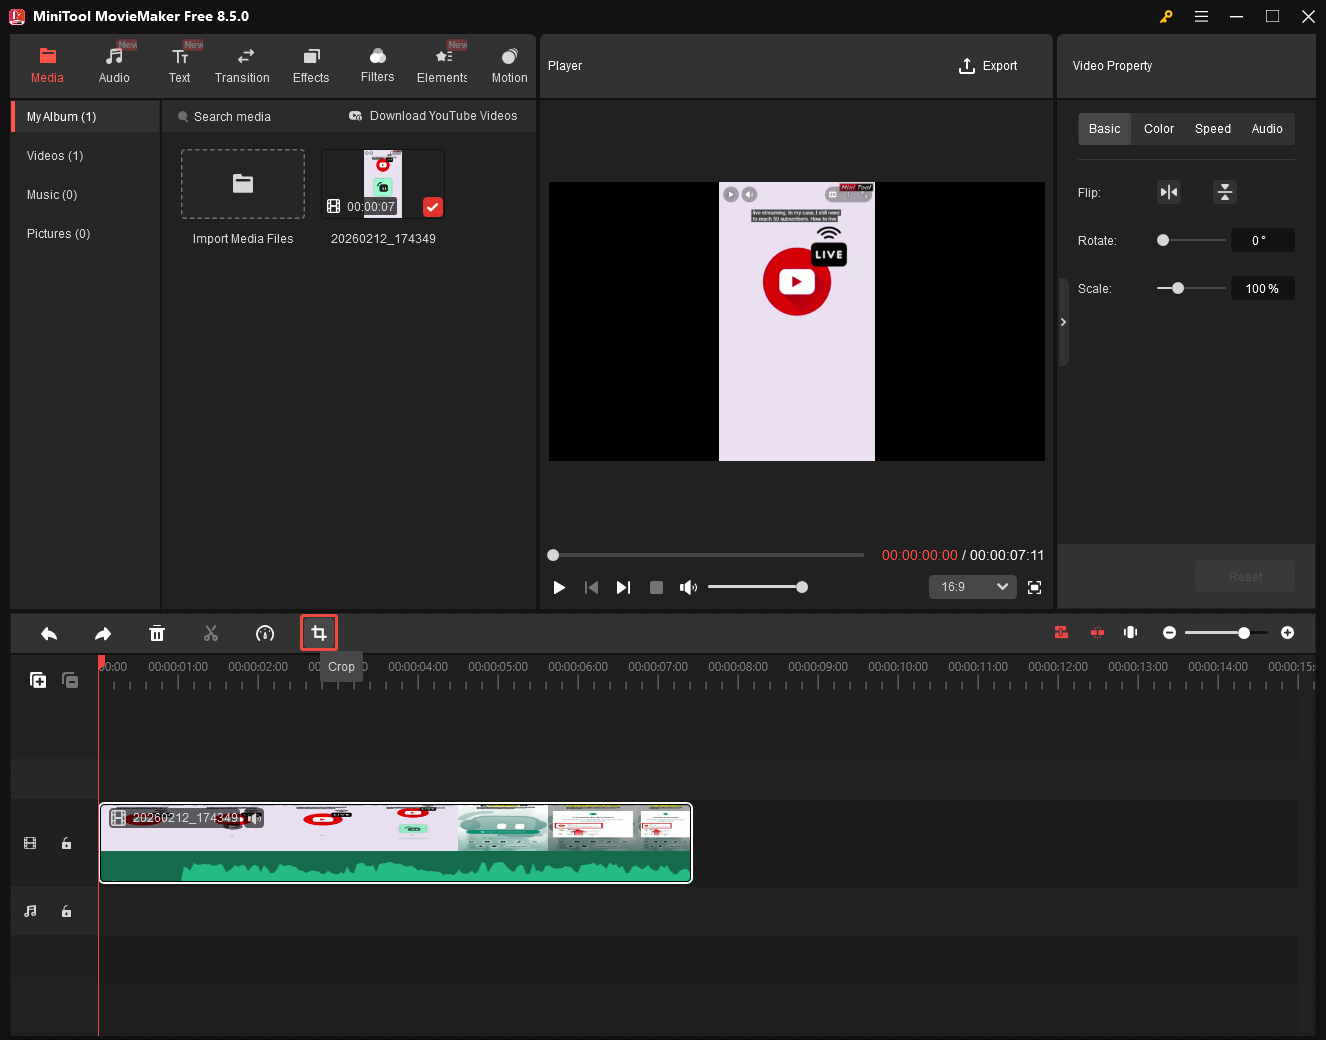
Step 3: Change the Video Aspect Ratio
Select the clip on the timeline and click on the Crop option.
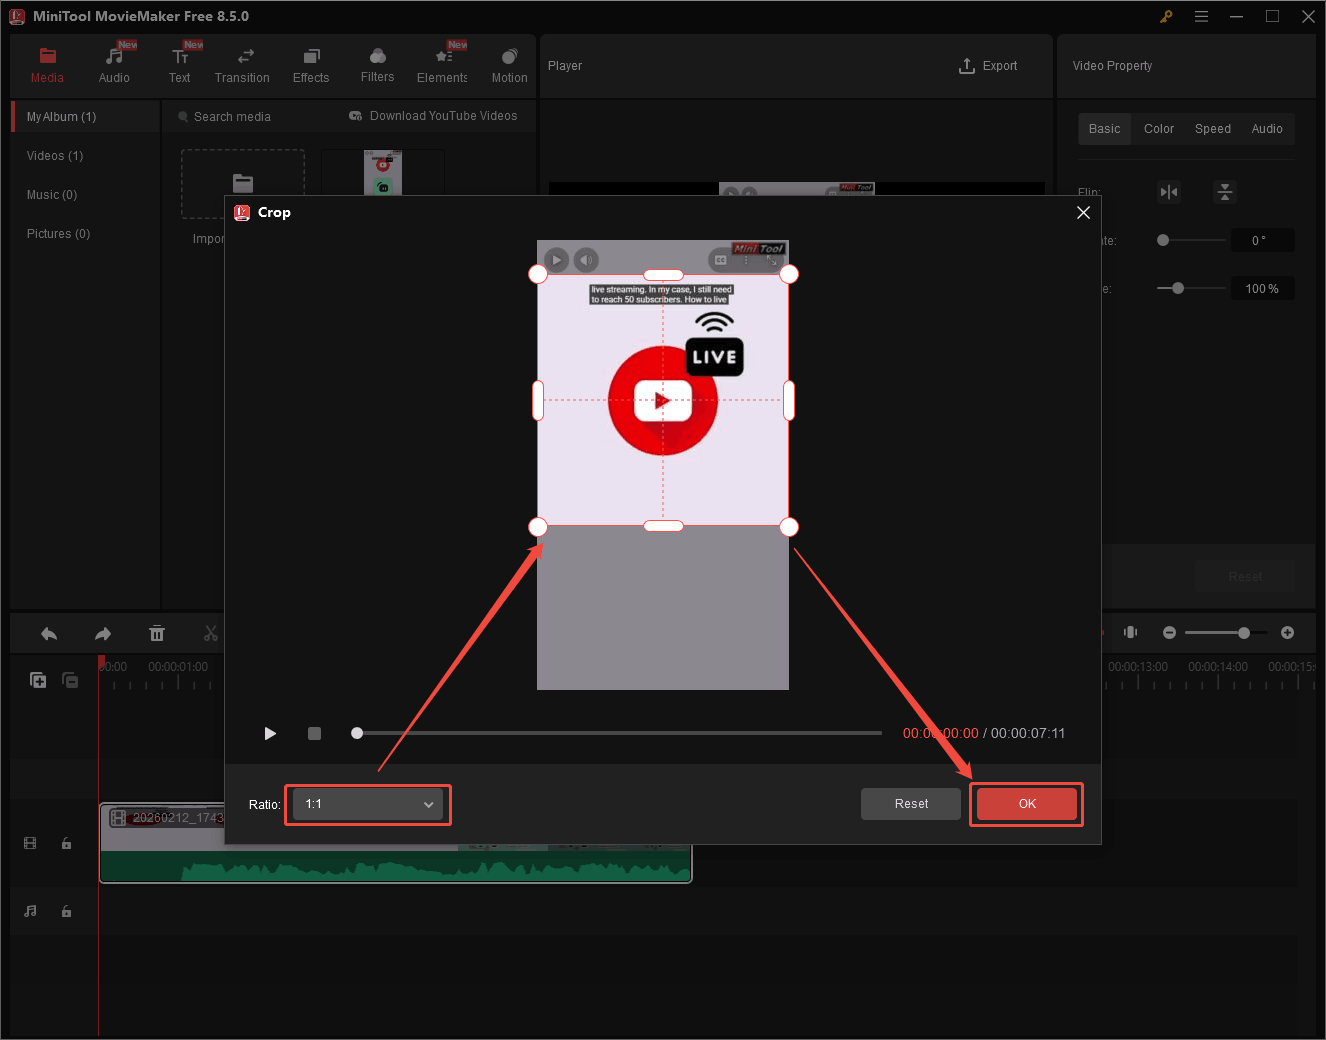
In the Crop window, expand the Ratio option and select the aspect ratio you want. Then, move the frame to the appropriate position and click OK to confirm your adjustment.
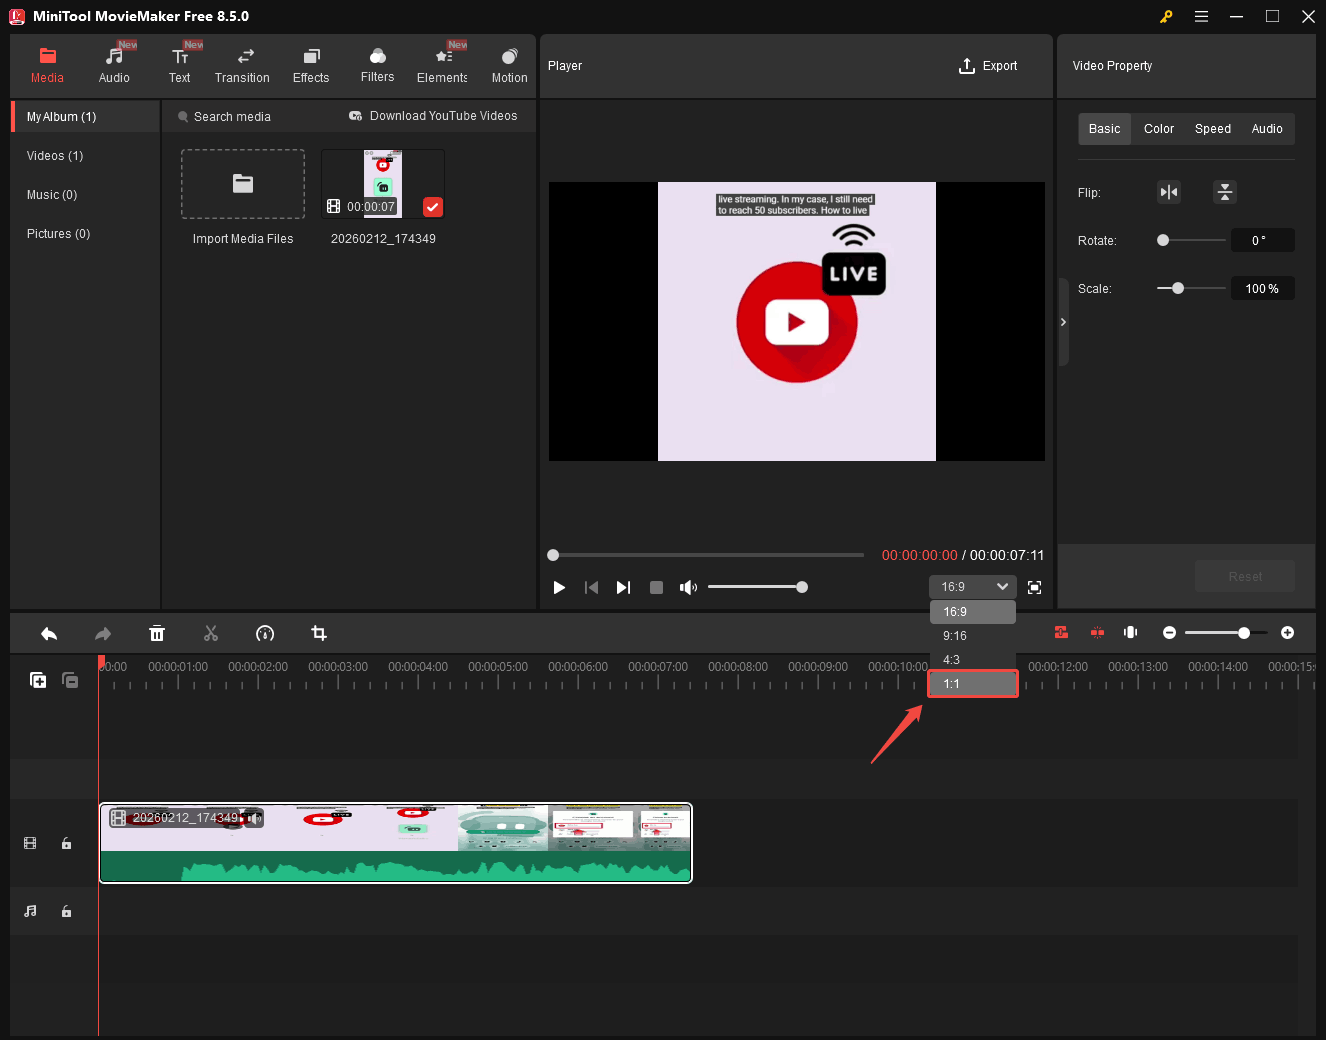
In the bottom right corner of the Player section, choose the aspect ratio.
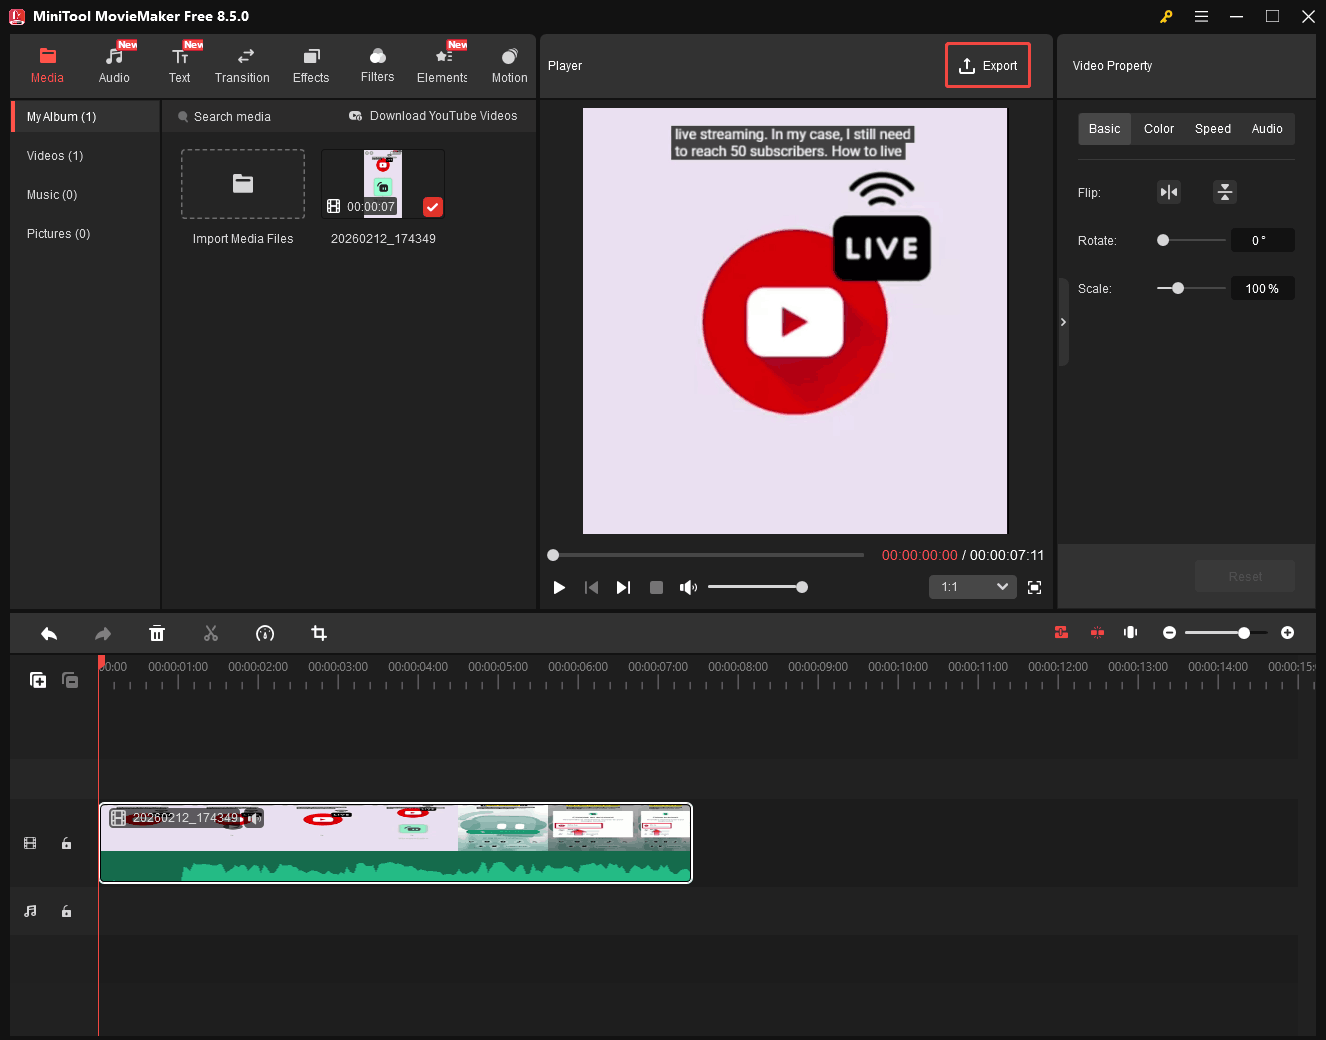
Step 4: Export the Video
Click the Export option at the top-right of the Player section.
In the pop-up window, change the video name, select the export location, format, resolution, and frame rate, and then click the red Export button.
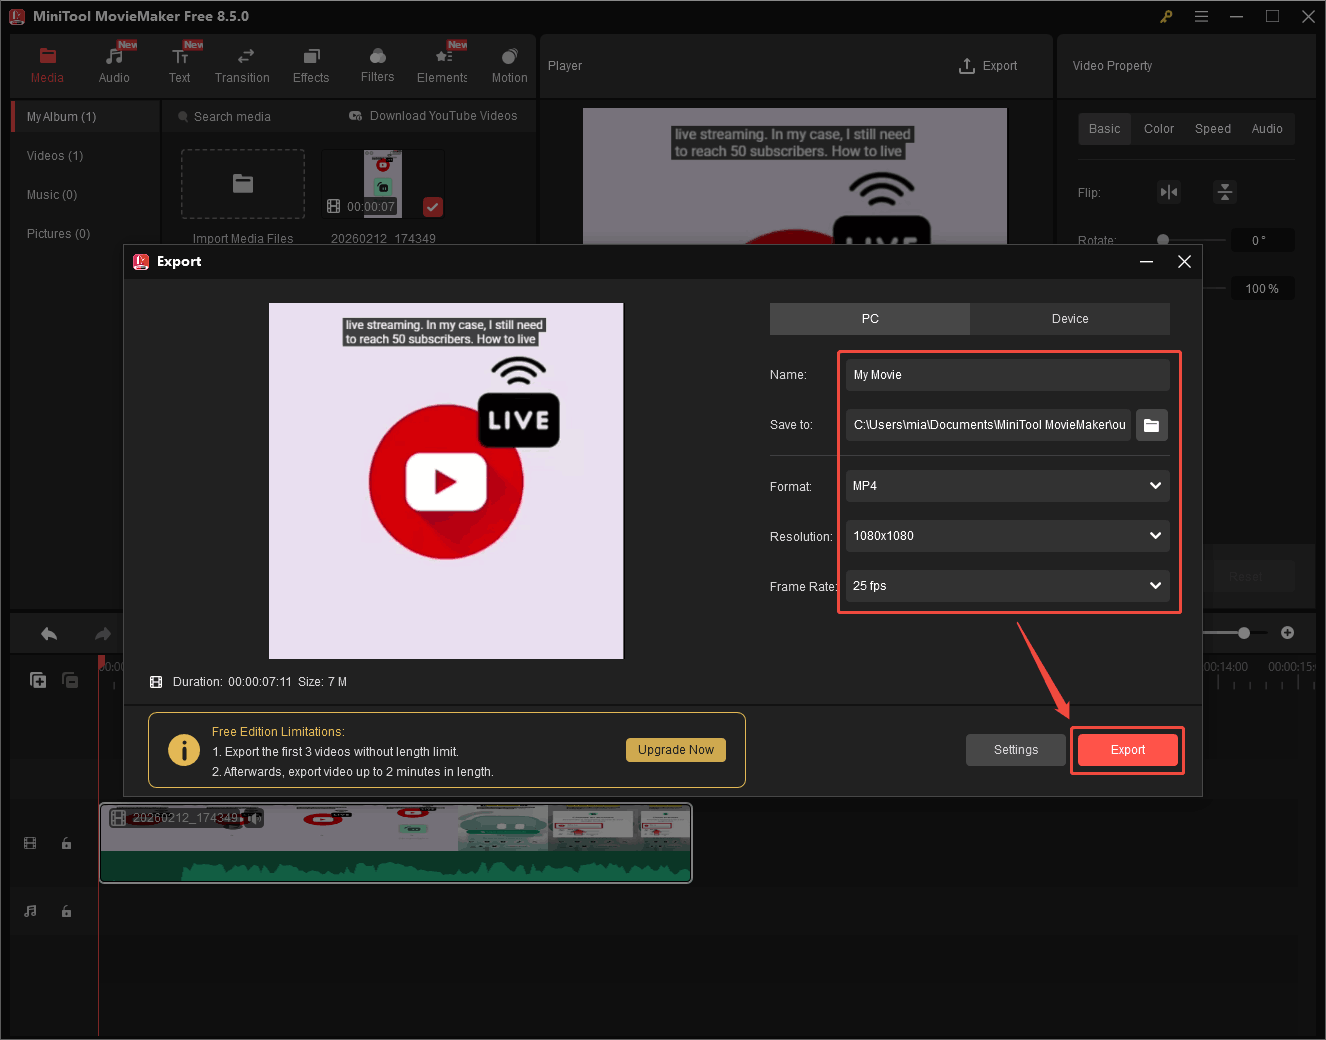
Then, in the pop-up Export window, click Find Target to locate the exported file instantly.
Besides adjusting the aspect ratio of the recorded video, you can also use similar steps to convert a horizontal video to a vertical video.
Conclusion
Vertical video is now a dominant format. This article explains what it is and why you should record it. If you want to record vertical videos, MiniTool Screen Recorder is a good choice. You can use it for clean and watermark-free capture. Furthermore, you can use MiniTool MovieMaker to change the aspect ratio of the video to suit the requirements of some social platforms.
If you have any questions or suggestions about MiniTool Screen Recorder and MiniTool MovieMaker, please don’t hesitate to email us at support@minitool.com.