Screen recording can sometimes lag, which can affect the quality of your videos. This article explains why screen recording lags and recommends six reliable no lag screen recorders for Windows.
Why Does the Screen Recording Lag
Screen recording lag is a common issue that can make your videos look choppy, stutter, or lose synchronization with the audio. The result is a poor viewing experience, which can be frustrating if you're trying to capture high-quality content. Understanding the causes of this lag can help you avoid it and ensure smoother recordings.
1. High CPU or GPU Usage
One of the most frequent causes of screen recording lag is the heavy load on your computer's CPU or GPU. When multiple applications are running simultaneously, your system may struggle to encode video data while performing other tasks. This can lead to stuttering, frame drops, or delays in video and audio synchronization.
2. High Recording Settings
Recording at high resolutions, such as 4K, or at high frame rates, such as 60 FPS, can demand a lot from your computer. If your hardware isn't powerful enough to handle these settings, it can result in performance issues during the recording. Lowering the resolution and frame rate can reduce the strain on your system and improve performance.
3. Inefficient Encoding Methods
Some screen recording software uses inefficient video encoding methods, which can overload your system’s resources. Encoding requires significant processing power, and if the software doesn’t optimize this process, it could result in lag. Choosing the right software with optimized encoding methods can make a big difference.
How to Minimize Screen Recording Lag
By addressing the causes of screen recording lag, you can minimize or even eliminate these issues. Here are some effective solutions:
- Close unnecessary background applications: Shut down programs you don't need during the recording process to free up resources.
- Reduce recording settings: Lower the resolution to 1080p or 720p and set the frame rate to 30 FPS instead of 60 FPS to reduce the strain on your computer.
- Use optimized software: Choose a lightweight, no lag screen recorder that efficiently manages your system's resources to ensure smooth recording.
- Ensure your system has enough RAM and storage: Regularly clean up your system and consider upgrading your memory or storage if necessary to avoid performance issues during recording.
Since using a lightweight and optimized screen recorder without lag is often the easiest and most effective solution, the next section will introduce six reliable options to help you achieve smooth recordings.
6 Best No Lag Screen Recorders for Windows
This section highlights six of the best no lag screen recorders for Windows that deliver smooth and stable performance. The tools covered include:
- MiniTool Screen Recorder
- Xbox Game Bar
- Microsoft Clipchamp
- Snipping Tool
- OBS Studio
- Bandicam
Below, we will review each recorder in detail to help you choose the best one for your needs.
MiniTool Screen Recorder
When it comes to the best no lag screen recorders, MiniTool Screen Recorder is the first tool that comes to my mind. It supports screen recording without a time limit or watermark. You can choose to record your screen, webcam, or capture both to create a picture-in-picture overlay. It is perfect for capturing live streams, videos, gameplay, online meetings, and tutorials.
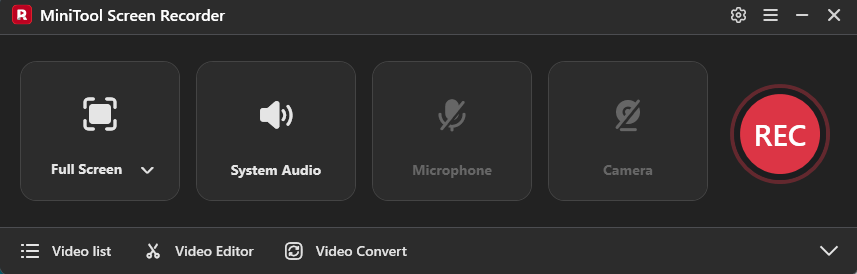
Additionally, MiniTool Screen Recorder gives you flexible controls over audio settings. It allows you to record system sound and microphone audio simultaneously or separately, which meets your diverse needs.
The customizable recording settings are one of the key features that make MiniTool Screen Recorder a lag-free tool. It offers multiple frame rate options, as well as different video quality choices, including original, standard, and high. You can also configure hotkeys for quick and convenient recording.
Moreover, the software comes with annotation tools, such as shapes, text, drawings, whiteboards, and step numbers, allowing you to highlight key information or add real-time notes during recordings.
All in all, MiniTool Screen Recorder is an easy-to-use screen recorder without lag for Windows users. The lightweight program doesn’t impact system performance and offers an intuitive interface with customizable settings, making it an excellent choice for both beginners and professionals.
Pros:
- Intuitive interface and ease of use
- Customizable recording settings, including frame rate, video quality, and recording duration
- Advanced recording features like annotation and webcam tool
- Without time or watermark limits
- Record video up to 4K in MP4 format
Cons:
- Only available on Windows
How to Record Screen Using MiniTool Screen Recorder
The following section guides you through the detailed steps for recording screen activities without lag using MiniTool Screen Recorder.
Step 1: Download and Install
Click the button below to start downloading MiniTool Screen Recorder. Then, follow the on-screen instructions to complete the installation on your computer.
MiniTool Screen RecorderClick to Download100%Clean & Safe
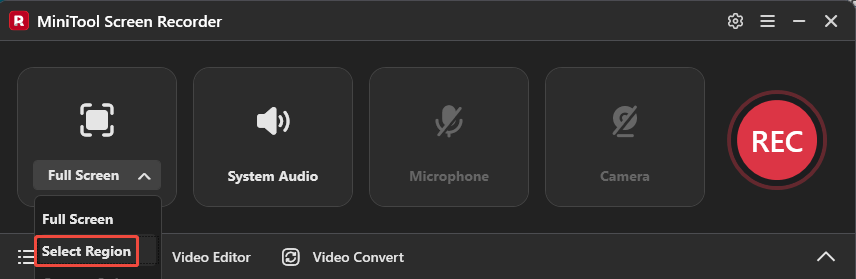
Step 2: Select the Recording Area
Open the application you want to capture and launch this free no lag screen recorder. A red dotted rectangle will appear around the computer screen as the application defaults to full-screen mode. To change the recording area, expand the Full Screen option and choose Select Region. Drag the cursor to select the desired recording region.
Step 3: Control the Audio Recording
By default, both system sound and microphone audio are recorded along with the screen. If you don’t need microphone audio, click Microphone to turn it off.
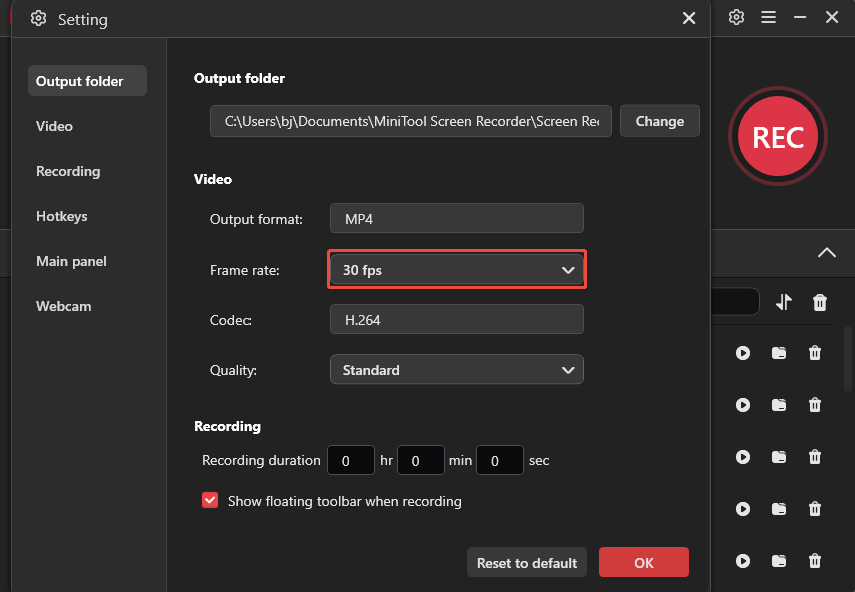
Step 4: Adjust Additional Settings
Click the Gear icon in the right corner of the interface to enter the settings window. The default frame rate is 25 fps. Click the Frame rate dropdown list and select 30 fps, as it is clear and smooth enough for most video recording. Then, you can change other settings such as video quality, recording duration, hotkeys, and webcam position. Click OK to save all the adjustments.
Step 5: Start Recording
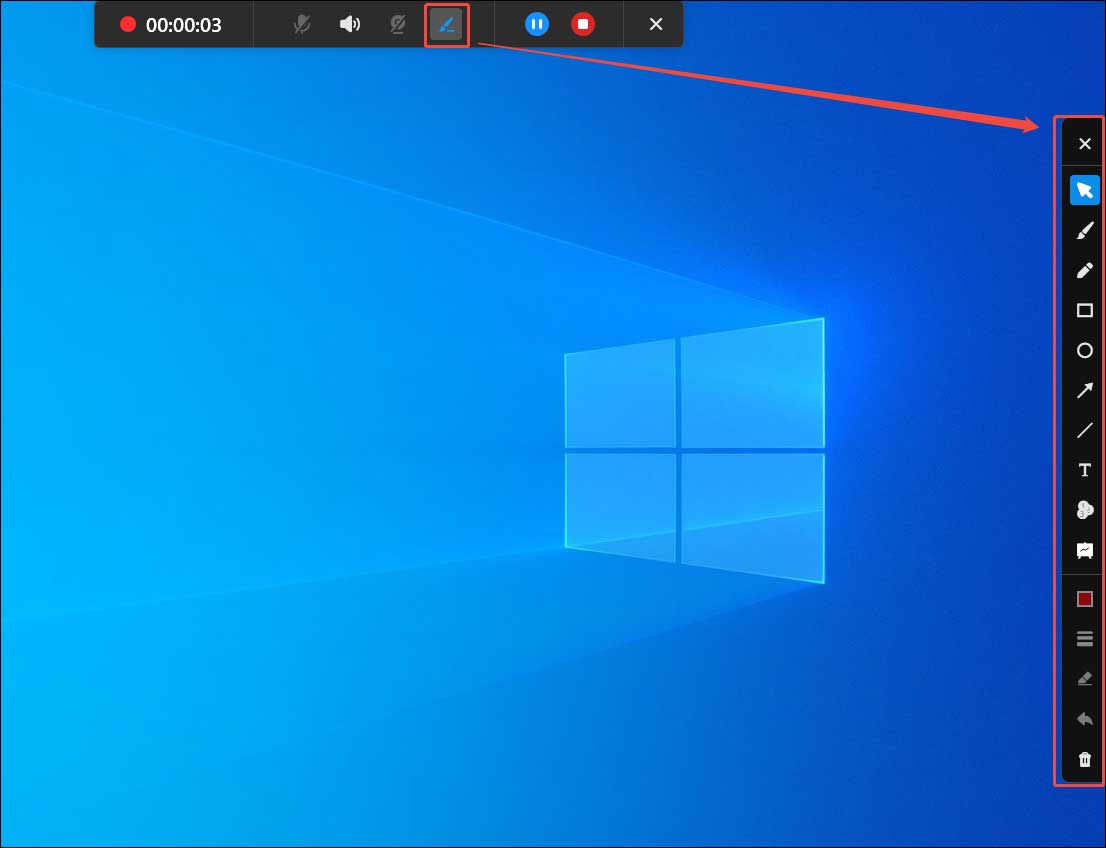
Click the REC icon to start recording. Alternatively, you can press the default F6 key (or your designated start recording shortcut key). After a 3-second countdown, the software will begin recording, and you can start your screen activities. If you want to pause the recording for a smooth result, you can press F9 to pause and resume recording.
To add some annotations during recording, click the Pen icon in the floating bar. The annotation panel will appear on the right side of the screen in full-screen mode. Then, you can choose your desired tool to add real-time notes.
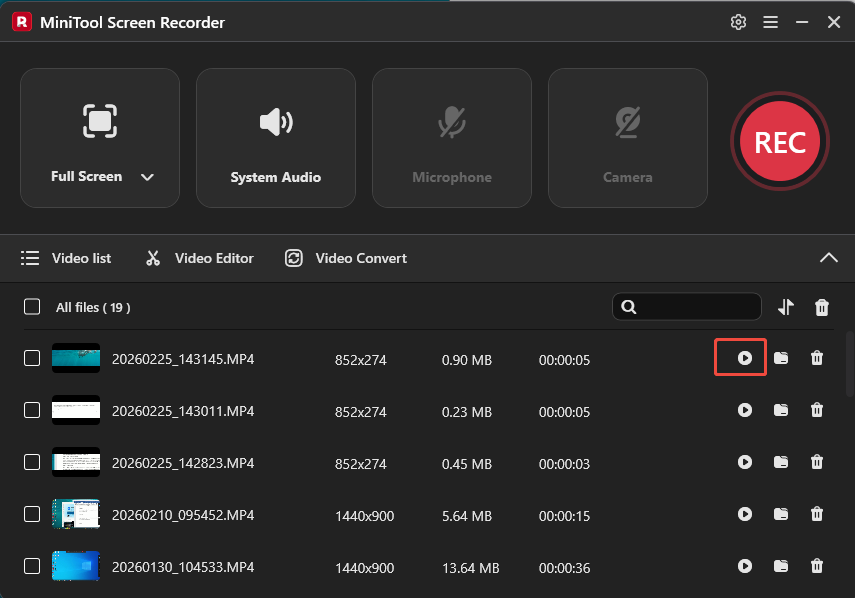
Step 6: Stop and Check Recording
To end recording, click the End icon in the floating bar or press the default F6 key. Then, the latest video will appear at the top of the Video list module in the interface. Click the Play icon to preview your video.
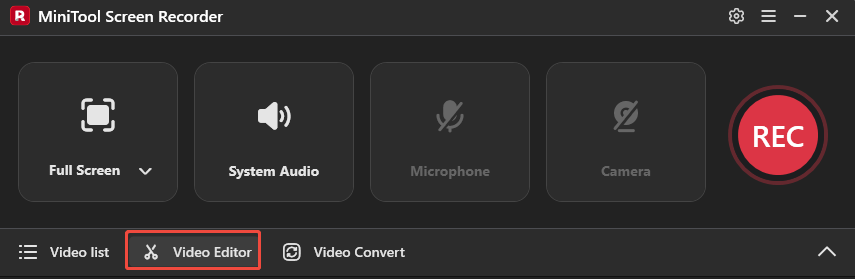
Step 7: Edit the Video (Optional Step)
To edit the video, MiniTool Screen Recorder offers a convenient companion editing tool. Click Video Editor next to the Video list to open or download MiniTool MovieMaker. Then, you can use it to trim unnecessary parts to make the video more stunning. It allows you to edit the video without watermarks.
Xbox Game Bar
Xbox Game Bar is a native Windows tool for taking screenshots and recording the screen. With its flexible recording settings, Xbox Game Bar lets you customize keyboard shortcuts, adjust video frame rates, such as 30 fps and 60 fps, control audio volume, and change video quality.
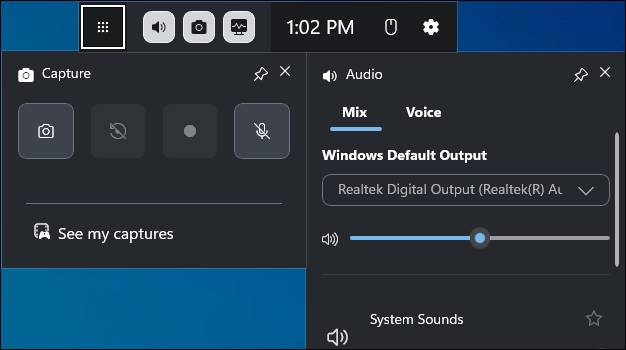
In terms of screen recording, Xbox Game Bar can automatically detect the active window to be recorded. Therefore, you don’t need to select the recording area manually. Additionally, it provides a performance panel that displays real-time data on CPU, GPU, VRAM, RAM, and FPS, allowing you to monitor how your computer is handling applications.
While the Xbox Game Bar is popular for recording screen activities, especially for game clips, it supports recordings up to 4 hours. For tasks requiring longer recording durations, it is recommended to pay attention to the time and repeat the recording as needed to achieve the desired result.
Pros:
- Built-in and free to use
- Customizable recording settings and convenient shortcuts
- Powerful performance monitoring panel
Cons:
- Maximum recording duration of 4 hours
Microsoft Clipchamp
Microsoft Clipchamp is another built-in no lag screen recorder for Windows. It comes pre-installed on Windows 11, so you don’t need to waste time downloading it. For quick recording, there is also a web-based version available, which requires no installation.
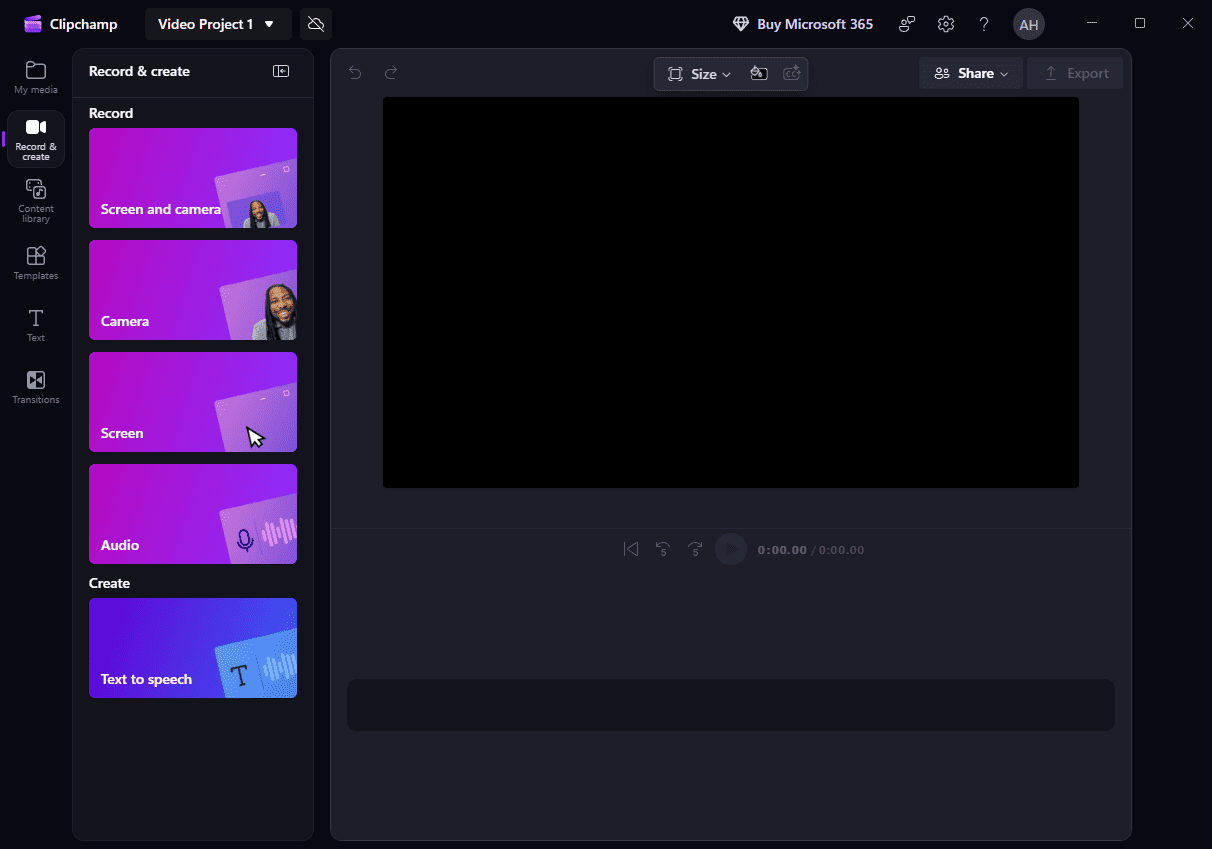
When screen recording, Microsoft Clipchamp supports capturing the camera, screen, audio, and both the screen and camera. It allows you to choose to record the entire screen or a specific window. It also includes a teleprompter that lets you view your script while recording.
As an all-in-one tool, Microsoft Clipchamp can also serve as a video editor. You can directly edit your recording, which improves work efficiency. However, Microsoft Clipchamp also has a limitation on recording duration. You can only record up to 30 minutes per session.
Pros:
- Support both screen and webcam recording
- Include teleprompter and video editing features
Cons:
- Free version has a maximum recording duration of 30 minutes
- Limited customizable recording options
Snipping Tool
Snipping Tool is a built-in, no lag screen recorder available on Windows 11. If you’re using Windows 10, however, you can only access its screenshot functionality, as the recording feature is exclusive to Windows 11.
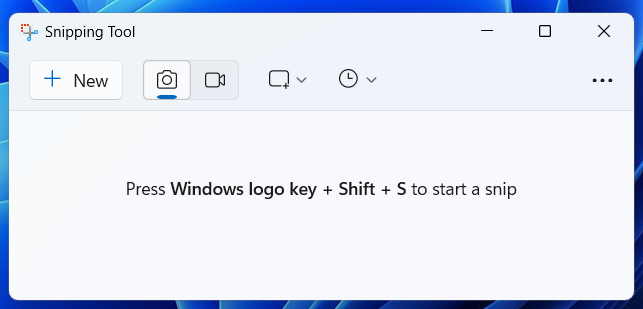
With Snipping Tool, you can record the entire screen, a selected area, or specific application windows. It also gives you the option to capture both system audio and microphone input during screen recording. Additionally, Snipping Tool provides a shortcut to open Microsoft Clipchamp, where you can easily edit your recordings.
Pros:
- Free and no need to download
- Simple to use and convenient shortcuts
Cons:
- Only available on Windows 11
- Lack of flexible recording settings, like frame rate
OBS Studio
OBS Studio is another free no lag screen recorder. As an open-source, cross-platform recording tool, OBS Studio is available on Windows, macOS, and Linux.
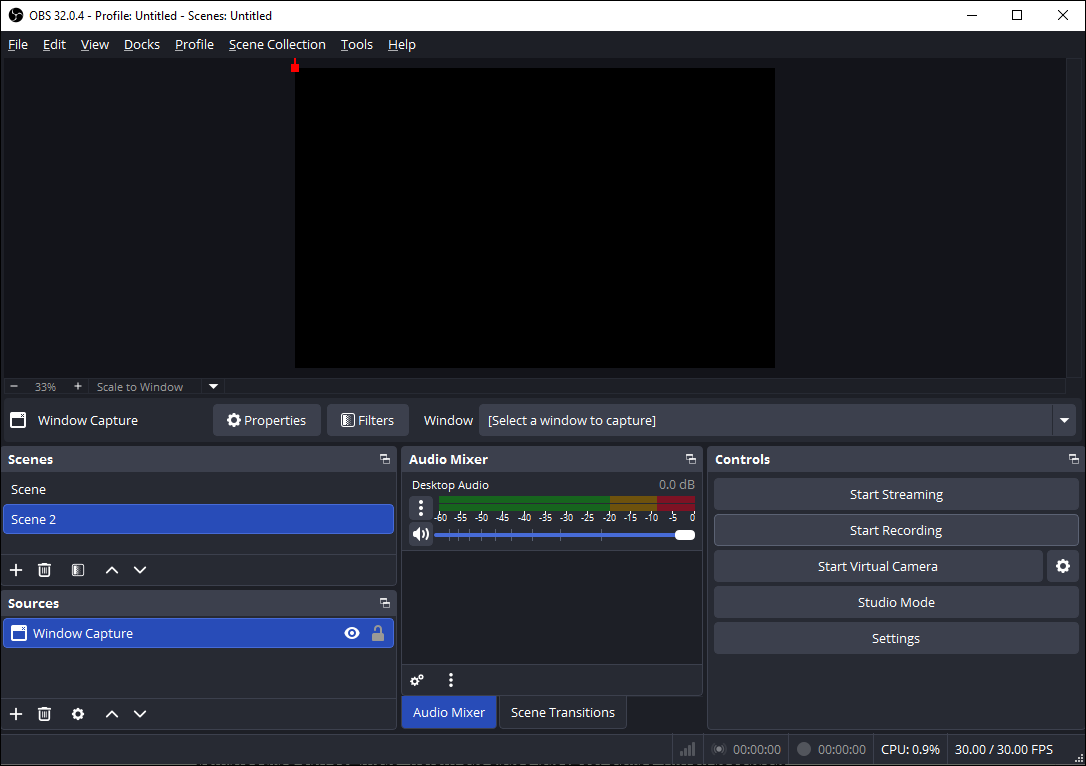
OBS Studio provides powerful and comprehensive features to meet diverse recording needs. You can capture your entire screen, specific application windows, webcams, microphones, system audio, and more. The customizable recording settings, including encoders, resolutions, frame rates, and hotkeys, make it a professional choice for users looking for flexibility and high-quality recordings.
However, its complex interface and steep learning curve might make it challenging for beginners to get started.
Pros:
- Flexible recording selection and adjustable settings
- Cross-platform support and open-source nature
- Support multiple output formats for diverse recording needs
Cons:
- Steep learning curve, especially for beginners
Bandicam
Bandicam is a popular, no lag screen recorder for Windows, known for its lightweight design and ease of use. It allows you to record all activities on your computer screen, offering flexible recording options, including full-screen capture, specific regions, individual windows, webcam, audio, and even recording around the mouse cursor.
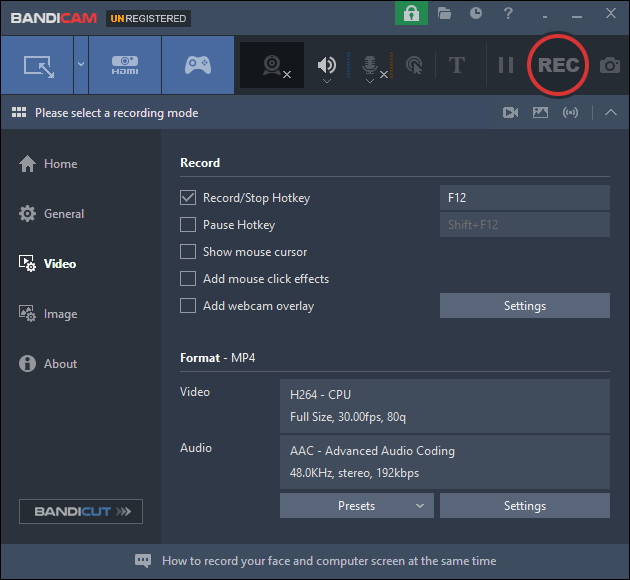
Additionally, Bandicam provides useful features such as real-time drawing tools, mouse click effects, and dedicated modes for recording devices and games. Its user-friendly interface and customizable settings make it easy to adjust frame rates, video codecs, and video quality according to your needs.
However, the free version has a recording time limit of 10 minutes per session and adds a watermark to the recorded videos.
Pros:
- Flexible recording options and customizable settings
- Advanced recording feature like real-time drawing tools
Cons:
- Watermark in free version and 10-minute recording limit
Conclusion
This article explains the main factors that cause lag during screen recording and recommends six of the best no lag screen recorders.
When choosing a suitable no lag screen recorder, you should consider factors like lightweight design, powerful features, and your specific needs. Tools like MiniTool Screen Recorder and built-in Windows options are convenient and easy to use. OBS Studio can be a bit complicated to use, while Bandicam has limitations in its free version.
Finally, if you have any questions or suggestions about MiniTool Screen Recorder and MiniTool MovieMaker, please don’t hesitate to email us at support@minitool.com.