Microsoft PowerPoint is a widely used software designed to share images, text, videos, and charts with others in the form of slides. Recording PowerPoint presentation videos with your own face and sharing the recorded videos on social media platforms to gain more followers are common practice for content creators.
Why Record a Presentation on PowerPoint with Face
Presentations with real people are more dynamic than those with only narration. Video content that includes body language and facial expressions can extend viewers’ attention span and information retention, thereby helping them better understand complex concepts. During a PowerPoint recording, maintaining eye contact and a confident expression builds credibility and positions oneself as a professional communicator.
How to Record Yourself on PowerPoint with the Built-in Recorder
PowerPoint has a built-in recorder that enables you to record your presentation with microphone sound, helping you speak your idea during the presentation. Also, you can enable the webcam in a picture-in-picture format during recording.
In addition, users can start recording from the first slide or current slide and pause/resume the recording. If you make a mistake, you can re-record specific slides rather than the entire presentation. It allows you to use a laser pointer, pen, or highlighter during the recording.
Below are the instructions on how to video record yourself presenting a PowerPoint with the built-in recorder.
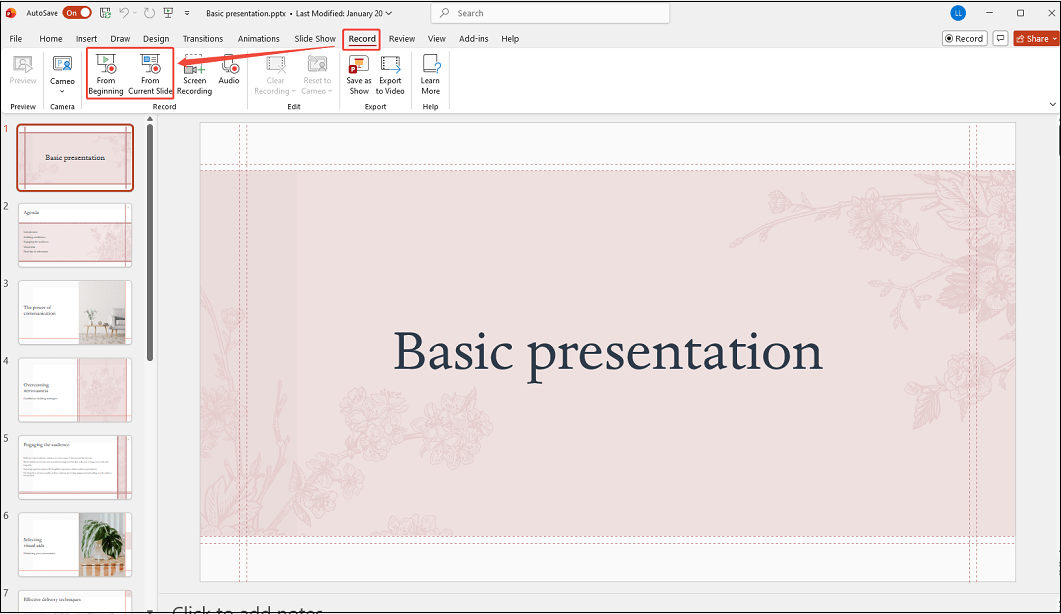
Step 1. Open Your Presentation and Launch the Recorder
1. Open your presentation on PowerPoint.
2. Click on Record in the top-right corner and click on From beginning or From Current Slide.
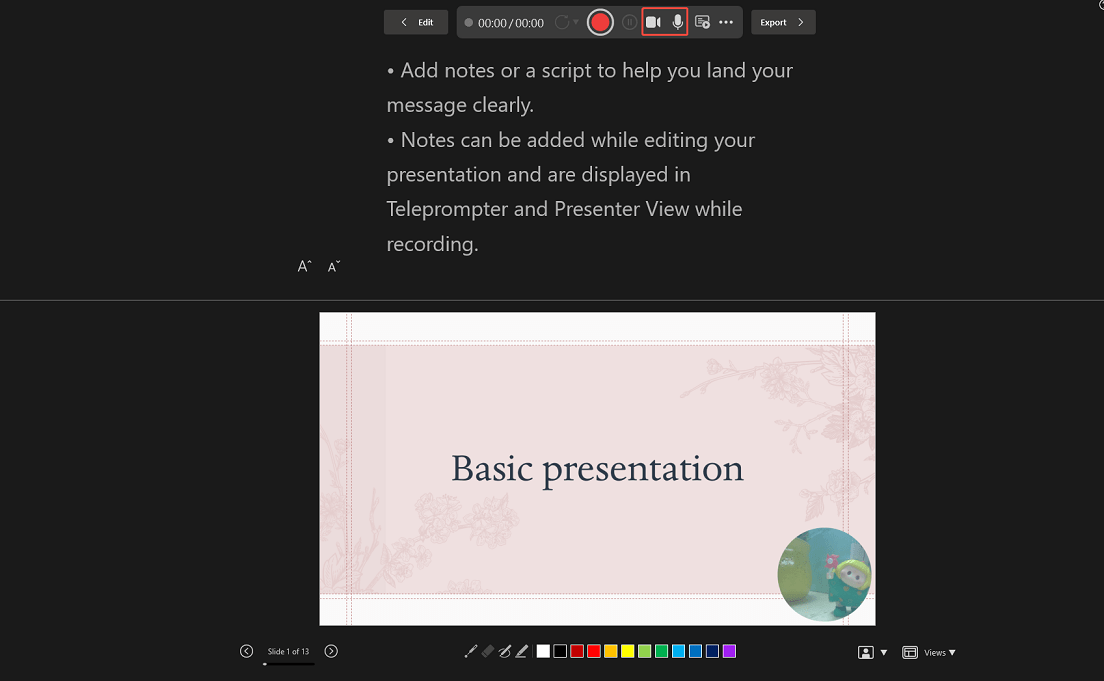
Step 2. Control the Webcam and Microphone
The webcam and microphone are enabled by default.
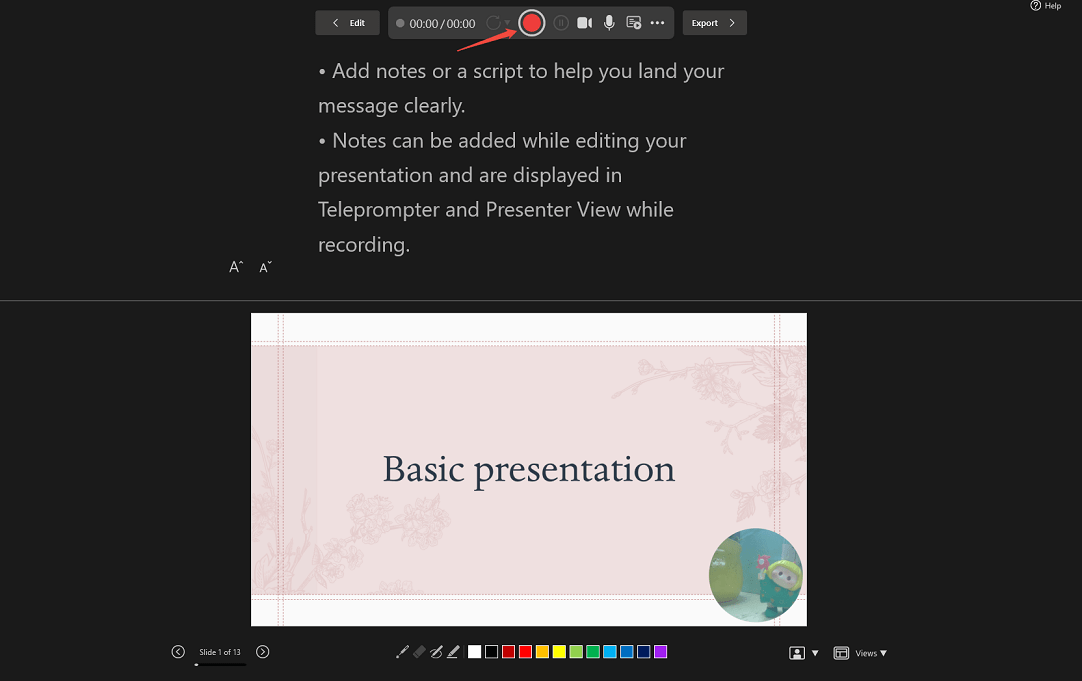
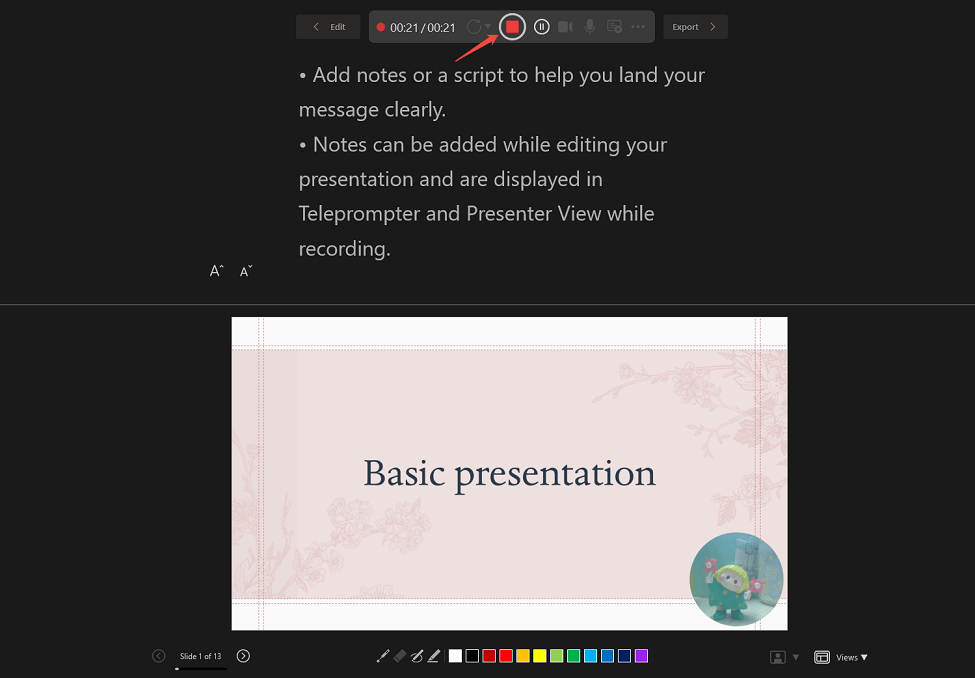
Step 3. Start/End Recording
1. Click on the Start recording button.
2. Play the slides you want to record one by one.
3. Click on the Stop recording button to end the recording.
Step 4. Save and Export Recorded Video
Click on Export to save the recorded video with your face.

How to Record Yourself on PowerPoint with MiniTool Screen Recorder
MiniTool Screen Recorder is a lightweight and professional screen recording tool suitable for users, no matter what level you are. You can not only record PowerPoint slides but also webinars, live videos, meetings, gameplays, TV shows, etc. All the recordings don’t contain watermarks.
To record on PowerPoint with face, the webcam is enabled. You can customize the size, position, and shape of the webcam overlay. You can choose to record system audio, microphone audio, or both. Even the recording area can be selected manually.
For presenters who want to mark key information during PowerPoint recording, they can use the annotation tool. Now, follow the detailed steps to record yourself presenting on PowerPoint with ease.
Step 1: Download and Install MiniTool Screen Recorder
Click on the button below to download MiniTool Screen Recorder. Then, follow the prompts to install it on your PC
MiniTool Screen RecorderClick to Download100%Clean & Safe
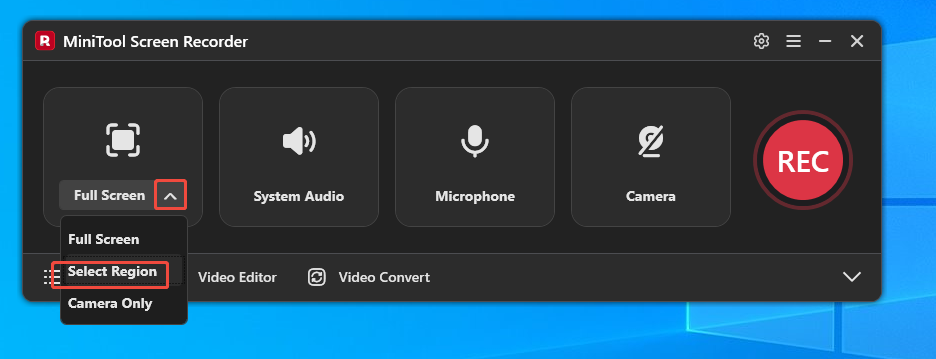
Step 2: Choose the Recording Area
MiniTool Screen Recorder defaults to full-screen recording. If you want to record a specific area, expand the drop-down menu next to the Full Screen option, then choose the Select Region option.
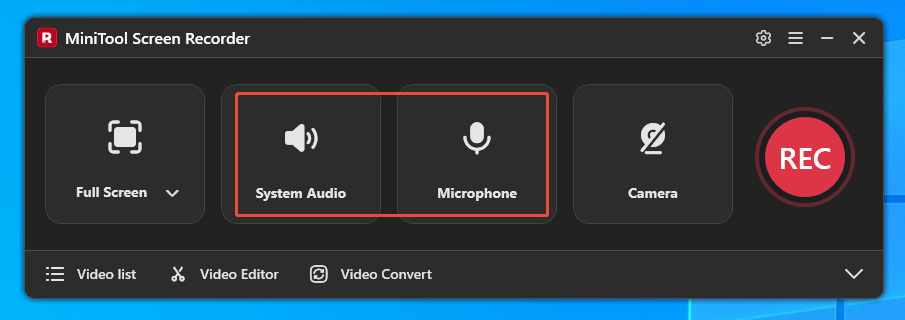
Step 3: Manage the Dual Audio
Microphone and system audio recording functions are enabled by default.
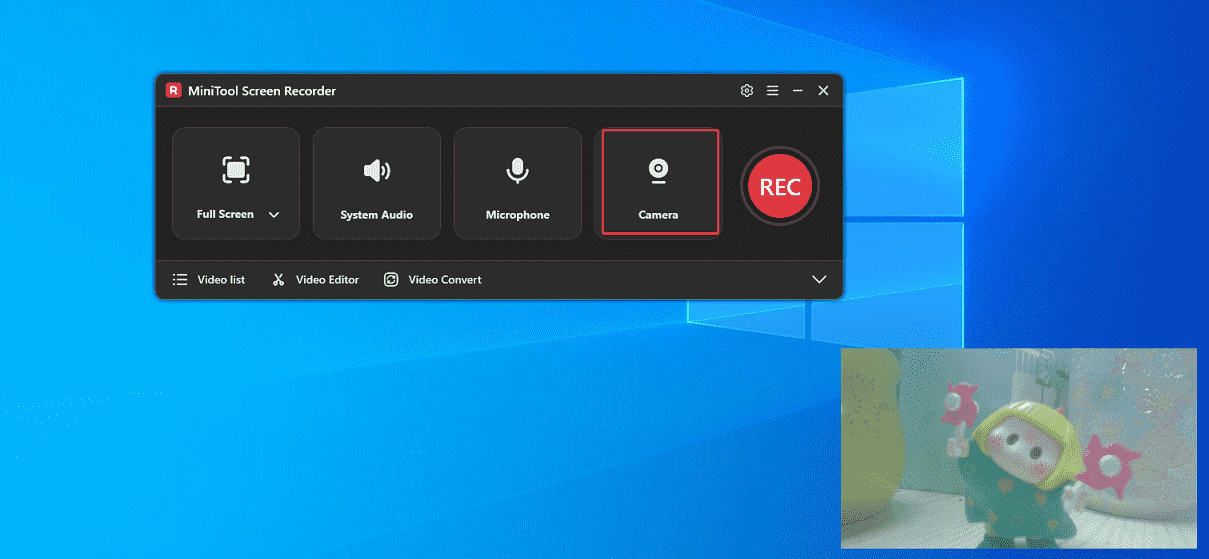
Step 4: Open the Webcam Recording
To record yourself on PowerPoint, you need to click the Camera icon on the right to enable the webcam recording feature.
Step 5: Start and End Recording
1. To begin the recording process, click the REC button on the right side of the main interface or press the F6 key.
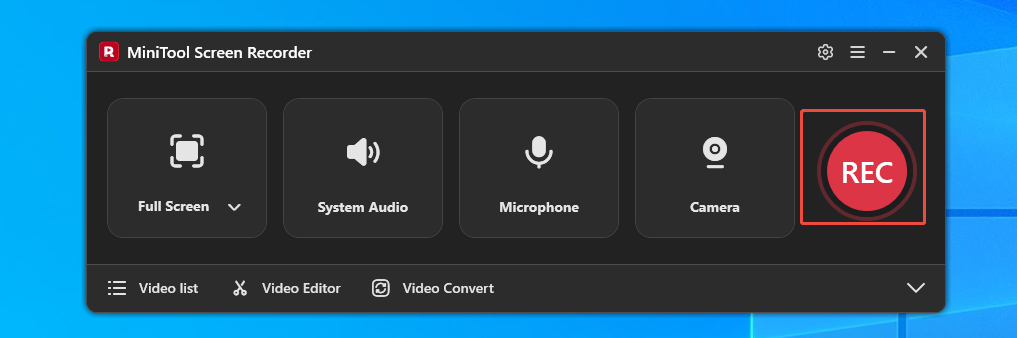
2. Play the PowerPoint slides you want to record.
3. Press F6 to stop recording.
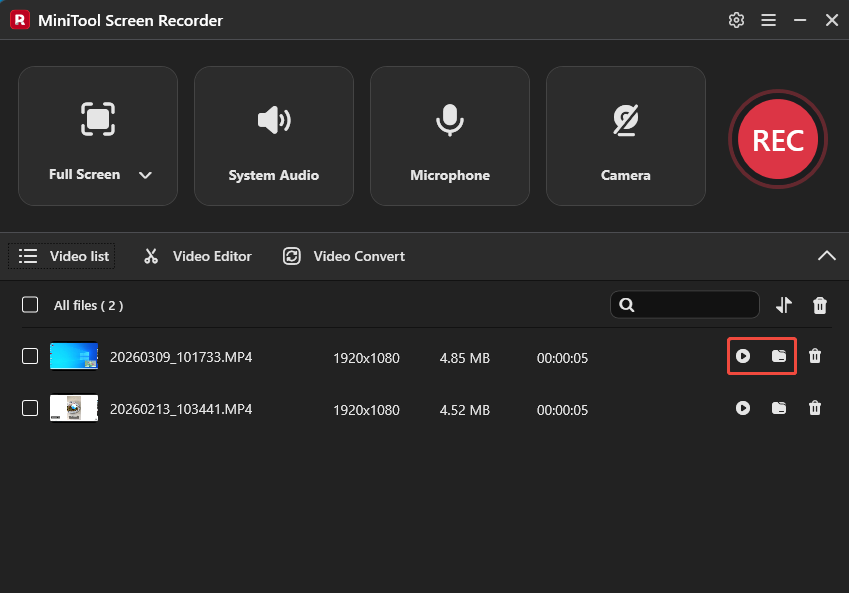
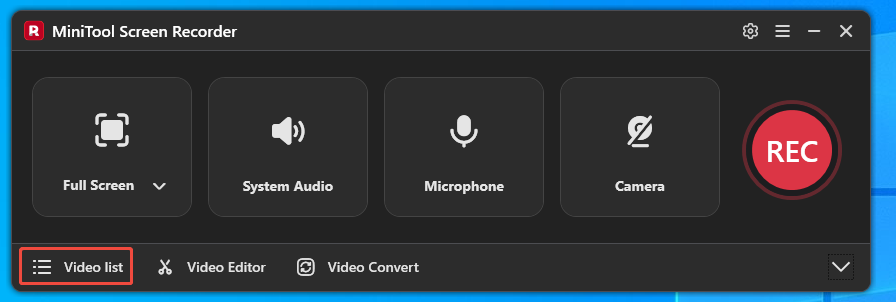
Step 6. Review the Recorded PowerPoint Video with Face
When the recording ends, the recorded video will appear on the Video list tab. Here, click on the Play icon to check the recorded video. Or click on the Folder icon to access it on your computer.
The built-in recorder of PowerPoint and MiniTool Screen Recorder are easy to use. However, for users who need to customize screen regions and multiple audio inputs, MiniTool Screen Recorder is better suited to their needs.
Bonus: Edit Recording to Make a Better Presentation
To achieve better presentation results, click on Video Editor on the main interface of MiniTool Screen Recorder to edit the recorded presentation.
Or, click on the button below to get the video editor directly.
MiniTool MovieMakerClick to Download100%Clean & Safe
You can use the basic trim feature to adjust the start/end time of the recorded PowerPoint video. Also, cut the unwanted parts, such as awkward silences and irrelevant chatter, to ensure consistency. Also, you can adjust the video playback speed and set the fade-in or fade-out for the sound to be natural and smooth.
After you are satisfied with all your changes, you can set the resolution, frame rate, and formats (MP4, AVI, WMV, MOV, MKV, MP3 when you export the edited video.
Wrap Things Up
This article introduces two free methods for how to record yourself on PowerPoint, including using the built-in recorder and MiniTool Screen Recorder. Furthermore, you can edit the recording to make a better presentation to others with the video editor.
If you have any questions or suggestions about MiniTool Screen Recorder and MiniTool MovieMaker, please contact us via email at support@minitool.com. Or you can send me a message directly on X.