Why Record Valorant Gameplay
Recording your Valorant gameplay lets you review your decision-making, aim, and positioning. You can spot mistakes you missed during the match and correct them, helping you climb the ranks faster.
Plus, recording saves your highlight plays and team victory moments. You can share these clips with friends or post them online to showcase your skills. Moreover, you can study replays of teammates and opponents to learn more effective strategies. Furthermore, recording Valorant gameplay permanently preserves your favorite matches, which transforms fleeting encounters into lasting memories.
How to record Valorant gameplay on Windows? Below are three reliable methods. Read on.
Best Way to Screen Record Valorant Gameplay on Windows
MiniTool Screen Recorder is a lightweight, user-friendly screen recording software for Windows. It supports full-screen, selected area, or webcam recording without lag, making it ideal for capturing Valorant, PUBG, and other competitive games.
MiniTool Screen Recorder captures 4K ultra-high-definition screens and supports multiple frame rates, ensuring every aim, highlight, and team play is crystal clear and smooth. You can also record system audio, microphone, and camera in picture-in-picture mode, making it easy to add commentary and reactions – perfect for creating highlight reels and tutorial videos. This application also features screen annotation tools that allow you to add text/numbers/text and draw on your screen.
Moreover, MiniTool Screen Recorder’s clean interface and one-click recording make it easy for both beginners and professionals to get started easily. With no watermarks, no time limits, and MP4 format support, you can effortlessly save, replay, edit, and share your best moments.
MiniTool Screen Recorder minimizes the impact on system performance while providing steady, high-quality recording for positioning reviews, highlight capture, and gaming content creation.
Now, follow the step-by-step guide below to record Valorant gameplay.
Step 1. Download and Install MiniTool Screen Recorder
Click the download button below to download and install MiniTool Screen Recorder on your computer. Then, launch this Valorant recorder by double-clicking the shortcut icon on the desktop.
MiniTool Screen RecorderClick to Download100%Clean & Safe
Step 2. Set Recording Settings
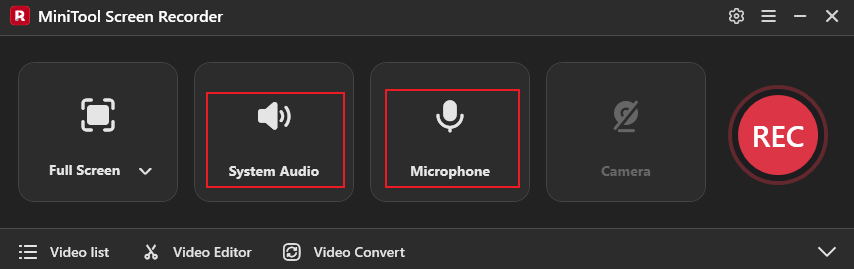
Control audio settings
The system audio and microphone are turned on by default. Keep the system audio active. If you want to record your voice when playing your game, also keep the microphone turned on.
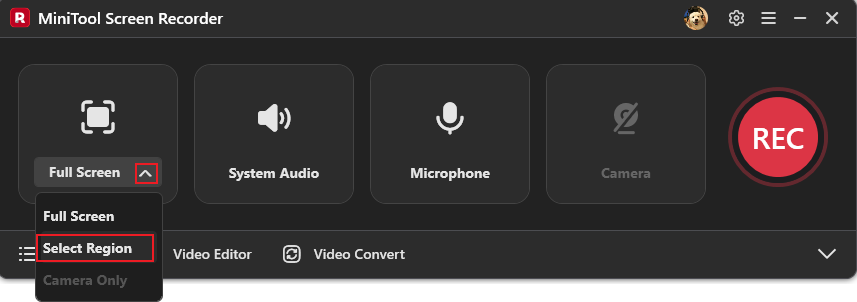
Select the recording area
The full screen is recorded by default. If you want to specify a recording area, select the Select Region option from the Full Screen drop-down menu, then drag the mouse to specify the area.
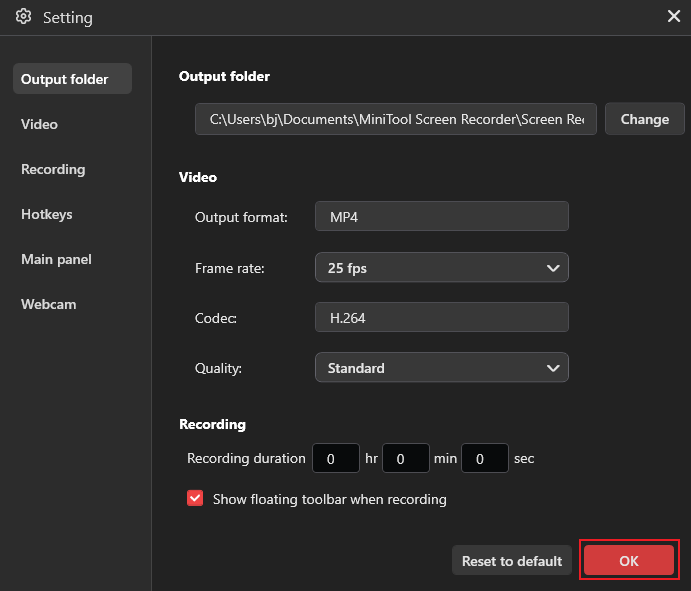
Access more settings
Click the Settings icon in the top-right corner to open the Settings window. Then, you can adjust the frame rate and quality for the output video. Click the OK button to save the changes.
Step 3. Start Recording Valorant Gameplay
Click the REC button in MiniTool Screen Recorder. After a three-second countdown, the recording will begin. Open Valorant and start playing. During the recording, you can press the F9 key to pause/resume.
Step 4. End the Recording
Press F6 to end the recording. Then, find the recording in the Video list section. Click the Folder icon to locate the recording, or click the Play icon to watch it.
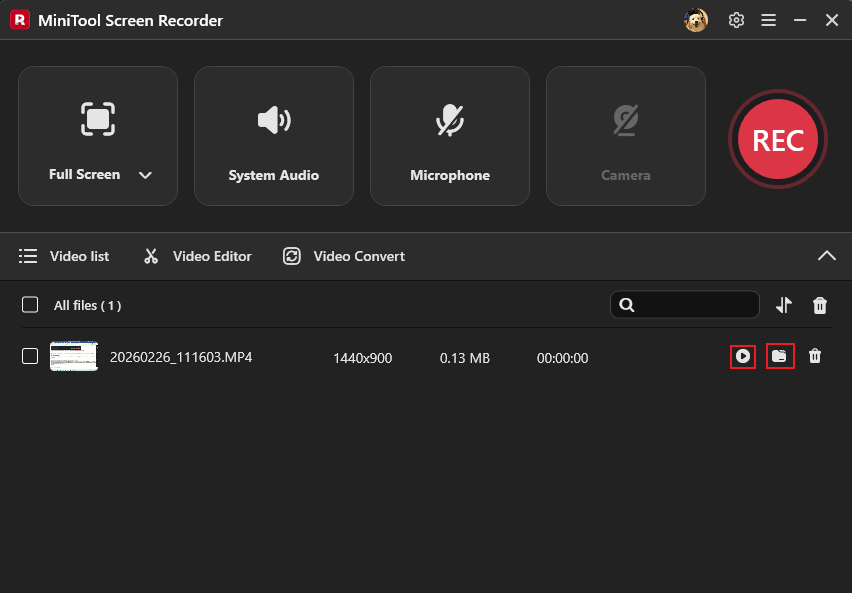
Want to edit your recorded video and turn it into a game highlight reel? Select the Video Editor option next to the Video list to download or open MiniTool MovieMaker. Within the video editing software, you can edit your recordings by trimming, cropping, reversing, rotating, speeding up/slowing down, and more.
Additionally, MiniTool MovieMaker offers a rich library of transitions, stickers, music, filters, and more – all free to use in your videos. Click the download button below now to unlock endless creative possibilities for your recordings!
MiniTool MovieMakerClick to Download100%Clean & Safe
Other Recommendations to Record Valorant Gameplay
Here are two pre-installed screen recorders on Windows you can use to record Valorant gameplay.
# 1. Game Bar
The Windows Game Bar, also known as Xbox Game Bar, is a built-in screen capture tool in Windows 10/11. It records your screen in high quality and automatically saves the clips.
Additionally, this tool allows you to independently adjust the volume levels for game audio, voice chat, music, and system sounds without switching windows. Balance microphone inputs and game audio effortlessly for clearer communication and a more immersive gaming experience. Game Bar operates efficiently in the background with minimal system resource usage, enabling smooth gameplay recording.
Here’s a quick guide on how to record Valorant gameplay with Game Bar:
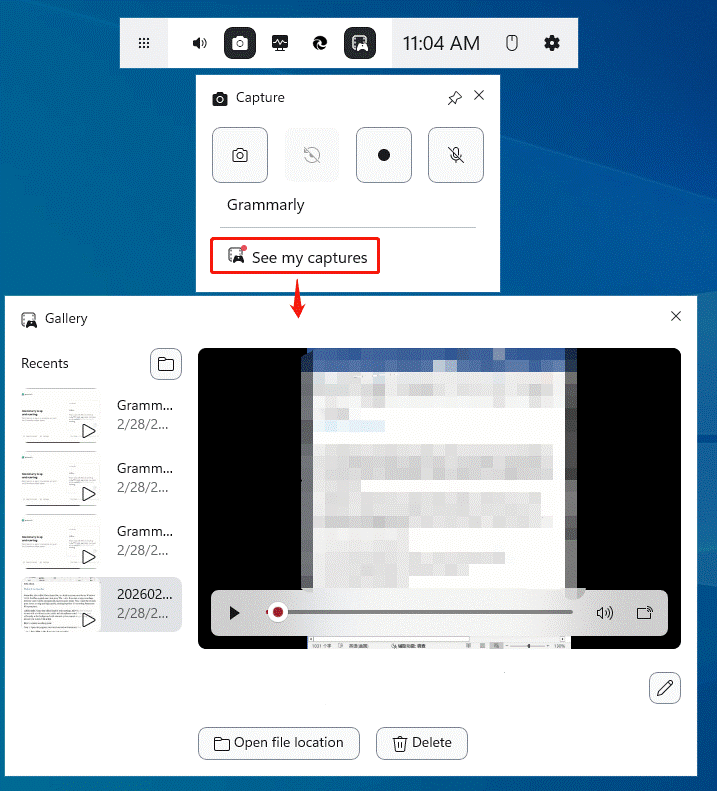
Step 1. Press Win + Alt + R to start/stop recording.
Step 2. Open your game and start playing.
Step 3. Go to the See my captures section to view your recording.
# 2. Microsoft Clipchamp
Microsoft Clipchamp is a pre-installed application in Windows 11 that offers professional and easy-to-use screen recording capabilities, enabling quick and clear capture of screen content. It can record full screen, a single window, or browser tabs, and provides flexible audio options: system audio, microphone audio, or both. It's perfect for recording gameplay.
Follow the guide below to record Valorant gameplay:
Step 1. Open Clipchamp from the Start menu. (If you’re not on Windows 11, download and install the program from the Microsoft Store.)
Step 2. Click Create a new video, choose Record & create, and click Screen.
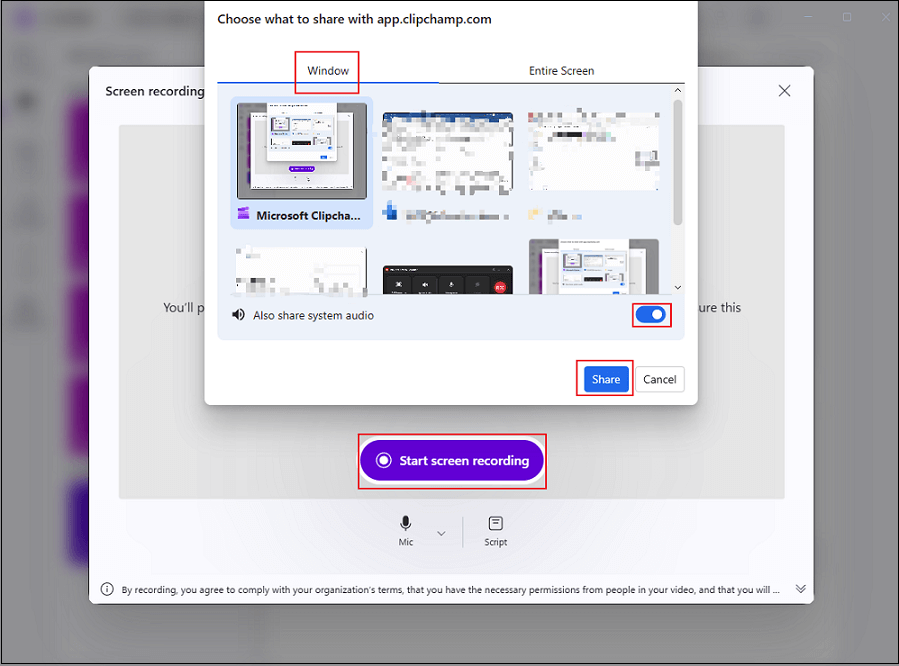
Step 3. Click Start screen recording, choose your game window, enable Also share system audio, and click Share.
Step 4. Open your game and start playing.
Step 5. Click Stop and review to end the recording.
Step 6. Click Save and edit to export the recording.
Final Words
How to record Valorant gameplay on Windows? This post offers three user-friendly screen recorders and shows you how to complete the recording task step by step. Now, it’s time to record your game highlight!
You can contact us via support@minitool.com if you have any questions about using MiniTool Screen Recorder or MiniTool MovieMaker. Also, you can send me messages directly on X, and I’ll help you as soon as possible.