I enjoy playing games and often use replay files generated by the game engine to review my performance. These files allow me to rewatch matches from different perspectives, helping me analyze mistakes and improve my strategies. Many competitive and strategy games support replay files, such as League of Legends, Fortnite, and Rocket League.
However, I soon realized a limitation that replay files can only be opened within the original game. This makes them inconvenient to use, especially when I want to share my highlights or achievements with friends. Since replay files are not actual video files but data records, they cannot be played on common media players or easily shared across different platforms.
Because of this, I started looking for a way to convert replay files into a more accessible format like MP4. After trying different methods, I found that replay files cannot be directly converted to MP4 because they are not video files but data records of in-game actions. Therefore, I decided to convert a replay to MP4 by recording the gameplay.
How to Record Replay to MP4
This section focuses on how to record a replay to MP4 on PC using the desktop screen recorder, MiniTool Screen Recorder, and Windows built-in gameplay recorder, Xbox Game Bar.
Method 1: Use MiniTool Screen Recorder
MiniTool Screen Recorder is a versatile Windows screen recording tool. It allows you to capture on-screen activities without a time limit. With its user-friendly interface and robust functions, this software is popular among both beginners and advanced users.
When recording game replays, MiniTool Screen Recorder provides flexible control over video and audio settings. You can record the entire screen, a selected region, or a specific window, along with system sound and microphone audio. As a webcam recorder, it enables you to overlay camera footage onto your gameplay for tutorials or commentary videos.
In addition, the software offers customizable recording options. You can adjust the frame rate and video quality to achieve better visual results. It also includes real-time screen annotation tools, allowing you to highlight key information with shapes, text, step numbers, drawings, and a whiteboard.
From my perspective, MiniTool Screen Recorder is an easy-to-use yet powerful tool. Its lightweight design and rich features make it a reliable solution to convert a replay to MP4.
How to record a replay to MP4 on PC with MiniTool Screen Recorder? Follow the steps below.
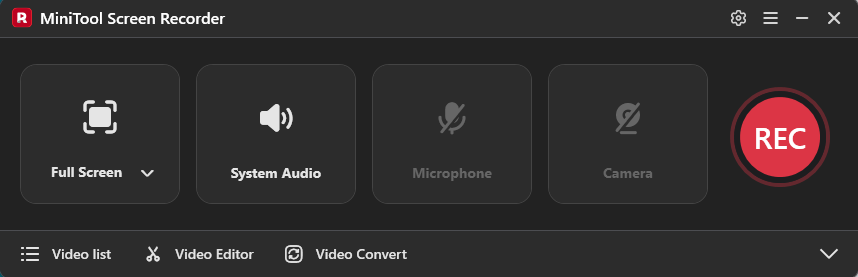
Step 1: Access MiniTool Screen Recorder
Click the button below to download and install the software on your computer. Next, launch it.
MiniTool Screen RecorderClick to Download100%Clean & Safe
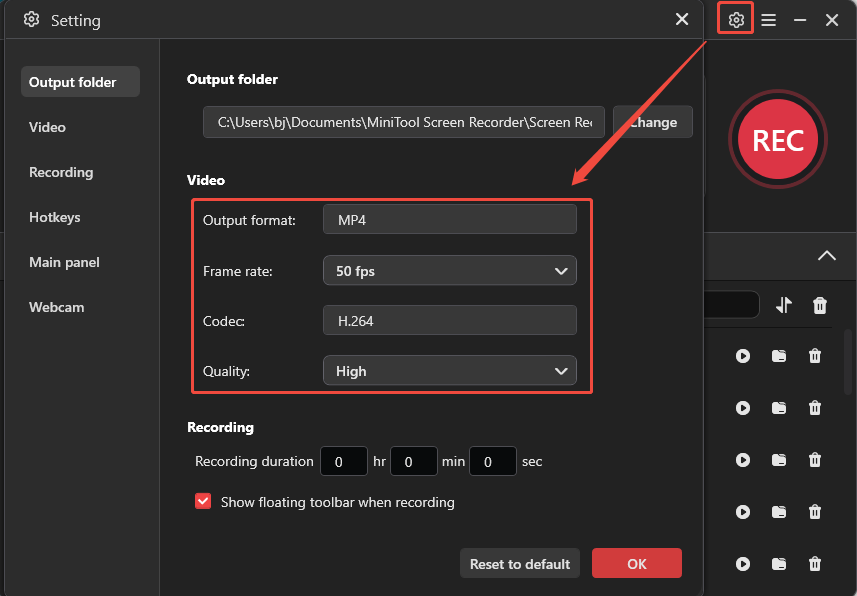
Step 2: Adjust the Recording Settings
Click the Settings icon in the upper-right corner of the main interface to enter the settings window. Switch to the Video section, and click Frame rate and Quality to choose your desired option. Click OK to save the adjustments.
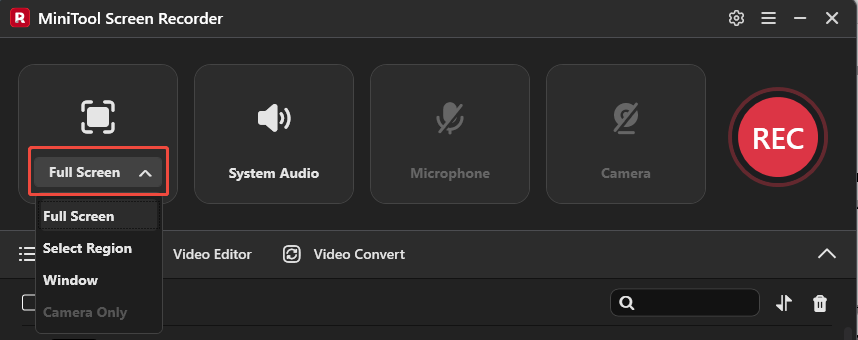
Step 3: Select the Recording Area
Open the game and click the replay you want to record. By default, MiniTool Screen Recorder captures the full screen. To record only the replay area, click Full Screen in the main interface to expand its drop-down menu. Click Select Region and drag the cursor to capture the replay window.
Step 4: Configure Audio
The system audio and microphone audio are recorded with the screen by default. If you want to record only game sound, simply click Microphone to turn it off.
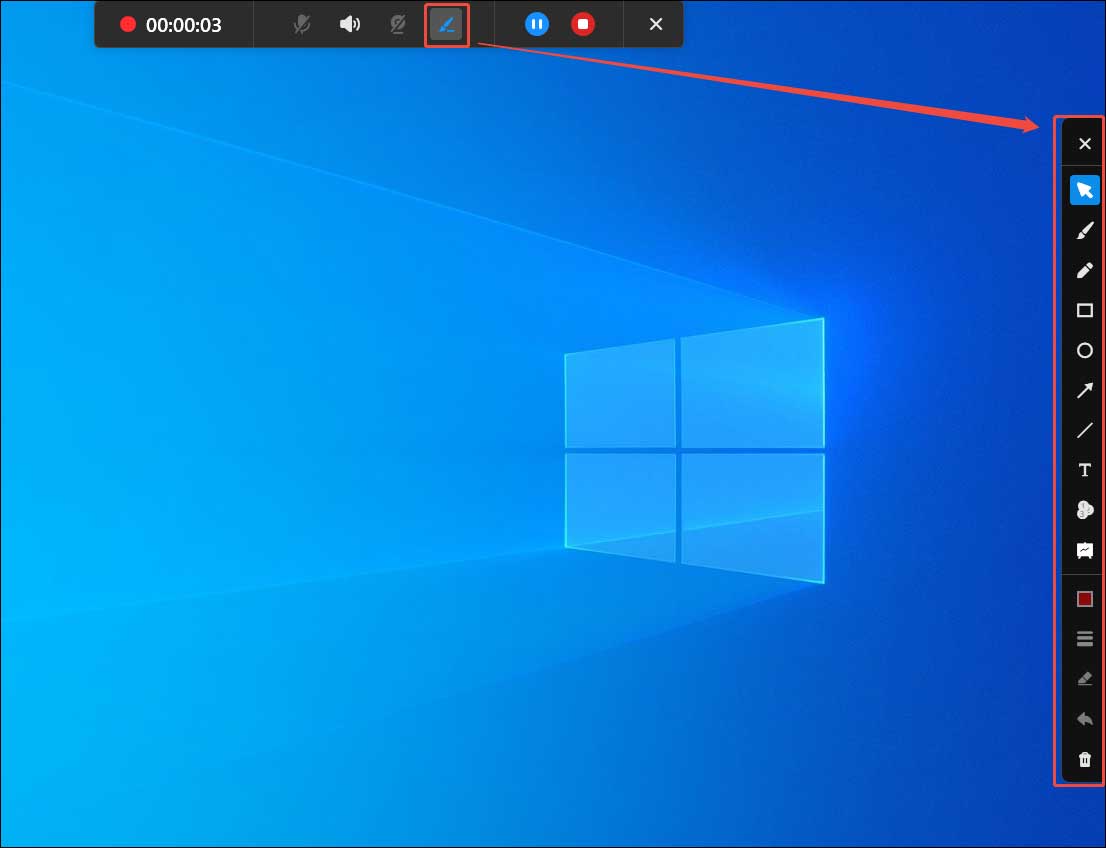
Step 5: Start Recording and Add Annotation
When you are ready to start recording, click the red REC button on the right side of the main interface or press the F6 key. After a 3-second countdown, the software will automatically begin recording, and you can open and play your replay file in the game. Press F9 to pause or resume the recording if you want to skip some parts.
To add notes or highlight some information, click the Pen icon in the floating bar. The annotation panel will appear on the right side of the screen in full-screen mode. Click the desired tool to mark key information.
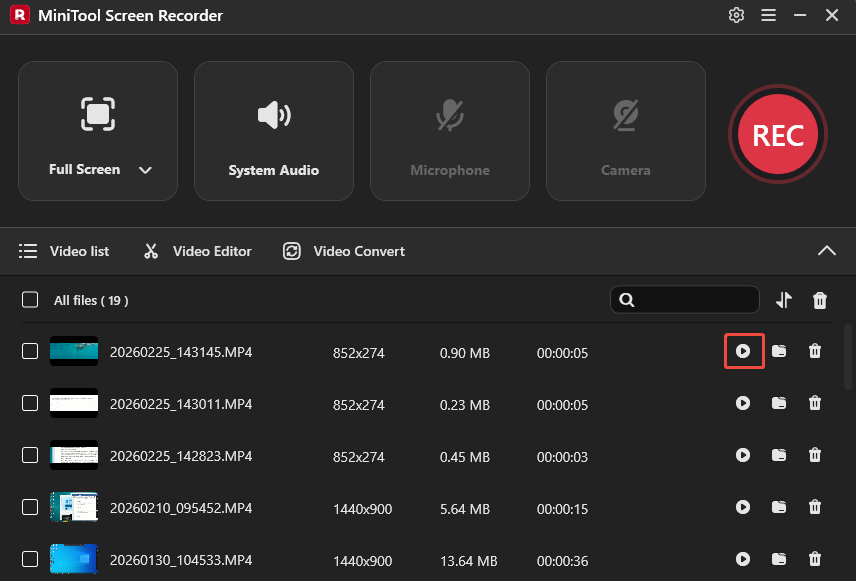
Step 6: Stop and Check the Recording
Press F6 again to end recording. The latest video will appear at the top of the Video list module in the interface. Click the Play icon to preview the recording.
Method 2: Use Xbox Game Bar
Xbox Game Bar is a game capture tool integrated into Windows. If you’re looking for a quick and convenient solution for recording replays, it’s a great choice since it doesn’t require any download or installation.
Xbox Game Bar allows users to adjust the recording settings in the Windows Captures panel, such as frame rate and video quality. It can automatically detect the active window for recording and let you record system audio and microphone audio together or separately. Follow the steps below to convert a replay file to MP4 using Xbox Game Bar.
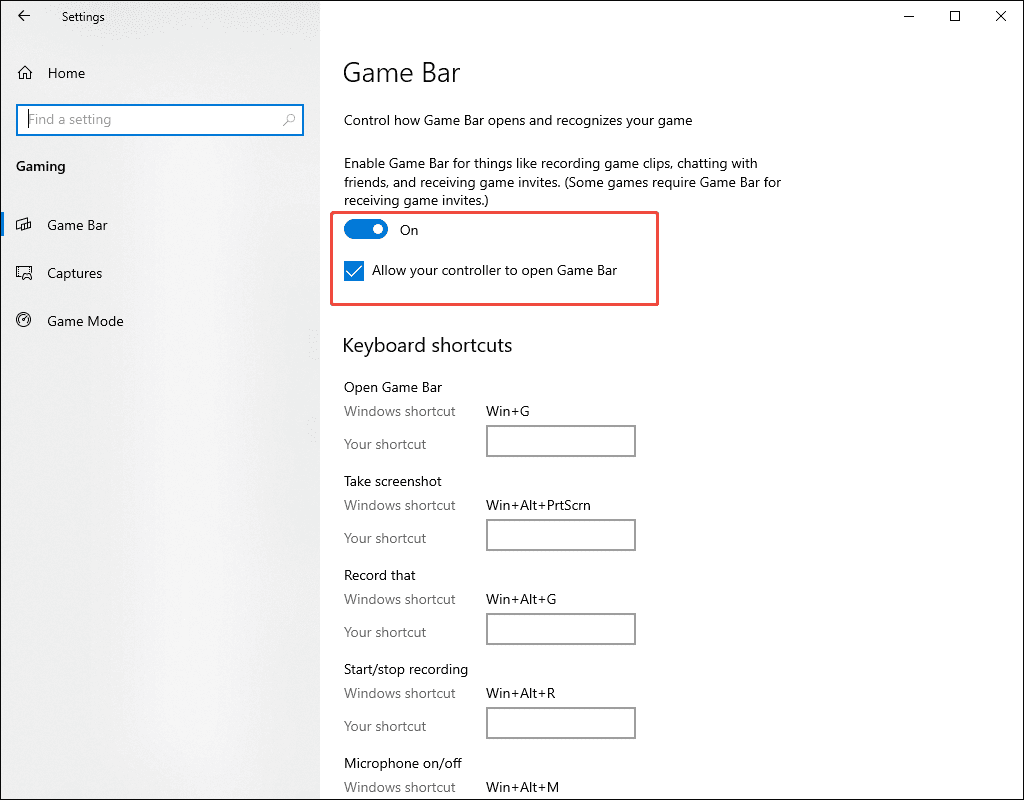
Step 1: Enable Xbox Game Bar
Press Windows + I to access the settings window. Click Gaming and enable the Allow your controller to open Game Bar option. Navigate to the Capture tab to customize the recording frame rate and quality.
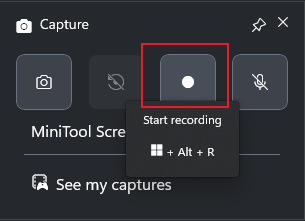
Step 2: Start Recording
Press the default Windows + G to open Xbox Game Bar. The microphone audio is disabled by default. If you want to turn it on, click the Microphone icon in the Capture panel. Next, click Start recording or press Windows + Alt + R to begin recording, and play the replay file in the game.
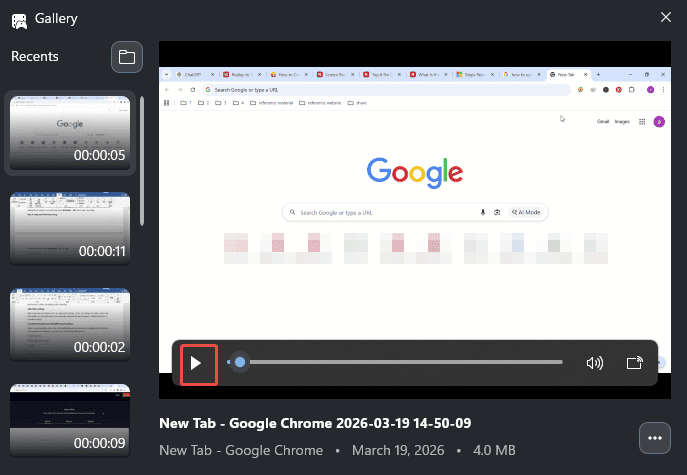
Step 3: Stop and Check Recording
To end recording, press Windows + Alt + R again. Click the pop-up notification on the right side of the screen. The latest recording is at the top of the Gallery panel. Click the Play icon to preview it.
Conclusion
This post demonstrates how to convert a replay to MP4 using two reliable screen recorders. For more advanced recording needs, MiniTool Screen Recorder is a powerful option, while Xbox Game Bar is ideal for quick and simple tasks. Choose the one that best suits your needs.
If you encounter any issues while trying out MiniTool Screen Recorder, feel free to email us via support@minitool.com or send me a message on X for assistance.