How to record Instagram Live on Windows? This article explains why you should record Instagram live videos and introduces how to capture them using 2 fantastic screen recorders, including MiniTool Screen Recorder and Clipchamp.
Why Record Instagram Live
There are many reasons why people choose to record Instagram Live. Below are the most common and practical reasons.
Save Meaningful Clips
Instagram Live often supports creators sharing fun interactions, amazing stories, personal experiences, exclusive announcements, schedules, and more. This live content may never appear elsewhere. By recording an Instagram Live, you can save these meaningful moments. Also, sometimes it’s not convenient to watch the live stream on Instagram continuously. To avoid missing any exciting content, you can record it first and watch it later at your leisure.
Edit the Live Content
Another reason for recording Instagram Live might be to edit clips from the broadcast. While recording streaming live can save the whole live process, it also contains a lot of irrelevant and ambiguous information. Editing the recorded video to remove unnecessary sections and add filters, effects, stickers, and text explanations, which will greatly improve its watchability and professionalism of the recorded video.
Share the Live with Others
Not everyone downloads and uses Instagram Live. In this case, many Instagram users record live streams and share them on other platforms, allowing non-Instagram users to enjoy the live content as well. In addition, some live courses, interviews, or seminars on Instagram are very valuable. If you can capture the key moments and share them with those who need them, making important information more accessible.
Used as Personal Study Material
Instagram Live is also an effective learning resource. Many professionals use it to explain concepts, teach skills, or answer viewers’ questions in real time. Instagram Live recordings can be used as valuable learning materials, allowing you to pause, replay, and review them at any time.

How to Record Instagram Live on Windows with 2 Tools
If you want to know how to record Instagram live streams on Windows, the following 2 useful tools can help you record them smoothly on your computer.
1. Use MiniTool Screen Recorder
MiniTool Screen Recorder is a lightweight and easy-to-use screen recording tool. It supports capturing Instagram Live videos on your screen. Even beginners can easily get started. MiniTool Screen Recorder provides watermark-free recording and provides advanced parameter settings, such as frame rate and video quality, making it an ideal choice for everyday recording.
Apart from the basic recording features, MiniTool Screen Recorder also supports webcam recording, which creates a PiP (Picture-in-Picture) effect. What’s more, it enables you to add screen annotations during recording. You can freely use tools such as brushes, highlighters, shapes, and the numbering tool.
Below are detailed steps on how to record live on Instagram using MiniTool Screen Recorder, which you can easily master.
Step 1. Download and Install MiniTool Screen Recorder
Download and install MiniTool Screen Recorder by clicking on the download button below. Then, launch it and click the Sign in option to log in to your account.
MiniTool Screen RecorderClick to Download100%Clean & Safe
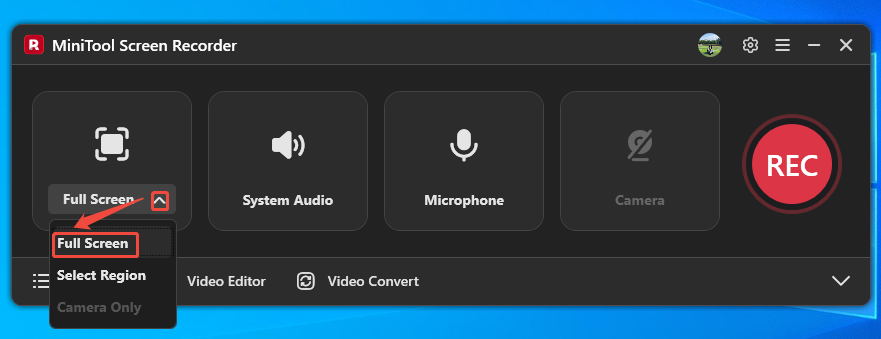
Step 2. Choose a Screen Type
Expand the recording pattern option to choose a type according to your needs. Here, I select the Full Screen option.
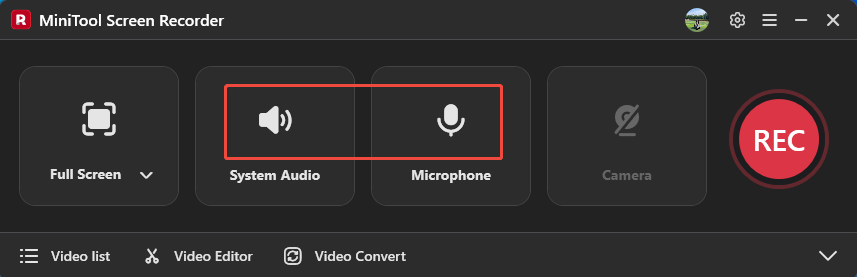
Step 3. Set the Audio to Record
Click on the System Audio icon and the Microphone icon to set the audio needed to record.
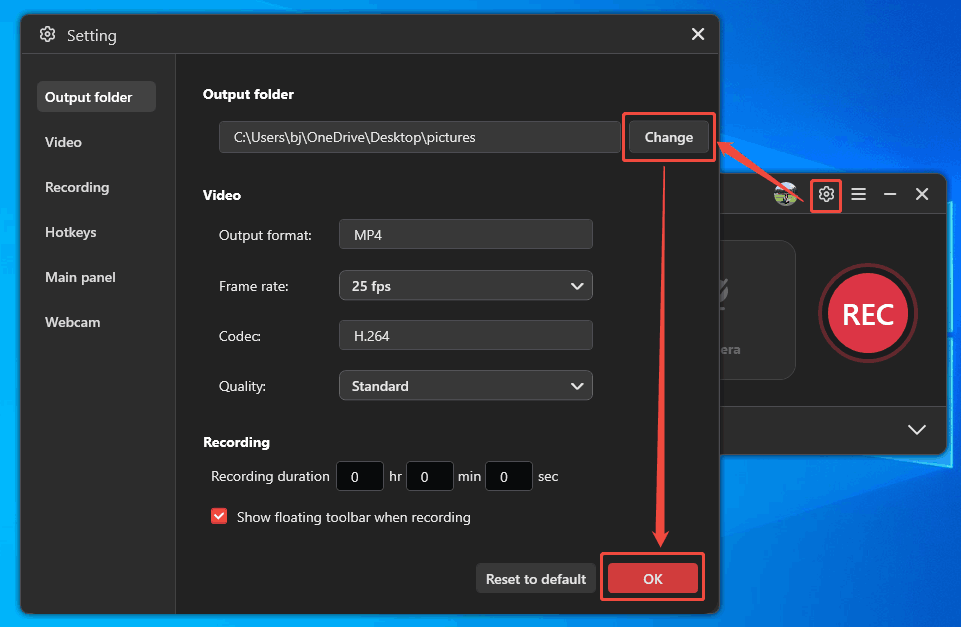
Step 4. Specify a Save Location
Click on the Settings icon on the upper-right of the recorder interface to trigger the Setting window. Then, click on the Change button to specify a save location. Then, click on the OK button to save the setting.
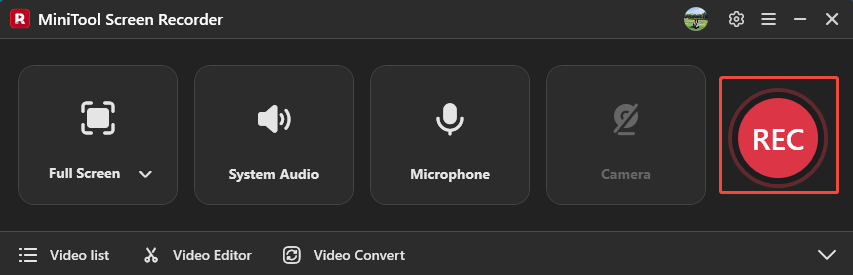
Step 5. Start and Stop the Recording
After completing the settings, you will return to the main interface. There, open your Instagram Live page and click on the REC button to begin the recording process after a 3-second countdown. To pause/resume this recording, press the F9 key. If you want to end it, just press the F6 key.
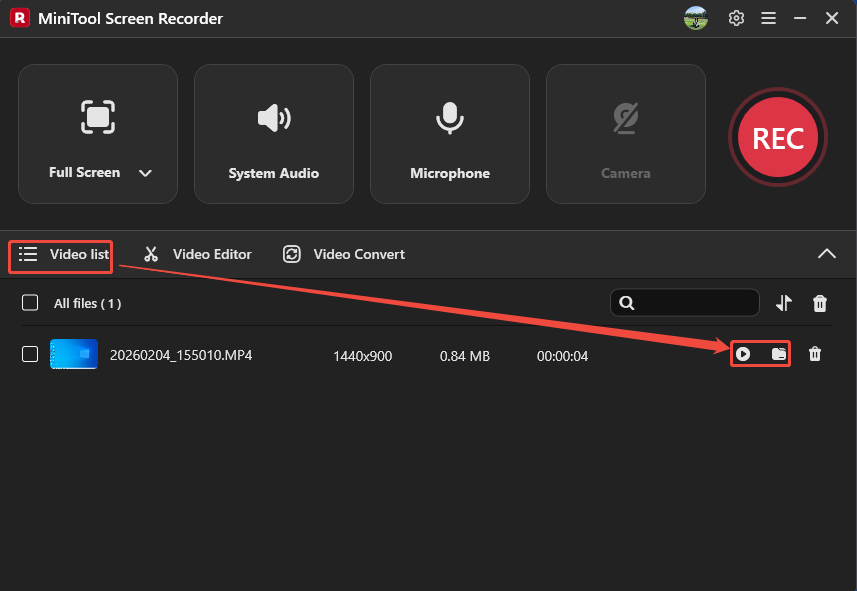
Step 6. Check and Locate the Recorded Video
Once the recording finishes, this screen recorder will land on the Video list tab. There, click on the Play icon to check if the recorded video meets your standards. Or click on the Folder icon to find out the save destination on your computer.
MiniTool Screen Recorder is an easy Instagram Live recorder for amazing moments. It is an ideal choice for users who want to record a live stream.
2. Use Clipchamp
Clipchamp is a Windows built-in recording tool. It allows you to record Instagram Live smoothly. In addition, Clipchamp enables you to export the HD (High Definition) recorded video. You can also share the recorded video on multiple social media platforms, such as YouTube and X.
Below is how to use Clipchamp to record Instagram Live.
Step 1. Get Clipchamp
If you are using Windows 11, you can open Clipchamp without downloading. Click the search icon on the screen taskbar and type Clipchamp in the search box. Then, select Microsoft Clipchamp from the search results to open it. On condition that you are using Windows 10, you need to get Clipchamp from the Microsoft Store. Then, launch it.
Step 2. Confirm the Recording Type and Start Recording
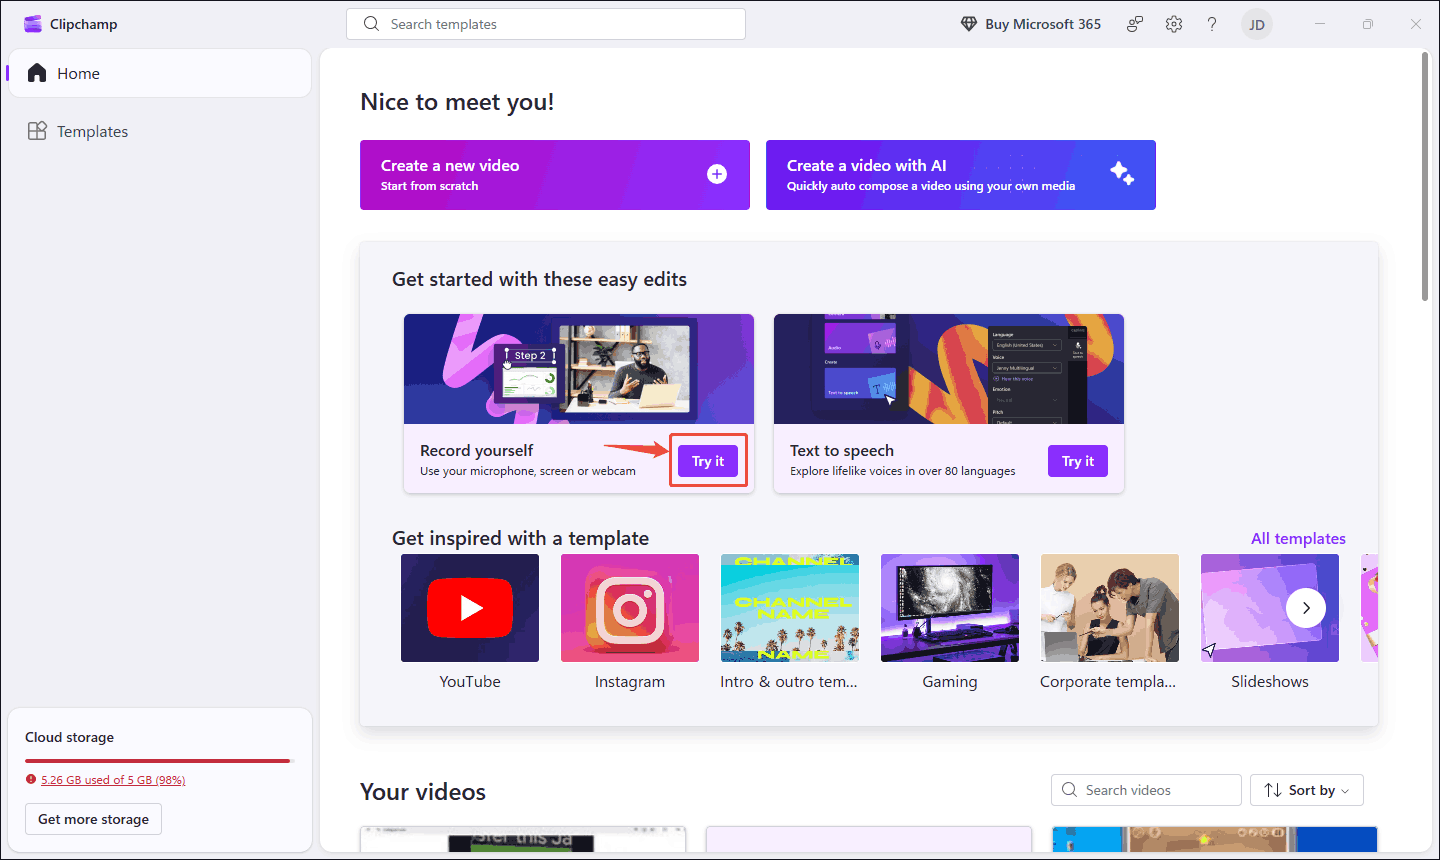
Firstly, find the Record yourself section. Here, click on the Try it option. Then, select the Screen option and click on the Start screen recording option to open the recording mode window.
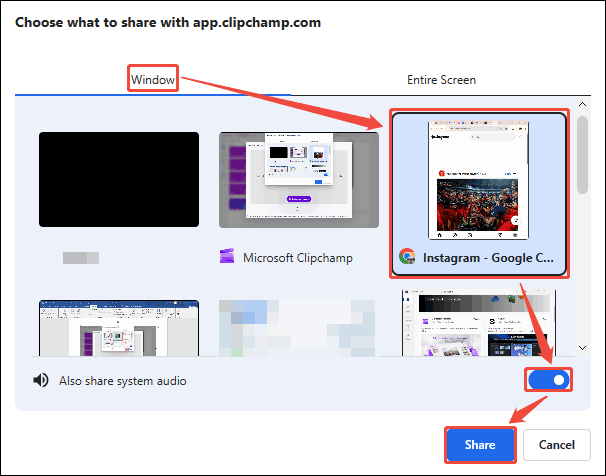
In the recording pattern window, choose a recording type according to your needs. Here, I choose the default Window tab. Next, click on the Instagram option and enable the Also share system audio button. Then, click on the Share button. After a 3-second countdown, Clipchamp starts recording.
Step 3. Stop the Recording
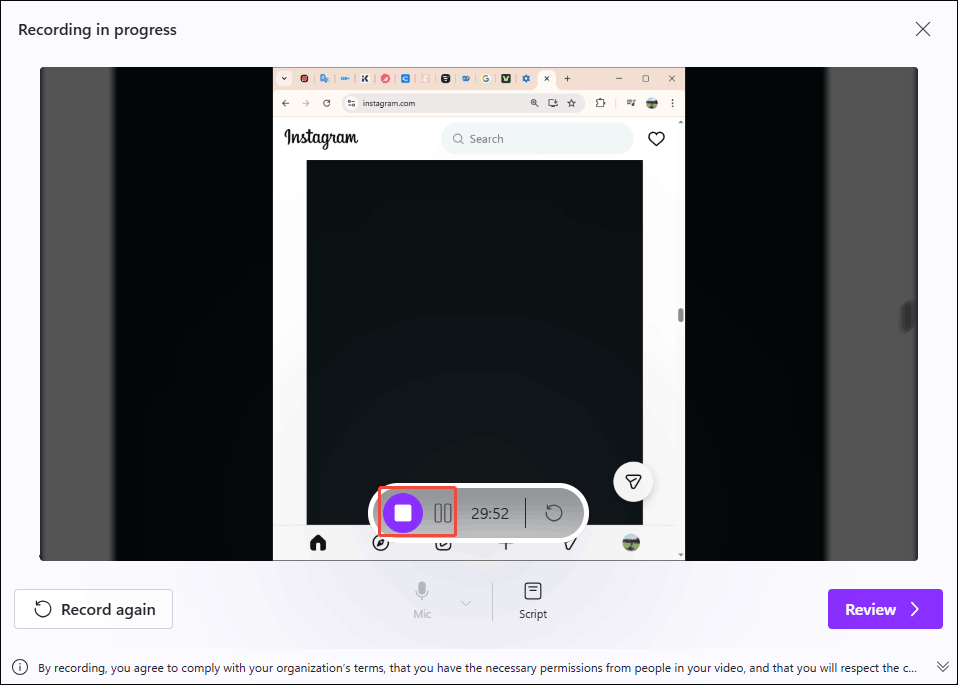
During the recording process, click on the Pause video recording button. If you want to end this screen recording, click on the Stop button.
Step 4. Export the Recorded Video
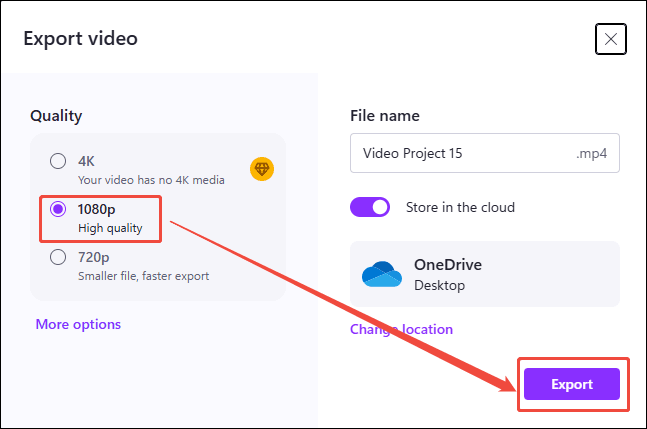
After ending the recording, click on the Save and edit option to enter the editing page. There, click on the Export option to trigger the Export video window. Here, choose a resolution. I take 1080p as an example. Then, click on the Export button to export the recorded video.
Step 5. Check and Save the Recorded Video
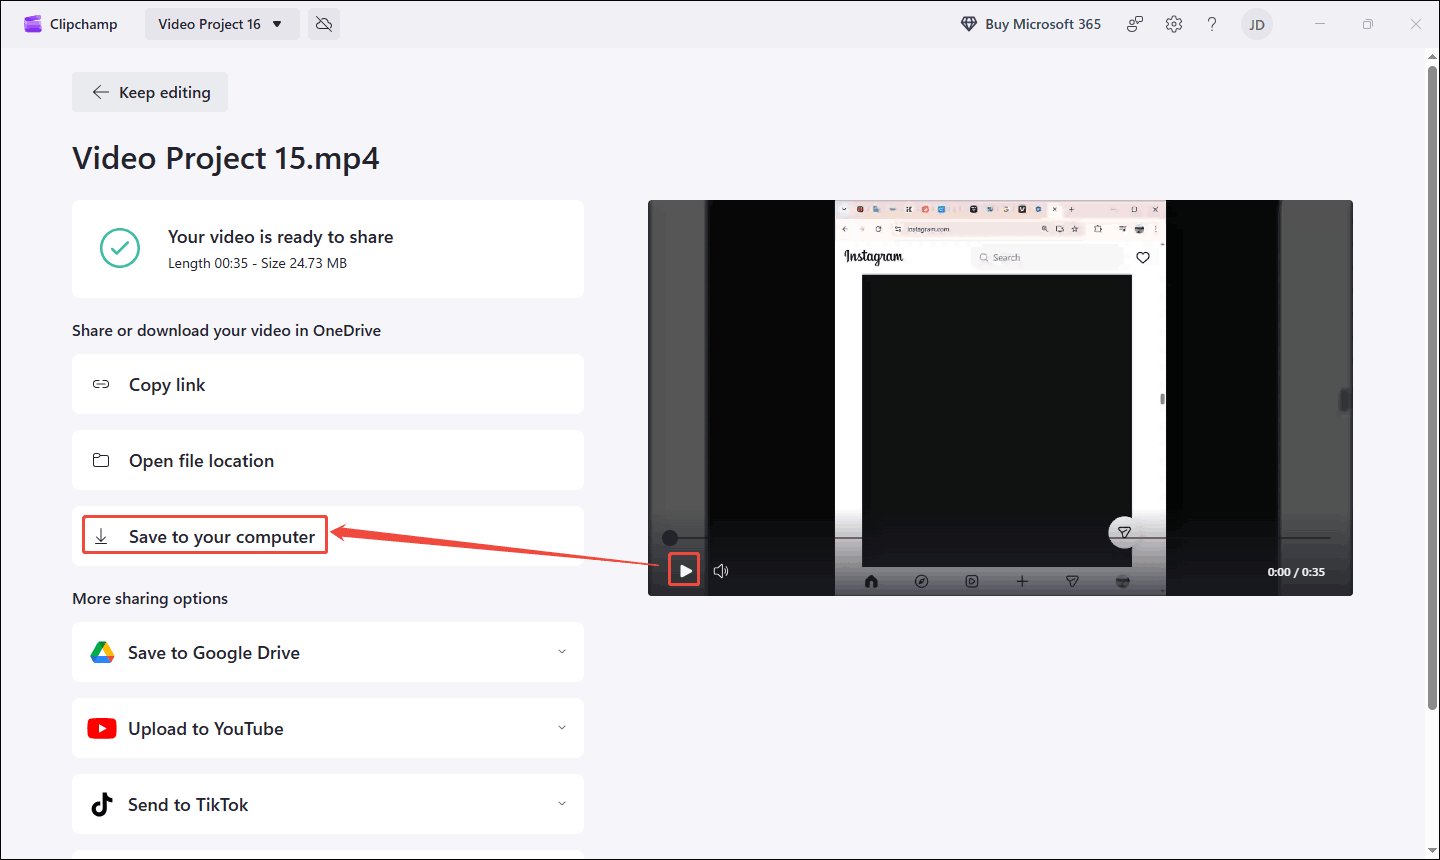
When the recorded video exports, click on the Play button to check the recorded video. Click on the Save to your computer option to store it on your PC.
If you use Clipchamp, you can only record 30 minutes. However, it can still meet your basic recording needs.
Final Words
Learning how to record Instagram Live on your computer will give you better control over your valuable content. This article shares 2 can't-miss screen recorders: MiniTool Screen Recorder and Clipchamp. Both offer easy ways to record Instagram Live on Windows.
If you are interested in MiniTool Screen Recorder, please feel free to email us at support@minitool.com for more information. Alternatively, you can message me directly on X. I will reply as soon as I see your message.