This post shows you how to record imo calls on Windows using two reliable methods: MiniTool Screen Recorder and Microsoft Clipchamp. These tools help you easily save your imo calls on your computer.
imo is a communication app that offers international video calls, voice calls, and messaging. When using imo, you may wonder how to record imo calls, especially if the conversations are important or worth saving. This post introduces two reliable methods to record imo calls on Windows, helping you easily capture and save your imo calls.
If you’re not familiar with imo, let’s take a closer look at it first.
What Is imo
imo is a simple and secure communication app available on Android, iPhone, Mac, and PC. It allows users to make high-quality voice and video calls, send messages, and chat in groups. imo also offers features such as instant message translation, making it easier for users to communicate across languages.
To protect user privacy and security, imo provides end-to-end encryption, time-based disappearing messages, and two-step verification for account protection. Overall, imo offers a communication experience similar to popular messaging apps such as WhatsApp, Telegram, and BOTIM in terms of messaging and calling features.
Can You Record Calls in imo
No, imo does not offer a built-in feature to record or save calls. However, you can still record imo calls using the built-in screen recording tool on your mobile phone or a third-party screen recorder on Windows. The following section focuses on how to record imo calls on Windows.
Before recording imo calls, it’s polite and necessary to notice and get the concept
How to Record imo Calls on PC
This section introduces two easy-to-use recorders for capturing imo calls on Windows.
Method 1: Use MiniTool Screen Recorder
The first tool worth trying is MiniTool Screen Recorder. As a free recorder, it strikes a good balance between versatility and simplicity, making it easy for beginners to record.
MiniTool Screen Recorder offers flexible recording options and comprehensive audio controls. You can choose to record the webcam, full screen, or a selected area. In addition, the software allows you to record system audio and microphone input separately or simultaneously, ensuring clear and synchronized sound.
What’s more, MiniTool Screen Recorder includes annotation tools that let you add real-time notes during recording. You can also customize the frame rate and video quality to achieve a smooth and clear imo call recording.
How to record imo calls using MiniTool Screen Recorder? Follow the guide below.
Step 1: Download and Install
Click the button below to download MiniTool Screen Recorder. After installing, open it to enter the main interface.
MiniTool Screen RecorderClick to Download100%Clean & Safe
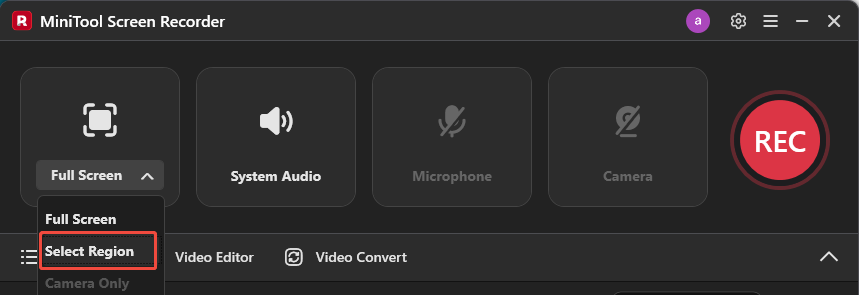
Step 2: Select the Recording Area
To record imo calls without other unnecessary distractions, you need to specify a recording region. Click the Full Screen option to expand the dropdown list. Then, choose Select Region and drag the red dashed rectangle to customize your recording area.
Step 3: Check the Audio Options
By default, both system audio and microphone input are recorded along with your screen. You can check these options directly in the interface.
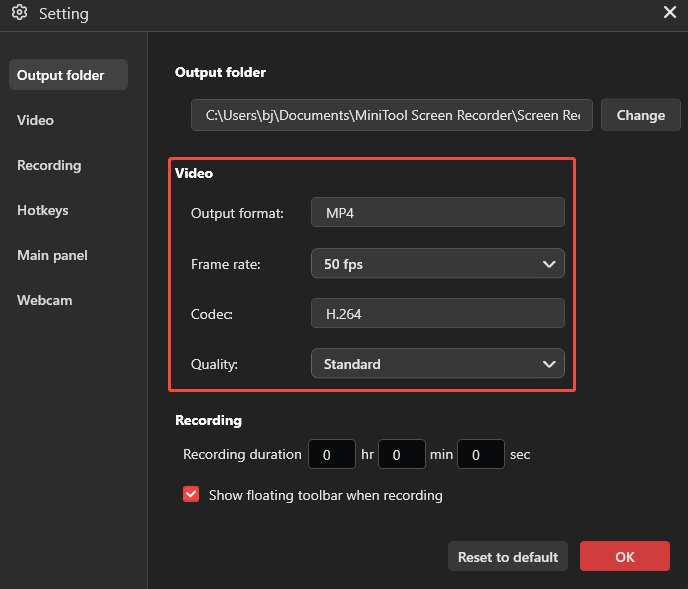
Step 4: Make Other Adjustments
For more advanced settings, click the Gear icon in the upper-right corner of the interface. Here, you can set the frame rate to 15, 20, 25, 30, or 50 fps based on your needs. Click Quality and choose from Original, Standard, or High. Then, click OK to save your changes.
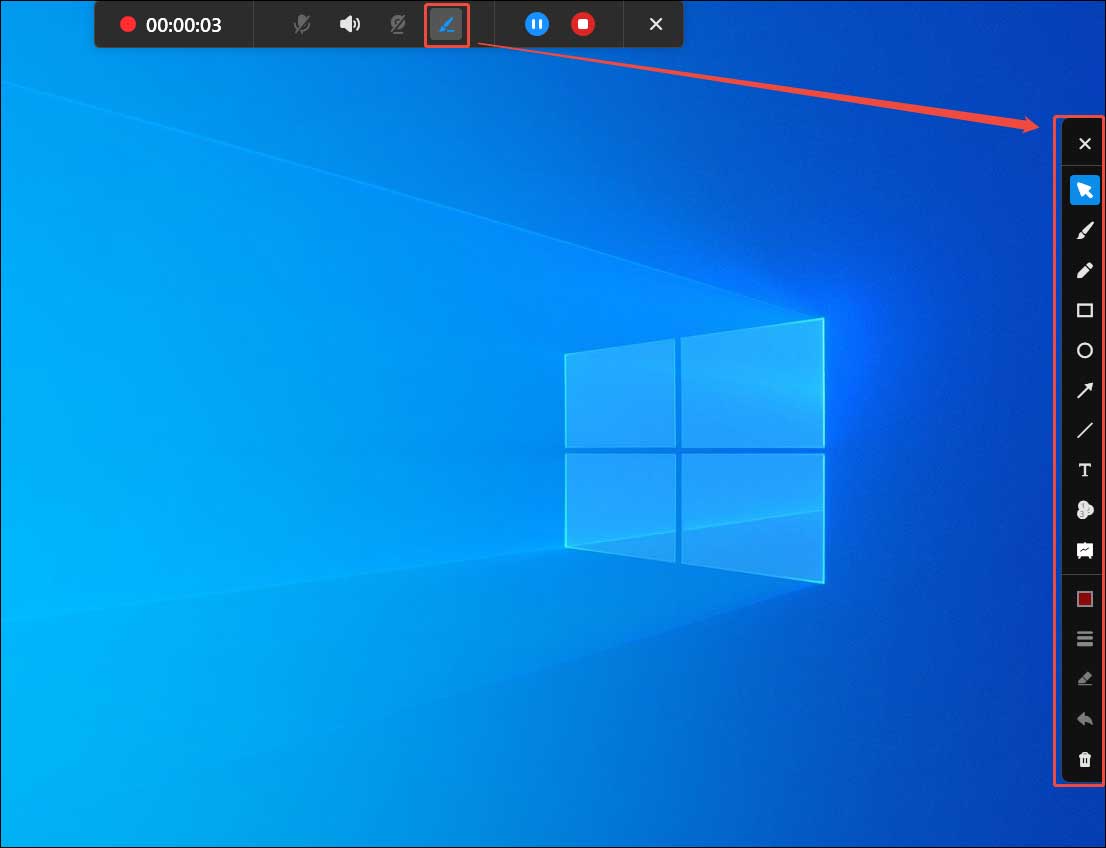
Step 5: Start Recording and Add Annotations
Press the default F6 key on the keyboard or click the REC button on the right side of the interface to start recording. After a 3-second countdown, the software will begin capturing your imo calls.
During the recording, you can add annotations if needed. Click the Pen icon on the floating toolbar to open the annotation panel. Then, you can add text, arrows, shapes, and draw on the screen.
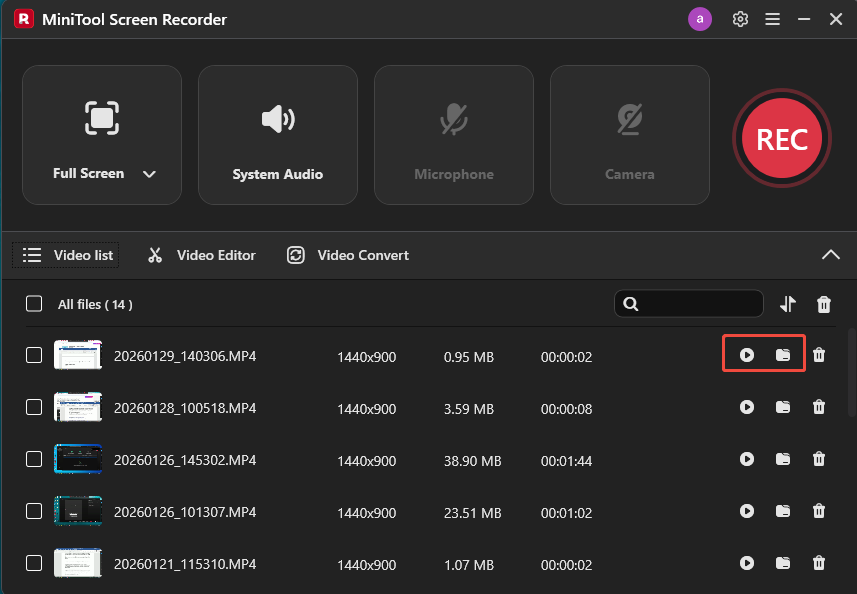
Step 6: End and Check the Recording
Press F6 again to stop the recording. Then, the recorded video will appear at the top of the video list. You can click the Play icon to preview the recording and click the Folder icon to check its file location.
If you recorded an imo voice call, you can use MiniTool Video Converter to convert the MP4 file to MP3.
Method 2: Use Microsoft Clipchamp
The second imo call recorder is Microsoft Clipchamp. It is available as both a Windows app and a web-based version, and you can download the desktop version from the Microsoft Store. If you are using Windows 11, Clipchamp comes pre-installed on your computer, so no additional download is required.
Microsoft Clipchamp is an all-in-one tool that combines screen recording and video editing features. It allows you to record a specific window or the entire screen and provides flexible control over system audio and microphone input. In addition, it includes a built-in teleprompter that lets you view your script while recording.
Here is how to record imo calls using Microsoft Clipchamp.
Step 1: Access Microsoft Clipchamp
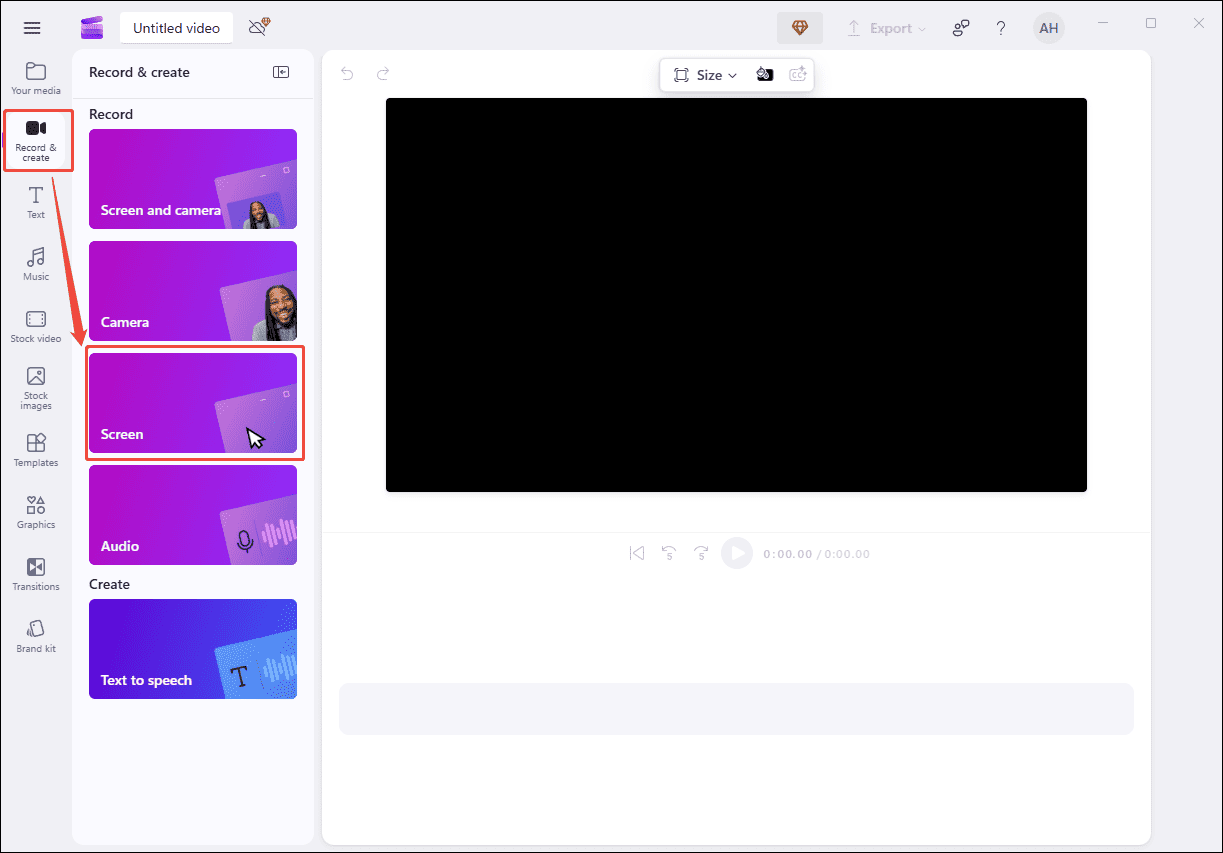
Open Microsoft Clipchamp. Click Create a new video to enter its main interface. Then, click Record & create and select Screen.
Step 2: Customize Recoding Settings
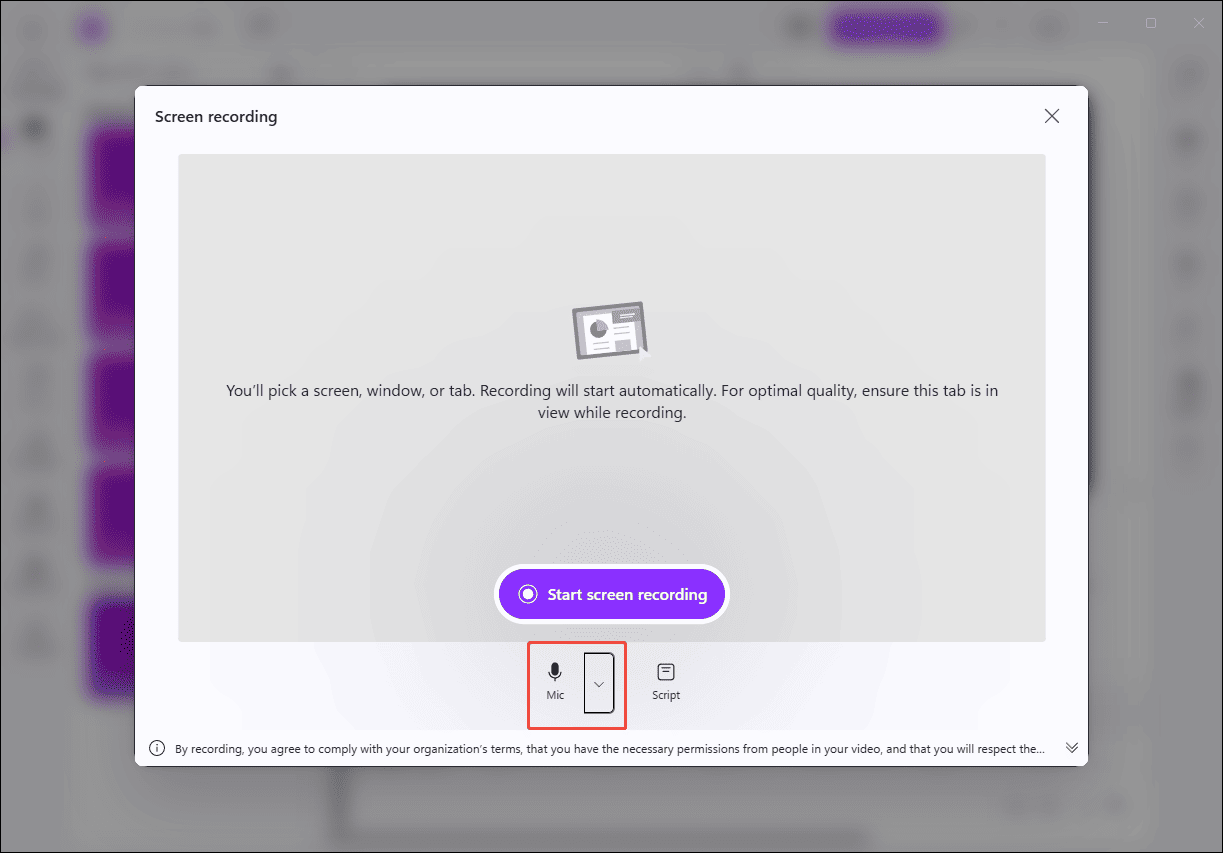
After clicking the Screen option, a pop-up window opens. Click the Mic icon to capture your voice. Next, click Start screen recording.
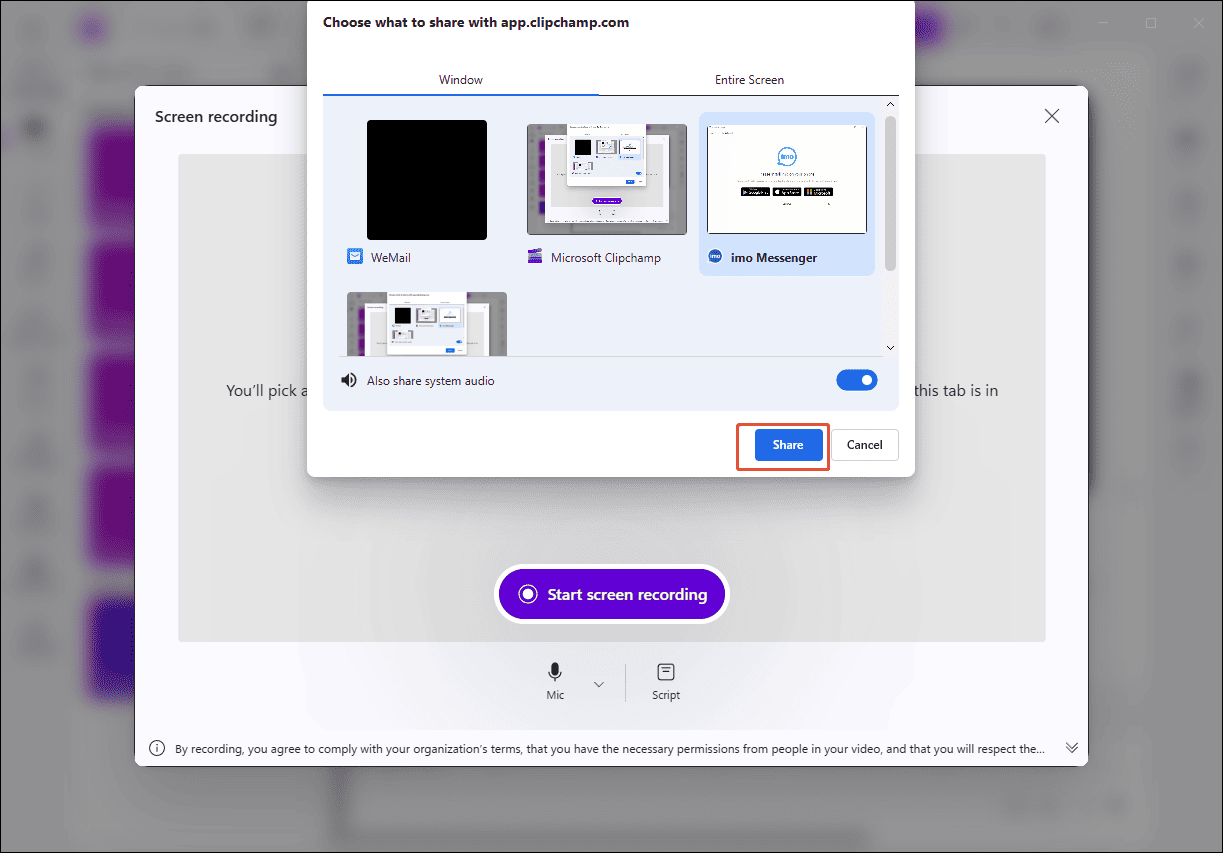
A new pop-up window will appear, allowing you to choose either an individual window or the entire screen to record. Select your imo call window and make sure to enable the Also share system audio option so that system sound is captured.
Step 3: Start and Stop Recording
Click Share and the recording will start after a 3-second countdown.
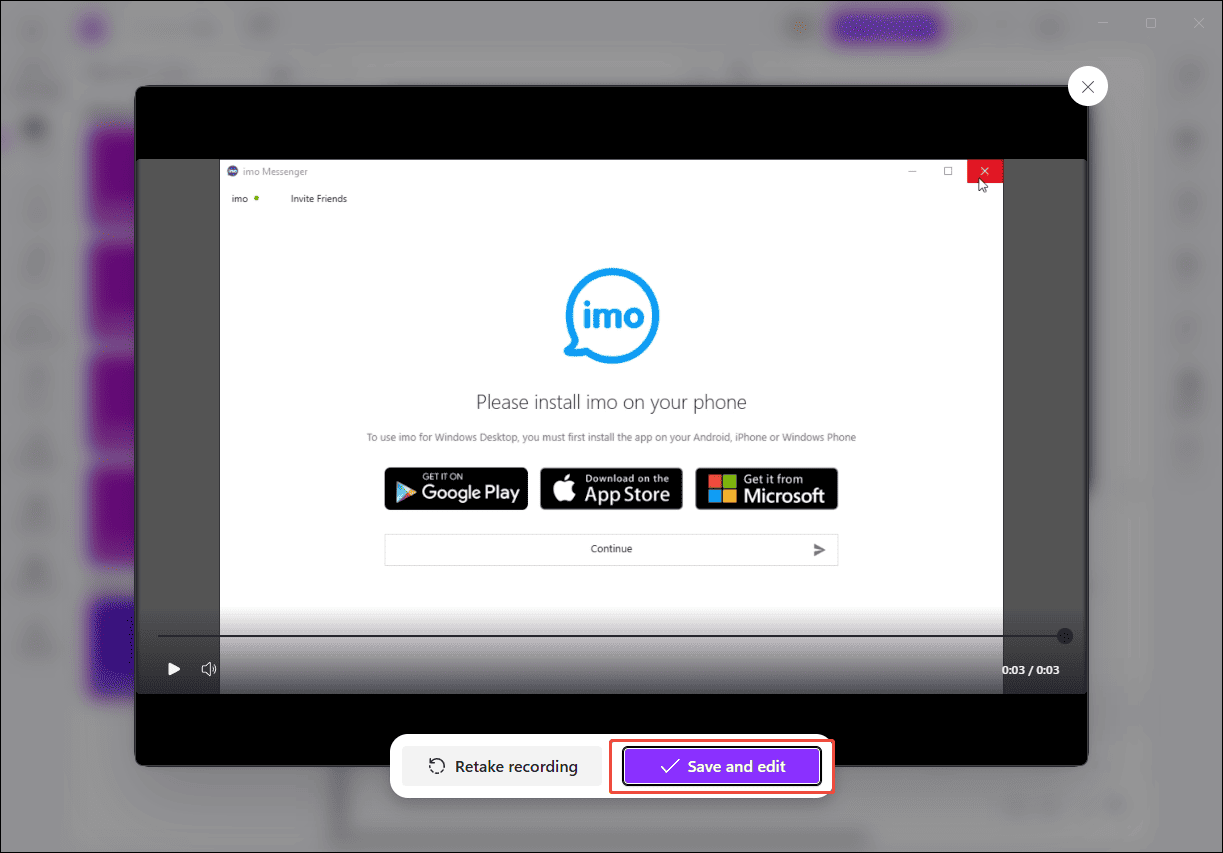
When you finish calling, click Stop and review to end the recording. Then, select Save and edit to edit the imo call recording within the application.
Conclusion
This post explains how to record imo calls on Windows using two practical methods. Whether you want to save an important business meeting or a meaningful conversation with friends and family, these two imo call recorders can meet your needs.
If you have any questions or suggestions about MiniTool Screen Recorder, please don’t hesitate to email us at support@minitool.com.