What Is Discovery Plus
Discovery Plus is a popular streaming service by Warner Bros. It offers thousands of shows and documentaries, including Discovery Channel, HGTV, Food Network, TLC, Animal Planet, ID, Travel Channel, etc. In addition, Discovery Plus offers exclusive original series with regular updates. Users can watch on multiple devices and choose between flexible ad-supported and ad-free subscription plans.
Can You Record on Discovery Plus
Can you record on Discovery Plus? The answer is no. The platform does not have built-in DVR recording functionality and cannot record content directly. But don't worry! You can achieve recording using third-party screen capture tools.
Even though Discovery Plus employs Digital Rights Management (DRM) technology to prevent content misuse (which may cause black-screen issues), professional third-party screen recording software can bypass DRM restrictions, ensuring the screen displays normally and enabling smooth recording of program content. However, please note that the purpose of such recording is solely for personal offline viewing or other legitimate uses. It may not be used for commercial purposes.
Advantages of Recording on Discovery Plus
In some cases, you may want to record shows on Discovery Plus. If you have a busy schedule or limited internet access, the recording feature lets you watch your favorite TV shows and documentaries anytime, anywhere. After recording content, you can even watch it across multiple devices.
Additionally, you can record shows as they air and watch them at your convenience. This is especially useful for programs with inconvenient broadcast times. If you have a particular fondness for documentaries, recording on Discovery Plus also helps you build a personal library of content – making it easy to reference and revisit favorite episodes anytime.
![How to Record on YouTube TV with Ease [Step-by-Step Guide]](https://images.minitool.com/recorder.minitool.com/images/uploads/2026/02/how-to-record-on-youtube-tv-thumbnail.png)
How to Record on Discovery Plus with High Quality
Can you record on Discovery Plus? How to record on Discovery Plus with high quality and enjoy a high-definition viewing experience? The content below recommends three professional screen recorders, which can bypass black screen issues and capture your screen smoothly.
Method 1. Use MiniTool Screen Recorder
MiniTool Screen Recorder is a free and professional Windows screen recording tool, which can capture your 4K screen without time limits or watermarks. It offers flexible recording options, allowing you to capture the whole screen, a selected region, or webcam footage.
In addition, MiniTool Screen Recorder enables you to control audio settings based on your needs. It can capture system audio and microphone sound simultaneously or independently. Moreover, this screen recorder allows you to customize video frame rate and quality, making it ideal for recording movies, TV shows, etc.
Furthermore, MiniTool Screen Recorder offers real-time screen annotation tools. You can highlight, draw, add arrows/numbers/text, etc., on the screen when recording.
Follow the step-by-step guide below to screen record on Discovery Plus:
Step 1. Download and Install MiniTool Screen Recorder
Click the download button below to download this software. Then, follow the on-screen setup instructions to install it on your computer. Then, double-click the shortcut icon on the desktop to launch this program.
MiniTool Screen RecorderClick to Download100%Clean & Safe
Step 2. Configure the Recording Settings
Set audio settings
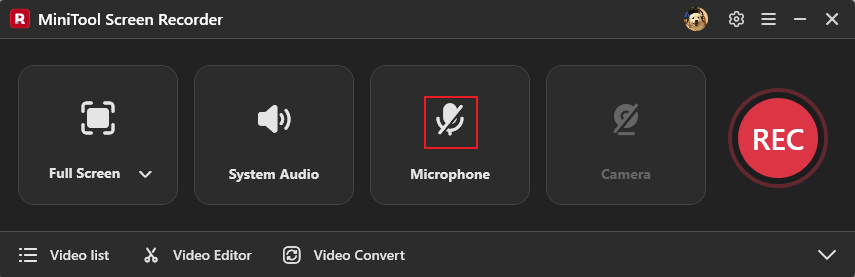
The system audio and microphone sound are activated by default. Since you want to record TV shows, click the Microphone option to turn it off. This way, sounds like speech, background noise, and other audio unrelated to the TV show won't be recorded.
Choose the recording region
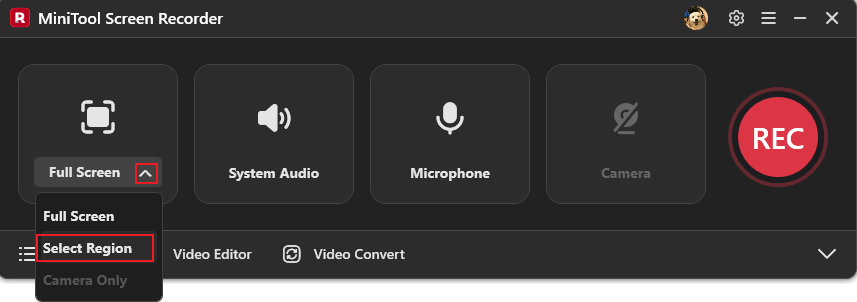
The full screen is recorded by default. If you want to record a selected area, expand the Full Screen option, click the Select Region option, and drag the mouse to define it.
Adjust more settings
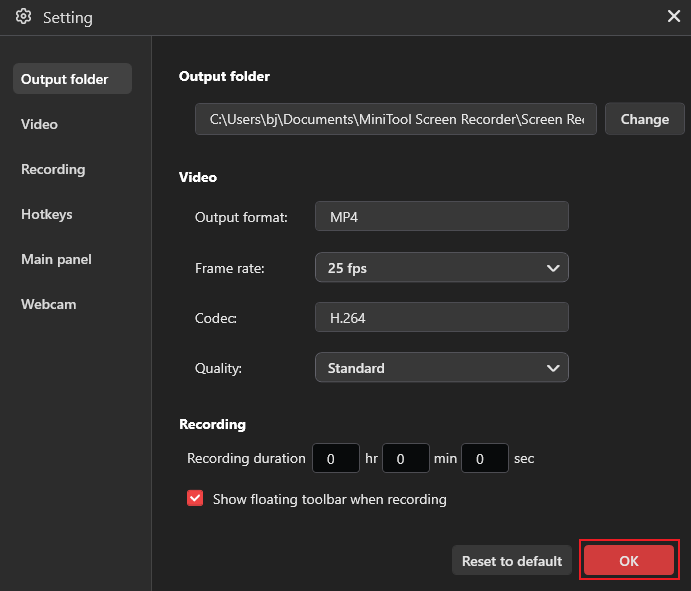
Click the Settings icon in the upper-right corner to open the Settings window. Then, you can change frame rate, quality, and other settings based on your needs. After that, click the OK button to save the changes.
Step 3. Start Recording on Discovery Plus
Open the show you want to record. Click the REC button on the floating toolbar, and the recording will begin after a three-second countdown. During the recording, press the F9 key to pause/resume.
Step 4. Stop the Recording
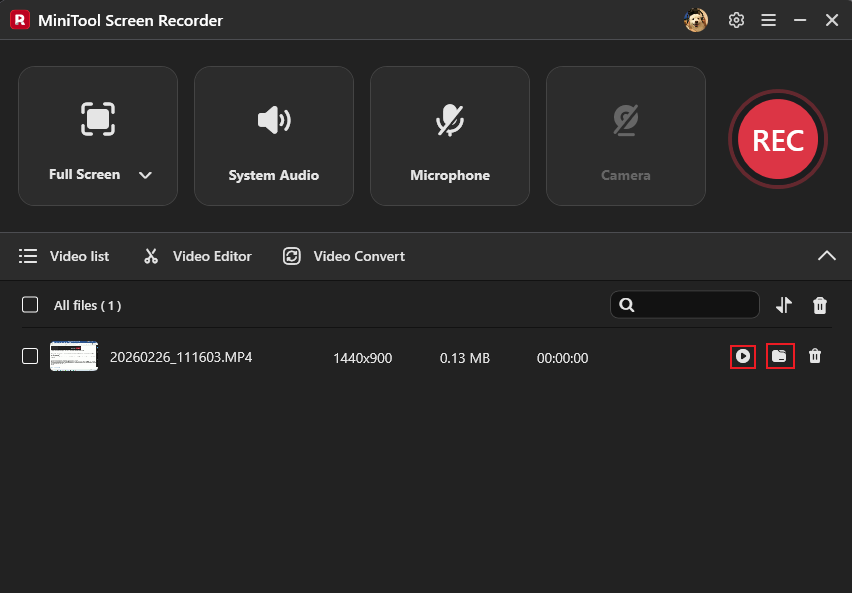
Press the F6 key to stop recording. Then you can check the recording in the Video List area. Click the Play icon here to watch the recording, or click the Folder icon to locate it.
Moreover, if you want to edit the recording, click the Video Editor option next to Video list to download or open MiniTool MovieMaker. There, you can edit your recording by trimming, cropping, splitting, reversing, rotating, and more. Also, you can add transitions, effects, music, stickers, motion, and text to the video. Just click the download button below to give it a try!
MiniTool MovieMakerClick to Download100%Clean & Safe
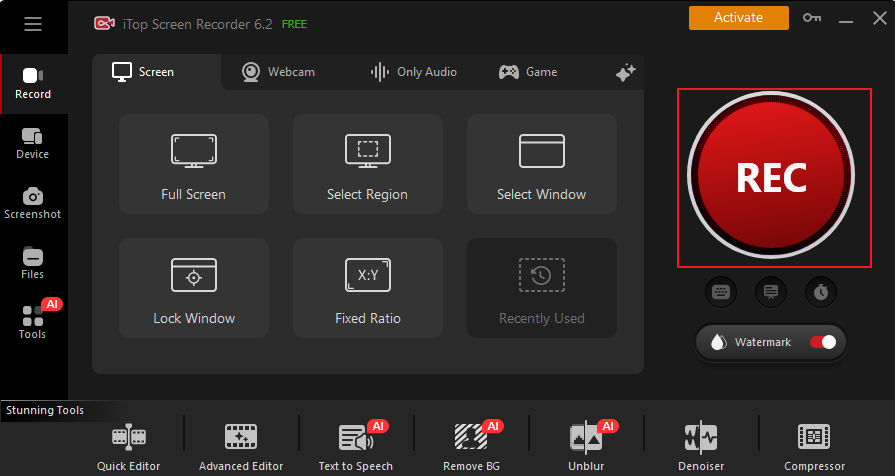
Method 2. Use iTop Screen Recorder
iTop Screen Recorder is a lightweight, easy-to-use screen recording application. It supports up to 4K ultra-high-definition resolution and 120 frames per second, ensuring smooth, clear recording quality, making it particularly suitable for recording TV programs. Leveraging GPU hardware acceleration technology, iTop Screen Recorder achieves zero-latency recording while minimizing CPU usage, preventing system lag even during extended high-definition recording sessions.
Here's a quick recording guide:
Step 1. Download and Install iTop Screen Recorder
Go to iTop Screen Recorder’s official website to download and install it. Then, launch it.
Step 2. Set Recording Settings
Choose recording area
Based on your needs, click Full Screen or Select Region.
Control audio settings
The Speaker is turned on by default. Make sure the Mic option is turned off since you want to record TV shows.
Step 3. Start Recording
Navigate to Discovery Plus and open the program you want to record. Then, click the REC button to start recording.
Step 4. Stop the Recording
Press Ctrl + F9 to stop the recording.
Method 3. Use RecMaster
Can you record on Discovery Plus? RecMaster can help you do that! It is an expert screen recording tool that features multiple recording options, including full screen, custom area, game mode, webcam recording, audio only, etc. Also, you can control the system sound and microphone input based on your needs. To record Discovery Plus, follow the instructions below.
Step 1. Download and Install RecMaster
Go to RecMaster’s official website to download and install it. Then, launch this program.
Step 2. Choose the Recording Area
Choose Full Screen or Custom Area based on your needs.
Step 3. Adjust Audio Settings
Drag the System Sound slider or the Microphone slider to adjust the volume. If you want to turn off one of them, click the corresponding icon and choose Off.
Step 4. Start Recording
Open the program you want to record and make sure it’s ready. Click the REC button to start recording.

Step 5. Stop the Recording
Press Alt + 2 to end the recording.
In Summary
Can you record on Discovery Plus? With third-party screen recorders, the answer is yes! To record Discovery Plus with no lag, this post recommends three free and professional screen recorders: MiniTool Screen Recorder, iTop Screen Recorder, and RecMaster. By following the instructions mentioned above, you can screen record on Discovery Plus smoothly.
You can contact us via support@minitool.com if you have any questions about using MiniTool Screen Recorder. Also, you can send me messages directly on X, and I’ll help you as quickly as I can.