Discord is a versatile communications platform that supports text, voice, and video chats, live streaming, and watching movies, TV shows, and YouTube videos. All in all, it’s an all-in-one platform for communities, study groups, and friends to share media, stream, and stay connected.
Video calls are one of my favorite features on Discord, and I enjoy chatting with many friends together to share recent insights, thoughts, and experiences. Sometimes after a call, I regret that I didn't record it for later review. Therefore, I wonder how to screen record on Discord.
At this point, you may ask: Can you screen record on Discord? Here’s everything I want to share about screen recording on Discord.
Can You Screen Record on Discord
Yes, I, or anyone else, can capture content on Discord. While the platform doesn’t provide a built-in recorder, there are many third-party applications available for this task.
Does Discord notify when you screen record? Discord does not notify users when someone screen records or takes screenshots of chats, video calls, or streams. That’s because the platform doesn’t have a built-in alert system for recording.
How to Screen Record on Discord
In this section. I’ll explain how to record Discord streams using MiniTool Screen Recorder and Windows 11’s Snipping Tool.
Method 1: Use MiniTool Screen Recorder
MiniTool Screen Recorder is a free and powerful tool for capturing the whole desktop, a custom region, and a selected application window, along with both system audio and microphone input. As a webcam recorder, it can record a camera only or record the screen with a camera simultaneously. Besides, it has a simple layout that’s easy to navigate. Therefore, I often use the software to create tutorials, share gameplays, or make demonstrations.
Additionally, MiniTool Screen Recorder offers extensive screen annotation tools. I often use lines, arrows, shapes, step numbers, text, and other elements to enrich my screen recording.
How to screen record on Discord using MiniTool Screen Recorder? Follow me.
Step 1: Download and Install
To begin, get the screen recorder on the computer. Once installed, launch the software.
MiniTool Screen RecorderClick to Download100%Clean & Safe
Step 2: Choose the Recording Area on Discord
First, navigate to Discord and find the content you want to record. Then, return to the main interface of MiniTool Screen Recorder to confirm the recording area.
I found that the software is set to record the full desktop by default, and it also allows me to change the recording region flexibly. After clicking Full Screen, I can see the other three options:
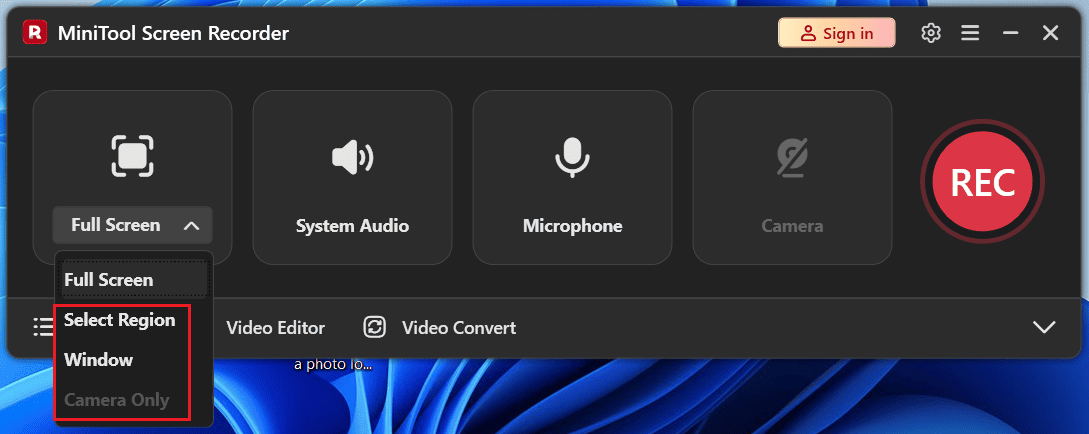
- Select Region: This allows me to freely select any area of the screen for recording. For instance, if I only want to capture a specific video player on Discord, I click the Select Region option and drag the mouse to choose the desired area.
- Window: Support recording the selected software window. From these settings, I can also select the Discord window to record.
- Camera Only: If I have a camera plugged in, this option lets me record myself only on the computer. If I want to record the camera and the screen simultaneously, click Camera next to Microphone to activate it.
Step 3: Set Audio Preferences
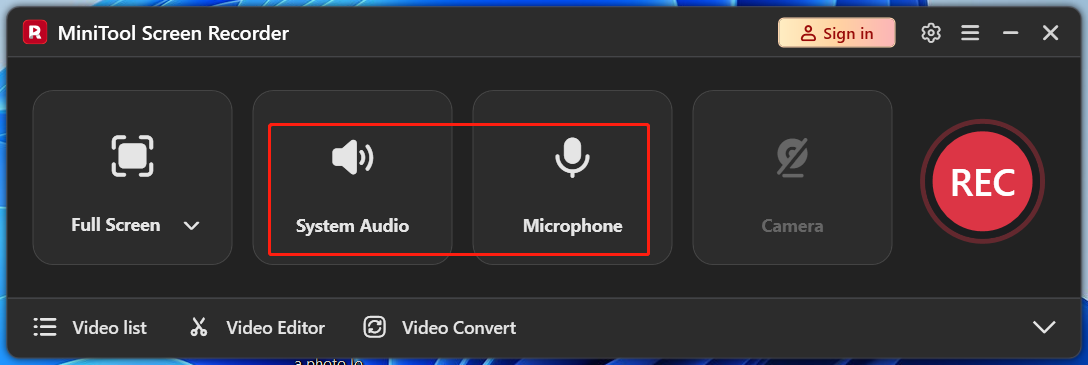
Make sure the System Audio is turned on to capture audio from Discord. Besides, I also recommend muting other tabs to avoid unwanted sounds and ensure high audio quality. To record my voiceover, I need to plug in a microphone and make sure the Microphone option is enabled.
Step 4. Configure Recording Settings
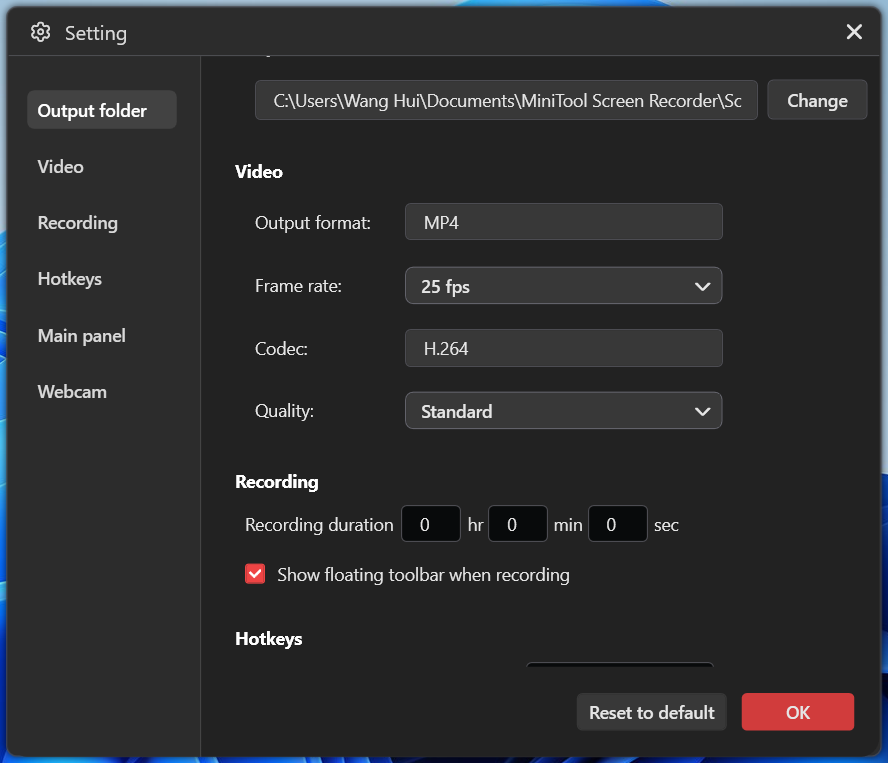
In the main interface, click the Gear icon in the top-right corner to open the settings window. From there, I can adjust settings like the output folder, frame rate, and video quality, set a recording duration, and select the camera’s resolution, shape, position, and size. Finally, click OK to save my changes.
Step 5: Start and Stop Recording
Click the REC button or press F6, and the recording begins after a 3-second countdown. Meanwhile, the software will be automatically minimized to the system tray, which is very convenient. Then, start playing the content or other activities on Discord.
Press F6 again to stop the recording. If I set a duration, the recording will stop automatically once the time is up.
Step 6: View and Manage the Recording
After stopping, the recorded video appears at the top of the Video list. Click the Play icon to watch it or the Folder icon to open its location on my computer.
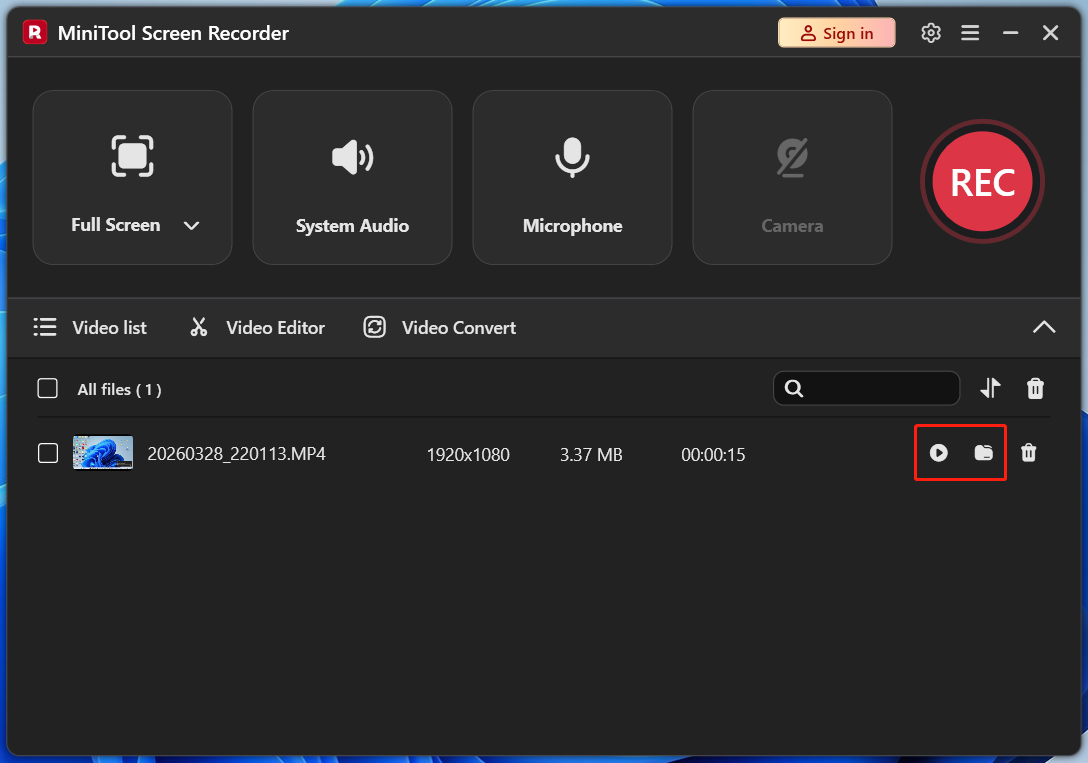
To trim the start or end of the recording, click Video Editor next to the Video list option. This will give you access to MiniTool MovieMaker, an easy-to-use and feature-rich video editor.
Method 2: Use Windows 11’s Snipping Tool
When I was running Windows 10, I often took screenshots using Snipping Tool. After upgrading to Windows 11, I found that the software has added a recorder for quick screen recordings.
Here’s how to record Discord streams using the Snipping Tool on Windows 11.
Step 1: Open the Application
Click the Search bar, enter “snipping tool”, and open the matching result.
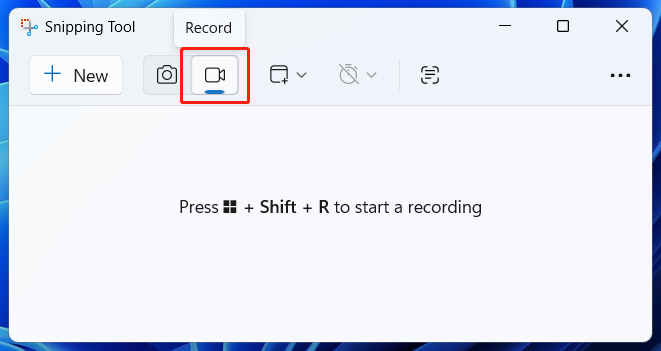
Step 2: Enable the Screen Recorder
On the main interface, click the Record (a camera-like icon) to activate the screen recording tool in the Snipping Tool.
Step 3: Choose What to Record on Discord
Go to Discord and locate the content to be recorded. Click the Snipping Tool icon on the taskbar to open it in the Discord window.
Click the + New option on the left, and when the next toolbar appears, click on the screen, and the software will automatically choose the entire Discord tab. Also, I can resize the rectangle and move it to select the desired recording area on Discord.
Step 4: Check Audio Settings
By default, the Microphone input is muted. If I need to add commentary while screen recording on Discord, I’ll click Microphone to enable the settings. The system audio is enabled by default. If I need to screen record on Discord with the audio, I don’t have to make changes. Otherwise, click the icon next to Microphone to mute system sound.
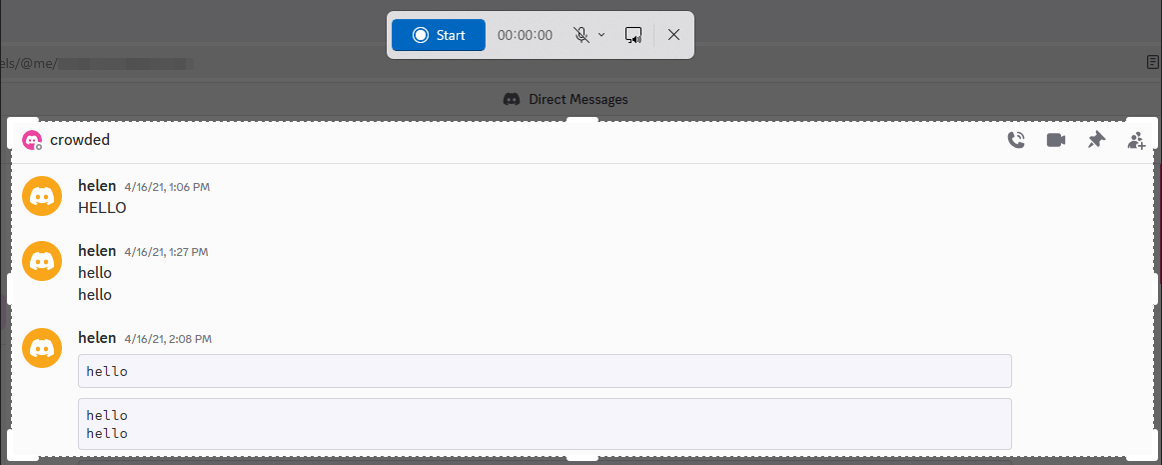
Step 5: Start and Stop Recording
Click the Start option, and the recording begins after a three-second delay. Then, start playing the content on Discord or perform the desired actions. To end the process, click the red Stop recording button.
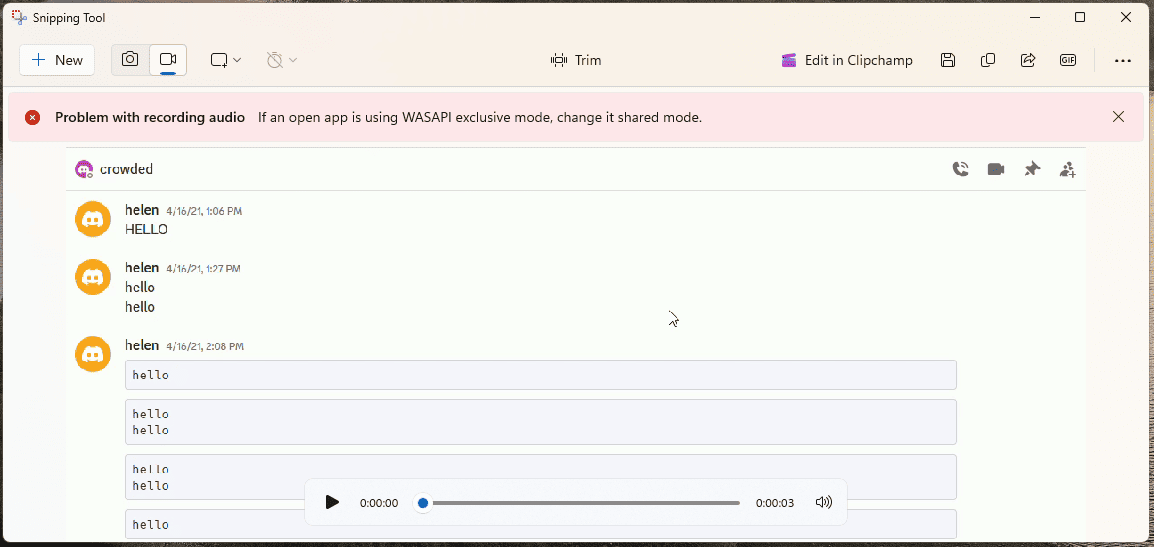
Step 6: Edit and Save the Recording
The recorded video will immediately display in the Snipping Tool window. I can watch the video by clicking the Play icon at the bottom, or clicking Trim to delete unwanted parts at either end of the video. Finally, click the Save as icon to save the recording as an MP4 file to the computer.
Conclusion
After reviewing this post, I believe you should learn how to screen record on Discord using MiniTool Screen Recorder and Windows 11’s Snipping Tool. Both are easy to use, and the processes are straightforward. In contrast, the former provides more features and settings to control the video, and the latter offers basic functions for quick and simple recordings.
If you encounter any difficulties while using MiniTool Screen Recorder, send an email to support@minitool.com for help.